If I apply Future, I prefer to flush my airbrush out with a mix of distilled water and 70% isopropyl alcohol. If you haven’t applied Future before, practice on something. .
In an email, I asked the gentleman from USP to consider producing a “Blunt-ender” as there are a number of ACL, SCL, and FEC people here in Florida that model pre-Amtrak passenger trains. Add to that, the blunt-enders made it into the Amtrak era and stayed in service until the early 80s.
I’m going to contact the members of the ACL-SAL-SCL Yahoo group and see if someone has drawings. I do have a book with some decent photos and will ask Mark if they would work.
Spoke to Mark on the phone again and after I asked him a few more questions, I ordered the Pullman Standard fluting material. As before, very friendly gentleman.
I’ll post a new thread with pictures of the AHM observation as I progress on it. Arjay, I’m probably going to be a “little” nervous when it comes time to apply the Tenax, but I will practice on some scrap styrene pieces first.
Mark is a great guy and very easy to work with. [:)]
And practicing with scrap styrene is a good idea…you don’t want too much glue behind the strips, but you don’t want too little, either. Too much, and you’ll see a definite warping of the strip, too little, and you’ll see bulges. Practice makes perfect, after all! [:)]
Hey Arjay, why not use a little more glue or a little less glue? The warping and bulging would be prototypical on lightweight cars after several years in service. Too much glue and you run into the problem of plastic that has become too soft for a secure bond and too little glue and you will actually run into the parts seperating over time.
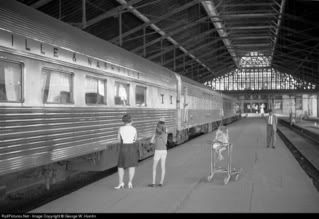
Yipes! I vaguely remember seeing warped or damaged corrugation on Amtrak trains back in the 1970s, but that was the exception rather than the rule. I have loads of photos that I took back then and surprisingly almost all of the ex-Santa Fe, ACL, SAL, FEC, and CB&Q cars that I saw had corrugation that appeared to be in exellent condition; especially considering their ages.
So, I want my HO corrugated cars to look like these! [;)]
Now, as for the idea of “warping”? Let’s state it delicately…
Me no want no stinkin warpage! [:P][banghead] [:o)]
Antonio stated the main reason…I’m modeling the time when Santa Fe still somewhat cared about the appearance of their passenger trains. Besides, glue bubbles and bulges don’t really convey the right sort of damage…they look more like someone parked the cars next to a blast furnace and let the siding melt, rather than impact or age damage. That’s the main reason why it’s best to laminate the siding a little at a time, so you don’t end up with bubbles like that.
Arjay and Antonio, I understand your issues. The bulging and warping were more prominant on smooth sided cars. I remember riding Santa Fe passenger trains and they were very anal in maintaining their equipment and we can thank John S Reed for that as the Santa Fe was very proud and realized the image their passenger trains created. I’m fortunate in that I only model business trains and rely on brass for my equipment.
Well, just got the fluting in the mail. The Pullman Standard fluting is exactly as the sample in John’s photo. Seems to be a very flexible type of styrene material. Appears easy to cut.
The challenge, I think, will be to get the fluting to “bend around” the blunt end of the observation. I’ll worry about that stage once I’ve performed all the measuring and needed cuts.
The roof comes off easily and the window glass is not flush mounted. They’re two clear pieces attached to the roof that are the length of the car’s interior… Definetly produced back in the 70s, but still, a decent looking car that’s based on Pennsylvania’s Broadway Limited observation.
Nice thing here is that I won’t have to mess with the roof since it’s already a faded black color.
For starters, I plan on
Cutting off the skirts, the molded grab irons, and the molded diaphram next to the vestibule,
Giving the body an “alcohol bath”
HOPEFULLY install the fluting.
4 .Fill the bins with BB shots and any additional needed weight.
Install underbody details
Install a painted interior
36" Metal wheels (or better quality trucks–not sure yet)
I am going to have to use the Budd corrugated sheathing to do the obs for the Senator. I am thinking that applying it with a solvent cement is not the way to go for the reasons being mentioned here.
I am considering masking off the area where I want cement to be and applying a thinnned contact cement. Using the same method as applying Formica to counter tops, I would also apply a thin coat to the sheathing and allow both to dry. Then I would place a slip sheet of wax paper on he car side exposing just the first end . Then I would press down the first end and gradually slide the paper out and use a wall paper roller to press the sheathing into the contact cement. There would be no ripples or bulges and it would be on permanently. I have used this method to apply Formica successfully so it is a proven technique when working with contact cement.
For the bend around the end, I would obtain a dowel of the right radius and clamp it in a vise with a few inches extending. Then I would heat the area of the bend using a hair dryer, heat gun or try dipping it into hot water. Just do a litle at a time until you have a 90 degree bend. Then trim off the excess length.
Thank you for the suggestions. I’ll practice with the sprue pieces from the fluting kit and experiment with Arjay’s adhesive application method and yours. [;)][tup]
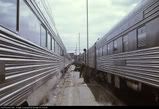
As can be seen in the photo, that bend around the back is going to be a tight one!
I’ll plan on using the hot water method and hopefully create the bend by using a dowel or solid pin that’s approximately 1/32" diamter.
It will be at least a couple of weeks before I’ll start on this project since I have a lot going on. However, I’m really looking forward to working on this car and the undec. diner from Walthers… [:)]
You know, one thought has just occurred to me…make absolutely sure you remove the adhesive on the back of the fluting before you try to apply it with either method. The adhesive is there to hold the styrene sheet down during the milling process, but it isn’t needed (and isn’t strong enough) for our purposes.
I’m eagerly awaiting photos of your model, Antonio! [:)]
I was wondering about that tacky material. Thanks for that tip. To remove the adhesive did you use alcohol or just gave it a soap and water wash? I was considering using a scotch pad along with some warm water and a gentle dishwashing soap.
I’m excited about doing this model and other passenger cars, but I’m bogged down with job related paperwork [:P] that won’t be finished until almost the end of this month. After that I enthusiastically plan on jumping back onboard the metalizing train [:D]
Dishwashing detergent should do the trick. You may have to let it soak for a while to loosen it, and then GENTLY wipe it off with a paper towel or scotch pad. If that doesn’t cut it, try the alcohol. And if even that doesn’t do the trick, a paper towel with a little WD40 certainly will (just don’t forget to wash it all off with detergent afterwards!).
Hi guys, Arjay. Just an update with an observation.
I paint stripped the car a while back and am now in the process of installing the USP corrugated sides.
First thing: WOW! Texnax dries incredibly fast!
So fast that at first, I encountered the problem of the panel not adhering to the surface which got me worried…then I realized that I needed to press the panel section onto the glued surface area in a few seconds instead of taking my usual leisurely 15 to 20 second approach when using Goo or Ambroid. After that, It became easier. Talk about a short learning curve! This stuff is even faster than some of the CAs I’ve used for industrial applications.
Hopefully this car will look decent when I’m done with it. I’ll post a new thread with photos in the near future. [:)]