Before I get banned from the forums for raising the same question that has been raised a thousand times, I am going to quickly throw this one out for consideration.
On my current layout, I use 1/2’ plywood as a surface on a 2" x 4" framework. However, on a new layout that I am comtemplating, I am thinking about using foam instead of plywood.
Can a 2" x 4" framework adequately support 2" foam without any plywood support underneath the foam? How about 1" foam? Exactly what type of foam do you use?
Three things intrigue me about foam. First, it is so much lighter to transport. Second, it is a lot less expensive than plywood. Third, it would be a lot easier to cut holes in it for the purpose of installing Tortoises from above the layout.
I’ve built sections of my home layout using 1x4s for the module construction. I used 2" thick foam, gluing it to the benchwork with acrylic latex caulk. 2" foam, being thicker will hold up without a plywood base better than 1" foam. In some areas, my foam is 8" thick. The problem I ran into with using foam with plywood support came in wiring the track. I found that it’s easier to make a tool to “thread” the wire through the foam than to try to guess where the wire would come through the plywood, without having to “swiss cheese” the plywood.
Can it be done, certainly. I have done it myself… you will find that if you use 2" foam and then 1" on top you can carve into it to create gullys and add rivers. acoustics are another story. as some will mention there are reasons to use at least 1/8 ply or mdf. a word of caution, seat the foam with a coat of housepaint and you can glue on it.
My previous layout was built with 1x4’s in a typical box frame with 2" of foam glued on top with yellow glue. No plywood. Worked just fine.
If you DO put plywood under, like I did on my current layotu, they make long drills so you can drill holes for feeder drops all the way through the foam and plywood. No guessing.
I think you can get away with using a long drill bit…in a normal sized drill. Long Drills asre bulky and take up space. Just get a normal sized drill, with a long bit.
One issue is weight. You can’t put much on 1 inch foam, but it will hold track and carved foam scenery.
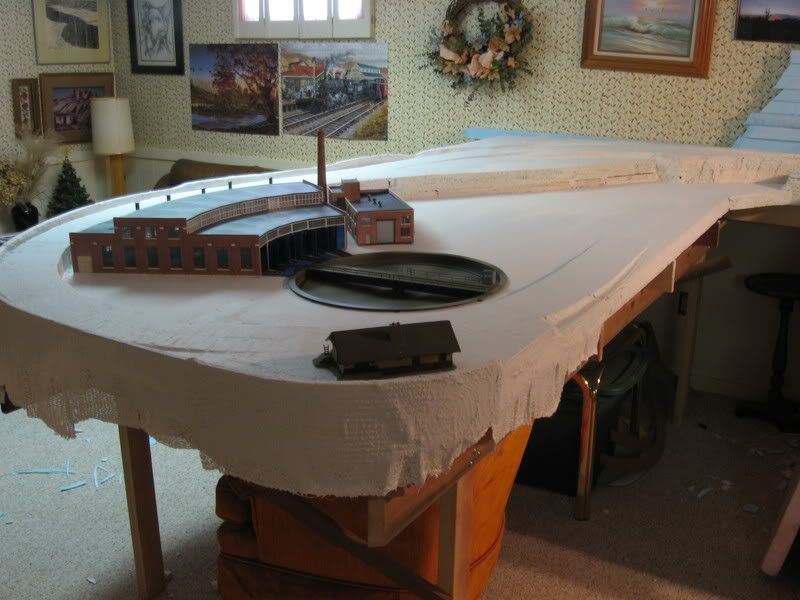
Two inch foam will hold a few rock castings. but you can’t lean on it much to reach a far place. Where I have it over plywood, I tend to be sorry. My whole 4x10 table for the round house scene is 2 inch foam on 1x4 frames. I used WS risers for the grade around the outside. One pic for effect
In my neck of the woods, a 2x8 sheet of 2" foam costs a little more than $15. A 4x8 sheet of 1/2" ply is a little over $30, so costs are a wash (for me).
A grid that will adequately support 1/2" plywood will also support 2" foam.
So my way of deciding which to use (I have used both) is the type of layout I intend to build. A closed top layout, regardless of material, lends itself to being flat. It’s extra effort to make it non-flat. For a closed top, flat layout:
foam is lighter - doesn’t matter unless you are moving the layout.
foam dents, but dents can be avoided with precautions
foam is much easier to carve for below track scenic elements
plywood is easier to mount under-the-layout components.
plywood is easier to convert to cookie cutter, open grid, with grades. Foam can be cookie-cuttered, but I haven’t seen it done often.
For an open top layout, there are other considerations.
The thickness of foam requries greater separation and steeper grades for hidden or under-the-scenery track. Or a different structure must be used over top the hidden track. For the style of layout I like to build, this is the #1 issue with foam
Two inch construction foam (not bead board) is plenty strong enough to hold up HO track and trains, but not strong enough to climb on or sit on. It doesn’t need a plywood backing from a strength perspective. Foam is so soft that fasteners will not hold in it, the only way to fasten foam in place or things to foam, is with adhesives.
Foam so soft that the edges of a piece of foam need protection, otherwise people leaning on the layout will dent the foam. I use 1 by 4 pine edge boards.
In order to hold the edge boards in place, I cut plywood sheets to fit and put a dado in the back of the edgeboards to accept the plywood. This gave me light but strong modules with a solid bottom to accept switch machine mounting screws and other under-the-layout things. The foam lays in the module and is secured with PLZ300 construction adhesive.
I consider 2 by 4 overkill for model railroad bench work. One by four is plenty strong enough.
This 18’ x 6’ part of the layout was light enough that two of us carried it all the way around the house from the garage to the Train Room with little difficulty.
I climb up on it by putting a 2’ x 3’ piece of 1/4" plywood down and kneel on it. After I get down there is little evidence I was up there. Any dents or gouges that do occur just look like part of the landscape once ground cover is added.
For adding fasteners or switch machines just PL300 a small square of 1/4" plywood or any wood from the scrap box underneath as big or small as required. It will not come off.
One thing I will never do again is use foam over plywood as I found it frustrating, to say the least, trying to work through both. One or the other is fine but not both together.
I don’t know why more modelers don’t use spline in conjunction with foam, they complement each other perfectly and IMO are a perfect combination. 48’ of spline risers for $8.00 must be cheaper than WS foam risers, and the transitions in and out of curves and grades is the most natural looking there is.
1" x 4" frame is more than adequate to hold a few of pounds of trains. We are not holding up refrigerators and waterbeds. I often wonder why people build their tables as if they are building a floor of their house.
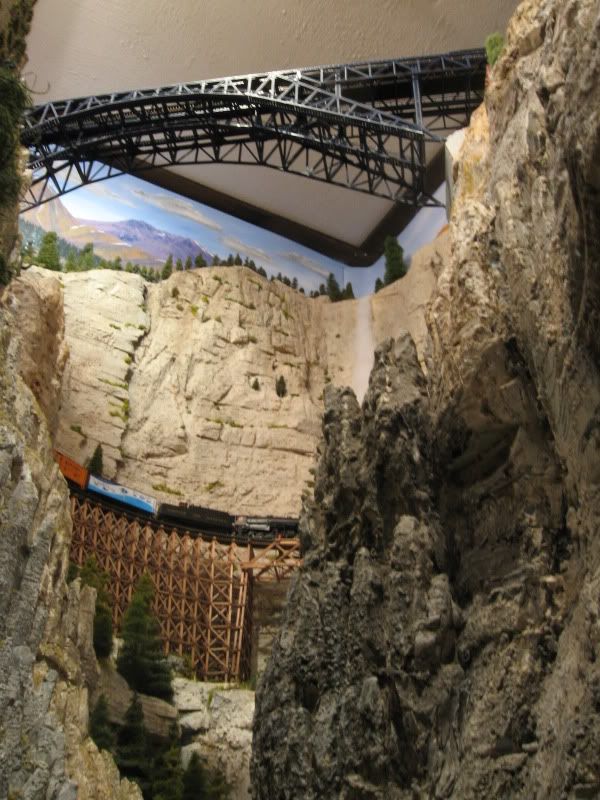
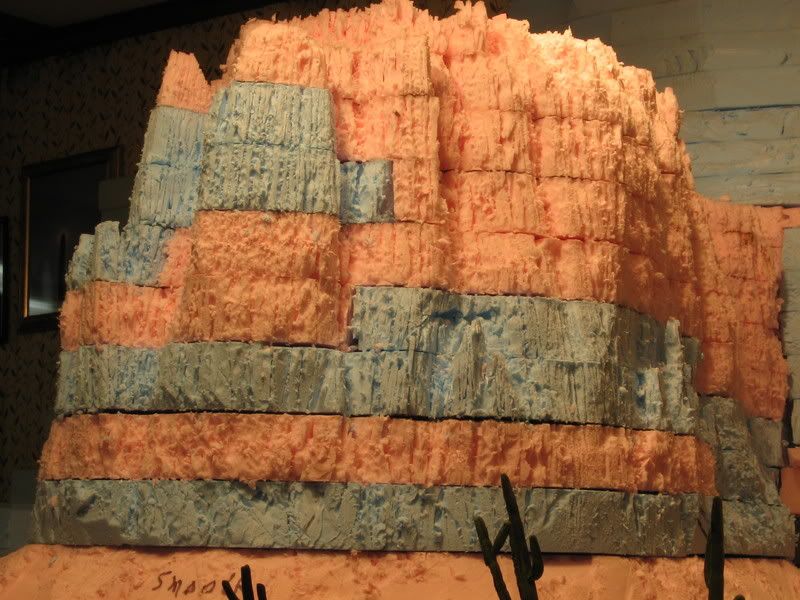
Here is a scene that is a little further along in construction. This train is just coming out of a siding for its long climb over the Rocky Mountains. In this spot it is double wide spline roadbed and solid granite rock made out of pink foam.
I think foam is great. I wish Dad and I had it fifty years ago.[:)]
I like 1X4 frames with plywood tops (3/8 to 1/2) and 1/2" blue Styrofoam on top of that. And you can “cookie cut” all you want but use foam “risers” instead of wood. And the risers are constructed differently than the traditional wood ones.
I’m not quite yet to the point that I’m willing to trust 2’ foam for structural components like the rest of you are (too many life-long experiences of absentmindedly leaning against fragile items or dropping things to quite feel comfortable using it).
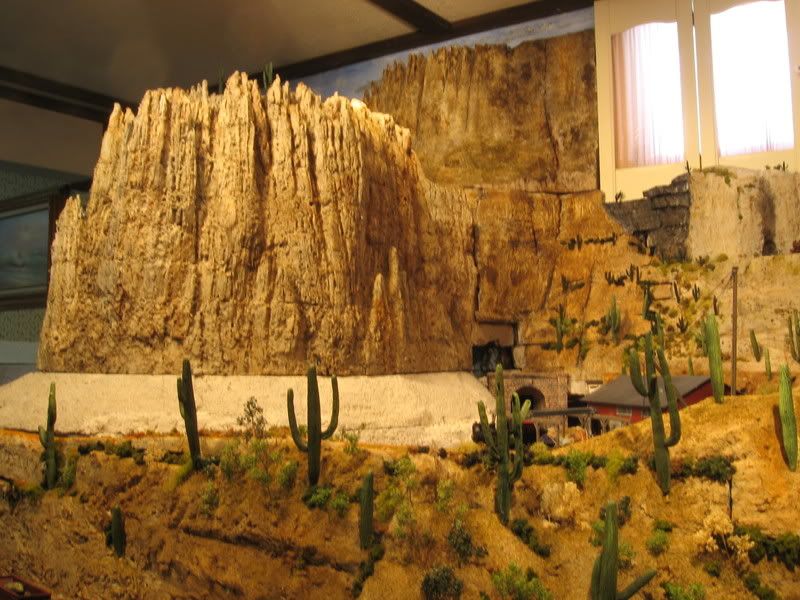
However, I am intrigued by your use of it for the scenery/granite in that pic. Could you post a brief description of how you did that? I like the look and am planning on using foam extensively for scenery in the layout I’m currently building. I like the effect you’re getting there.
Some of us are sort of fanatic about foam scenery and are inclined to give more advice than asked for. I stack my pieces with Low temp hot melt glue. I carve with a serrated steak knife. I paint with acrylics, mixing the colors on the foam. I will give more advice if asked. Here are just a couple of my pics.
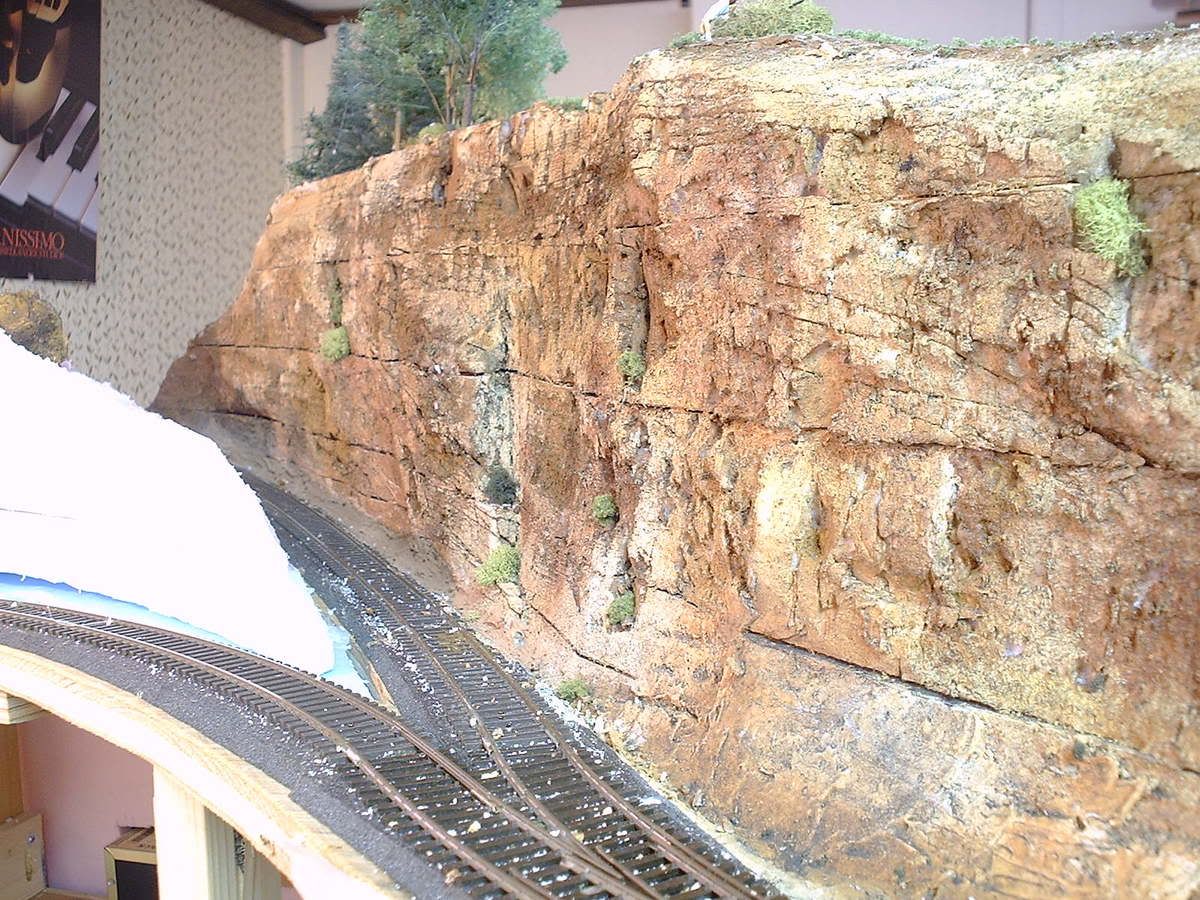
Charlie here is a link to a You-tube how to video. This is where I got most of my ideas from. Watch the video and keep an eye out for things he does like using wall spackle. He uses it to fill the cracks between the layers of foam but then he takes his finger and dabs bits all over the rock face. I find this makes a big difference in the finished look.
I also use real dirt. First bake it in the oven to kill all living things in it. I then put it through about four or five different sized sifters. I have coffee cans of dirt of different coarseness. I bought the strainers at the dollar store. Most have a few sizes hanging on the wall.
I was modeling the Rocky Mountains so I Googled “how to paint the Rocky Mountains”. The first site I checked gave me a list of about thirty different colours I would need. So I went to Walmart and bought about the first twelve on the list for $2.00 a piece. They are those little paint bottles in the art supply section. I went to Home Depot and bought a four litre can of granite gray as I have a forty plus feet of Rocky Mountain pass to paint.
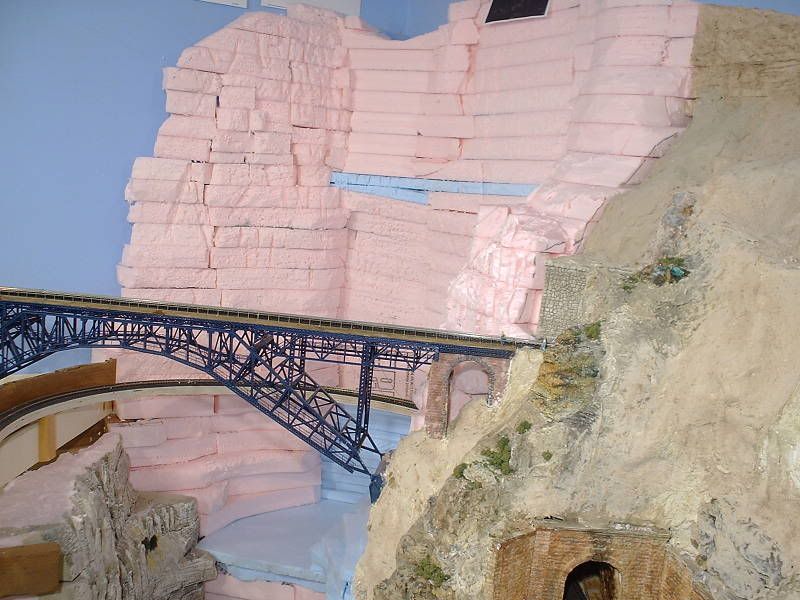
Pile the foam. I get a better result if I get away from that layered look, meaning try and stack some of the foam off the horizontal. There will be larger holes to fill but just jam in chunks of foam and smear Dap over it.
I used caulk to stick the layers together. Some use a glue gun or PL300 or other glues. It doesn’t matter. The one thing to consider is carving through the glue. Caulk is easy to carve through. Caulk is also seismically advantages when mountains are bumped. They tend to move instead of dent.
Carve away and don’t be fussy. Use a bread knife, rasp, box cutter, stab and twist with a chisel, whatever. Don’t just cut but also break the foam away.
Randy, it is Masonite. 7 x 1/4". 1 inch high. Some use less than an inch in height but I figured going with the 1 inch made it a lot easier for all those " in my head " math calculations for the risers on the grades.
I ran a few pieces through the saw at 45 degrees for a nice bevel on the outside pieces.
A little super elevation is easy with a rasp.
The nail in the top of the riser in the photo is where the centre spline goes. I first laid the one next to the centre against the nail and then glued the next one over to it. Once two were glued together they stayed in place and then I glued the centre one in after removing the nails. This sure beat trying to nail the centre one in as a stand alone starter as some have done.
This is a little bit OT, but just to kind of sum up for any beginners who’ve made it this far.
2x4 lumber is what we use to frame houses. You don’t need to get into heavy duty construction materials like these for your model railroad (although it’s not WRONG, it’s just over-engineered). 2x2 posts and 1x4 or 1x3 lumber is more than sufficient.
Foam is generally not structural in the sense that the benchwork is. To go back to the home construction example: the plywood that your floor is made out of would not support your weight were it not supported by floor joists every 18-24". The same concept appies to your layout. Foam is perfectly adequate to support your layout, provided it is supported from below. I use 24" joist spacing, and the 2" foam with the joists WILL support my weight. But whether you have a firm base of plywood or similar under it is purely a matter of personal preference.
LION uses foam, plywood, fiberglass, Celotex, and OSB board for trackway (all on the same layout–LIONS are CHEAP and all material is surplus). Foam needs support from underneath, but then so does the Celotex which I much prefer to work with but it has not been made in 50 or more years (fire codes, you know).
Some nice 2" thick fiberglass roofing material is greats stuff. Follow a roofing contractor around and take it from his scrap pile (after asking, of course).
LION puts his supports 16 inches apart. good enough to support fragile materials, far enough apart to allow a power drill to be used later.
LION does not put Tortoise switch machines under 2" material. Actuators are not long enough, him has not found piano wire stiff enough to throw the points, and welding rod is far too stiff.