BTW, Zoro is said to be a Grainger company that sells the same lines at much lower prices. I have ordered from them twice. Both orders were shipped immediately and arrived promptly.
My research also indicates that Grainger owns the Dayton brand.
Edit: I also found this 1.5 RPM version, which seems perfect:
You are correct Wayne, the 5/16” shaft does turn at .45 RPM at 12 volts. Because the motor is DC you can reduce the voltage and reduce the turntable speed.
With a large locomotive to me even .45 RPM looked too fast so I have the voltage set to 8½ volts. With a 850,000 pound locomotive on the bridge faster looked toy like to me. The only turntable I ever saw operating was the 130’ SP turntable in the El Paso SP Yard in the early 50s and it was very slow, but that is a 65 year old memory.
In manual mode I use a DPDT Off/Momentary mini toggle switch wired to short the motor windings. That stops the motor instantly making track alignment super easy
I saw the Tennessee Valley Railroad Museum turn one of their steamers a few years ago. It seemed pretty quick at the time. But I just found a YouTube video of the operation, and it is much slower than I remembered. It took well over a minute to turn the engine 180 degrees. The speed of the turntable appeared to vary at times, perhaps simply in response to the operator’s contol inputs.
Well, I certainly can’t say that the turntable seen in the link isn’t moving at a prototypical speed, but it’s certainly slower than most of the ones I’ve seen. I’ve never thought to actually time the speed, though.
However, the one which stands out most in my mind was this turntable…
The hostler brought a geep out of the roundhouse and onto the turntable, then turned the table perhaps a little more than 180° to have the loco pointing in the right direction for its train.
The table spun so quickly that when it stopped (very abruptly) the loco actually rocked back and forth (side-to-side) quite severely at least a couple of times. I don’t know if it was a turnable malfunction, or perhaps the holstler operated it at a speed not normally used (or maybe not normally allowed).
I certainly wouldn’t want one to move that fast, but 2 or 2.5rpm looks reasonable to my eye… slow enough that the loco doesn’t rock to a stop, but fast enough that I don’t fall asleep. [;)]
Some operations on our model railroads do need slowing down, but I don’t think that they necessarily need to be scaled totally prototypically. Watching a loco being turned on a turntable is no more exciting than pausing for a water stop, or waiting for brake pipe pressure to climb.
Even at prototypical speeds (my layout’s mainline speed limits are mostly 30mph or less) it doesn’t take very long for a train to move from one town to the unprototypically-close next one. Most trains, once they arrive, will have switching work to do: cars to spot, others to lift, and others simply to be re-spotted. This could take anywhere from 15 minutes to 2 or 3 actual hours - some waiting for a switch to be lined, or handbrakes released or set, but most of this keeps the locomotive moving and the
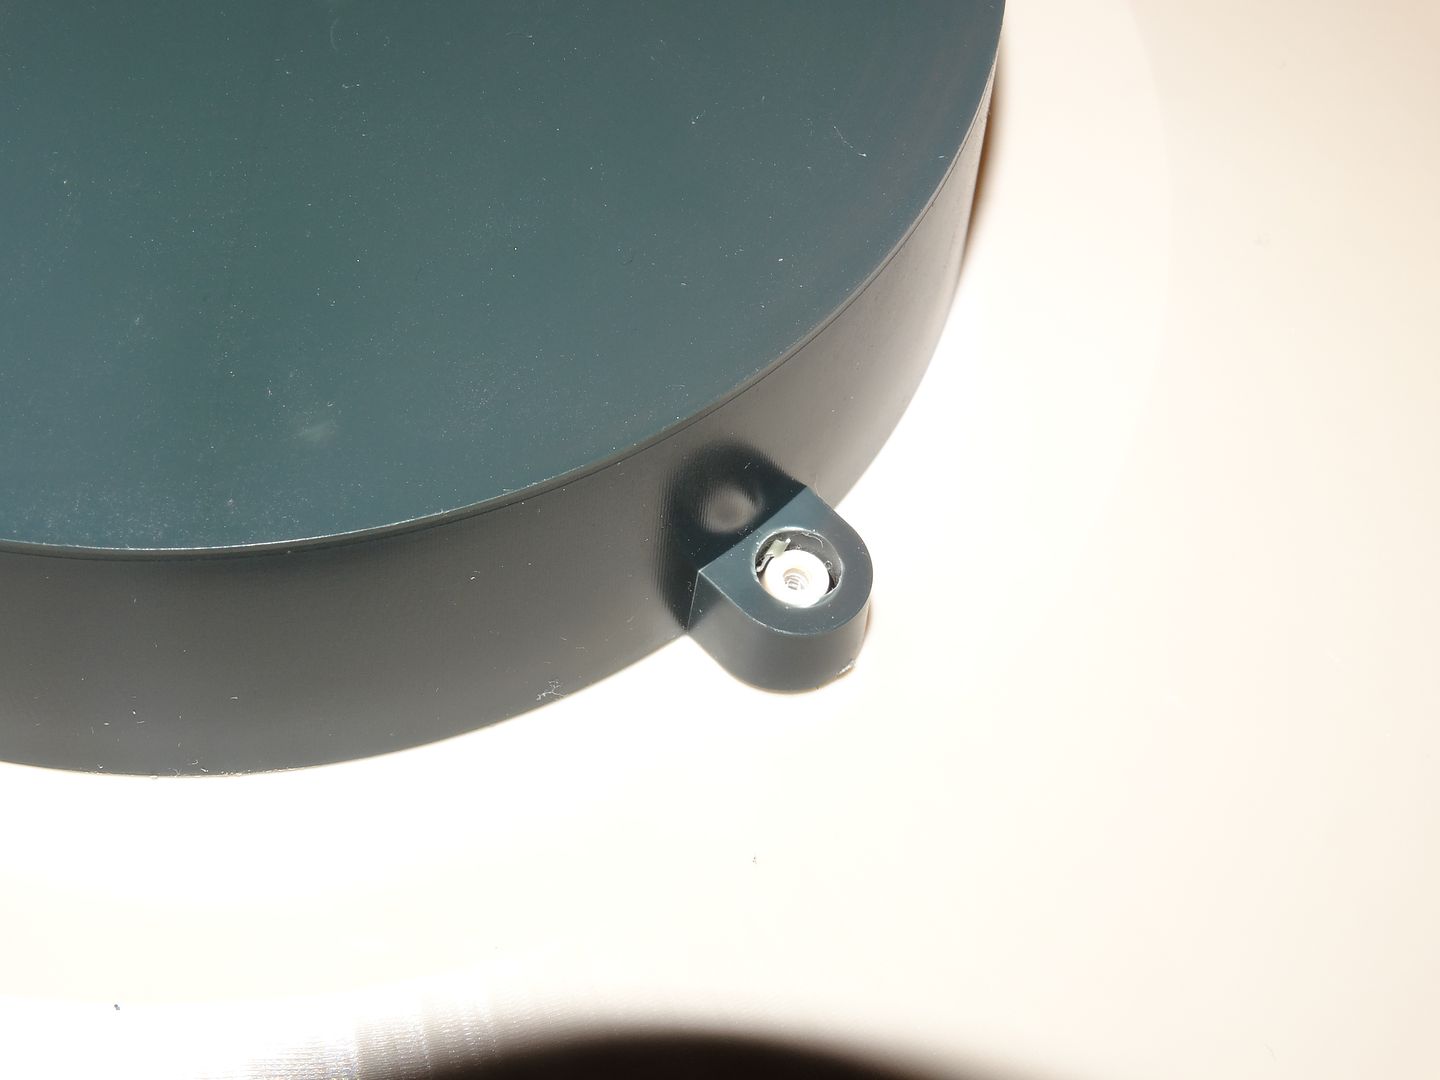
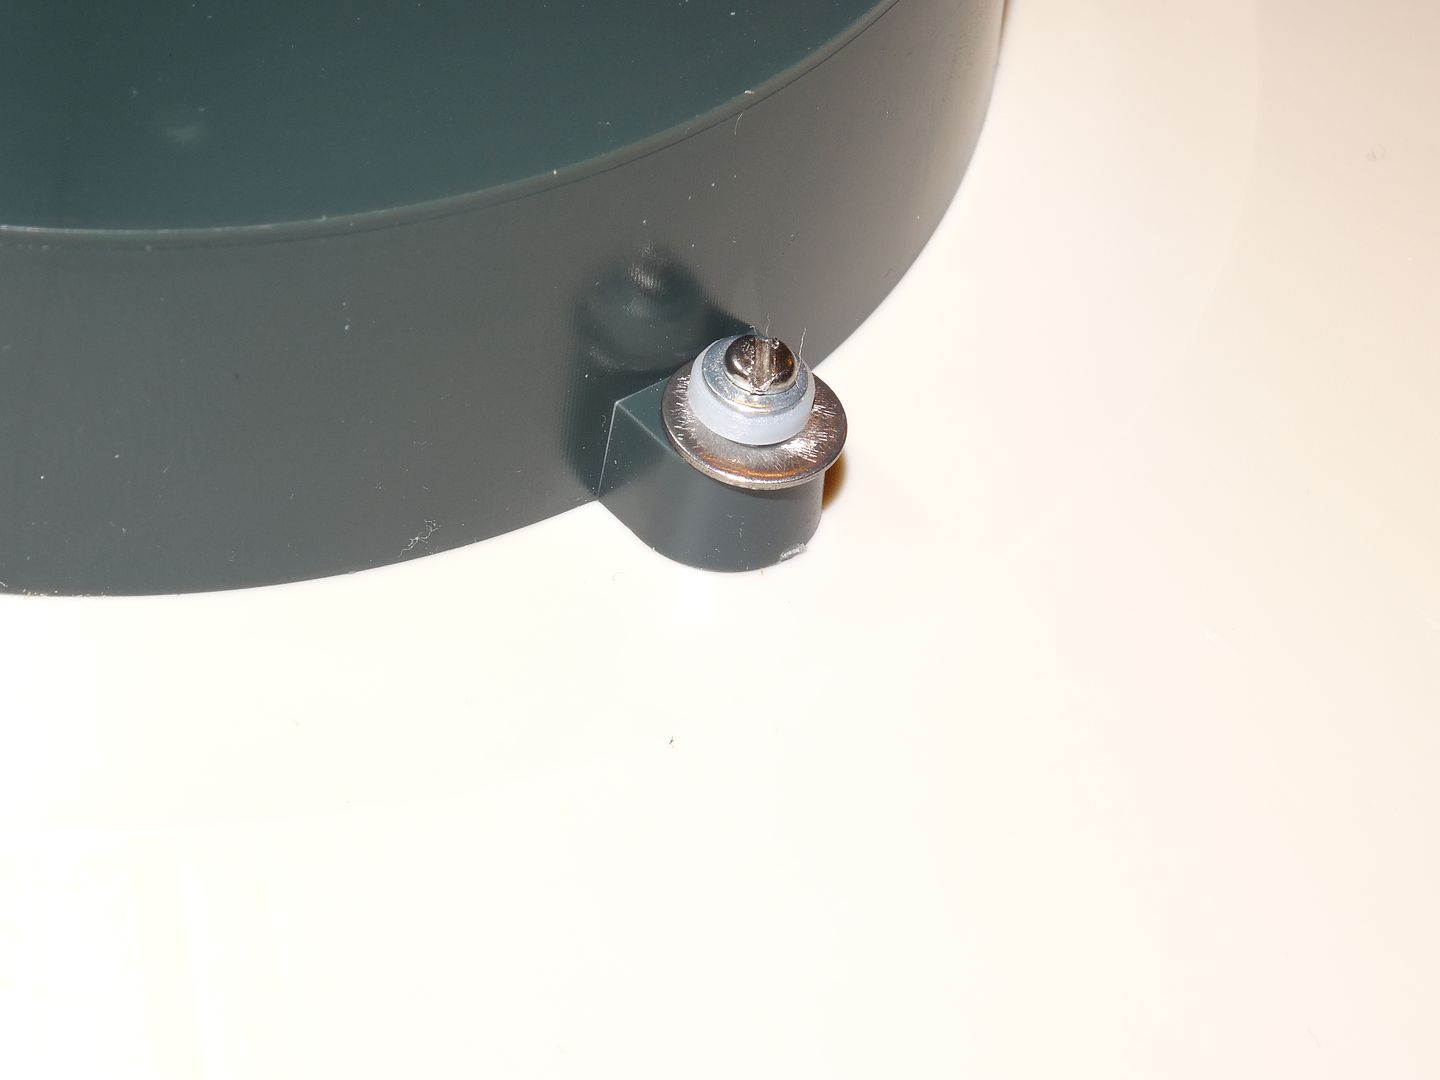
I got the turntable yesterday and have done some test fitting. The pit was not warped but I discovered the the lower bushing and the upper bushing do not line up properly. It is enough to cause one end of the bridge to be lower than the other by about 1/4". That causes the low end of the bridge to contact the ties on the pit rail, and of course it would make track alignment impossible.
The solution was fairly simple. There was no allowance for adjusting the position of the lower bearing so I drilled out the mounting holes in the motor cover/lower bearing holder to 7/32". That allowed the motor cover to be moved around just enough that the bearings could be lined up. I will use washers to cover the larger mounting holes. I had to use nylon spacers because the replacement screws were a bit too long (that’s all I had on hand). The original screws would have been too short to grip properly with the washers in place.
I am also changing the bridge wheels. I have two sets of surplus wheel sets from Grandt Line switcher kits which have stub axles. The wheels are bigger than the absolutely crappy ones that came with the kit so I have drilled axle holes in the trucks to accommodate them. I can only use the wheels without the gears molded into the hubs. The ones with the gears are too wide. I’ll have to get creative to get the visible axle bearings in the right spot. Hopefully the wheels will line up with the pit track but if not I will either adjust the ends of the bridge (simple solution) or grind out the existing track and ties and put a piece of real rail in (complex, messy solution).
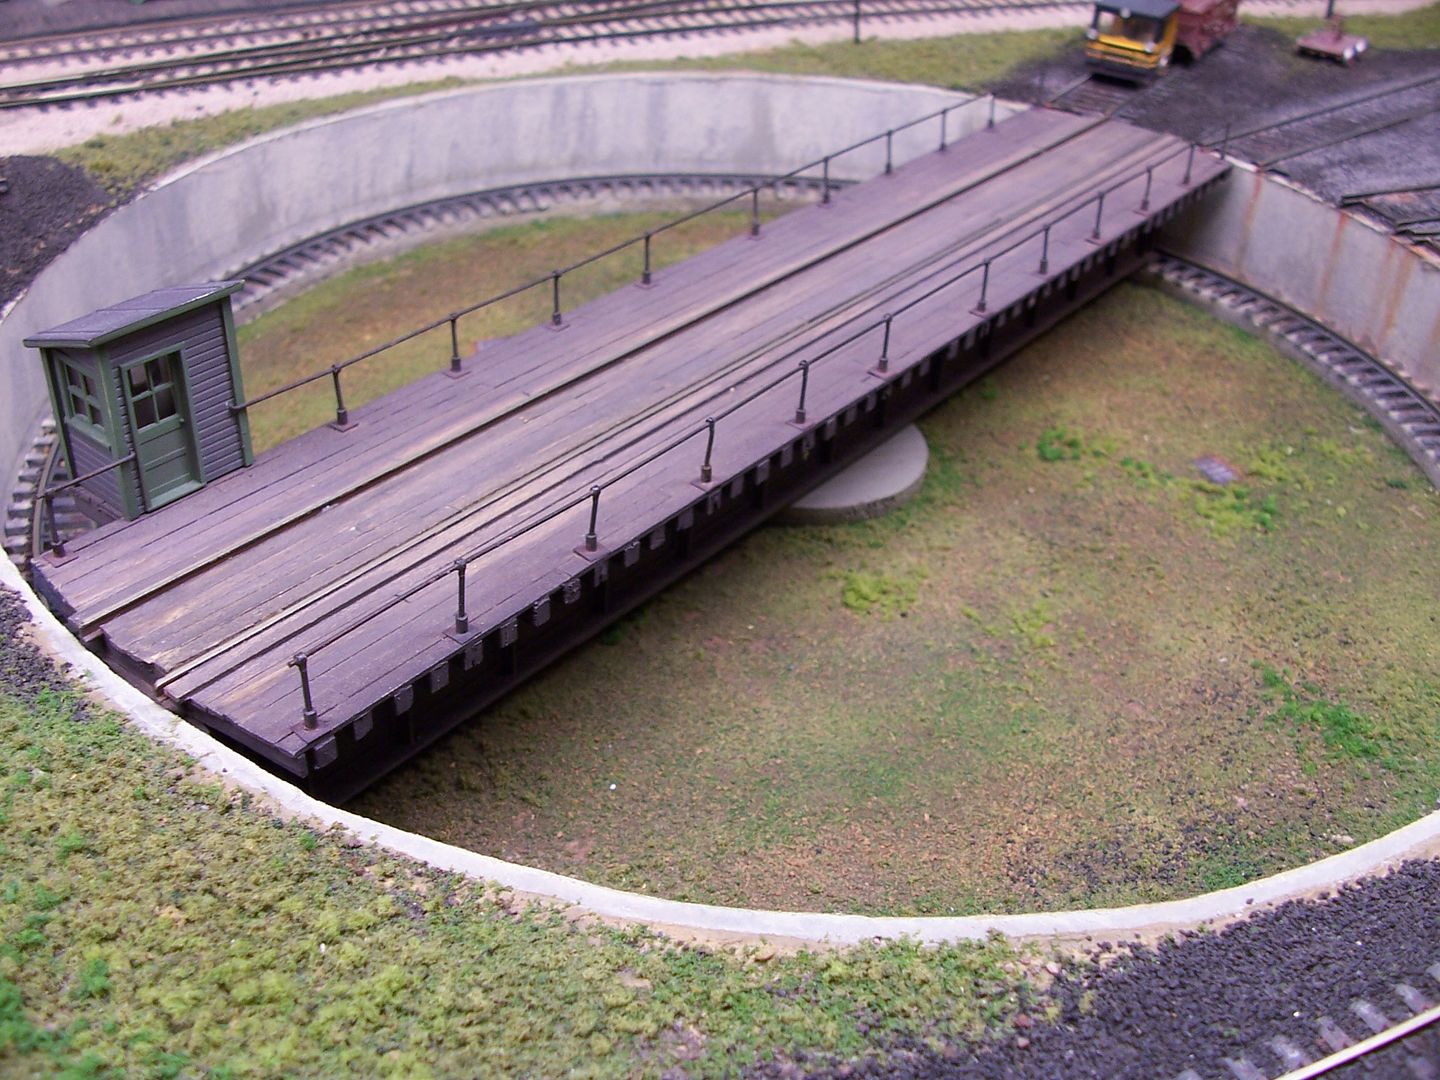
Now that I have the turntable under construction I need some inspiration with regard to painting and detailing it.
Please show me pictures of your completed turntables, or pictures of the real thing. I figure it will be much easier to do most of the painting before the bridge is installed in the pit. Rust stains from the tracks leading into the pit can be done once the track is in place but doing the major painting before assembly seems to make sense.
Don’t have a pic but what I did after painting was paint the inside of the pit bottom with white glue and then pored a dirt colored crushed rock over it. Let dry, dump off the excess rock (or ballast if you want) and then put some weeds here and there and then wet watered it and dribbled on matt medium mixture for baslasting. The reason for the white glue first step is it forms a single sheet when dry and alows for a really thin layer.
Here is my version of the built-up indexed model from 2006. I figured that with a plugged drain and after some heavy rain, some oily water would accumulate at the bottom of the pit.
Ditto on the 90’ kit. I motorized it and it worked OK for a while but now the motor won’t turn. It didn’t wear out from over use since it was on my branchline and only turns two locos per session.
I’m glad to hear about the problems with the DCC 90’ TT. I was considering getting one to replace the kit built one. I think I’ll just save my money
My 130’ prebuilt non-DCC TT works fine although I occassionally have to clean small pieces of debris out of the gear teeth. Programming the stops proved to be unreliable so I just line it up by eye.
Nice job on the TT. I think the oily water looks great. The various colours on the pit floor are well done too. I don’t want to add tons of weeds and debris in the pit. I want it to look like it is reasonably well maintained.
Did you do the ‘arch’ (can’t remember the proper term) or was it part of the kit?
Dave, the arch is part of the model. This TT is the “built-up” version, the first sent out already assembled by Walthers with indexing. It is not the “DCC” version recently released by them. It has been a decade, but I seem to recall having to install the hand rails and perhaps the operator’s shack. The electrical arch is also an item to be installed by the owner.
The arch that was supplied with my kit is a bit wimpy. I’m thinking about getting some Micro Engineering columns to build a heftier version just for looks. Micro Engineering apparently doesn’t sell the columns seperately so I guess I’ll have to use a bridge kit as a donor. I’m thinking of using an N scale kit so the arch doesn’t look too heavy.
Not much to see in this photo of my Walthers 90’ turntable. I’ve motorised it using the motor and gear train from an old VCR, but the turntable itself is too noisy (wheels, I suspect) and flops around too much to stay in position when a locomotive is moving on or off of it. I think that a stronger spring against the driveshaft will fix that.
This is my sorta-scratchbuilt turntable, an 89’er due to limited space…
The pit was cut into the 3/4" plywood top of the layout, which was used here specifically for the installation of a turntable. The pit walls are 1/8" Masonite, and the pit bottom is the cut-out piece from the 3/4" plywood. I cut the concrete base for the ring rail from 1/4" plywood, and the ring rail itself was cut from a piece of Atlas code 83 flex track…
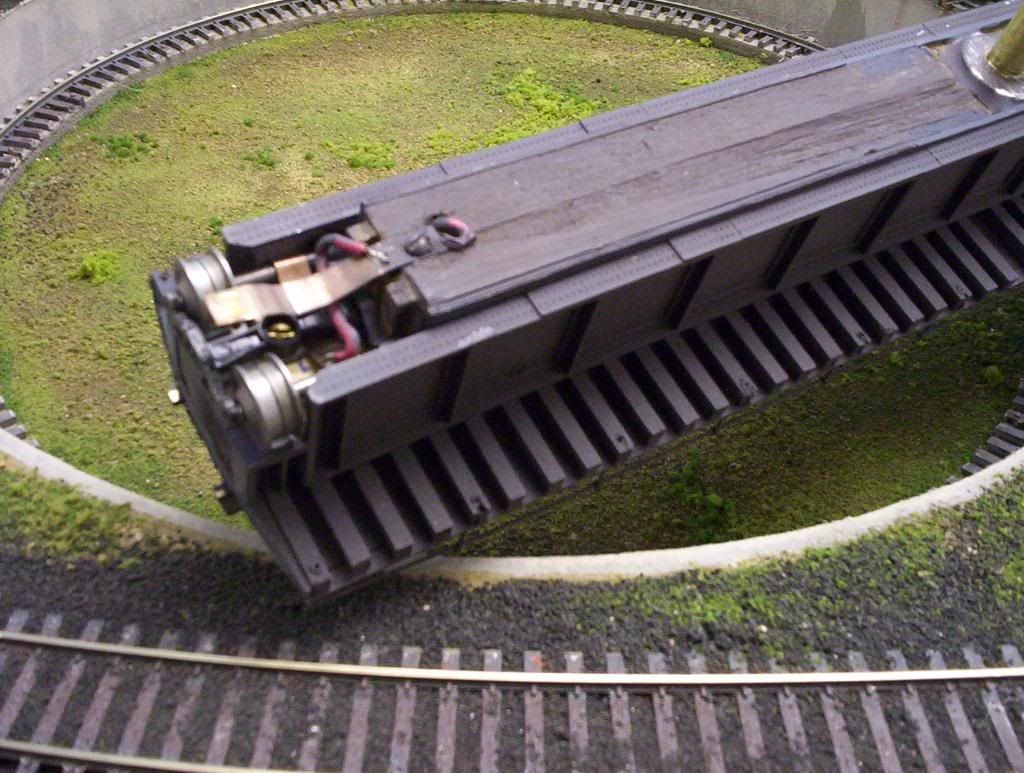
The wheels, face-to-face metal wheels from an Athearn passenger car are mounted in plastic trucks from a freight car, and current for the table’s track is via the ring rail and metal wipers, and a wiper on the turntable’s shaft (from an old handmixer).
The table is a pine block, cut to size, with “steel” sides cut from a couple of Atlas through girder bridges off the “used” table of my LHS. The track is Atlas code 83 flex - I cut the webs joining the ties, then, after spreading them out, added 10"x10" ties cut from basswood which I had on hand. Using the plastic ties kept the rails in-gauge, while the longer wood ties allowed support for th
What parts did you need, Dave? I have been kit-bashing quite a few M-E bridges, and some Central Valley ones, too. I can send you some girder parts I have left over. Many of the rivet plates from C-V and Tichy can be helpful for your arch, too.
I have a Diamond Scale TT with a New York Railway Supply stepper motor indexing. I’m pretty happy with it. I only gave it a basic paint job and hope to get back to doing more details in the future. I want to letter a “WORK SAFELY” slogan on the bridge sometime soon…
I know they’re grossly oversized but I wanted the lamp posts on the bridge, too (wired to the rail so they’re lit when the DCC is on. The Diamond TT actually collects power for one rail through the arch and the other rail through the pit rails. This is nice because I can use all four brass pit wheels for pickup. I’ll try to get a better photo soon. Diamond has a nice motor/gearbox casting at the bridge ends.
Thanks for the very generous offer. I’ll send you a PM.
I like the lights on the bridge, and I plan on doing the same thing with scratch built lights. I assume I will have to include a rectifer in the circuit for the LEDs in order to run them off of track power.
The Walthers kit includes a bunch of decals but they are all in black. I doubt that I will use them.