By the looks of it, the locomotive must’ve missed the tracks on the turntable by at least half…perhaps the wheels on one side on the rails of the opposite side, and the other wheels on the walkway or over the edge ot the table.
At least it got turned…over. [:P]
The CNR, and probably a lot of other roads, too, used air from the loco’s brake hose to power turntables at the end of rural branchlines. Most of these locales had no enginehouse, but needed a place to turn the locomotive. The turntable might be in town, but many were simply in a field at the end of the track.
There are several photos of this operation in Ian Wilson’s series of books on various CNR lines in southern Ontario.
Here’s a video of the Tennessee Valley Railroad Museum’s turntable in action. The turntable uses electric power, but the manner of power collection is not obvious.
It measures about 80 foot in diameter using Google Earth’s tools, which I have found to be fairly accurate. The museum states that the turntable was originally built in the early 20th century.
Thanks for that info. It seems to me that since I am modelling service facility the turntable would have its own power so I guess I’ll do a tower.
CG:
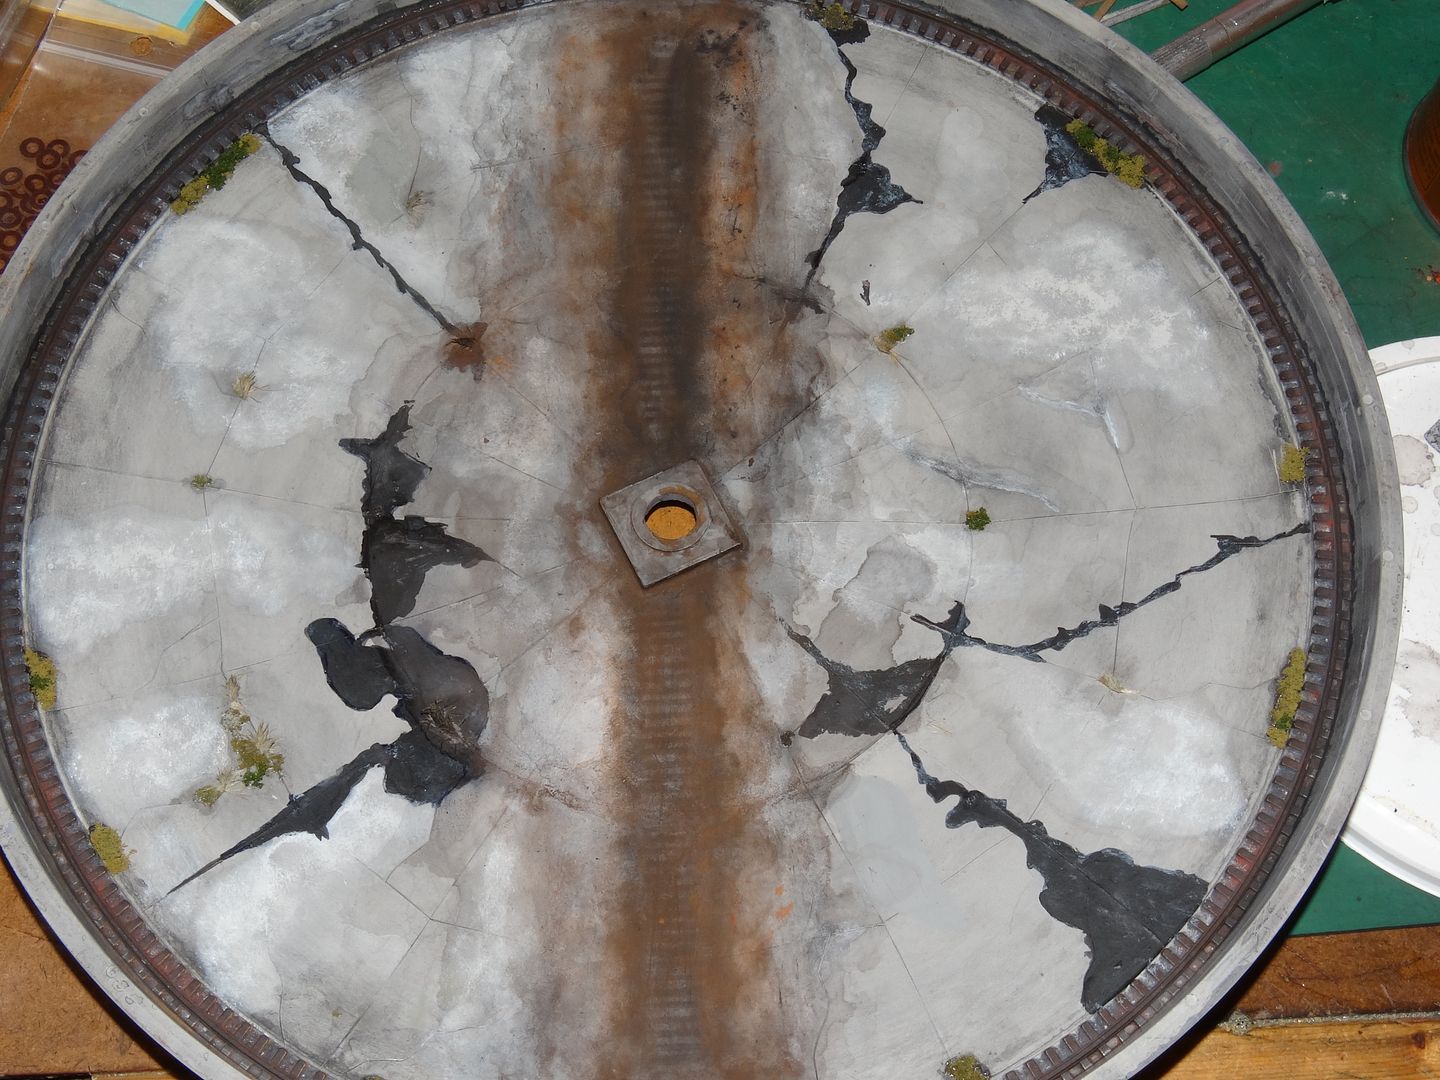
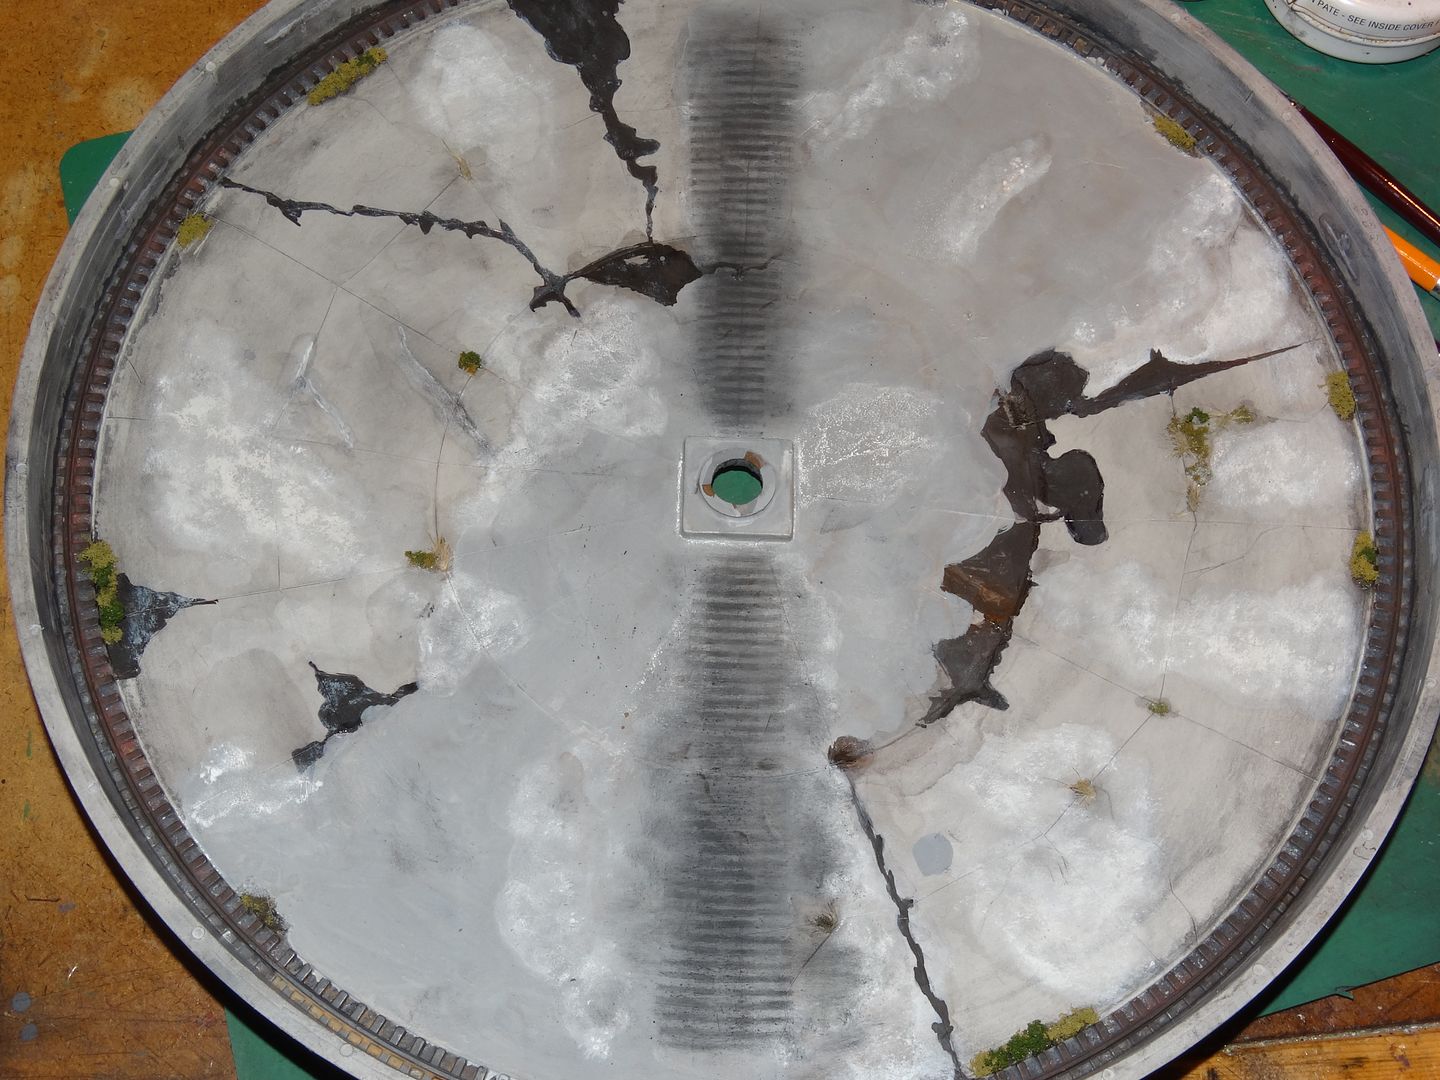
Thanks for the link to the videos. I made some interesting observations. One was that the Tennessee Valley pit rail was not covered with grease, nor were the rails on the bridge. Back to the drawing board on that part of my pit.
There was a second turntable video that came up after the one you linked to. I noticed that the pattern that the grease stains formed on the bottom of the pit under the bridge when it was in its most commonly used alignment are very similar to the picture that Henry posted. I was going to plank the bridge between the rails but I’m thinking that I will not do that so I can re-create the grease stains falling from the bridge ties.
I could spend the rest of my modelling career just painting the pit over and over again![swg][(-D][(-D][(-D]
nitpicky things…. (disclaimer) - you could do nothing more to it, call it done and have a great looking weathered turntable.
The rust powder on the bridge boards could be toned down slightly. The boards look a lot better in terms of spacing and gaps. – I still think it might look good with a planked center section between the rails. Does the bridge have a railing and or shack/superstructure?
I think the pit could use some loose debris in the center if that doesn’t gum up the works. It would add another layer of texture and tie the textures and colors together. The white looks really good and rest of the weathering in the pit looks good. You got some great textures and some good details.
At the very least - Get yourself a loco and a mockup of some scenery and shoot some low angle shots just to see how it looks. I think it will look great….(post
The boards don’t come off as being quite so ‘rusty’ in reality, but I have some grey wash that I could use to tone the orange tints down a bit.
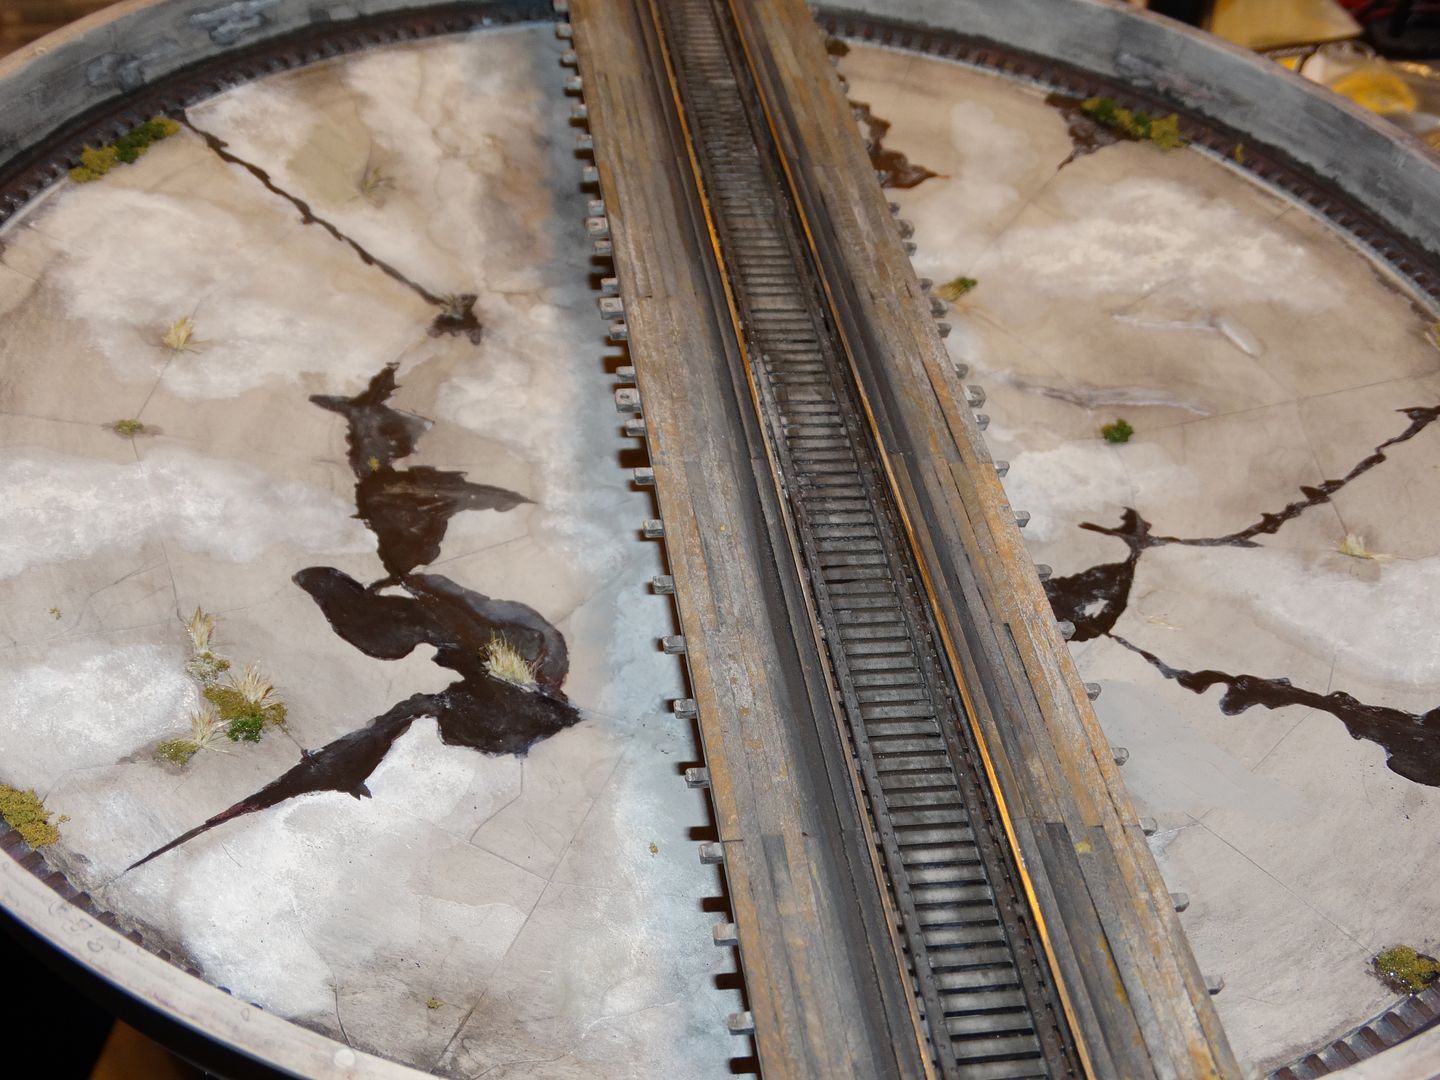
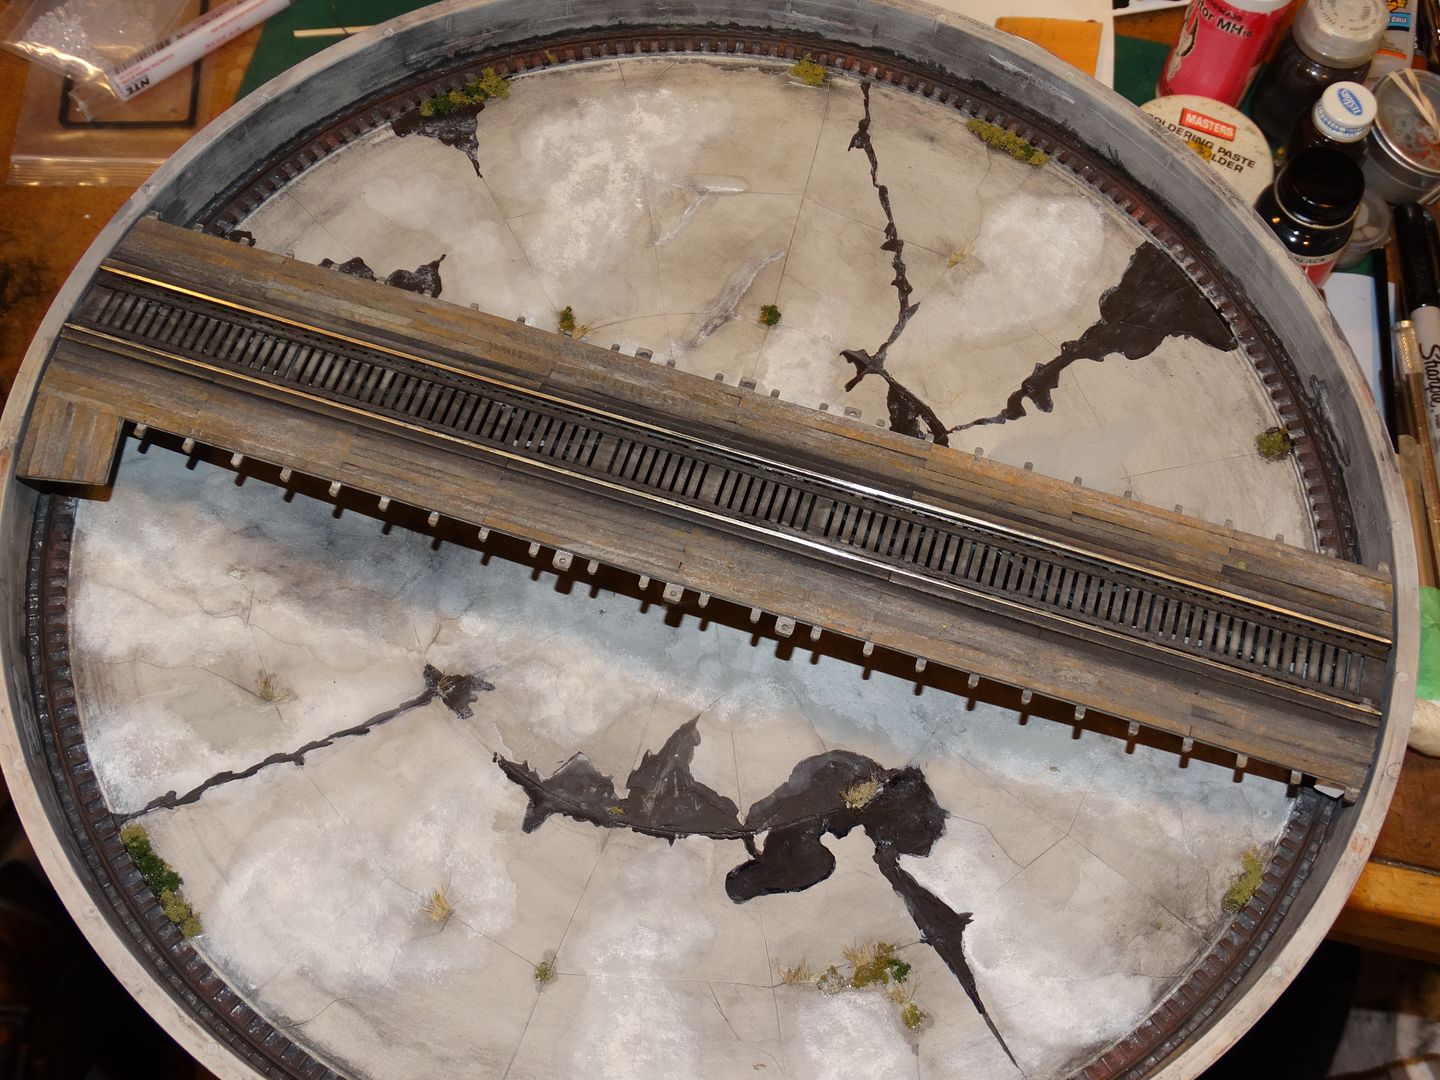
I deliberately left the center unplanked because I wanted to mimic the oil/grease stain pattern that was evident in the picture Henry posted. You can clearly see a pattern where the grease has dripped between the center ties on the bridge when ‘hot’ (incoming) locomotives arrive at the turntable:
I have made an initial attempt at copying the grease stains but as usual they are a bit overdone and too rusty:
The bridge will have a railing and a shack. I don’t care too much for the railings that came with the kit so I’m going to make my own. I will probably use the Walthers shack unless something more interesting comes to mind.
The turntable will be part of a small service facility which will include a nine stall roundhouse, all the usual fueling, sand and water supplies, plus a diesel maintenance shop, machine shop, paint shop and steam plant.
Nice job on the pit re-weather!!! You could still have that stain in the pit and boards in the center of the bridge (hey, maybe they planked the bridge recently or stuff runs down between the boards and rails…)[:-^][8D][:D]
When does it go on the layout?
BTW: you have inspired me to finish my gallows TT…Must be TT fever!!
It goes on the layout just as soon as I have a layout to put it on. I will finally be starting to build my layout this year. It has been a long time coming. I had to wait until my son moved out and took his exercise equipment with him that took up 1/2 of the layout space. That happened in September. In November we had a garden shed installed so I can get the rest of the stuff that is occupying the layout space out of the way. Next step is to build some shelving in the shed and some storage cabinets in the garage to hold the stuff that can’t go in the shed. Then I have to reduce the size of my mechanical work bench (not the model train one) and clean up several feet of storage shelving that holds my power tools and various household supplies and equipment. How fast all of that happens will depend on by back. It won’t be a quick process unless a miracle happens to reduce my back pain.
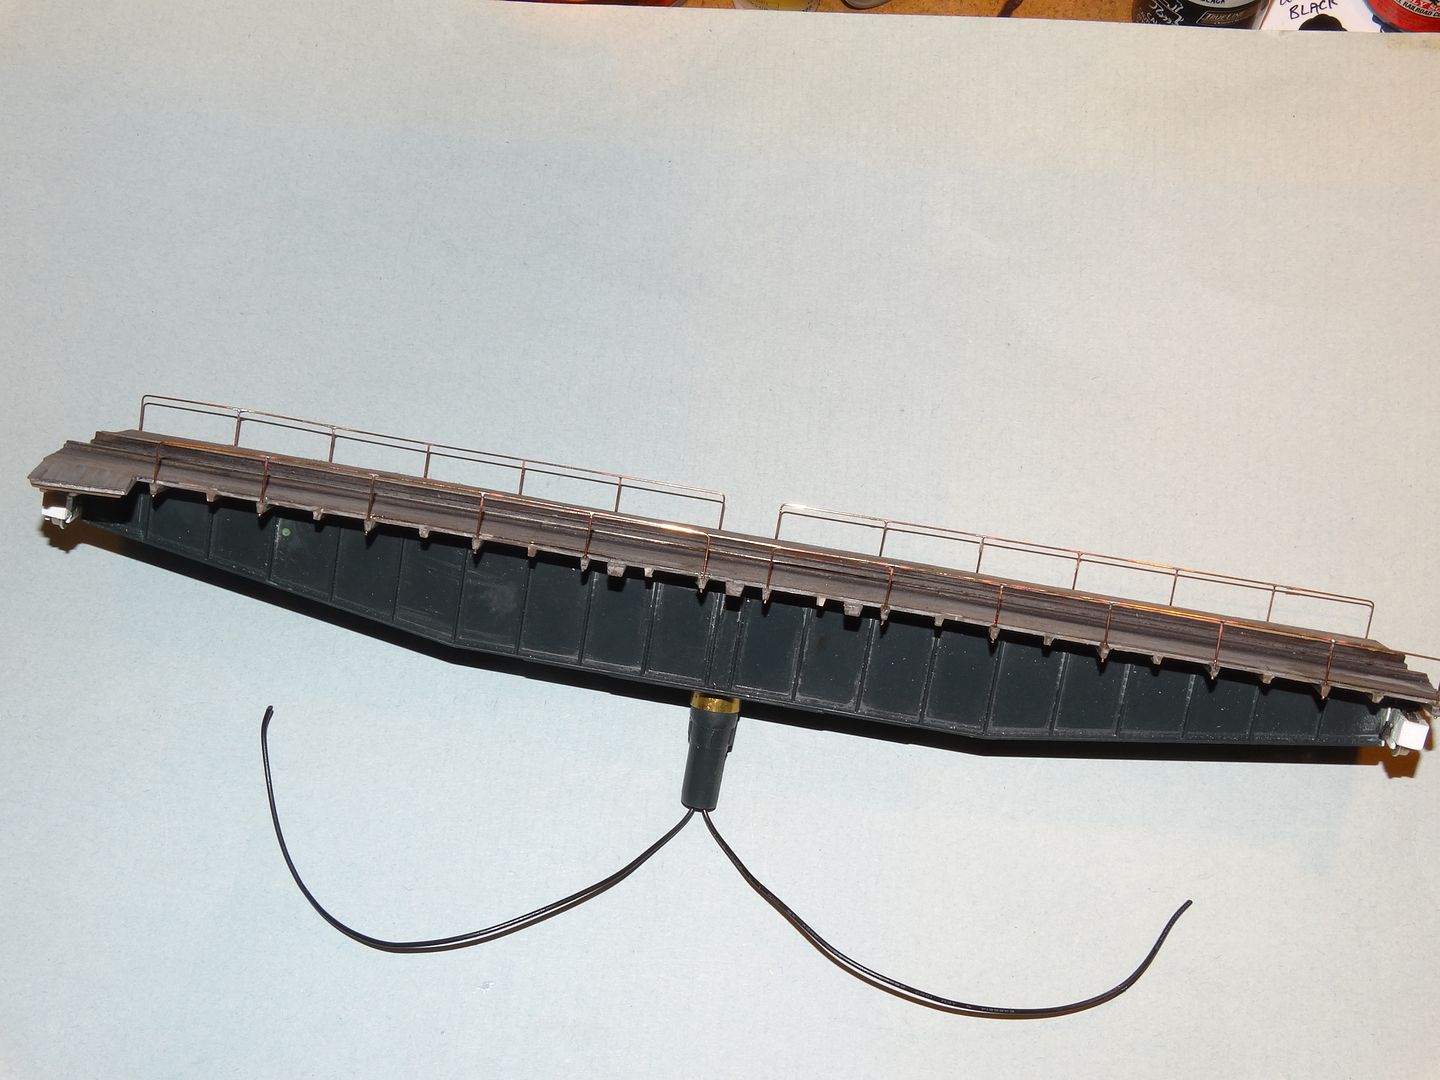
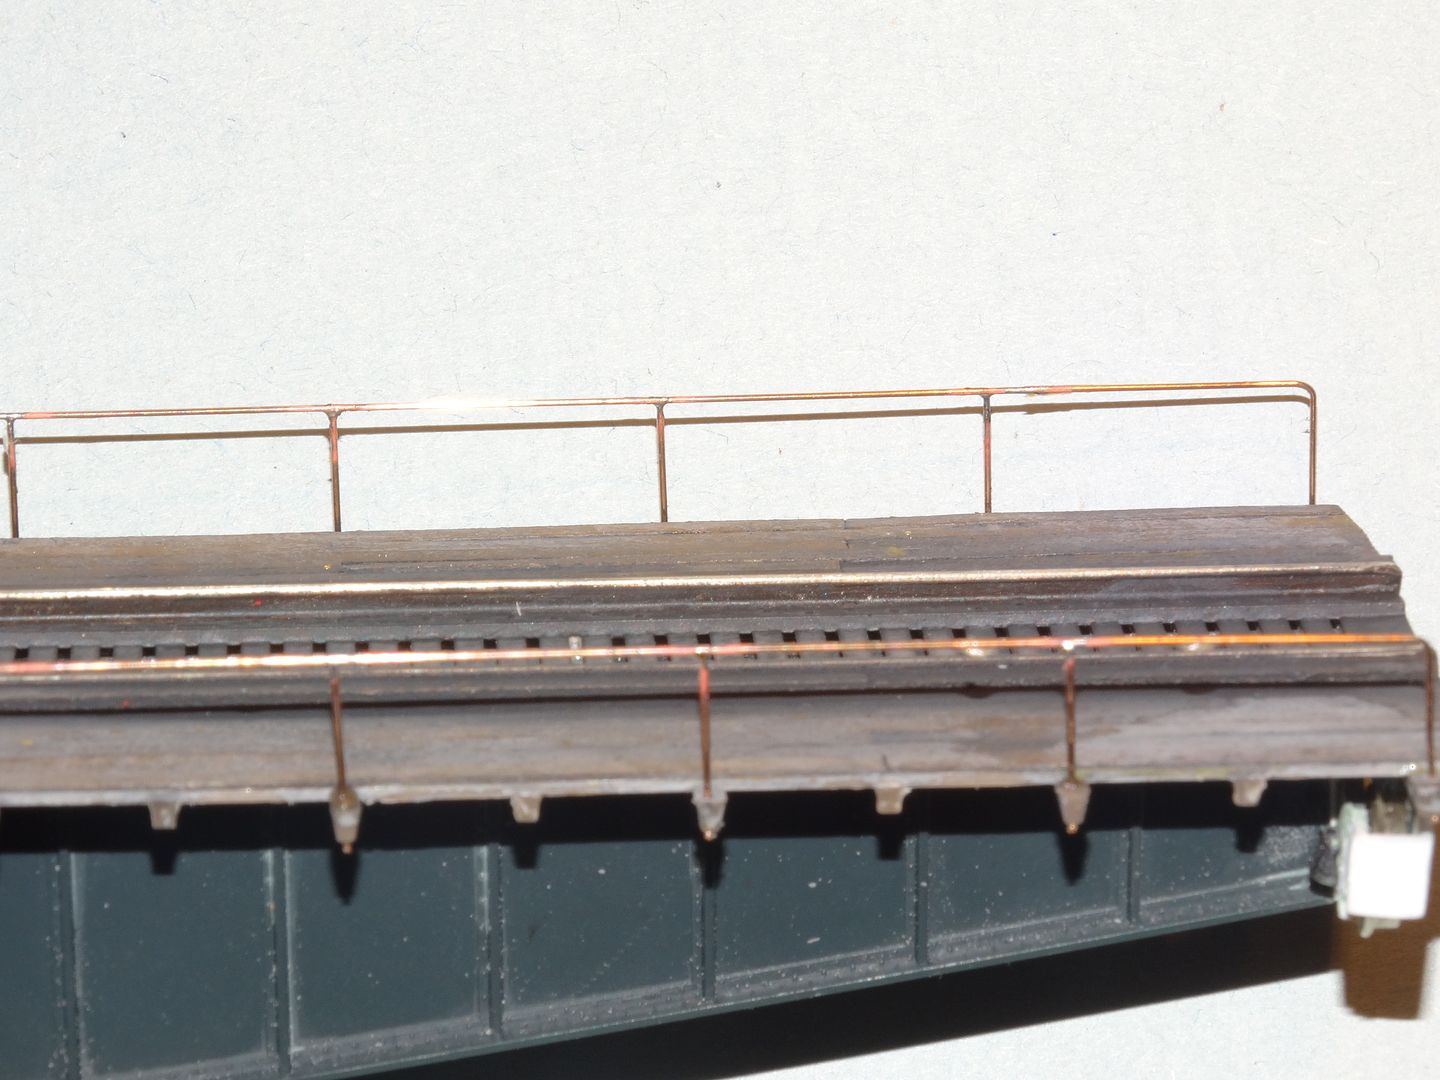
This turned out to be a whole lot easier than I thought it would be. I had envisaged having to construct some sort of fancy jig to get all the uprights in the proper locations but I ended up using the bridge itself as the jig. First I drilled holes in the ends of the extended bridge ties that support the railings slightly larger than the .020" phosphor bronze wire I used for the railings. I removed the ends of every second bridge tie because I wanted to make the railings a bit simpler than those that came with the kit. Then I bent the top railings to form the uprights for both ends of the railing’s span and glued the railings into place. Next I inserted the intermediate uprights into place and CA’d them into the bridge ties. After a little tweaking to get everything lined up it was a simple matter of soldering the tops of the intermediate uprights to the top railings. A couple of the ‘T’ joints had to be filed a bit and voila! It took me less than 1/2 hour to do the railings and the results were better than I had expected. Phosphor bronze rules!![tup][bow][(-D]
Wow!! The railings look great. The fine wire really works well. If I lived closer, I’d come over and help with the boxes and moving stuff for the layout.
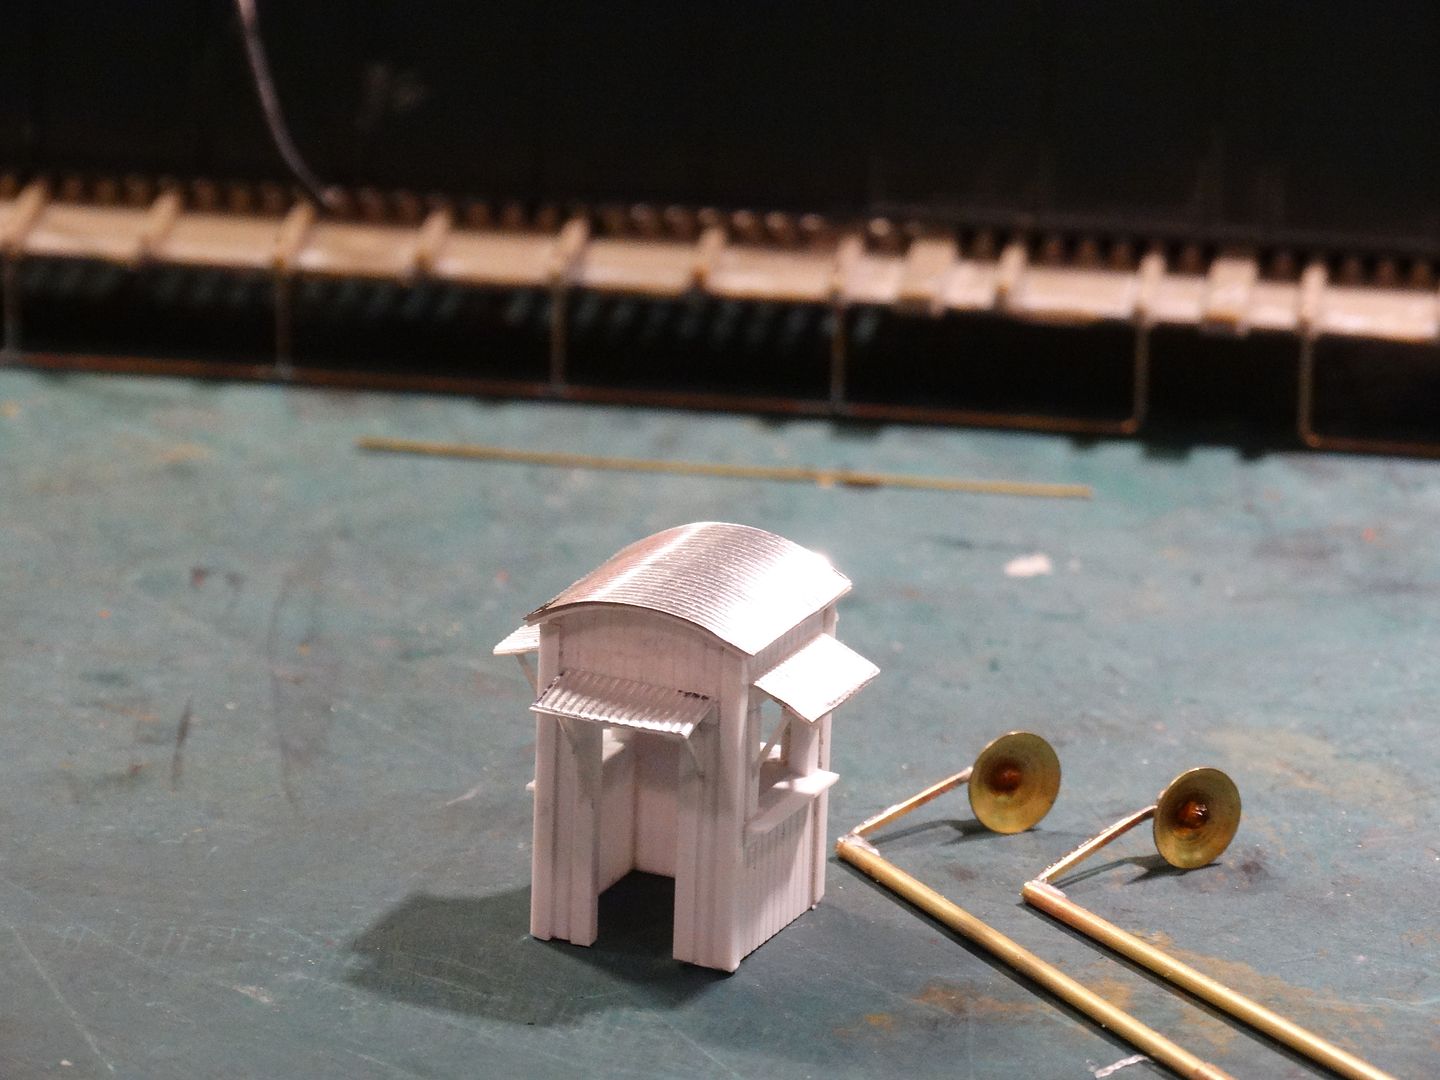
I didn’t like the Walthers bridge control cabin so I decided to design a new one. The original was a bit too clunky. Fortunately or unfortunately I ended up with almost exactly the same thing.[banghead][^o)] This one has a few more exterior details. I’m bald on top so I added some window awnings. I’m always the first one to know when its raining. At least now if I am imagining myself in the bridge control cabin my head will be dry![swg][(-D][(-D] I still have to put some sort of control panel in it.
You can also see the bridge lights. I had to pull an old Inter Mountain trick by dying the LEDs orange because their ‘white’ was too harsh[:(!].
A slippery slope isn’t it? First you start by weathering, then its replace the boards on the tt bridge deck, then its scratch building railings and control cabins…Where does it all lead???[8D][8D][:-^]
The cabin and the lights are Looking real good…
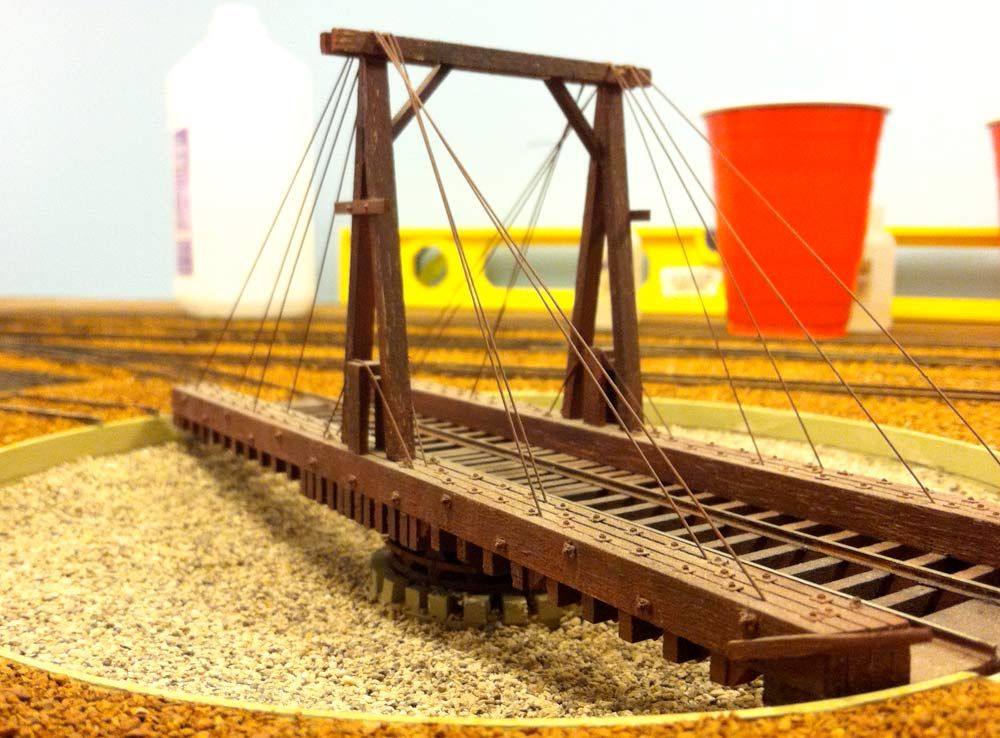
Here is a shot of the El Portal TT that I am currently working on…
I know it doesn’t look like much, the ground dirt is the first coat of several to come. Watching your progress has been inspiring.
Is that an item that can be purchased separately? I’m looking to do something a bit different with the bridge arch. The one Walthers supplied is too bland IMHO.
Guy, I love the details like the support cables and the NBW castings!
In this case I deliberately jumped on to the slope! I don’t care for most ‘out of the box’ structures, although I’m pretty happy with my Blair Line and Bar Mills models after detailing them. I’m hoping that the origin of the Walthers turntable won’t be too obvious when I’m done. Also, I’m really hoping that it will operate reliably when installed. Why else bother with it?