I’m working on the above kit. There was no instruction sheet in the package, and I cannot find an on-line source for that. Could be that it’s a rather easy kit so why would it be needed?
Yet, there are two small pieces on one of the sprues, Part 9 to be exact, rectangular pads, maybe 3x4 mm at the most. Does anyone know what these are intended for? Or if there really is an instruction sheet that I cannot track?
Those little pads are the ‘shoes’ that the bridge hinges will rest on.
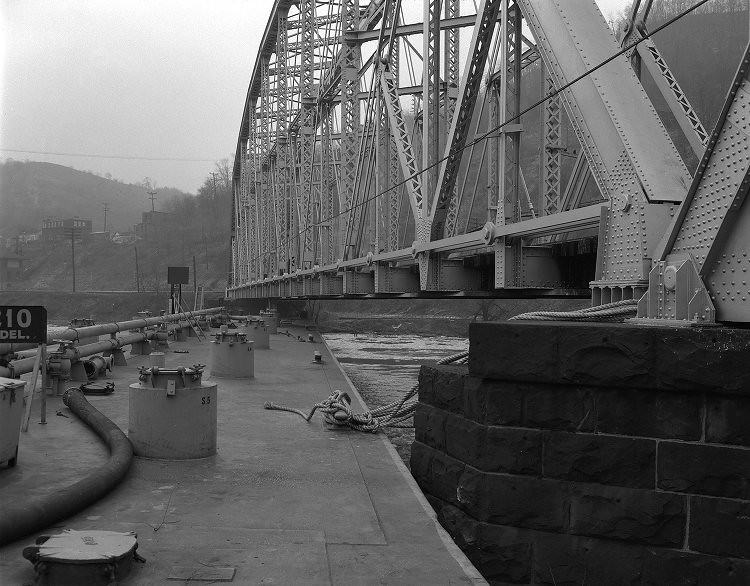
Most bridges of any length in steel expand and contract substantially, and instead of allowing them to rest on rollers at one end (which would require special joints in the track akin to those at mainline drawbridges) they have hinges at each end to allow them to ‘bow’ slightly when hot. If you look at prototype images, you will see both how the hinges attach to the bottom chord or web of the bridge, and how they rest on a special hardened surface which is cemented into the material of the abutment.
Thank you Cheers. If not the wrong tree, at least the wrong branch. The HO scale version doesn’t include this detail, which is interesting considering what else I just learned about this. Thanks for your help.
Thanks Overmod. Your thought here is the “what else I’ve learned about this” and resolves the question quite commendably. The “special hardened surface” makes sense, and I appreciate the guidance here.
Overmod, final (I think) question. “Special hardened surface” means these pads are not painted the same color as the concrete. Something, I would suppose, to represent metal, or steel, right? Any suggestions about what color you’d use?
Ed’s right; most of the ones I’ve seen have been painted the same as the “rest” of the adjoining steelwork, and painted at the same time during maintenance.
The caveat is that the hinges are supposed to be greased, and the ‘surplus’ grease will streak and show dirt. I’d also expect a certain amount of dust, trash, and leaves to make its way around the shoes.
I am tempted to think that details on an N-scale abutment large enough to see and manipulate may represent the whole hinge, glued between the plain ol’ bridge lower chord and the stone or cement finished top of the abutment. You wouldn’t see any part of the shoe plate in that case.
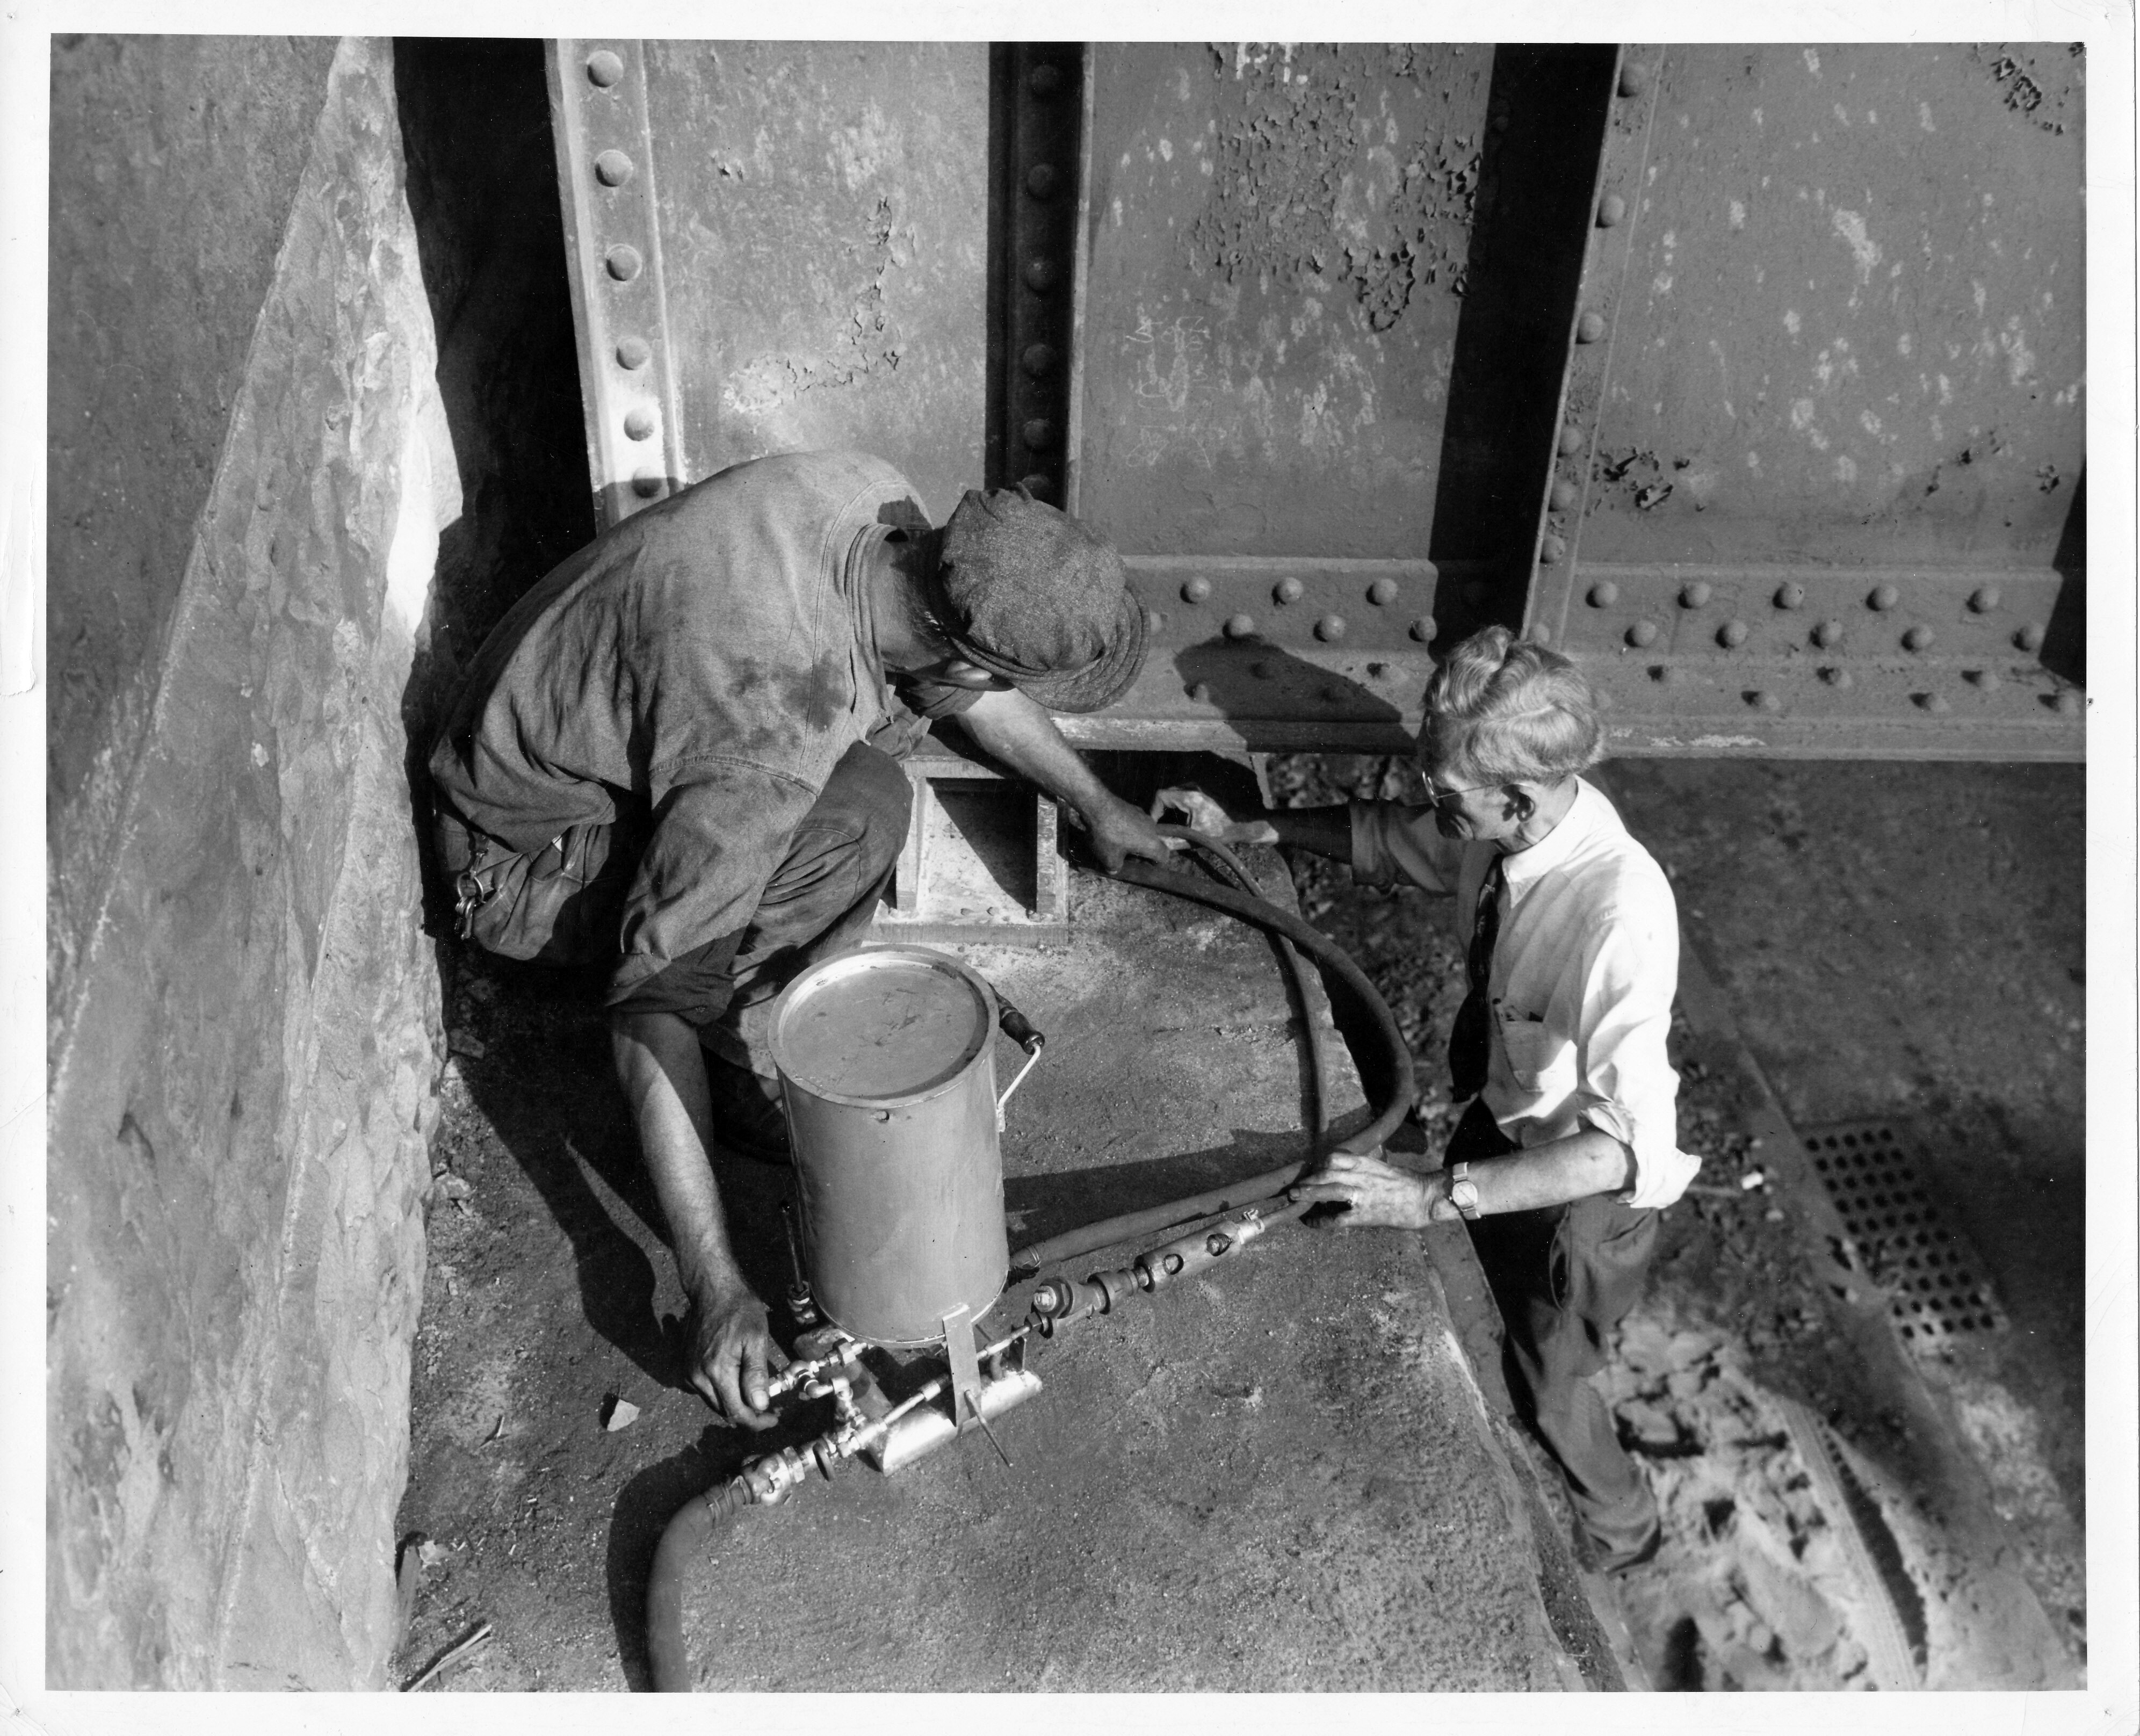
This appears to show some type of abrasive bead process, perhaps in preparation for some kind of ‘Magnaflux’ test or simply removing corrosion prior to painting.
These ‘shoes’ don’t appear to be a type that requires grease but that may be what they’re doing here. The light color residue (and the engineer standing in a pile of wet sand) leads me to believe the former.
A little PM goes a long way toward bridge longevity[8D]
And I have now learned more about bridge supports than I ever thought it possible to learn. Nothing comes easy, does it? Which explains why a guy wearing a white shirt and tie is in the down-n-dirty making a living. Sweet.
It’s so easy that all he has to do is roll up his sleeves not to get his shirt dirty!
I suspect that the cleaning is for inspection and possibly some form of early NDT testing, not to prep the hinges for relubrication. You would NOT abrasive-blast where you subsequently wanted sliding contact on heavy grease…