I’d like to start a running list of individuals ‘order of operations.’ What I mean is, in what order do you weather? I’m sure there are a variety of ways and so I’d like to pool them together to cross reference.
For example, if I were to guess, this is how I might start:
Clean model of impurities with soap and water
Spray a light layer of dullcote to add tooth/texture for paint (Is this even necessary if you’re applying a sun fade?)
Apply sun fade (assuming a variety of techniques here)
Apply Future acrylic gloss coat if using decals of any sort (I’m struggling with this step because I just added a fade, but what’s best if you’re going to apply decals? Or maybe decals is in a different part of the steps)
Apply decals over Future
Apply graffiti now if the desired look is an old tag; otherwise, skip for now. Also, if graffiti is a decal instead of hand drawn
Apply dullcote to seal decals and or graffiti
Apply washes (washes usually go best on a gloss coat, so the Future floor wax might be a good thing? Thoughts?)
Apply dullcote to seal wash
Apply paint chipping with paint of choice (this could be applied near the beginning if a rust base coat was used and painted over using salt technique)
Apply dullcote to seal
Apply rust streaks with paint of choice
Apply hand drawn graffiti now if the desired look is a fresh tag
Apply additional rust streaks if streaking over graffiti is desired
Apply dullcote to seal
This is by far an uneducated guess and would like everyone’s input. What’s missing? Are there too many steps? Do I have the wrong order, etc.?
Assuming it’s and undecorated kit, I normally get the car completely painted and lettered, and sealed with flat finish, before starting weathering. I figure that’s what happens in real life, the car comes out of the shop in new paint and lettering and then weather takes it’s toll on it. I also prefer “dry” methods, I rarely use like a paint wash to weather.
Sun fading isn’t that prominent a problem in my area (Minnesota) so I generally don’t do much with that. I go over the finished car with a heavy layer of powdered charcoal, then use a paper towel to remove much of the charcoal, leaving ‘dirt’ in areas like between slats on a wood car, or around rivets on a metal car. It also tones down the lettering and give the car a nice ‘patina’. Particularly on older cars that would have been pulled by steam engines, I leave the roof and sides fairly ‘sooty’.
After sealing the charcoal in with flat finish (charcoal doesn’t dissolve and fade like chalk) I’ll then use some chalk or weathering powders to add rusty red, gray, brown etc. where needed.
Of what little weathering I’ve done so far, I’ve found that cheap water colors (the kind that kids use to paint by number) at full strength is the best for the basic weathering. I use a color that is close to the color of the car (e. g. red or orange with boxcar red, brown with boxcar brown, etc.). These water colors do not cover the paint job but leave a hint of the color, which, over the lettering makes it look faded or partially weathered away. rust streaks and other dirt streaking, such as the splash from wheels on the ends, can be done using browns, black or white or any combination of those colors. The nice part about using these water colors is that if you don’t like the results you can remove it with a damp rag. Additionally, you don’t have to seal the finished product with any kind of spray-over, such as Dullcote. NOTE: to get these paints to stick and not bead on the surface you may have ot add a very small amount of dish soap to enable the paints to flow over the surface.
When I weather I start by fading the whole car/engine. Then after that dries I give it a shot of dullcote. Now if I’m going to add decals (new reporting marks) I do that before I weather. But…sometimes I do that last, just depending on the car.
The I will add grime between the ribs, doors, etc…Then a shot of dullcote. I do the rust pits/streaks last. Then a shot of dullcote. The underneath is next to last and the final step is the roof. After all of that is done, a shot of dullcote. Some people say you don’t need to spray a lot of dullcote, but I’ve never had a problem doing it.
I also make sure to wear latex gloves. You don’t want finger prints all over it. A good mix of paint brushes, some makeup sponges, and good weathering powders will also help.
Those are great looking cars, Robert. What materials (or paints etc. other than weathering powders) did you use for this? You didn’t mention that in your post.
Tom the fade was done by just your basic white Testors paint thinned with paint thinner. It was sprayed by a airbursh of course. The rust pits were done by Windsor Newton oils, but I think any kind of oil paints would work. The powders were AIMS weathering powders.
The only thing I can throw onto that list is if you are going to use rubbing alcohol in any of the washes or to clean the engine, do that before dullcoating or it will “frost” the engine. I found this out the hard way on an N scale GP-40…
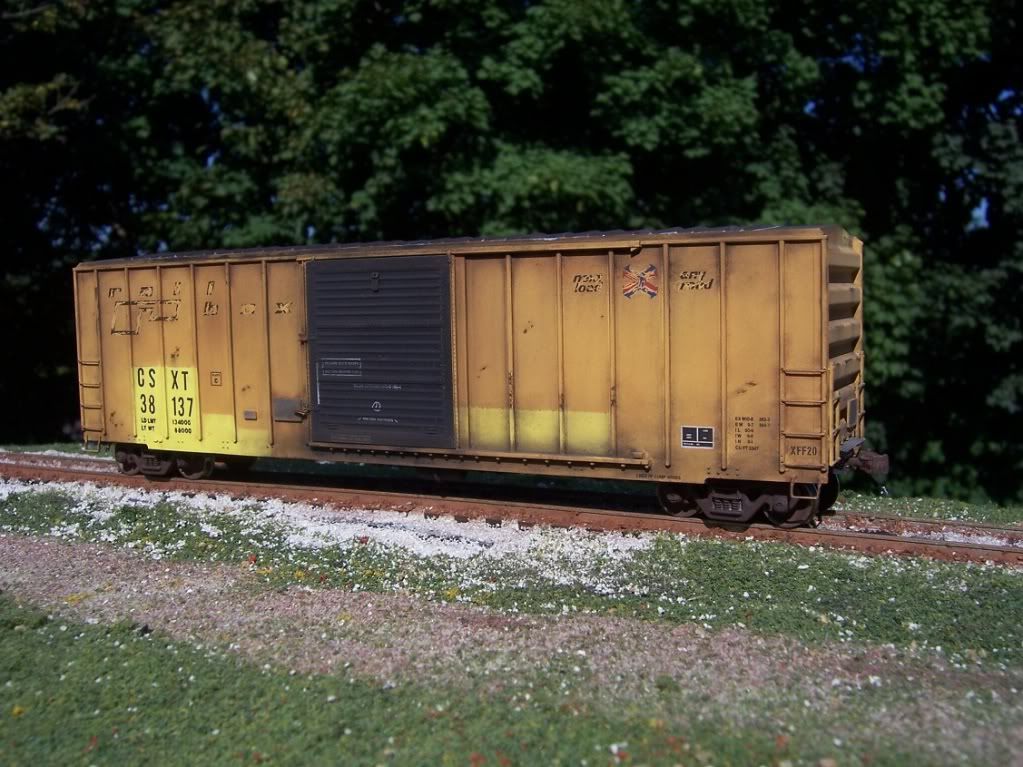
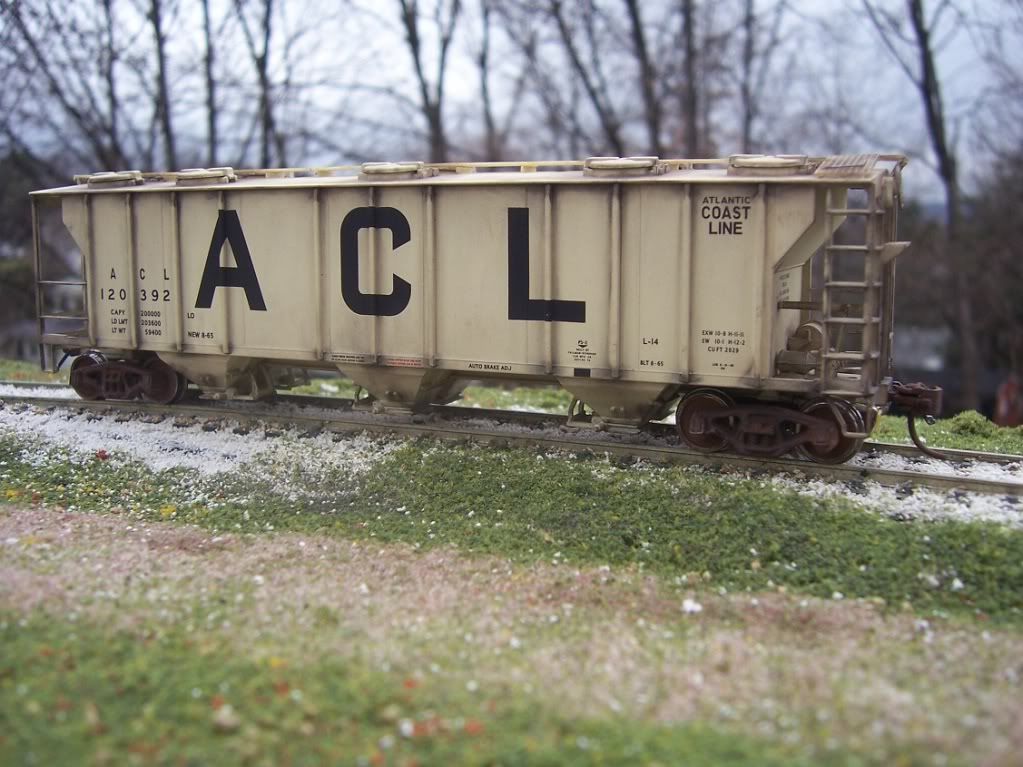
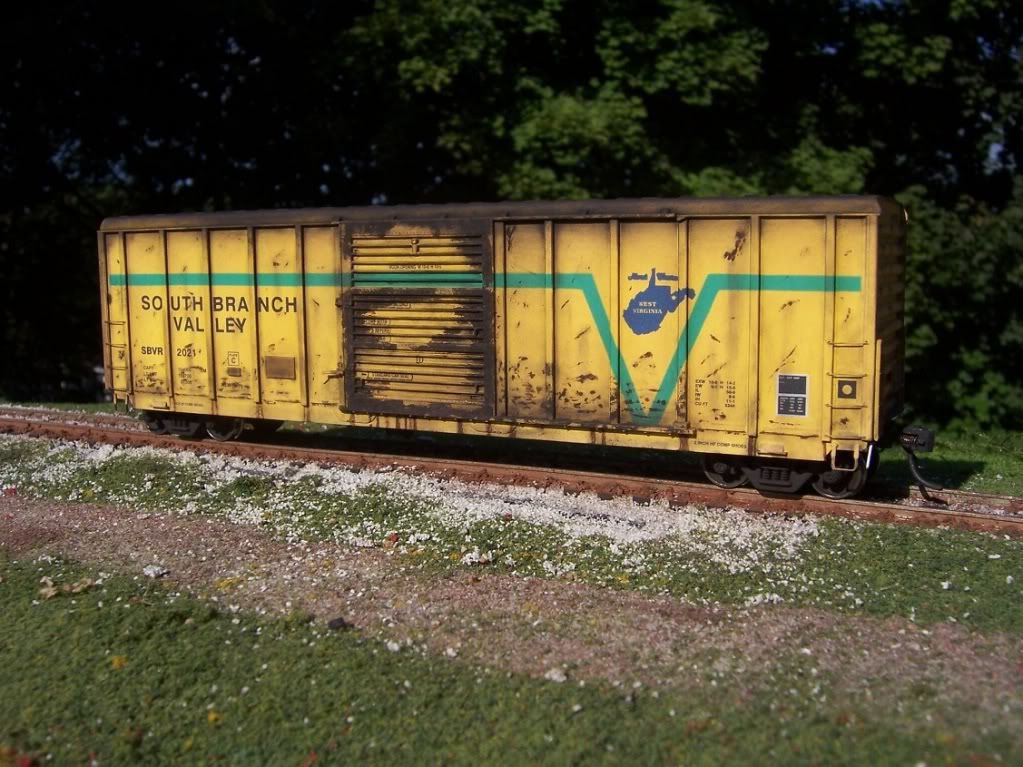
Excellent work on both the weathering and photographic skills. Very nice! The professionals on this site are always a source of inspiration, thanks for sharing your work.
I believe I’ve narrowed down the list from the feedback I received. I should now mention that these steps would align with weathering a RTR car that already has factory decals.
Clean model of impurities with soap and water (optional for some)
Spray a light layer of Dullcote™(no substitute for this; it is also recommended to spray through the airbrush slightly thinned) to add tooth/texture for weathering mediums
Brush on multi-layer fade or color change with a wide brush using thinned acrylic paints (40 paint/60 water ratio)
(option 1 in place of wash) apply appropriate color with airbrush
(option 2 in place of wash) apply dry brush using water mixable oils
Spray a light layer of Dullcote™ to seal work up to this point
Weather enitire car accordingly with oil paints, powders and a minimal amount of acrylics, which include: scratches, pits, streaks, etc.
Spray a light layer of Dullcote™ to seal weathering
Apply graffiti if the car requires it. Use acrylics to hand paint (There is an excellent article by Gary over on The Weathering Shop)
If graffiti requires weathering, use a light wash to fade the tag and then add appropriate dings, scratches, streaks, etc.
Spray a final layer of Dullcote™
A lot of this information I received from the guys over on the Rustbucket forum which I highly recommend anyone join if you’re into prototypical weathering.
I sand or scour the model with the GREEN “scotch” pad before any of the said steps. Why? Because every car gets "rubbed’ or “brushed” by tree limbs along the way,each to and from. The Scotch-pad also fades the cars shiny look (RTR models) and also gently removes or fades lettering and logos too.The technique requires use of water with the pads and horizontal/vertical sanding on the car to get this subtle effect. I also use the sanding pads after a car is completely finished,to add more rubbing or brushed marks on the car.Practice this on a scrap-box car for this technique is not for every car-type. Use the Scotch-pad on Box-cars,Hoppers and Inter-modal equipment too.