That time again aready? Well for those of you who are new to this thread, this is where we post photos of our projects for the week(end), or what we have done model railroading related. For example, shown here is a bunch of scratchbuilt styrene details for a roundhouse interior. The stalls I need to scenic are on a corner, so they have to have some kind of interior to make it look lived in.
Right below here, is also something train related. I got word the Wheeling and Lake Erie ran their first revenue train on the newly refurbished Clairton Branch on Wednesday. I was one of three railfans who documented the trains journey. Remember in one of the July WPF, the bridge piers being unloaded from truck to flatcar are the same exact ones shown here
Thanks for starting everything for the weekend Jimmy, roundhouses and engine houses need detail including shelving, tools and parts. Good start on that detailing.
Got a couple of cars done this week!
Here is an Intermountain 40’ PS1 Boxcar Kit, I used the modernizing ladders and walkover platform as the Southern moderized the cars when they took over the Savannah and Atlanta Railroad then painted and lettered in a standard Southern style lettering of the early 70’s.
Proto 2000 PS 4427CF Covered Hopper Kit, substituted a Plano Roofwalk for the kit supplied plastic one. Drilled a lot of holes for the roofwalk supports to install the Plano Roofwalk. Painted with Foquil #20 Caboose Red and lettered with Oddballs decals.
Nice action shot you have there. Good luck on filling up that roundhouse…but I’m guessing just the easy to see into part?
Rick,
Ohhh, that’s tasty, 40’ S&A box, Southern-style, with a triple digit road number as the frosting on the cake.
Well, I’d hoped to get more RR-stuff done this week, but other priorities ensued. And I’ll admit I’ve been working some in the radio shack lately. It does have the side benefit of being able to tell if a train’s in the 'hood by something other than hearing the horn, which isn’t much notice to get to the tracks with the camera.
The forestry crews did get back to the formerly barren hills of Bear Town to finish replanting. To make things easier on the crews, Bear Town was sent to the shop…
This left a big hole near the station. Reports that several schoolchildren fell in on the way home from school were unfounded.
A short time later, Bear Town was looking somewhat bushier, even though it’s already pretty far back in the bush.
With the giant sinkhole refilled with a much healthier looking woods atop it all, the people of Bear Town can settle back into their daily routines of hard work, good fun, and picking cinders off their laundry.[;)]
Thanks for opening the door on another WPF, Jimmy! November already! Model Railroad Month!
Nice to see the roundhouse details. Is the track laid and turntable in?
No Photobucket for the last 12 hours or so! Again!
I have tons of photos in Flickr and Google Photos. I’ll have to figure out how to link them here. So far, no luck. PB has been down VERY OFTEN lately. I heard they were a victim of the Dyn cyberattack. I sure hope they get their act together soon.
Mike, I need to make some kind of access like that but in my case it would be for a down-town urban scene. I’ll be turning my attention to it in the next month or so. Nice progress!!
I see your photo, RDG Casey. The Middle of nowhere sure looks great! Nice place for a picknick, I would say! Even with an occasional cinder shower [Y]
I’ve been making some major progress on the North-side of my layout, a long-neglected area. It required ripping out a four-switch ladder track.
I figured Flickr out! Click on your photo and at the bottom right of the page is an upward curving arrow. Click on that and it will open a new page with a link that looks like, bear with me, my HTML skills are rudimentary. The open brackets are replaced by { in the below example
highlight and copy only the part in bold that begins with the {IMG] and ends with the {/IMG] Remember the { is not what you will see, it will be a bracket opening right
Paste that in your post No need to use the photo icon. It;s not what Jimmy asked for but it’s all I have handy from the Severna Park MR Club
I don’t have any model photos of late, hoping to finish up a SD40-2 soon, so look for that in the near future… (Adding lighting, and fixing a broken detail part)
In the meantime… Railfan shot from yesterday, at, what I thought, was a neat angle not commonly seen.
I had some extra time, so was playing around with angles and lighting. This one turned out pretty neat I thought.
Yes, the trees are past prime color, but the BNSF unit added some.
And yes, that crossing signal gate is slightly different than most… First one I have ever seen like this.
Now, if only we could manage that in HO scale… Talk about super detailing!
Jimmy, thanks for getting the thread started for us this weekend! As usual there is much here to hold my attention…
I have gotten some scenery work started at Keuka Creek on the layout. It looked like this a few weeks ago (this is where a new wedge shaped addition is so Keuka Creek has to be exptended):
I have added the broken up ceiling tile “rock work” to the foam:
Last night I painted the tiles with Kilz to seal them for final staining:
Camera always picks up things that need to be done… The Kilz is still wet in the photo as I just painted it.
Jimmy, Thanks for the WPF roll out. Gotta’ have pallets and I like yours.
Finished refurbishing an old scratch built structure for a future wharf-side scene. The Campbells corrugated alum. held up well, but there was a 20+ year accumulation of real dust and grime to deal with before the repaint. Used Woodlandscenics N scale gooseneck lamps as their HO sized ones seemed too large.
Lots of excellent scenery. I have to confess that I used to scoff at the use of ceiling tiles but I’m not any longer.
Peter: The N scale lights look just right. I’m not sure if you are aware but LightsForModels is now assembling the Ngineering working gooseneck lamps. Their HO scale lamps are actually to scale:
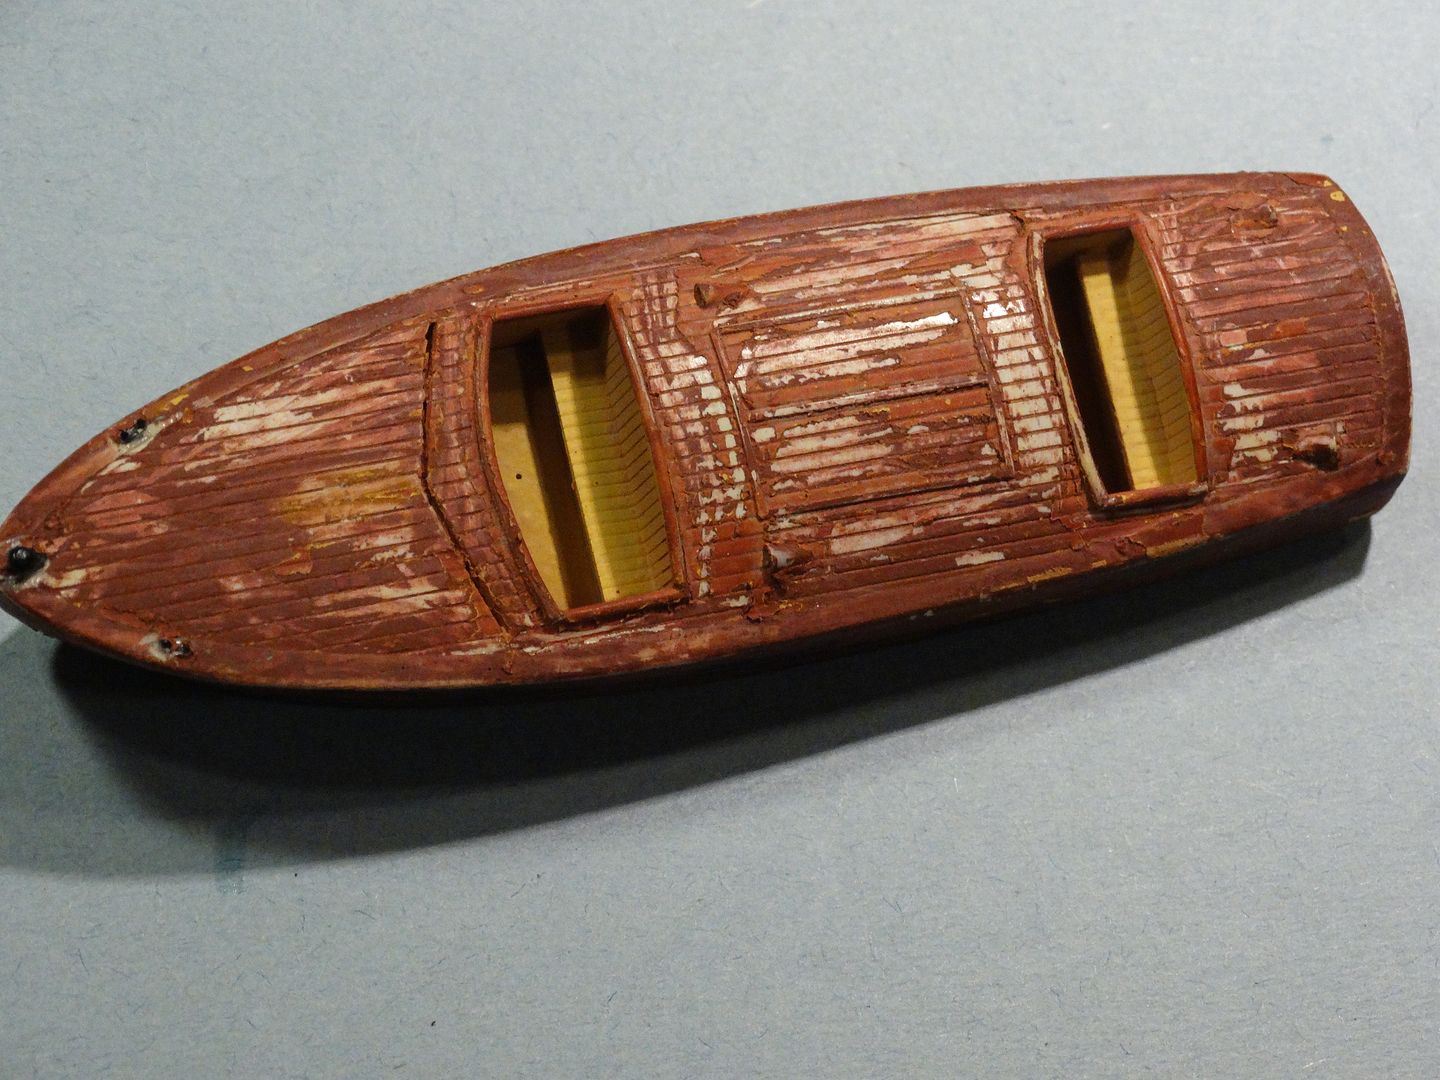
I can just hear the questions now. “What the heck is that mess?” Actually, I thought it makes a good impression as an unrestored and obviously neglected mahogany boat. What do you think?
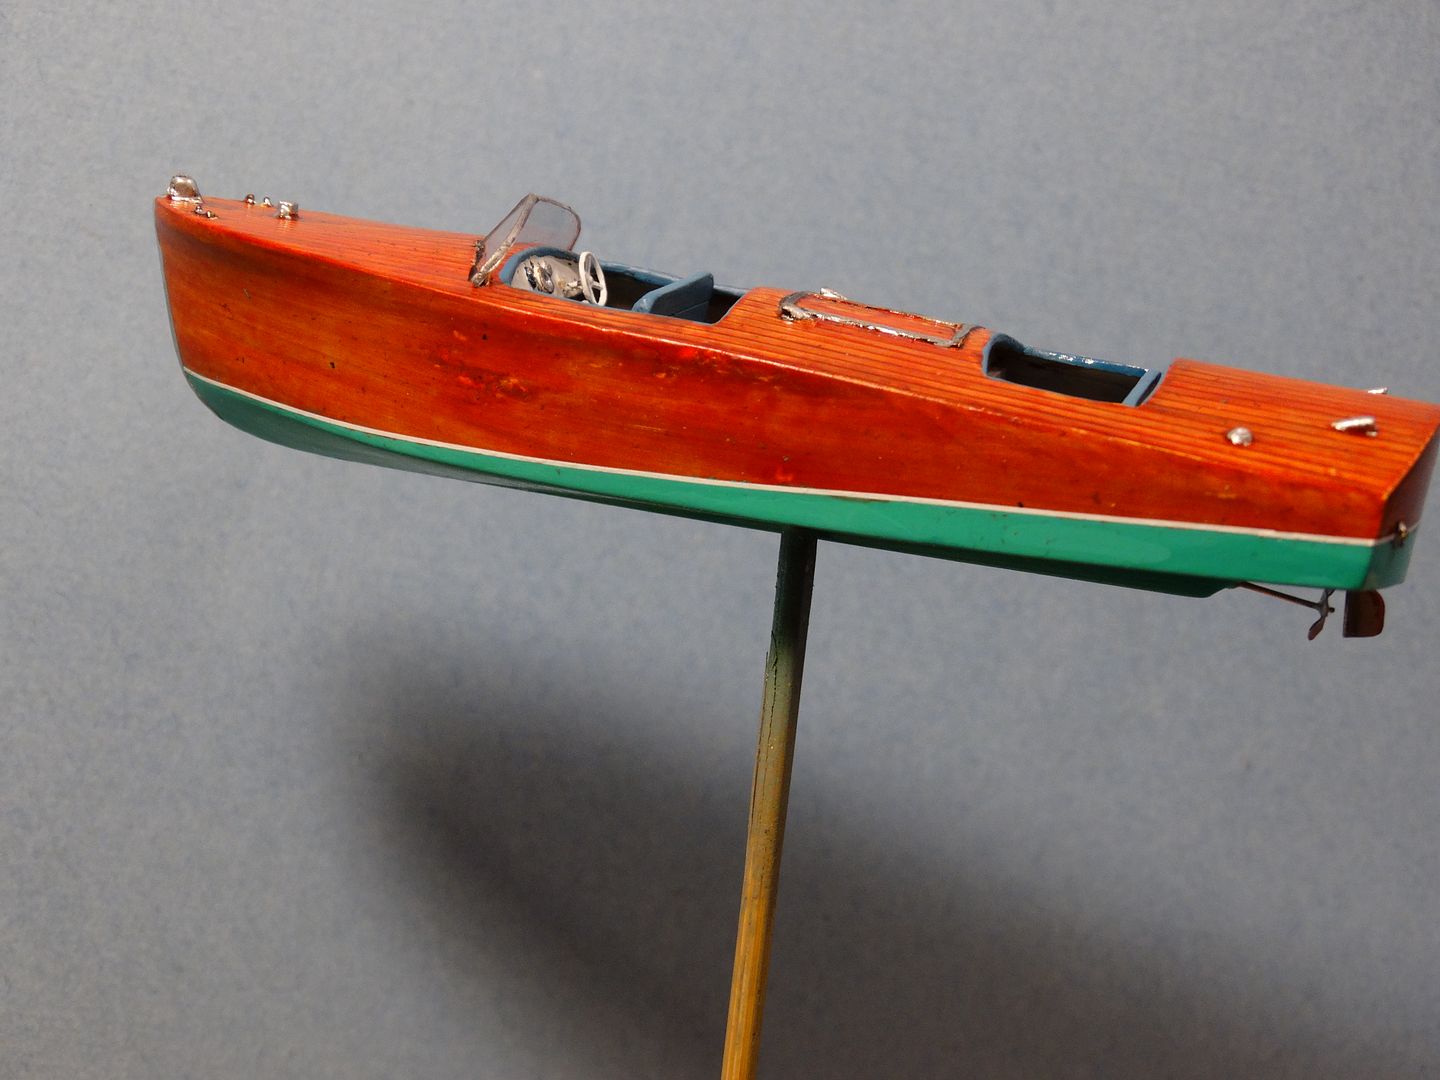
I didn’t set out to make a model like this. I was trying to create a second mahogany launch like this one:
I couldn’t get the colour right, so after several coats of paint I decided to strip it and start over. I plunked it in a tub of 70% isopropyl alcohol and promptly forgot about it. A month or so later I pulled the boat out of the tub and tried to scrape the paint off. That proved to be difficult. I think the alcohol may have been past its prime. It was used previously. So, this is the mess I am left with, or is it an unintentional masterpiece? Does it look like an unrestored boat, or maybe like one that has had the first attempt at stripping the hull? Be honest please!
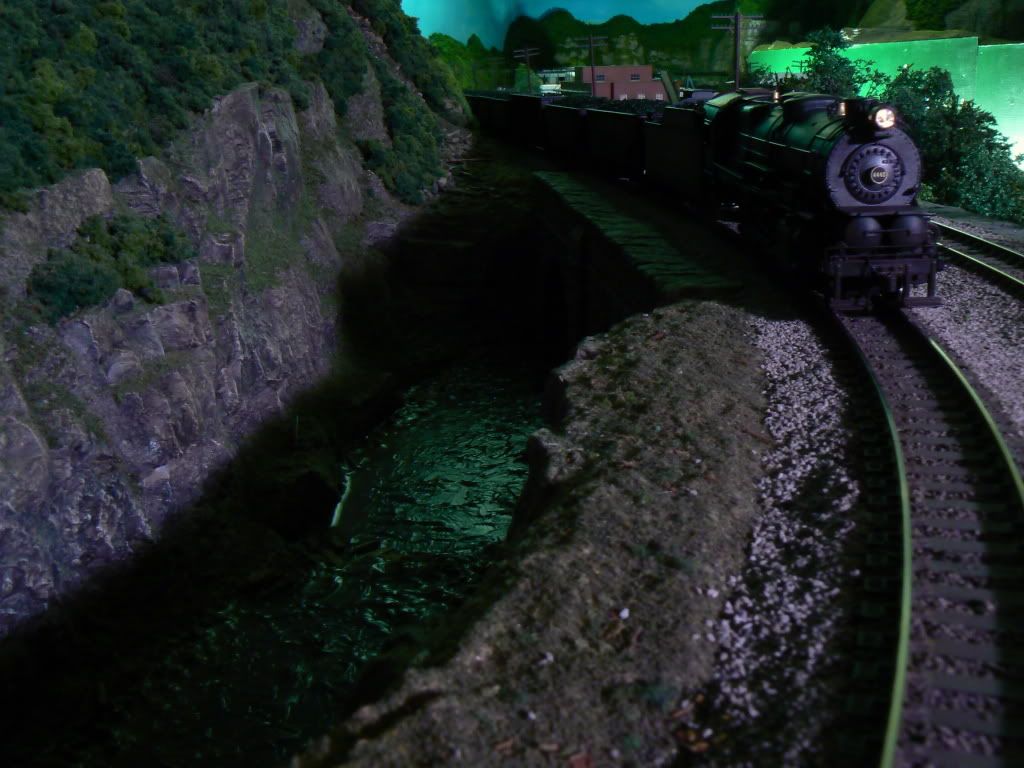
Thanks Dave! The look I am trying to get is the look of the stream and falls cuts in the Shale formations here in the Finger Lakes. One of the best of these is here at Watkins Glen at the South end of Seneca Lake (I live at the other end of Seneca lake).
Here is an older shot of the area that I am adding to. The ceiling tile works quite well in creating the look of the Shale Cuts in this area…
Great scene there, howmus. I’m just getting ready to do a similar scene on my New York, Binghamton, and Western and this seems similar to what I had in mind. My scene will be in an inside corner and a waterfall will be emerging from the curved back drop into a gorge similar to yours. I will have a single tracked curved trestle that I am reusing from a previous layout.
I may given the ceiling tiles a try. I’m guessing you brush them with plaster before applying paint and texture. Any other tips you could share?
Hi [color=red]jecorbett[/color]. No plaster is used on the tile exceot if you want to fill in some spots. Plaster will end up a different color when you get done, so in those spots I add greenery… How this is done as follows:
Use the 1’ x 1’ regular ceiling tiles (I used Armstong, but other brands can be used). A contractor gave me a bunch of broken 2’ x 4’ ones that are used in the metal grids. Those are not the same and I don’t think will work as well. I finally went over to Lowes in town and talked to one of the salepersons in that dept. He walked around the area a bit, pointed down at a bunch of broken ones they had sitting there. I got 4 of them for a whole dollar… Home Cheapo or other places may have similar stuff you can get on the cheap.
Break the tiles by hand. You will see the rock strata like edges where the tiles break. I then cut the back of the part I want to use to fit in place. You can remove the white top of the tile as you break it up. Then just fit the broken peices so that the rock strata shows what you want. I use plain old white glue to hold them in place. Practice a bit and you will get the hang of it quickly.
After the glue sets paint the exposed edges of the tiles with something called “Kilz” I would recommend their original one. I think it will leave the rock strata showing the best. This time I am using a latex variety of it. Does the same thing and after it dries there isn’t much difference from the original Kilz. Kilz will seal the tiles and will let the paint do its job. Without it the paint will absorb into the tile forever I guess… Kilz is used t
jecorbett
I may given the ceiling tiles a try. I’m guessing you brush them with plaster before applying paint and texture. Any other tips you could share?
Hi jecorbett. No plaster is used on the tile exceot if you want to fill in some spots. Plaster will end up a different color when you get done, so in those spots I add greenery… How this is done as follows:
Use the 1’ x 1’ regular ceiling tiles (I used Armstong, but other brands can be used). A contractor gave me a bunch of broken 2’ x 4’ ones that are used in the metal grids. Those are not the same and I don’t think will work as well. I finally went over to Lowes in town and talked to one of the salepersons in that dept. He walked around the area a bit, pointed down at a bunch of broken ones they had sitting there. I got 4 of them for a whole dollar… Home Cheapo or other places may have similar stuff you can get on the cheap.
Break the tiles by hand. You will see the rock strata like edges where the tiles break. I then cut the back of the part I want to use to fit in place. You can remove the white top of the tile as you break it up. Then just fit the broken peices so that the rock strata shows what you want. I use plain old white glue to hold them in place. Practice a bit and you will get the hang of it quickly.
After the glue sets paint the exposed edges of the tiles with something called “Kilz” I would recommend their original one. I think it will leave the rock strata showing the best. This time I am using a latex variety of it. Does the same thing and


 No need to use the photo icon. It;s not what Jimmy asked for but it’s all I have handy from the Severna Park MR Club