Thank you. Yes, I used a program called XtrakCad to draw up my plans. I have gotten a little further on the original part of the layout (se below), but still have very far to go there too.
I am a slow builder - my default sequence of action is think-build-think, not build-think-build, so it takes quite a while. Then again - there is no particular deadline, as long as I am enjoying what I am doing.
Track plan is strongly influenced by prototype track plan from Minnesota short line Progressive Rail’s suburban Airlake Industrial Park in Lakeville, MN, ca 2000-2001, but I am planning to backdate the layout to the late 50s or early 60s (to run with older and smaller cars), and make it more urban looking.
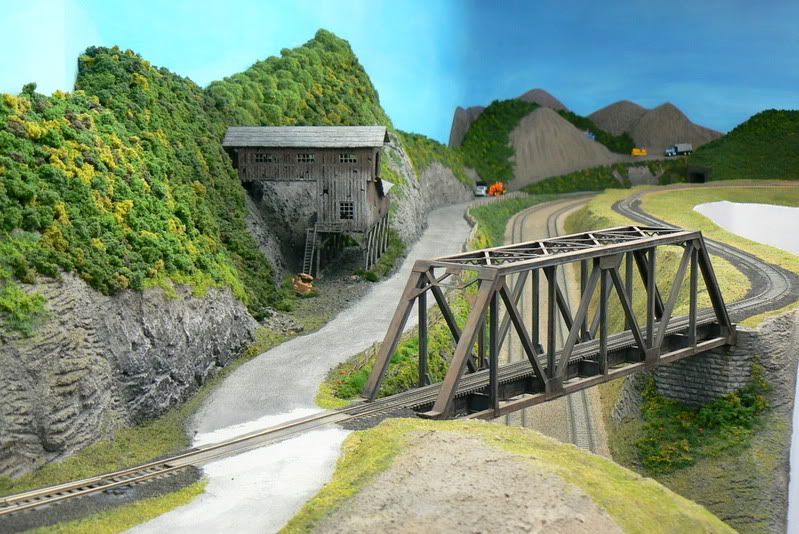
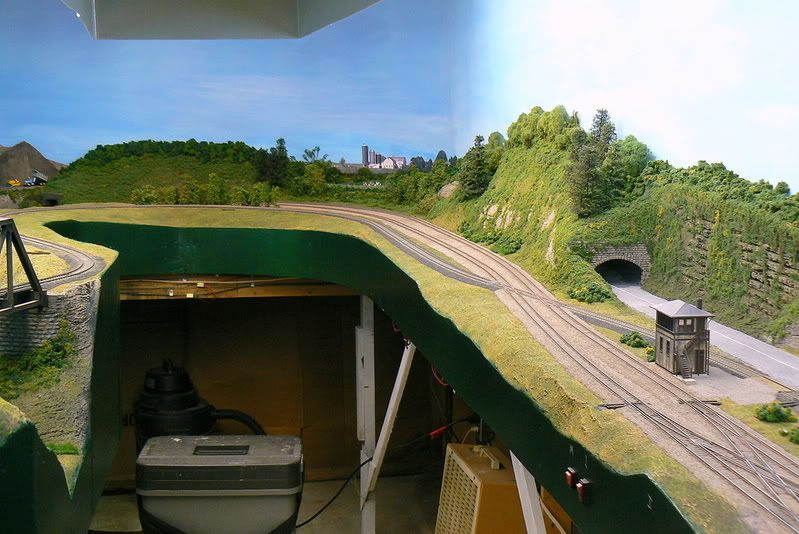
Hi Stein: Thanks for your reply. As long as you’re having fun, that’s the main thing. In my second post, I promised you a track plan. I don’t have that, yet, but in the mean time, how about a photo tour? It’s basicaly a west loop w/staging to a east double loop. It’s double track east to the yard and single track from the yard to east staging. The branch goes from the mine east to staging. Note: All the trains are west bound.
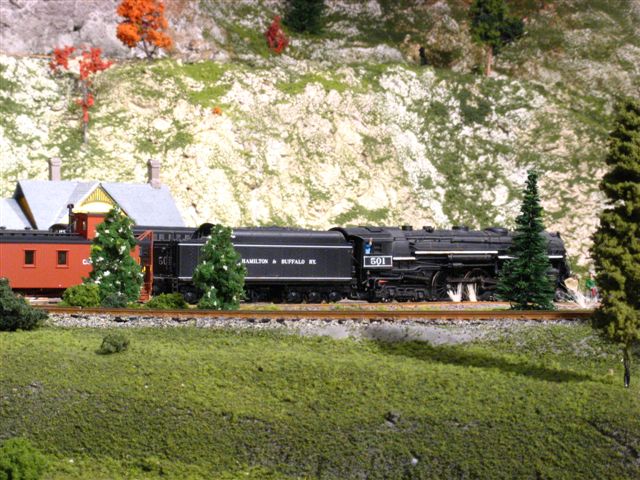
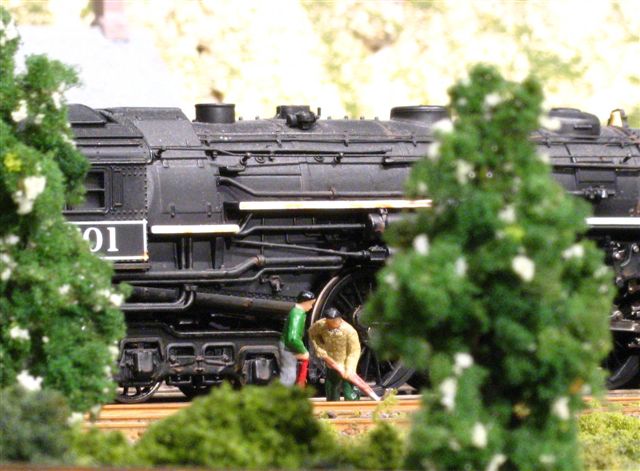
I have had this BLI Hudson for just well over three years, and I performed my first weathering job (at least, that was the idea) on it a few weeks after I got it. So, it looks like a tired old lady, second hand from the NYC when the TH&B purchased it and it’s sister-to-be, #502. BTW, the TH&B also had Berskshires.
I tried a more intimate, and hopefully dramatic, image this time. There are two images, a distant shot and one much closer to the engine and ground crew.
Great work all! You guys are KILLING me. It’s work like this that almost makes me regret only being able to afford a 1 bedroom condo with NO room for even an ‘N’ scale layout. Damn NY tri state area with it’s ridiculous housing costs [:(!] [banghead] [sigh] Buyer’s market my a… er um, bum! [soapbox]
Nice cross section of photos this weekend, everybody.[tup]
Grampy/DJ - I’ve spent a lot of time trackside in PA, and you certainly have captured (quite well) the look and feel of the PRR main’s Harrisburg-Pittsburgh line. Niiiiice.
Boy, this is a weekend for great photos, everyone.
Crandell–I like the weathering job on that Hudson. Especially the close-up–sure brings out the detail! [:P]
Grampy’s–that is one AWESOME hunking layout there. Great work! You’ve got me drooling. [bow]
Thought I’d include another angle of the shot of Fred and the ash-pit car from a couple of weeks ago. They just dumped the ashes from #1400 and that’s a WOODEN car. [:O]
Yeah, I thought the same thing about it all… BEAUTIFUL work… and the roads…PLEASE share! I am trying to make mine and they haven’t turned out so well, yet…
I’m concerned that your industrial leads are directly off the main line. You will be fouling the main quite a bit while working the industry tracks. Is there only going to be 1 train going at all times? IMO the industry tracks would be on a long runaround so the main stay open for other trains. Of course if there is only 1 train, then no problem. But I like the plan otherwise.
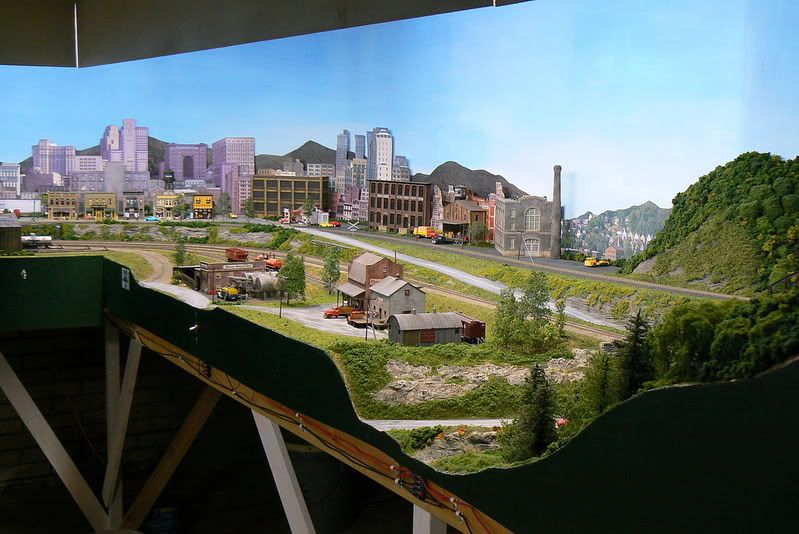
Hi Stein and everyone:Thank you all for the kind words. This is 3 yrs. worth of steady “work”. Actually, only the first shot is looking west. Staging is on the other side of the tunnel. No. 8 is just a close up of my farm scene in the right hand corner. Here’s a shot of a longer view down the town of Stoney Creek, east bound. Ah, roads. I’ve tried 5 different materials. The first was asphalt tape, (I forget who made it) but I wouldn’t recommend it. Too hard to work with. Then, I tried foam core (available at AC Moore), it’s 1/4 " thick, foam with paper on both sides. About 75 % of my roads use this material. Then, I tried .040 styrene. All my city streets and most of the rest of my roads use this material. I also tried a roofing shingle on one spot. My 2 favorites are styrene(plastic for sale signs are perfect and inexpensive) and foam core. Determine how wide you want your road to be. Mine are 3" wide (HO). Glue the material down(I use white glue). Use weights till dry. Work your scenery material (I use a mixture of Structolite and Sculptomold) up to and slightly overlapping your road material. The edges don’t have to be perfectly smooth. I remember learning to ride a bike on the road if front of my house. You had to try to stay on the road, because if you got off the road, the shoulder was pretty rough and usually resulted in a wipe out. Anyway, then I painted the road surface with my basic earth color. Any color will do, you’re just sealing the surface. I tried adding texture to my early roads, (white glue with fine ballast). But, I thought this resulted in too rough a surface. On the road through Stoney Creek, I wound up using a palm surform tool to smooth it. After that, I only used ballast for dirt roads. Then I painted the road grimy black. This looks like a newly paved road. I like a weathered road. I used sidewalk chalk for this. I used an old surform blade and
Do you recall who TH&B aquired its Berkshire(s) from? ( I’m assuming they were 2nd hand). I’m planning to model a bit of the TH&B in the Fort Erie/Buffalo - Welland area in 1952-53. So far the only TH&B steam I have is the BLI Hudson like yours. I know that Bachmann and Lifelike both have released berks, but I didn’t think they were used by the roads I’m modelling (CN, NYC/MC, PRR & TH&B).