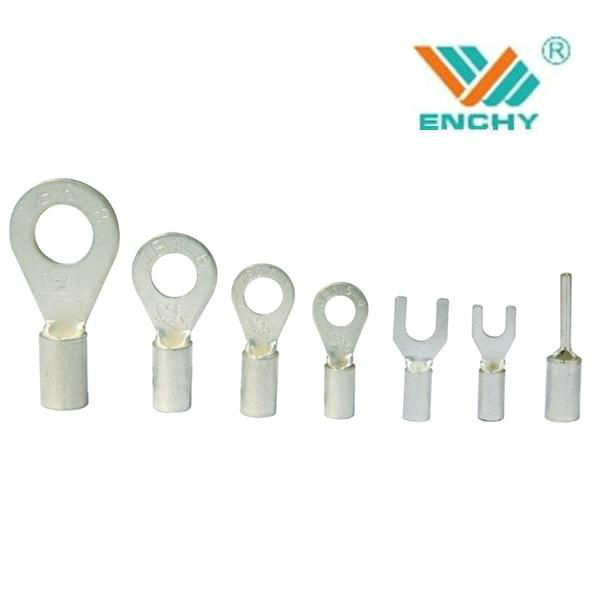
These are WAGO brand Wire Lever Nuts part no. 222-415. This part no. is good for wire gauges 28 - 12 AWG (stranded and solid) and 600 V / 20 A maximum.
They can be had at the local big box hardware stores for about the same price as Amazon @ $22 for 40 pcs. Its becoming a favortie amoung electrician doing house wiring ( from what I have read ).
Whats nice about these is you do not cut into your bus wire sheathing like you do with the suitcase type connectors. Also, just a simple flip of the lever for the coresponding wire and it is easily removed. Once lever is locked down, they hold the wire firmly.
Below shows the bus wire coming in one side and out the other with 2 feeders in the middle:
Below shows how I daisy chained them to get 16 feeders ( 8 of each polarity ), Pic was before I added the bus wires:
Okay, I guess, if you don’t want or need the ability to positively identify a wire and have that kind of money to use. My screw, washer and nut stud terminals on home-fabricated terminal blocks cost about two cents per connection, They also create a much neater and more professional look.
Part of that is my USAF flight line background speaking. Flying (through the air) junctions and combat aircraft electricals don’t mix.
Chuck (Modeling Central Japan in September, 1964 - with bulletproof electricals)
As a life long member of the electrical trade, for some 40 years now, connectors of this type have some value in very specific applications.
BUT , they will never replace the “wirenut” for basic branch circuit building wiring, and will never replace some form of fixed terminal strip for control wiring.
Since I don’t use DCC, I have little use for the “buss wire” application and have to agree with Chuck, I have never cared for that sort of “free dangling” wiring.
Not necessarily my neatest work, I would consider this picture the bare minimum requirement for wiring neatness:
But similar to Chuck, I have a backgorund in industrial control wiring…
Another problem with these and suitcase connectors is that you can’t put a meter on the connection.
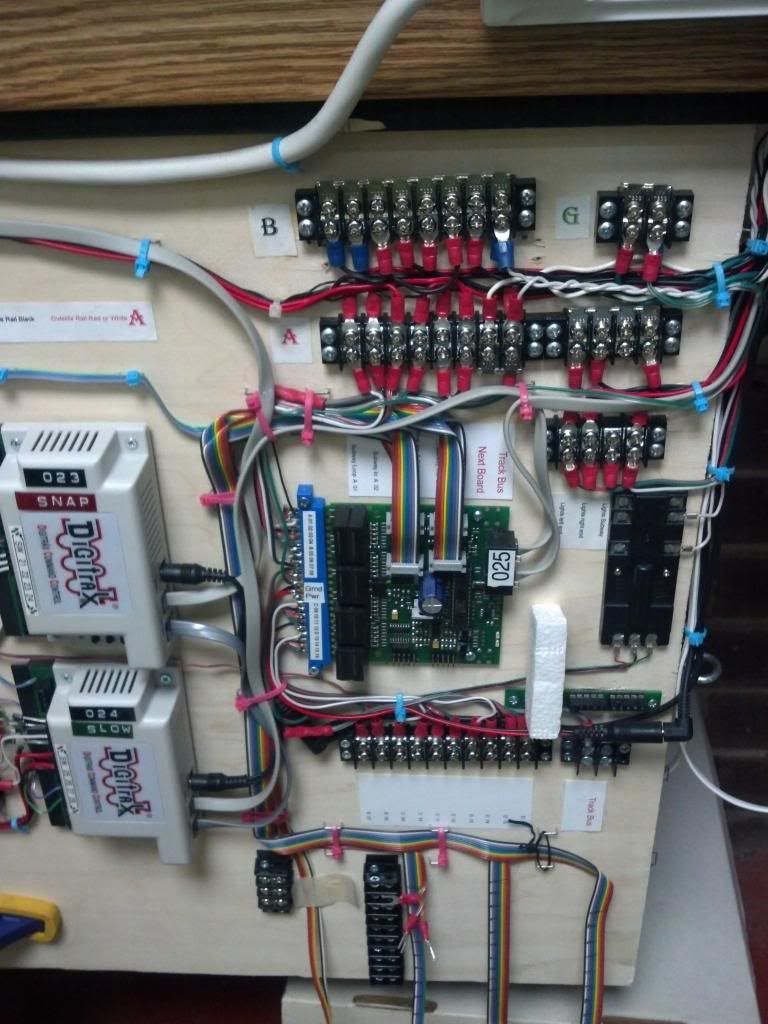
On my module, I started with old school barrier strips:
along with non-insulated crimp on lugs:
I use the non-insulated because I believe they give a better crimp. And I use the official crimping tool.
But lately I’ve been trying these:
You don’t have to use crimp-ons, and it’s easy to disconnect wires. Although the ends do get squished, so you can’t do it many times (as opposed to the crimp-ons). Also, with this style, you can easily cut them to length. I buy the “twelvesess” and cut them down as necessary. Unlike the old style barrier strips, these don’t have jumpers available so that you can gang a connection. I just use a short piece of wire, but it ain’t elegant.
But with both styles, you have access for testing.
Soldering works quite nicely until you need to disassemble the connection. And wire nuts work nicely, except they tend to chew up the wire.
Yeah, people do have opinions, even if they’ve never had one in hand before. I haven’t, but I can definitely see uses for them, especially since they’re reusuable. For instance, I like to move things around sometimes before I find an arrangement of track I like or because reconfiguiring something makes for better ops. Installing these to start with could get things operational, then you can adjust as needed. Once finalized, you could probably go for more permanent connections easily and systematically. For me, that would most likely mean wire nuts.
I think they’d be especially handy on modules for me. I have some plans I’ll get to someday and this would work well for me to do that. Leave things long on the feeders. Then as you finalize, you tidy and tigheten things to avoid that “droopy” look Sheldon notes is annoying.
Everybody has their own "style’ of working, but coming from an architecture, engineering and construction background, I prefer to plan things and then only do them once.
“Temporary” is in my view a last resort when necessary, and waste of time and resources other wise - planning minimizes changes and temporary - at least in my world.
Those look like nice little connectors, and like I said there are situations for which they are well suited, including the application as shown.
My point, and if I may speak for Chuck as well, is that overall there are good reasons to approach electrical wiring from a more disciplined approach - trouble shooting - and possible future changes - being two very good ones, not to mention durablity and long term reliability.
Walk into any factory in the world, open up the control panel that runs whatever kind of machines they have, you will not find a rats nest of wires run willy nilly, you will find neat, bundled, labled, secure wiring - why would we want less for our model empires?
Soldered connections, and terminal strips with crimp connection (which I then solder, even though I use a proper crimp too for them). All run at least as neatly as Sheldon’s picture, though I try to keep it even more orderly. Labels everywhere.
Even if I would use those lever blocks, they would be mounted to a swing-down panel in neat rows, not just left dangling.
I did do some industrial control work, but more of my work time has been spent with servers and network systems, and if there’s one thing I can;t stand, it’s a rack full of servers with network, power, and KVM cables coming out all over the place. It’s just asking to take down half of someone’s network all because you need to slide one server out for maintenance. Racks have channels and most rack mount equipment has cable management arms to keep all that stuff nice and neatly bundled and each server’s wires away from the others. Neatness does count, even for model railroads. You may think you remember where everything goes - today, two days after you hooked it up. But what about 2 years from now? I actually have a pretty good memory, and I may indeed remember it all in the future - but I’d also rather just have it all labeled and recorded so I can instantly see both ends of a suspect circuit, rather then crawl around tugging wires to trace the line from source to destination. It takes just an extra minute to record the information as you add connections - it can save HOURS in the future when a problem crops up.
I can see the the wire lever type for repairs and automotive use, my preference for my control panel is the brass bus bar type and the Euro screw type. I recently found a good source for terminals, LED-Switch.com
They have good pricing on these terminals, the 12 position brass bus bar above is $1.50.
The 6 amp 12 position Euro above is $1.10.
The brass bus bars workout very good for multiple wires. I have all my 8½ volt rural structure lighting going to a pair of brass bus bars (40 pairs), also all of my 1.4 volt vehicle lights go to a pair of them too (70 pairs).
I have seen these before and I thought they were interesting, but I have to agree with the others who question their ease of organization. I don’t see any mounting tabs. Is there a way to mount them neatly in a row on a board?
I also question the set up where you have multiple leads coming from one location. I can see that working for accessory power but if those are your main buses how long does that make the track feeders?
Also the fact that house builders are using them isn’t really a strong recommendation IMHO. Those guys choose the cheapest and fastest method, not necessarily the best. Remember when the housing industry was all perked up over aluminum wiring?[xx(] I had that crap in a previous house and I had more than one outlet explode as a result of wire fatigue.
Sorry, I’m not trying to offend, but I’m not convinced they are an improvement over other methods.
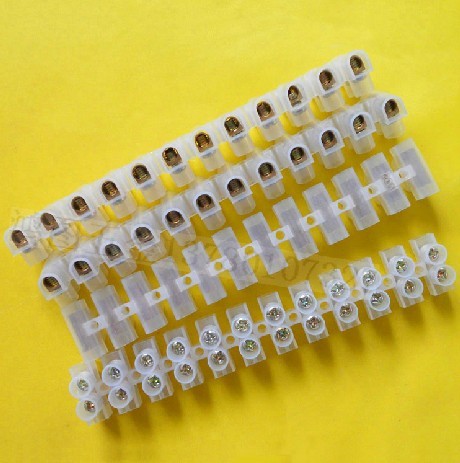
I also use the European Style barrier strips of twelve. I cut them down into two’s to blocks for the feeder wires from tracks on my DC layout. Very easy to use and test when installed. Will accept a 12ga. wire.
There’s some mighty good looking wiring in this thread! Mine looks good but it takes periodic overhauls or rewiring sessions to keep it that way. Wiring takes on a life of it’s own over time on my layout.
I think I have incorporated every style and type of wiring in this thread over the years. I’m one that is in constant redo mode so I have ended up using Telco wiring techniques. Over the years I have found out that the “Telephone Way” of running wires really works pretty good. Telephone type “D rings” spaced at 18” works slick for long runs and as many post in this thread say the Control Industry type wiring works very good inside my control panel too.
The lever type connector or splice looks very good for mods or changing things. I went to small #20 gauge wire nuts a few years ago and I have been using Micro Connectors for removable type stuff for the last couple of years. Micro Connector can also be used for distribution and by using the 40 pin breakable strips from eBay the cost is bearable.
The squares on the cutting mat are ½".
Both single row and double row connectors are easily cut with an Atlas Snap Saw. By using a double row strip with positive on one side and negative on the other you can end up with as many as 40 sockets for distribution. Works great for trouble shooting or just removing power easily.
I use both of these style connections and label everything; as memory is not reliable. Every Tortise has a printed label with standardized connections. Every yard, complex or industrial siding has a panel with all connections labeled. The photos here were taken before ALL wiring was done, but you get the idea. Also, I use the suitcase connectors for feeders from the bus and some of these feeders go to a distribution terminal for multiple feeders in a conjested area like yards. I can see the use of the OP’s connectors in some places but still prefer my choices.
I like your labeling much better than mine! I use Avery labels and although they work of my lax memory they’re not near a nice as yours. I’m just finishing up my latest redo on my wiring, it’s a constant hassle to keep the rats nests out of my panel. Years ago I went to using DB connectors on my control panel so I could remove it and make changes at my workbench.
Back view of my control panel, all the switches are labeled with a simple numbering system to match my schematic drawing. “Bxx” for block, “Txx” for turnouts and “LEDxx” for the LEDs.
Front view of my control panel, the drawing is a printed CAD drawing. I made a mirror image printout to help me label and wire it from the back. The colored toggle switch handles aslo came from LED-Switch.
The panel is finished in these pictures but I still have about a week of wiring left in the frame where it mounts. I’m currently updating the DB-37 & DB-50 plugs in the frame. I also added the Brass Bus Bars in my earlier post, they beat the heck out of the home made bus bars I made 25 years ago.
Just no way you can avoid a little ‘‘rat’s nest’’ wiring on a DC control panel with block control. Using ribbon wire is a great way to keep wires neat…but there is just no way to do that with DPDT toggles all over the panel. That is one advantage to DCC, that I will agree with.
Maybe one day I will take a closer pic’ of inside and it will show everything is labled, in & out.


 The 6 amp 12 position Euro above is $1.10.
 The squares on the cutting mat are ½".
