My layout is fully operational and ready for scenery and track ballast. Which should I do first? I’m guessing track detail should be done first but am worried that plaster drippings etc. will mess up the track detail? Also don’t want to have to reach over buildings etc. to detail the track. Thanks - Bill
Bill, experience has taught me to do scenery behind the tracks first, then ballast and detail track, and save the foreground scenery for last as you will spend more time detailing it. John
I normally do the same. Track, rough scenery, first layer of texture, ballast, fine texture and detailing.
Nick
Definitely the majority of the scenery first for a couple of reasons…
-The scenery was there “first” in real life so the ballast needs to look like it’s on top of the scenery– like in real life.
- Doing the scenery can be, well, messy. Even being careful, I’ve glopped this & that onto the trackbed numerous times and if there was ballast in place already– OUCH! Lots of ballast repair jobs.
My layout is mostly cut-out plywood roadbed, attached with risers on an open grid framework. After I had the track in place and operating trouble-free, I added the basic landforms. In urban areas, much of this was plywood upon which structures would sit, although some buildings have nothing but the benchwork beneath them. For more rural areas, I used patching plaster over screen. Once most of this base was in place, I stained it with thinned latex paint in a nice “dirt” colour. The next step was to paint the rails and ballast the track, although in most areas, I also added the lineside ground cover. After that, I worked on individual areas, adding structures, scenery and basic details.
For me this approach is working well - having the basic landforms in place on an open-grid or L-girder layout means that the ballast won’t roll down the shoulders of the roadbed and drop onto the floor, and it also means that, for the most part, neither will the trains. [(-D] I don’t recall any instances where plaster was dripped onto the track, although if you’re using the dipped-paper-towel method, you may want to cover nearby track with newspaper or masking tape. I used a fairly stiff plaster mix, applying it with a medium-width drywall knife, then brushing the still-wet plaster with water to smooth out the knife marks.
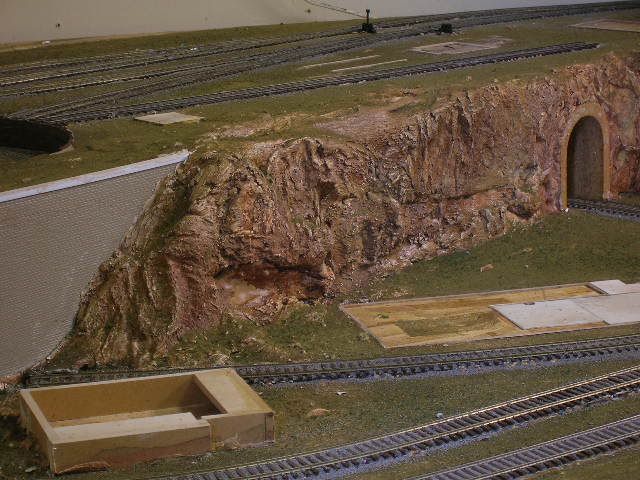
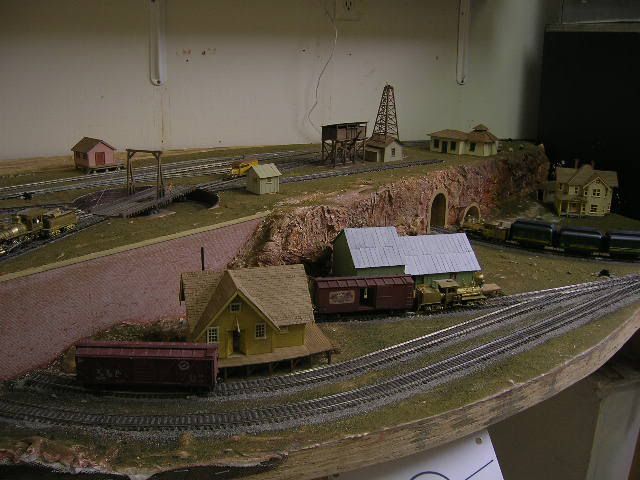
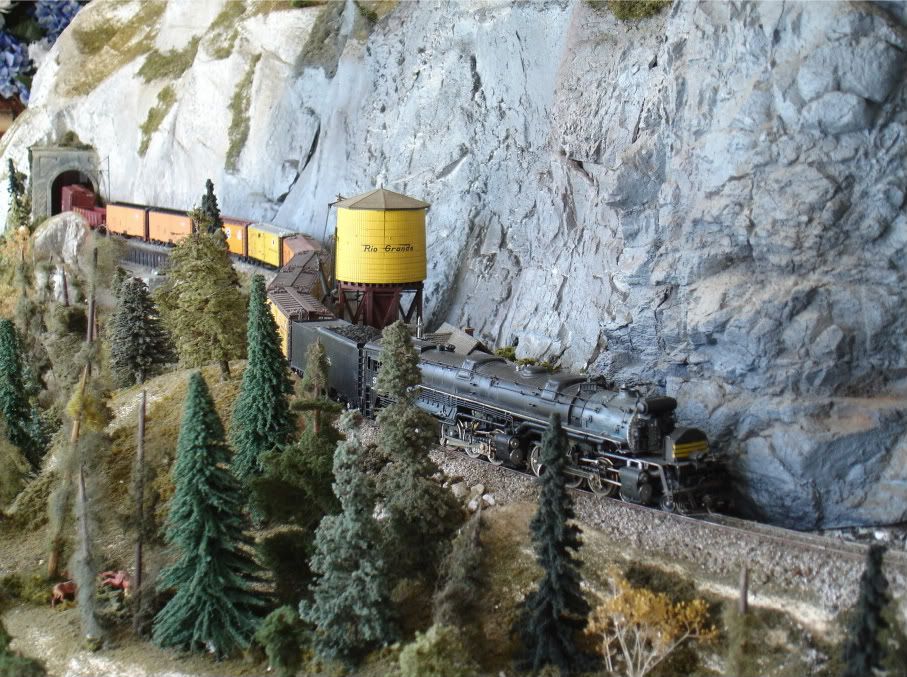
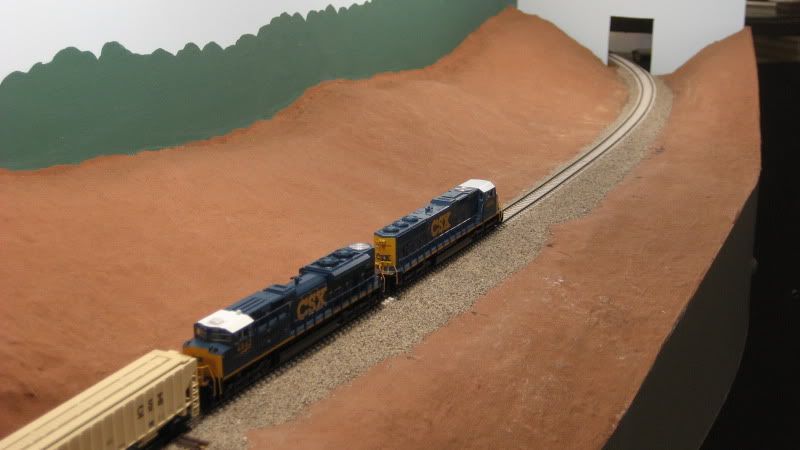
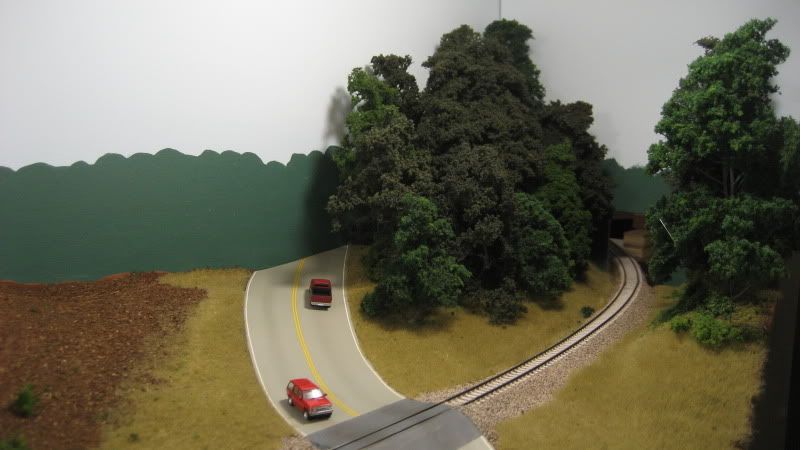
These pictures will probably explain it better:
Here’s some of the stained but otherwise unfinished plaster - the pocket of greenery was simply a test section:
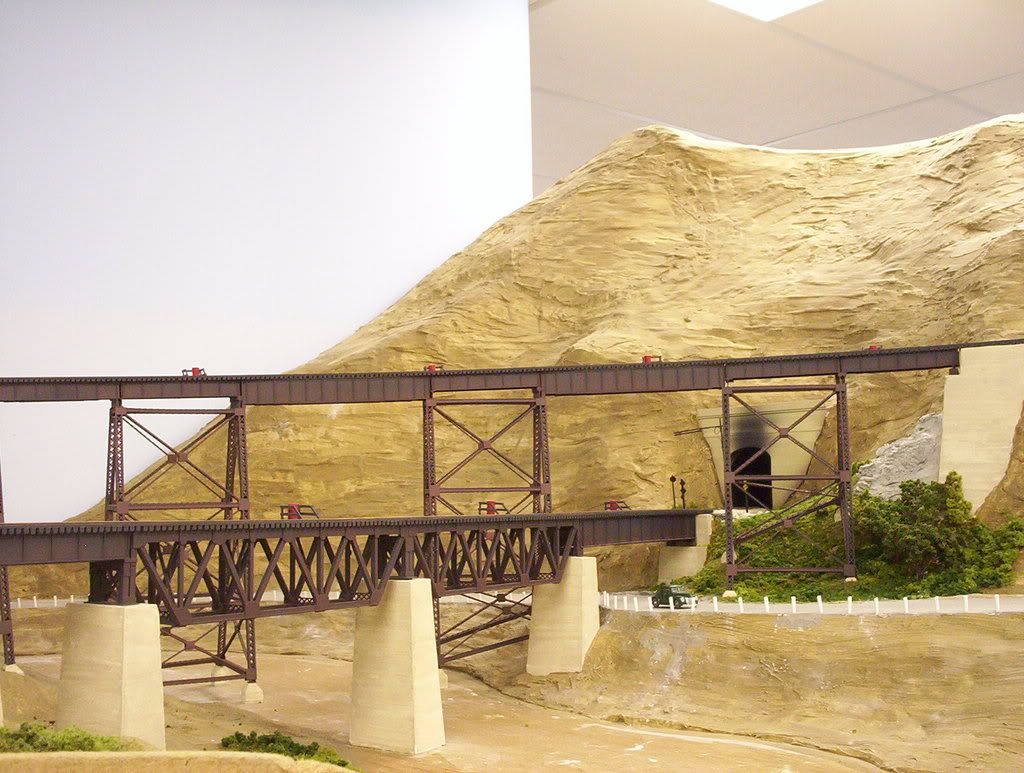
Here’s the same area seen from the opposite direction. The ground cover under the bridge was installed simply to soak up excess glue that had run down the slope from adding the rock fill and ballast on the upper tracks. Eventually, this whole area will be covered in trees:
In a general sense, I tend to favor working back to front of the layout. In reality, I work on whatever I feel like working on at the time. I do enjoy hand laying track through some rudimentary scenery rather than just bare benchwork. So roughing in the scenery tends to come early for me.
I’m also a big fan of progressive construction, as featured in the Model Railroader project layouts of the 1960s. Build some track, then put some scenery on the entire layout. Add some more track, then fix, repair, or revamp the scenery to fit the added track. Take time as desired to further detail track, scenery, structures, and rolling stock. Rinse and repeat.
In the end, it’s really personal preference - like most of model railroading. For any given selection of materials and methods and process order, there are pros and cons. And there are usually work-arounds somebody has discovered to mitigate the worst of the cons.
my thoughts, your choices
Fred W
Wow thanks, great replies. Especially all the photos from Wayne. My layout is L-girder with 2" foam. My first priority lately has been to get Car Card operations up and working in order to see if I need to alter any track before continuing. The foam has been temporarily painted brown (just because I couldn’t stand the Dow Blue anymore) and will be covered with plaster cloth next. Even though model RRing for over 40 years, this will be my first effort with scenicking. You can see some progress photos on my website:
http://cwhowell2.com/modelrr/modelrr.htm
Bill
From your last post, it doesn’t sound like you’ve done much in the way of “texturing”. It sounds like you’ve got the rough terrain forms made with the blue foam, but just have broad expanses of dead level blue terrain, now painted brown.
If this is the case, you want to finish rounding out your terrain forms (hills, valleys, ditches, rivers, pastures, etc.) before you ballast your track. I use a mix of sculptamold over extruded styrofoam and plaster cloth over balled up newspaper for this part.
When this is done, you can ballast track or work on the vegitatation, roads, paths, etc. as the mood takes you. It doesn’t really matter. After all, your railroad was laid down well after Nature made the terrain, but Nature has a way of trying to take it back. So it really doesn’t matter which one is “on top”.
This sequence is a good question to ask, because I think it makes a big difference in the outcome.
I do the track and then run it for a year to be sure it is dead-on perfect. Then I mask the track and do the scenery (through color and texture). Then I ballast the track. If I were painting the track, I’d do that during that year that I’m running the track without scenery.
Another thing I do during that year is build all of the structures. That way I can build a foundation for the structures before scenery, and scenic right up to them - the result is structures that look like they’ve been there for a while.
Ballast is almost the last thing to do. I agree that a good order is track, background scenery and rough scenery, then ballasting and then scenery details. Just make sure you cover your track with blue painters tape, slightly damp paper towels or masking tape so that you don’t get scenery gunk on your track. It is best to do the grass/turf along the track before you ballast that way when you ballast you don’t have holes showing where there is no scenery (grass and such).
Hi!
I had the same situation on my 11x15 room filling HO layout, and am happy to find that my processes are similar to what the previous posters wrote. After very thorough testing of trackage, I put in the plaster base scenery around the perimeter of the layout. Then, I began painting it with acrylics to blend into the backdrop - a process still going on. Probably when this is complete, I will weather the tracks/ties with a wash, and then polish the railheads. This will allow me to run trains, while I start in on putting in groundcover, rocks, and whatever structures - including telephone poles - will go around the perimeter of the layout. Once “completed”, and everything is running well, I may do the ballasting.
This is the process sequence on my last layout built in the '90s which is similar to the current one. This allowed me to not have to climb over finished scenery to get to the perimeter, and gave evidence of how the finished layout may look.
But in short, the ballast is last - just like in the real world.
Mobilman44
Caveat: I have not laid a millimeter of track which will have scenery around it on the main layout, and the end-of-the-railroad module (aka Pine Plank Plateau) has been scenery and ballast free for almost three decades.
I expect that as soon as the main line subgrade is in to the point where it will support roadbed and a tunnel portal, I will build some ‘quick and dirty’ scenery (Hardshell? Stacked foam? The jury is deliberating…) behind the right-of-way, even before the ballast-shaped roadbed is cauked down. Once rail is laid it can be covered while detail work is done behind it. Ballast will be a latecomer, to be placed AFTER the lineside ditches have been shaped with ‘ground goop’ of appropriate color. By that time. the only un-done major component of the scene will probably be foliage (or water in the river.)
That is the plan. Reality may differ.
Chuck (Modeling Central Japan in September, 1964)
Wayne , I would love to see more of your layout . You do great work. RON
I second that. Wayne your layout looks so crisp and clean.
Ron and Shawn, thank you both for the kind words. [swg] Of the thirteen pictures which I posted, ten were of unfinished or barely started scenes, which probably contributed greatly to the “clean” appearance. [(-D] Even the mostly-finished areas need to have lots of details added, although I’m not personally a big fan of clutter for the sake of clutter.
I do like to have my layout room well-lit, which helps to show both what’s been accomplished, and what has yet to be done and, as you can see, there’s plenty of the latter. I think, though, that “in-progress” pictures can often offer as much info as those of finished scenes, so I’m usually fairly generous with them.
Wayne
As Wayne so beautifully illustrated, there are quite a few various ways to approach this, all of which have obvious merit.
I generally do ballasting only after I’m satisfied with the track and operation. Then in genreral order, I do the background scenery, then very basic foreground scenery, then ballasting. But ONLY after I’m satisfied that the track in that particular area is working very well.
Since the Yuba River Sub is basically a mountain layout, and quite a bit of it is ‘cliff-side’, I do the ballasting before detailing the foreground scenery.
Tom
As tough as it is to resist the temptation of getting ahead of one’s self I have learned the hard way
A: Work form back to front that includes the backdrop also some time even before bench work is up.
B: Track work down and running flawlessly as others have mentioned for at least a year in my case usually longer as I tend to work slow…lol
C The next is to detail track and turnouts , painting and rusting track, adding detail parts to highly visible turnouts
D. Adding signals and or switch stands etc.
E: Ballasting track and usually at the same time scenery which is just ground cover along side the right of way
F: Scenery in conjunction with structures as to my recent use of Ground Goop planning of what structure is going to go where is essential.
And then there are cases where you throw all that out the widow and do it all pretty much in one shot, for example When I’m doing a tunnel portal first add the tunnel liner and then I will ballast add scenery right around the immediate area airbrush the portal to give a smoke effect and weather it in place same with certain areas of the layout that will become hard to reach once other track work is in place. My topside creeper is a god sent but if there is an area I can complete without having to use it then I will do that first. I have pretty much gotten away from plaster hard shell as the white glue and red rosin paper is a much cleaner method but if one simply take wide blue painters tape and places it on the track work to protect it from goops of plaster etc. it usually doesn’t take up much of your ballast with it when it’s removed.
I prefer the ballast first, then scenery approach, although I do also follow the “back-to-front” approach when it comes to the scenery part. I have found that having the ballast in places makes it easier to visualize how the scenery should look in a particular scene.
Ballast only:
Scenery added:
Jamie
Bill -
I’ll add my .02, but remember, it’s YOUR layout and your choice to do it any what YOU like.
In model railroading ballast IS scenery. It doesn’t do anything on a model railroad except attempt to make it look more “real”. In that sense, I’ll usually ballast dead last. Regardless of how well we plan thins out, there are always changes or modifications we decide to make along the way. Just easier to add the ballast after the major decisions have been finalized. And yes, some areas (and some layouts) don’t get ballast. Either because it looks fine the way it is, or it’s just too tricky and not worth the risk (like around N scale switches); in those cases illusion works as well as ballast.
Archer