I prefer to suit the benchwork method (and scenry shell) to the scenery and trackwork plan rather than the other way around. If you have high a track to space ratio and/or most of the space where there is no track has structures, a flat surface is probably easier. If you have most track on various grades and levels and or rolling/mountainous scenery, some form of open grid framework is probably easier to work with.
That said, options 3 and 4 are overkill IMHO. Assuming 16" shelf support spacing to match wall studs, 1/2" plywood is not needed with a reasonable foam thickness. If you insist on a plywood/foam laminate, 1/4" plywood is adequate. Or 1/2" plywood supported on 16" centers is also perfectly adequate without any foam. Use Homasote or cork on the plywood for your roadbed.
For smooth grades and grade transitions, nothing is easier than bending 1/2" plywood. Simply cut along the outside edges of the roadbed locations with a jig saw and bend the plywood “tongue” to the desired grade. Hold the plywood in place with risers attached to the frame.
Finding 24" wide hollow core doors may not be that easy; most I have seen are quite a bit wider. In any case, I don’t know that hollow core doors are any easier than 2" foam.
these are my thoughts and experiences, yours may differ
REASON: a shelf attacked to wall will exhibit ‘springiness’ - a resonance - will virbrate low frequencies. Combining legs to to floor with attachment to the wall will tend to damp out both horizontal and vertical vibrations (Good).
Gross overkill - unless (as in my case) the “shelf” is a complex sandwich of track on three levels, with the two top layers having grades running in opposite directions. (The lowest level runs right on top of the (modified) shelf brackets, between the steel stud “C used like L” girders.)
Possible - but you still need to secure the foam to the shelf brackets with something stronger than a thin bead of glue or caulk.
Better - or at least quieter, with the same proviso.
Overkill unless the span between shelf brackets is unusually long.
Hollow core doors can be used, but aren’t the best choice for heavily contoured scenery.
My solution (in use where the layout is a <24-inch shelf along a structural wall) is to start with the HD shelving tracks and brackets, with the tracks screwed directly into the wood wall studs with long screws (2.5"). I add a length of angle iron to the stock bracket, converting it to an “L-joist” to allow driving screws from below in the classic Westcott manner. The brackets are 16" long, the length of the angle iron on each is a variable because the aisle edge of the shelf is neither parallel to the wall nor straight. Since my stacked layers of trackage and supports don’t resemble your plans, I won’t bore you with the details. I use a lot of steel because wood products don’t r
Tell that to Bill Darnaby. His 10 scale mile long, double deck layout is nothing but 2x3s suppoting 2" blue foam. The layout’s been up for over ten years, and hasn’t experienced any shifting, sagging, flexing or breakage. He uses a thin bead of Liquid Nails to attach the foam to the 2x3 supports.
6: Other. My last layout was built mostly as a 1 foot wide shelf, with U-channel L-brackets, 1/4" Lauan plywood, and 2: foam:
This type of support is amazingly strong, blazingly fast for one person to assemble, and, if buying everything new, is actually cheaper than traditional layout construction techniques (about a buck a square foot, exclusive of track & finished scenery). The technique allowed me to build all of this layout on my own in less than a year:
I moved two years ago, and just settled on a new trackplan. My new layout will be a 25x25 double deck, around the walls layout similar to my old one (if you eliminate the lowest deck). I’ll be modifying the construction slightly, by adding 1x3s between the brackets and the Lauan. This will give me a more secure attachment point for everything, and will allow me to more easily add a fascia to the layout. It’ll also allow me to extend the overall width of the layout to 30" in places.
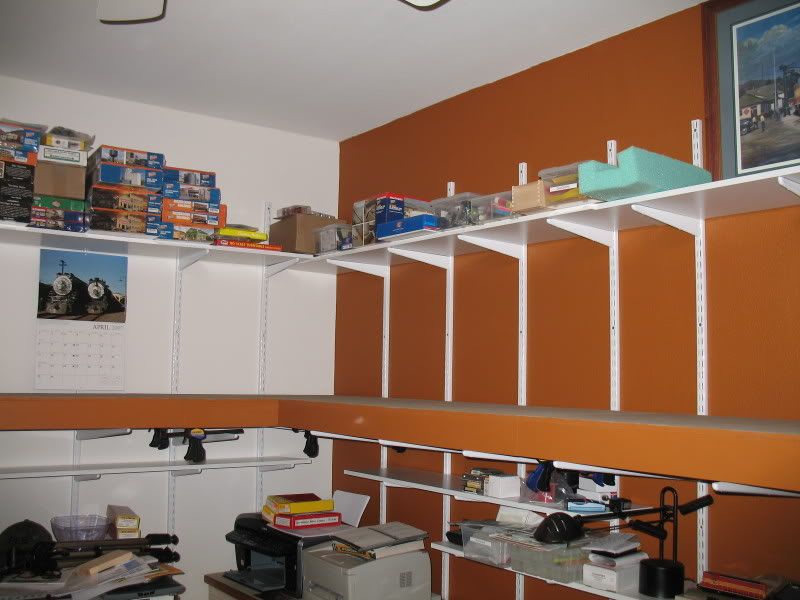
The Old Dog would look at some of the metal utility shelving systems offered by Sears and others. They would be free standing and hence movable. In addition, the shelves below and above the layout could be used for storage.
I’m going with #3 myself. I would skip the plywood except that it helps deaden the rumble of the train on just foam. Heavy duty shelf brackets are probably overkill. The standard brackets mentioned above will suffice.
This is exactly what I did. The shelving is 2’ wide and plenty strong. I just laid the blucor foam right on top of the table, The bottom shelves provide storage space for all of my railroad stuff.
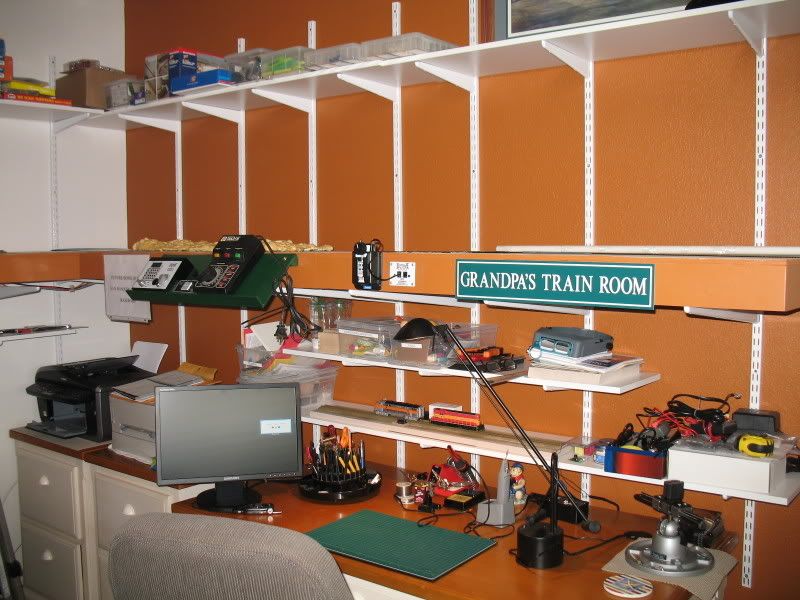
For what it’s worth, I’m currently building such a shelf layout along two walls of our spare bedroom. The layout is two feet wide and six and ten feet respectively. I used standard shelf brackets and standards made by Rubbermaid and available widely at Home Depot. The shelves themselves are constructed from 1x4 dimensional lumber, forming 2x4 boxes, and topped with 1/2" plywood. Over this I’m using 1/2" homosote sheets from California Roadbed for the yard areas and homosote roadbed for the remainder. Backdrops are currently being installed using 1x2 dimensional lumber, cut into 18" pieces, and glued to the standards using Liquid Nails. Wiring is easily accessible underneath and I’ve allowed myself plenty of room for my workbench and shelves both above and below the layout. Having built a 10’ x 22’ layout in my last home’s garage, the construction of this layout has been immensely easier and more convenient, since its indoors, air-conditioned, and the toilet and frig aren’t far away. Although I’m limited from running my California Zepher and Super Chief in all their glory, a switching layout has enormous opportunities for detail and operation. Someday, I get connected to a club and use that for my need to see long trains passing through the countryside. In the meantime, this project has enabled me to get active again and take a great deal of satisfaction from manageable projects like building my own switches and handlaying track. I hope this one railroader’s experience will inspire you to jump in and begin enjoying your layout.
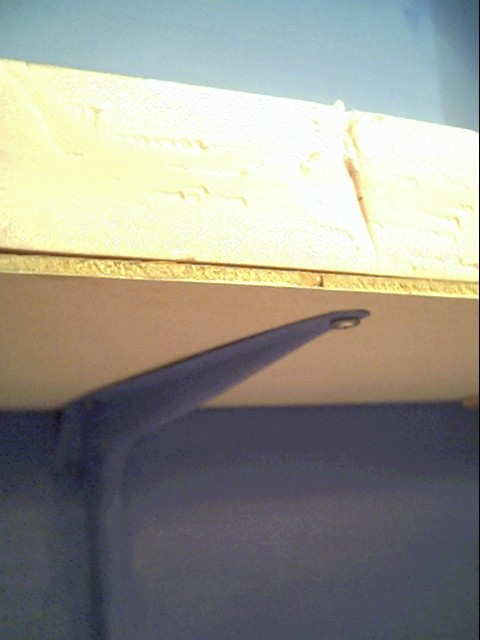
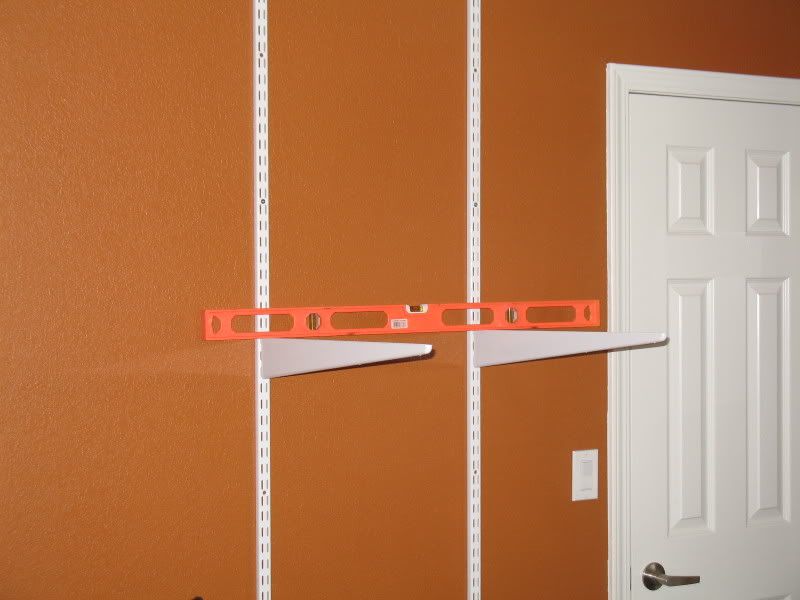
I plan on doing a triple-deck design that is 18" wide or less. I recently purchased some rubbermaid heavy-duty shelf brackets from HD (the kind that have two brackets welded together to prevent side to side wobble)… which was quite expensive. I then rigged up a mock-up to test deck heights. I placed an open-grid benchwork mock-up made with 1X3’s onto the shelf brackets and noticed something interesting. The brackets actually tilt upwards the further from the wall you get thus creating a front-to-back, downhill slope. I checked and my wall is level top to bottom.
I’m wondering if these things are designed that way to flex downwards and be level when really loaded up (say when using for storage in a garage). I won’t use that system now for the layout because the slope is too noticable. (I’m as yet undecided what I’ll do).
Has anyone else noticed this upward pitch of these shelving brackets?
Just out of curiosity, when using foam to make shelves, how are the roadbed and track attached? I doubt that spikes will hold very well, so I suspect that glue is used.
Yeah, I’m using foam directly on cheap metal shelf brackets for the current layout and am not having any problems at all. N-scale, 18-inch width shelves of 2-inch foam. I have glued some 1/8 -inch hardboard under joints though.
Yes. I use latex caulk to secure the roadbed to the foam. I use latex caulk, Liquid Nails for Projects (doesn’t eat plastic or foam), Aileen’s Tacky Glue or Crazy Glue (CA) to secure the track to the roadbed, depending on the application and what I have on hand.
it’s inexpensive , modular , available in several height/width combinations and provides the storage space required to meet my negotiated right of way agreement (my wife said i could have part of the basment if i built shelving to hold the stuff that’s already being stored there) .
since attaching 2 pieces of wood at a 90 degree angle AND having the top come out level isn’t a skill i have mastered i think a purchased shelving system is the way to go . i’ll replace the top shelf with a frame holding a blue foam (or pink depending what’s on sale) base and build up from there .
now all i have to do is move everything out of the basement , tear out all the walls , build a floor and new walls , and i’m on my way . well before that i have to figure out how to pay for all that , then i can start !
I’m just starting my first layout and it’s a workbench setting that’s attached to basement wall studs running a U-shaped 2x6 to 2x6 to 2x4 around in a shelf type setup. I have support legs running down to the floor for extra support.