Just My opinion…but If I were You, I would build it out of Mat board/Illustration board 1/16 thick and comes in 20x30’’ size, both sides smooth white paper and basewood or pine for bracing. It is a lot easier to get great cuts for window’s & doors, then You could glue thinner Evergreen or whatever thinner texture sheets on the siding. Mat board/Illustration board is extremely strong when built that way…the plus is, You don’t have to worry about light bleed through when using the board.
A couple of pic’s of My use of Illustration board and white pine that I cut on My table saw and what I used it for. The overpass is all scratch built with card and wood…the ABS railings are by Rix.
The red handle xacto in the pic’ has a #17 chisel blade in it…great for cutting openings.
The house in question could work as a first scratch build, but….it will take you a while and there may be do overs. When doing these projects often times the hardest part is coming up with the plan. Things like wall height, roof angle, eave overhangs, placement of windows - these usually take me some time. I will usually do a rough drawing of the structure to get things close. Hopefully your mock-up has allowed you to figure this part out already.
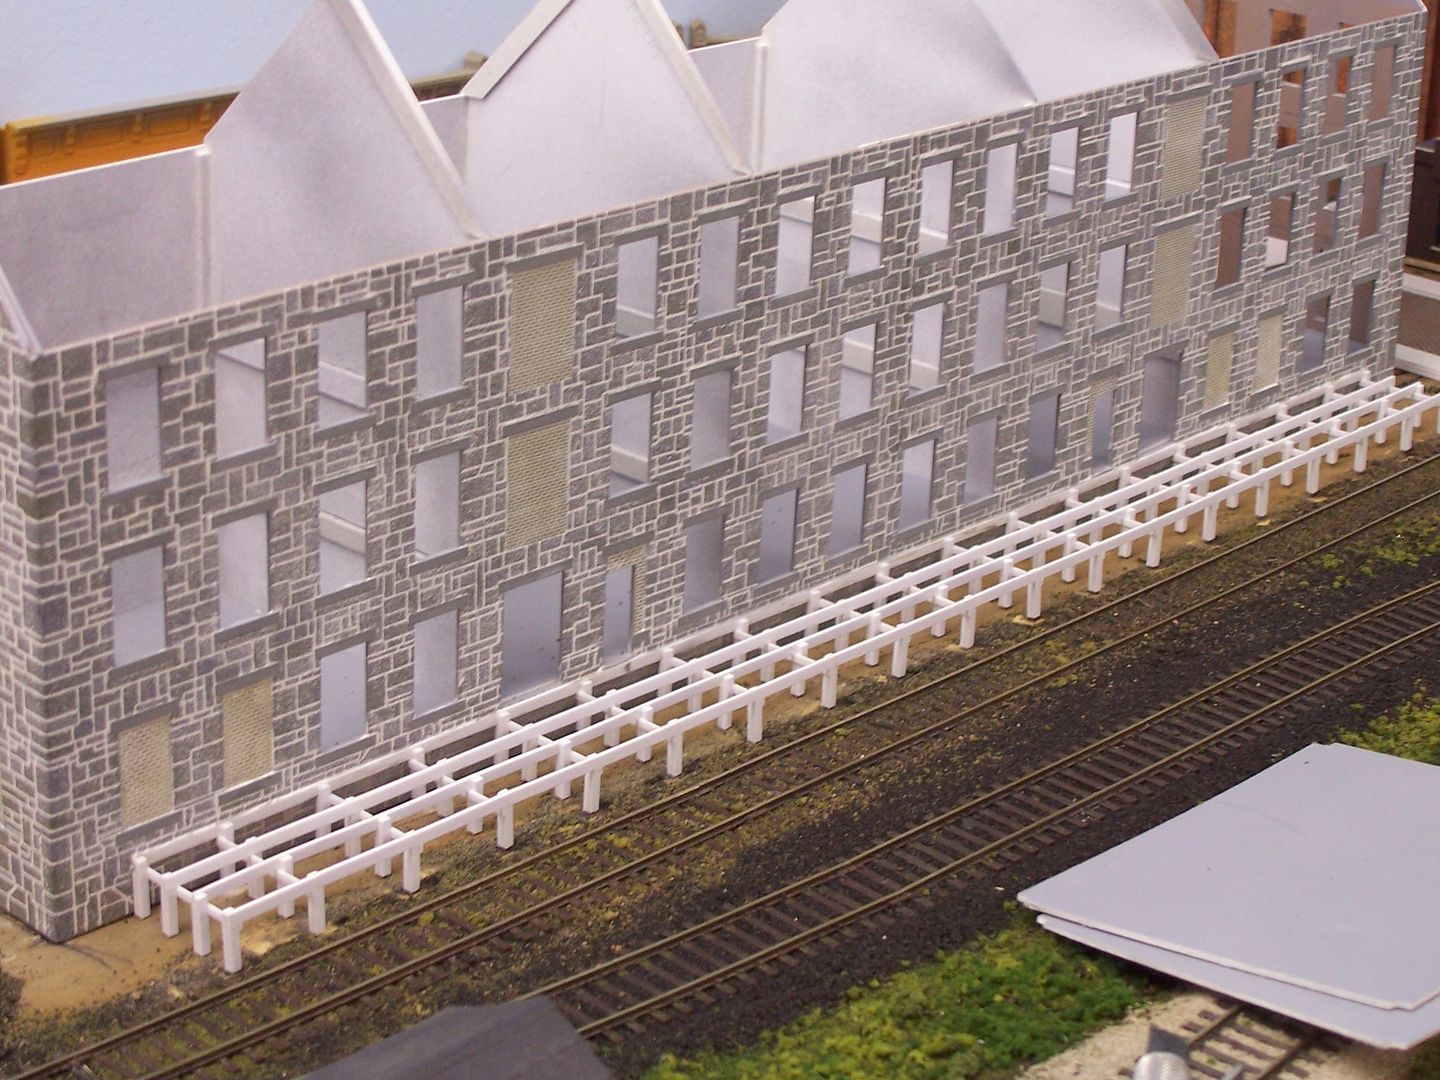
Almost everything I build of any size has some internal bracing. Your roof and other parts of the structure will need this to keep from warping. I don’t recommend building an internal shell and then covering it in clapboard. When you use this method you are in effect building the structure twice. Cutting windows and doors in two layers can also be a hassle. I would use the Evergreen clapboard sheets in as thick a dimension as you can get (.060 is ideal) and then brace them from the inside. Cutting window and doors is not as critical as it might appear. When you use Tichy/grandt line doors and windows the window/door frame will cover up some slop in the rough opening. It is still slow, painstaking work.
Even in styrene, you need bracing. Also you can get thick plastic for cheap or free, old signage is the sourse, then you laminate your clapboard to it.
Rich , I appreciate your comment on cost of materials for your planned structure. We forget why craftsmen kits are very pricey.
I would recommend you consider some selected compression as I think you have mentioned. From a retired builder, it can even be done on designing actual houses. Remove one or two windows in the long face of the building and remove the wall section associated with those windows. Move the shed dormer closer to the middle of the house. Reduced the size of the sky lights. It is commonly done in modeling real world structures. David Popp has good comments about how to do selective compression in his latest video on the Madison Station Depot project he is doing for Rehab My Railroad series.
I would not have great concern on taking on this structure as a first scratch build attempt. Work from a good set of plans, build a mock up from poster board and then have at it.
I say go for it, if you can build a kit, you are at least half way ready. I respectfully disagree with the suggestion of starting with a small shed. If you can’t cut and glue four walls together, we shoudn,t be having this conversation.You won’t learn anything or master any tricks if you don.t willfully expose yourself to the need of knowing how to do it.
If you make a mistake in cutting;the building ends up a little shorter, or you add a window or door… nobody got hurt
A few things I go by;
know your material,you can do stuff with plastic that wont work in wood
a picture or drawing is great help,Myself ,I use plans as a guild, not always the end word
I just bought $60 worth of stuff and carried it home in a small bag, but I would be hard pressed to break it down to hours of enjoyment. If that building you want to build was on a shelf in a store I’ll bet it would be way past the $100 mark, and you would still have to put it together
For everyday I have a chopper 2 but for things like pillors on a loading platform (they all need to be quite square) I use a Shay Wood Miter, very expencive but got mine on e-bay for cheap.
I think you should go for it without spending your time building ‘sheds’. That’s how I did it (OK, I made an outhouse first). The biggest mistake I have made was using too much glue to install large roundhouse style windows in my engine shop. I left too big a gap around the windows and I was trying to fill it with old fashioned Testors glue in a tube. It caused some distortion in the windows but nothing serious. If I had known what I do now about cutting the windows slightly undersize and filing the openings to fit I would never have had a problem.
Nibbler shears are designed to cut small holes in sheet stock. They were originally intended for metal work but they are perfect for styrene. They look like a pair of pliers with a little square block sticking out the end. The block has a slot with a blade that ‘nibbles’ material away a bit at a time. To use them, you drill a round hole in the middle of the section you want to remove large enough to allow the nibbler ‘block’ to fit through. Then insert the nibbler and slide the material to be removed into the slot. When you squeeze the handles the block is pulled into the end of the shears and a small piece of material is cut away. You have to repeat the process many times to get to the rough opening you want, hence the term “nibbler”. It sounds like a lot of work but when compared to having to repeatedly draw a knife blade along a cut line it really is much easier. It also takes much less force. Typically, if you are doing a window opening for example, you just nibble around the inside perimeter of the opening and leave the center to fall away on its own.
As far as the cost of materials goes, can the house be seen from all sides or are there walls that won’t be seen? If there will be non-visible walls don’t spend the money on clapboard for them. Same with windows. You may want to have window openings in the non-visible walls for lighting purposes (to let light in) but you don’t actually
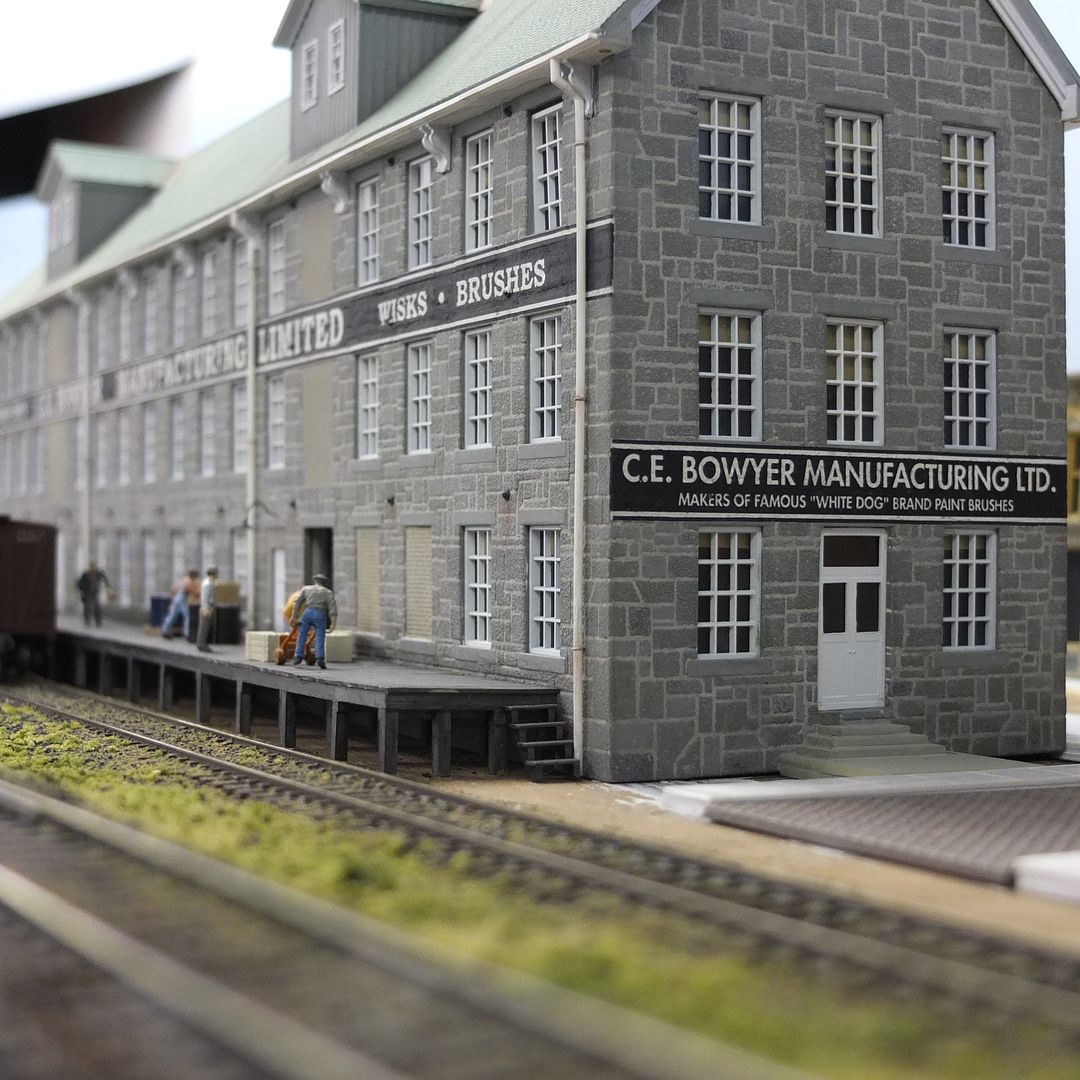
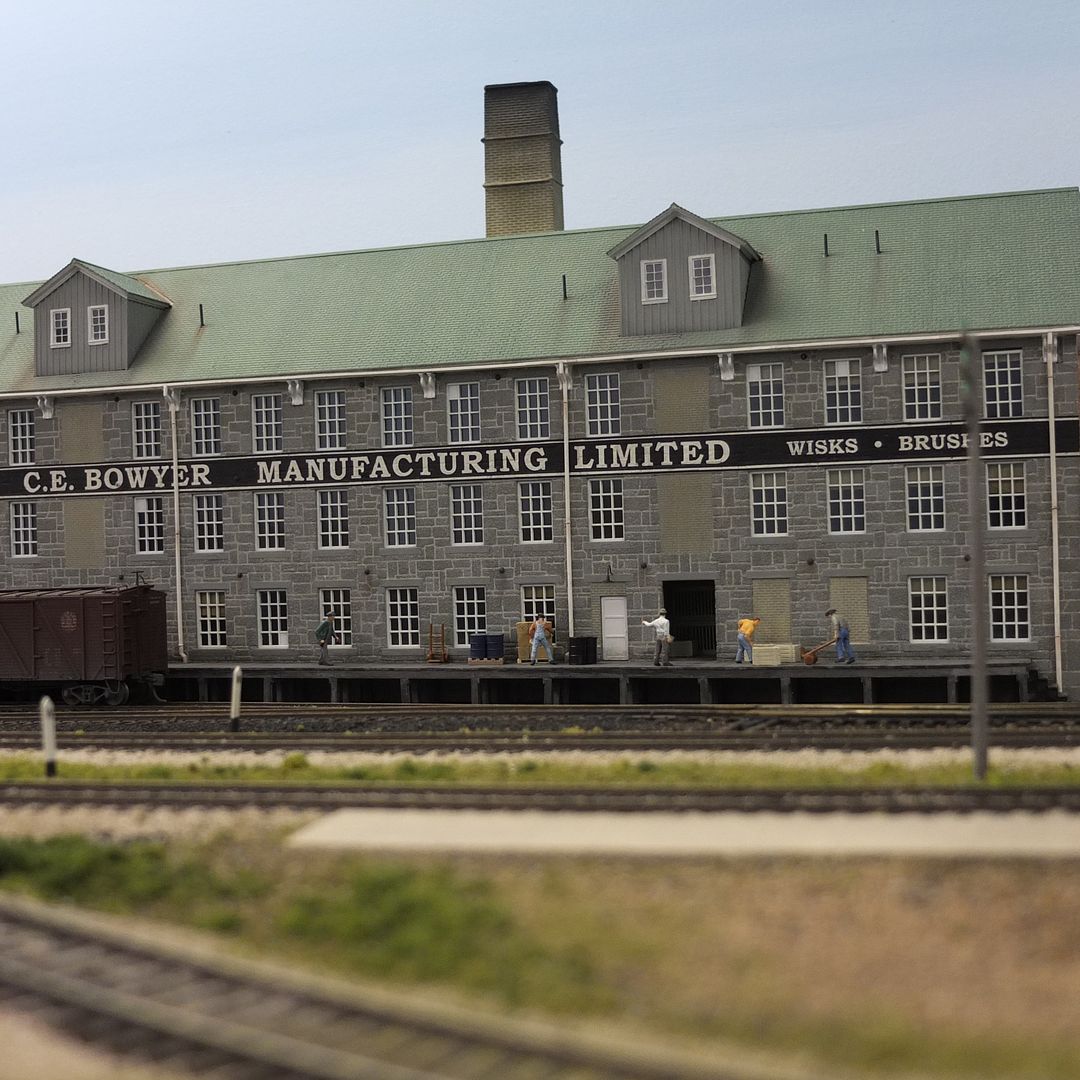
I wish I could blow up the picture of the mansion more so the details would be clearer. However, from what I can see, the original windows do not have the peaked top detail. Of course, there is absolutely nothing that says you can’t use them, and they will add some interesting architectural detail. If it were me I would stay with the square top windows and augment the tops with the layered lintels that the pictures seem to show. One advantage to the windows that you have chosen is that they are bigger than the ones I suggested so they would be better proportioned to the overall size of the structure. You could always cut the peaked part off and add lintels.
The important point is that it is your railroad, or at least Michael’s railroad, so you can do what you want.
Yeah, it is too bad that the photo that Michael posted cannot be blown up. On the ones he sent to me, it is possible to zoom in. There is ornamental detail above the windows but perhaps you are right - - just stick with the plain windows.
And here I thought that you were going to build your own Bertram’s. [:-^]
If you’re going to build in styrene, use only styrene unless some necessary component isn’t available in that material. Bracing styrene with wood means different adhesives than the solvent cement which you’d use for styrene, and that would apply for pretty-well any combination of materials.
Plastruct siding (and most of their sheet materials, in my experience) is more expensive than similar stuff from Evergreen, and some of it isn’t styrene, either.
You can use Evergreen strip styrene for the simple bracing required at corners - .125"x.125" is sufficient for that. For stiffening long walls, or supporting large roof areas and even for creating the large roof areas, a good and economical choice would be .060" sheet styrene. Buy a 4’x8’ sheet of it - it can be rolled-up and taped into a tube small enough to transport in the front seat of your car. Use a carpenter’s square and a utility knife when cutting it into the pieces required. As bracing, you can make one-piece floors and/or ceilings to stiffen long walls, and it can also be used as partitions to support large roof areas, as shown here:
As a sub-roof material, the thickness can represent the fascia, especially effective if you paint the edges the same colour as the rest of the trim:
I used Plastruct shingle sheets on this structure as it was the largest sheet roofing I could find. Since it’s not styrene, I had to use contact cement to affix it to the styrene sub-roof:
Doctorwayne has spoken - heed his advice!!! (because he is better at this than just about anybody else).
Ornamental detail is good! After all, you are modelling a mansion. The exact type of detail isn’t as important as the fact that it is there. Its posh, if you will. It gives the right impression.
Wayne’s advice is generally good. I don’t disagree with it in general. I have had success using 3M 77 to bond sytrene and basswood. It stays flexible and since it covers the entire area to be bonded (it’s a spray can) it doesn’t generally cause the issues that using other sorts of adhesives with dissimilar materials generally cause.
There is another advantage. It allows you to cut your door and window openings in the sytrene, then you spray and apply it to the basswood core piece, then you cut through the wood using the window openings in the plastic as a guide. This is more a technique I use for masonry buildings, where a thicker wall is desired.
Others will say it’s double work, but I’ve found it useful when I need to represent masonry and for general all around strength.
Contact works if you’re sure you can align properly when bonding. MEK is good when things aren’t so big that the MEK can’t siphon underneath to the center. So it depends on exactly what you’re doing. Keep in mind that like for a lot of scratchbuilding, the best technique can vary over the course of building a large structure. After a little practice with the materials, you’ll find yourself assessing each joint thoughfully as it starts becoming more obvious what’s best as you gain experience.
You just have to be willing to accept that if you make a mistake you are willing to spend more on the learning experience.
If you have building with $200 of materials and you make some fatal error (cut all the walls and install all the window and door castings, then find you made an error on how high the walls should be) you might have to back up a $100 or so and start over. If you start with a $10 building and mess it up on the last step, you’ve lost $10.
Your choice.
I would use either .020 or .040 clapboard and use styrene square strip pieces, or pieces of sheet styrene as bracing. I would do the roof from large sheets of styrene (plastic supply houses will sell a 2x4 or 4x8 sheet of .040 styrene, sign shops can also supply large sheet styrene).