I have a small brick structure made from Walthers modular sections that doesn’t have a floor but I want to model it with the door open as in the picture. How do you usually do this, cut a styrene sheet to cover the entire floor area or create a box like structure that would simulate a couple of walls also. The only part that will be seen is just inside the door unless a person were to bend down close to look in.
Your choice. It is easiest to make a floor for the whole structure, then add dividing walls if you so choose. You can put some blocks on the walls, then lay the floor, and drill and tap the blocks to hold the floor on the model, but be removeable for later detailing…
Ok, thanks Nigel. You’re right and I’ve been thinking it over, easiest thing is to do the entire floor since the building isn’t that big anyway. I think I’ll dispense with the walls.
Another way, especially for larger buildings, is to build a small “box” behind the open door. A friend of mine did this and glued pictures of the interior to the box so it looked like you could see farter into the building.
Depending on where the structure is situated on the layout I have done exactly the same thing. For example Walthers Merchant row series, nice looking exterior details but you have four stores and nothing inside them all wide open. So unless you plan on covering over the windows you have to build four interiors
On building with large warehouse doors etc. like a loading dock or a garage I build a small box and maybe put some back round material like barrels crate, people fork lift trucks cars what have you some times sticking part of the way out. I have built full interiors only a few times as I don’t feel that sort of level of detail is for me. You can actually get flooring material from Ever Green scale like tile or wood flooring. A guy at the club made a wooden floor for a couple of structures out of actual strip pieces of wood. stained it and varnished it to boot. Just a little bit of extra time on his hands.but it came out really nice.
If it were me, I would just do the entire floor with some 0.05 or 1/16" styrene sheeting because it would be less fussy than some type of “shadow box”. You may also want to think about lighting the inside of your structure, too.
Can you remove the roof? If you can, just lay the building on a piece of styrene then trace the contour of the inside wall onto it with a marker. I would cut along the outside of the line “generously” so that you can then get a nice semi-snug (but not too tight) fit after some slight trimming and filing.
If the floor is going to be elevated or above ground, you can glue pieces of dimensional styrene around the inside at the proper height to support the flooring. To achieve this, do the following:
Determine what height you want the floor to be at
Create an “L” jig (or jigs) out of two pieces of scrap styrene that are exactly 90 degrees perpendicular to one another - The inside (where the two pieces meet) and top of the “L” will be the exact height of your floor. (I’ve found that a piece of dimensional 4 x 4" or 6 x 6" styrene and a piece of 1/16" sheeting work really well for this.)
Using your “L” jig as a height guide for your flooring, press the floor piece you created earlier up into your structure - The inside corner of the “L” jig will run along the inside bottom edge of the wall and support the floor. You may need to check and adjust (up or down) the height of the floor until all sides are flush with the top of the “L” jig.
Glue a short piece of 4 x 4 dimensional styrene (~1" long) in the middle of the two shortest opposing walls so that it is flush up against the bottom of the floor - This will allow you the option of inserting and/or remove the flooring for detailing purposes
Once the two support pieces have been glued, push up and/or remove the flooring completely so that it doesn’t bec
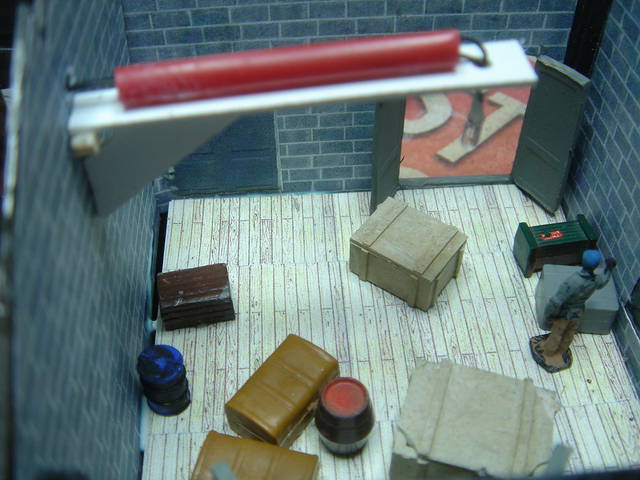
The interiors of buildings are hard to see. Take advantage of that. The floors and walls of this DPM Freight House are covered with computer-printed images of a wood floor and cinderblock walls, printed on card stock and cut to shape. Add some crates and barrels and perhaps a figure with a hand cart.
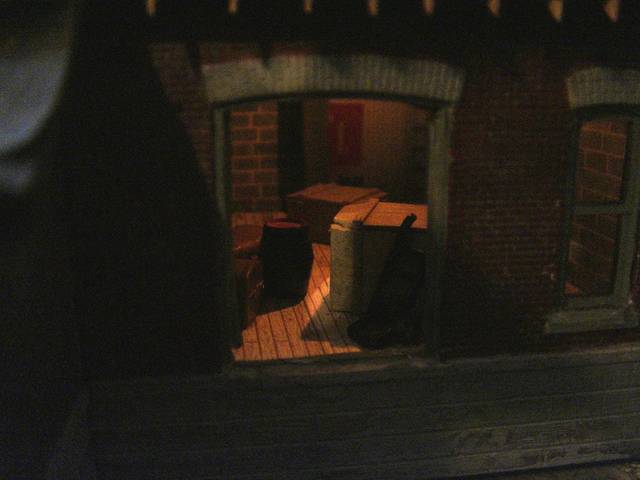
I added a grain-of-wheat bulb on a bracket to this model, to provide enough light to see the details inside the building. In place at night, running the 16-volt bulb at 12 volts, it looks like this:
Much obliged for all the tips and suggestions! This is a fairly small structure and the way it sits on the layout it’s pretty hard to see into it except from one angle and you can’t see very far in even then. I’ll make up my mind whether to go with a complete floor or a ‘shadow box’ type interior, either way you’ve all give me good ideas.
I use .040 sheet styrene to add walls and floors to buildings. I’m a bit fanatical about adding them to all buildings so there aren’t great caverns when people peek into the windows.
Jarrell, Hi. I use really cheap styrene. I go to My local discount store, Wall Mart, Dollar Bills or whatever You have nearest You. Buy some cheap For Sale signs.I pay about a buck a piece for them. If they are to flimsy double them up. That’s a cheaper option then wasting Your good styrene on flooring. I use it for roofing also. Just My thoughts…
There was a little article in one of the MR issues by Lionel Strang where the main theme had to do with the actual building of a small structure, I think a DPM garage, that was similiar to what you show in your post. He used a full sheet of styrene for the floor. To simulate a detailed interior without going the whole 9 yards, he had half a car model situated just inside the garage door along with some model roll around tool chests. Because there was a closed door on the other end of the structure, he painted the other half of the car a different color so that when seen from the closed door it would appear that there was a lot going on inside.
Plastruct offers ready made floor patterns of tounge and groove wood, brick, and tile.
For the inside walls you have several options. The easiest of which would be to use patterned brick PAPER. It’s in the ?scratch building?/?Scenary supplies? section of the walthers catalog.
The second option is just to paint it various shades of red.
Mr Beasley beat me to the printed out on a computer bit. (He always has good suggestions!)
A cheap way to add an “interior” may be to use some card stock or box paper. Paint it black if you don’t want light to shine through. Paint it white or some other color if you want it to appear.