Can anyone give me some ideas on how to attach my layout to my basement walls? I have poured walls. I am concerned about drilling into them and creating a path for moisture to get in. I had planned to attach 2x4’s from layout height down to the floor. Instead of legs down from the front edge, I wanted to run them down at an angle to the bottom of the wall 2x4’s. I know this will put more stain on the top end of the wall boards, but I don’t want them in the way. Tapcons w/ silicone in the holes? Some kind of adhesive? If anyone has had any luck…good or bad… please let me know. Thanks
Either large Tapcons or expansion bolts will work. Consider putting two of them at the top of your 2x4 since, as you said most of the stress will be on the top connectors.
Poured concrete is hard so you will need a hammer drill, not just a rotary drill for the holes.
BUT, before you start, have you considered framing a full 2x4 wall against your concrete wall first? Yes, it costs more and you loose 4" of space but you can insulate and vapor barrier the wall and apply drywall to provide a more finished look to the room.
Good luck,
-John
Instead of trying to attach the benchwork directly to the concrete, you really should frame a 2x3 or 2x4 wall. This will allow for some insulation, ability to run electrical, allow to attach the benchwork and give you something to attach a backdrop to if you don’t just paint the drywall instead.
Just mounting the frame to concrete walls is a bad idea.
If every inch counts, you could glue and shoot strapping on those walls and then finish. This won’t allow for electrical and only 3/4" insulation can be used between the 1x3 strapping.
I would agree that spending the money and finishing the basement (At least the layout area) is the best idea for a few reasons.
-
Concrete walls are almost never flat and smooth, so getting straight and square benchwork gets tricky. Also foundations are also not known to perfectly square. When you frame the basement walls you can lay them out square independent of the concrete walls. Concrete will also continually generate dust unless you seal it.
-
Concrete basements are also always colder then the rest of the house, good in summer not so good in winter. My finished basement runs cold in the winter but iit’s not as bad as when it was unfinished.
-
In my opinion you want a comfortable well lit dust free space to build a layout. If the layout space is not comfortable and inviting you are not going to want to be down there, thus very little work gets done on the layout.
I understand that finishing a basement can be and expensive project(mine was) but I think you’d be happier in the long run even if it means waiting a few years to start your dream layout.
While I also recommend framing a full wall at your layout location I’ll give my thoughts on direct concrete attachment.
I would recommend AGAINST a sealant at your fasteners. If you drill your hole, smear some sealant in it and then insert the fastener the fastener now needs to rely on the sealant as a friction medium instead of the concrete itself. Also, if you have such a concern about water penetration now I would NOT put any holes in the wall.
I’ll assume you have at least 6" of solid concrete wall there so you can safely use 3" to 4" of drill penetration IF USING a standard combo hammer drill (the kind with hammer on/off switch). If using more of a industrial drill then I recommend LESS drill depth because the hammer effect is 3 to 10 times stronger. This added pounding WILL cause minute fractures in the concrete that may allow for water seapage depending on the grade of the exterior ground and water drainage at your house.
I personally suggest using 1/4" or 5/16" diameter X 3" (+) TAP-CON concrete screws. When I need to attach a 2x3 or 2x4 with heavy loads I’ll take a 3/8" or 1/2" spade bit and create a 1/2" deep recess (think countersunk) and then drill thru the wood into the concrete.
USE THE BIT SUPPLIED! Hole diameter will make or break the project! Drill to the needed depth and with the drill running slowly pull the bit out. This pulls most of the debris out of the hole and makes for an easier screw insertion. Get the screws with the hex heads and cooresponding size driver tip. Drive the screw on low speed, if the screws go in hard find an old candle and dig the screws tip iinto the wax about 1/4". The wax helps lube the screw a bit and does not hinder the holding power.
If using expansion type anchors I recommend NOT using the style that requires lag bolts. Get the ones that are a stud type anchor. Much more holding power and the almost never loosen up over time.
I, too, vote for finishing the wall first.
I am also a fan of self supporting benchwork, as opposed to hanging it on the wall. You may want to move it someday.
I simply GLUED 1X3 furring strips with PL200 glue on my poured basement walls. After that I screwed the benchwork into the furring strips. No problems encountered yet going on 2 years strong now. My layout is a shelf layout 20" max to 5" minumum from the wall.

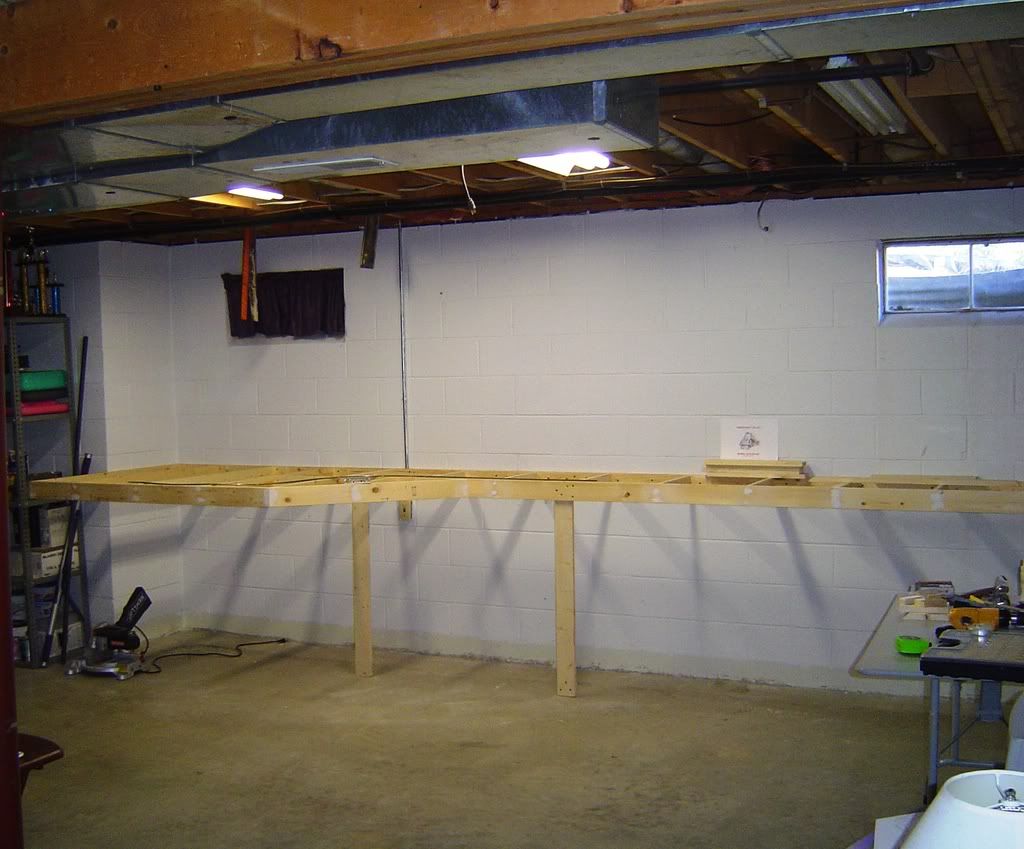
As you will see from the below pictures of my layout, I did attach to my block wall. I installed a 1x4 header around the walls. I countersunk the screw holes and used 3/16" x 1 1/4" KwikTap concrete screws from Loew’s. The key to this is when I drilled the 5/32" hole in the block (kit comes with the masonary bit) I never went all the way through the block. Once I installed the header my 1x4 framework was screwed into the header. If you look at the pictures you will see double 1 x 4’s on the wall (header screwed into the wall and frame screwed into the header) All said and done I currently have on 4 vertical supports for a 17’ x 14’ layoout and it is not going anywhere! Hope this helps. If you have more questions do not hesitate to ask.
Mark
Stow, OH

My basement (full in ground) is dry and has good HVAC. I had the concrete walls and floor painted when the house was constructed. I curently have a free standing modular layout, but will be ataching some benchwork to the walls. I am considering attaching 2" x 2" to the walls with anchor bolts, then attach brackets to the 2" x 2" for the benchwork to sit on. I am considering 24" centers for the wall bracing.
JIM
For my garage remodeling project my contractor furred out the masonry wall with 2 x 3s laid flat. He filled the gap with 2 inch foam panels, dry walled, taped, textured, and painted. I can now bolt metal studs cross wise at layout height and then affix horizontal shelf suports outward with diagonal members back to the wall. This way there are no legs and a very strong structure.
Thank you all for the good ideas. I live in Indiana, and the excessive rain we have gotten lately has made it clear that I have some waterproofing to do before I can do ANY railroading. ![]() Thanks again.
Thanks again.
One thing about finishing the walls is to check your local building code. Where I live, you can’t just fur strip and drywall. You have to have 2X4 studs, electrical in conduit, outlets every 6(?) feet, etc, etc. You can argue nobody will know but if you sell the house you’re likely going to have an inspection.
I’ve used 22-caliber loads to drive nails into concrete with good results. Wear hearing protection and don’t shoot a nail into yourself or others.
I was at the same stage a few years ago. I must agree with the other replys to this post, build a false wall. I fought for three days to try to mount 2X4’s to the concrete wall, after all the frustration I decided to build the false wall, it took just one evening. Insulation and electrical are very nice benifits, but I found one of the best things from drywalling the entire layout room was dust control. I made a drawing of all the items in the ceiling and drywalled the ceiling as well. Where I needed access I added small access doors, plastic ones that the cover just snaps in place. I added filters to the room vents and my dust is next to nil. The painted drywall is a great place to paint backdrops, I painted all the walls a sky blue, be careful its very easy to get too dark of a blue, I went through 4 different shades before I decided on one. The lighting plays a big part on the color shade. I bolted the back of the frame work to th studs with 1/4" lag bolts, two per stud. I used 2X2 legs every four feet bolted to the layout with two 1/4" bolts. The layout is so strong I can stand on if I wanted to. Good luck with the project.
Jim
I agree with the majority here and would frame out the wall if you want to use it to support the layout. I have a real problem with drilling holes in concrete, then hoping it won’t crack or leak. Especially since I plan on selling the house eventually. Were do you live in Indiana? I live in Mishawaka and we have been getting some really strange weather lately. Snow one day, thunderstorms 2 days later, then back to snow, then back to rain. Luckily my basement has stayed dry thru all the crazy weather.
John
I second ALL the reasons expressed for building a stud wall. I did this, wired plenty of electrical outlets, covered it with wall board (without taping), and then used wainsocat panel on the bottom. On the top, I used large sheets of styrene and painted the sky. Got all the benefits that others have expressed. I used removeable L-girder benchwork, so if I ever sell the house, a nice family room is left behind.
Have fun, Hal
I would strongly recommend against drilling a lot of holes into a masonry basement wall. Don’t mess with your basement walls if you can avoid it. Put up the furring strips with adhesive if you must, or just build a four legged benchwork if you’re not going to fully finish the cellar. Why not just build a girder table benchwork?
I hate to be a party pooper, but one thing to consider is how picky you’re locality is when it comes to basements. I have a cousin who is building a layout in her basement, and the tax assessor, when it came time to rate her property, said the basement now was being taxed as if it were a living space. She’d built-out the basement walls like was suggested here with 2x4’s and insulation and drywall. Not every place is like that, just thought I’d pass along a little bit of info in my possession.
I strongly agree with finishing the layout room first and building the railroad second; you will be happier in the long run. However if you are not concerned with that I would recommend a free standing layout. Short of that I would install a few 2"x4" ‘nailers’ at 4’ centers to the foundation with construction adhesive and either tapcons or ramsets. Then attach your benchwork to that. pete. http://selectcontractinginc.com serving greater cincinnati,ohiofinishedbasement specialist.
jackn2mpu is right!! I too live in NJ and most NJ municipalities and in other states will tax your basement as living space if you finish it off with studding and drywall.
There are ways around this!! In my Township, I checked with the Building Inspector and the Tax Assessor when I had a basement - a good idea to check with both to be sure they are on the same page. Here is what I found out:
I could paint the walls and floors plus, even install a suspended ceiling with lights and not be taxed extra - it was still considered unfinished. Bare walls and floors were the key! Also, the heater and water heater could be framed-in and covered with fire code drywall or paneling ( a small area) without being taxed. Permanent wall-to-wall carpeting was unacceptable, but strips of carpeting in the aisle ways were OK! ( I could glue it to the floor.)
The walls were painted a PRR station cream color, green floors with a boxcar red-brown trim. Please don’t bring up the subject of the safety-yellow steel support posts in earshot of my wife. I have had to promise her that I Will NOT do any safety yellow in the next basement!!
To attach the bench work I would put studs every four feet or so to attach L-girders or other types of support. The studs would be nailed to a plate top and bottom - nailed at the top plate into the joists and used hard cut nails in the bottom plate. No nails in the walls!
The back drop would be attached to the studs just above the top of the bench (platform) and extend to the drop ceiling. A finished appearance - yet officially - Unfinished!!
Building codes vary, but in my area normal construction in a basement area means no more than a 6’ reach to an outlet(something you want for your layout anyway). As far as the taxes; in my area the basement is taxed as ‘finished’ after 10 years!
I would suggest you build a stud wall(either 2x2 or 2x4), run the electrical for the outlets, insulate/vapor barrier, and sheet rock it. It is a good learning experience(get an electrician to do the hook up to the box) for future home projects. Too many model railroads are still in the ‘basement’ era for looks!
Jim Bernier