I was wondering if there’s a smart way in protecting point rails and the throwbar of turnouts from getting glued to their roadbed when ballasting. Even if I use a surgical method to apply ballast, isopropyl alcohol and scenic cement (or diluted PVA glue) around turnouts, I cannot always avoid glue getting into the wrong place. I’m working with N scale hand-laid (code 55) track and turnouts, and not to ballast is not an option for me. Does anyone know of a trick, like for instance using a hydrophobic medium to make sure the PVA glue stays away from critical parts? It would have to be something that can be easily removed after the ballasting, so vaseline would not be a good idea. Likewise, solder fluid wouldn’t work either as burning it away at the end could harm the soldering. Any ideas?
I just cover those places with strips of masking tape. You could also place some plastic sandwich wrap under the throwbar and points and pull it out after the glued ballast has set nearby.
I’ve had similar problems. Thanks of the obvious Selector, Saran Wrap. I use it everywhere for scenery protection, just never give it a thought for ballasting turnouts.
Mel
Modeling the early to mid 1950s SP in HO scale since 1951
I am guessing that you are using a jig to make the turnouts. If not, you might try building the turnout in place (Tony Koester did a video on MRVP). If you build it in place, you can ballast before installing rail, eliminating the need to protect anything. Just a thought.
I constructed a working #4 turnout using this method. I laid out the ties using Fast Tracks paper template. I used their Point form tool, Stock aid and Frog helper to make the turnout. I did not use any copper ties (except throwbar). Just NMRA guage and spikes.
I apply a few drops of Medium Oil to the hinges on the point rails and on the contact surfaces of the point rails. Same for the throwbar. Oil and water do not mix!
I do similar to Rich, applying plastic-compatible oil to the tops of the ties over which the points move, and then parking the points at mid-throw before misting with wet water and applying the diluted white glue.
I tried this when installing some of the Peco turnouts on my layout. I put a piece of black duct tape underneath the ties starting to the throwbar to the end of the points. The duct tape thus has its sticky side facing up. I trim the edges to be even with the ends of the ties. I put just enough ballast on the sticky part of the tape to hold (perhaps tamping it in with a Q tip) so the tape is completely covered. The ballast is lower than the ballast on the rest of the turnout (and rest of the track) but the turnout is ballasted and looks ballasted and the ballast does not interfere with the movement of the points or the throwbar. Only beneath the throwbar is there no ballast.
Thanks, everyone, for the numerous great suggestions. I am using FastTracks templates and tools to build the turnouts but even though I’m not using their jigs, I can’t build them in place and so ballasting before wouldn’t work (and anyway, I have completed building all turnouts). Saran wrap could work although pulling it under the point rails might be tricky. I particularly like Rich’s suggestion to use a few drops of oil. Would Labelle 108 work? In any case, I’ll try both.
How permanent is this solution? I understand that duct tape uses a very strong water resistant adhesive. Doesn’t it age over time, however, and lose its tackiness?
You could also use one of the spray bombs with the textured finish. It comes in many different colours so depending on the colour of your ballast you should be able to find a close match.
I think this is a great question, and I like some of the answers like the idea of using upside down duct tape. My club has experienced the folly of getting glue and ballast in the wrong places, and we will be facing the same issue again in the reasonably near future because we will be building a new layout. Since we seem to favour black ballast for the mainlines, black duct tape would be ideal.
Although the Fastracks turnouts have a healthy gap between the bottom of the throwbars and the roadbed I still carefully masked-off the throwbar.
For pointrail/tie lube I substituted Molykote Z for the graphite and used a dental irrigating curved tip syringe for accurate and controlled delivery of the wetting agent and glue.
Interesting video but is it really necessary to glue between the ties? I never do anymore because the residue just leads to problems and ballast gets stuck to the inside of the rails.
What I have done is to glue the ballast down next to the turnout with full strength white glue that I have brushed in place, one tie over will due but to be real safe do two. Just paint the area to be ballasted with white glue and pour on the ballast pushing down slightly with your finger (don’t use too much white glue, just paint as if you were trying to cover a dark color with say yellow).
Having looked at a couple of prototype turnouts in my local inustrial park, an observation.
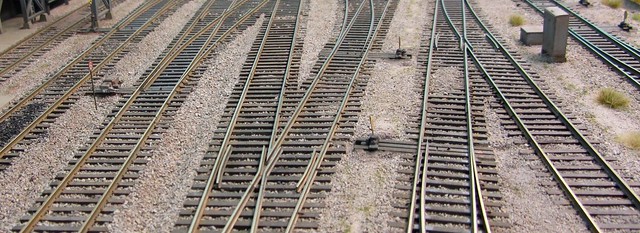
The headblock ties (the ones with the throwbar between) are set on top of tamped ballast. There is NO ballast above tie-bottom level to interfere with the throwbar. All the other ties are anchored by heaped ballast to the tie tops.
Since the wooden ties of my hand-laid specialwork go directly on a grey-painted cardstock track template it’s easy to simulate the look - and enjoy the obvious advantages.
Thanks for the helpful link, Peter, one more very useful technique. One question though: Molykote Z seems to be a very expensive surrogate for graphite. Before I’d buy it I’d like to understand why graphite is not good enough.
For all the various approaches there seems to be one common rule - that is to work slowly, carefully and to be patient. See also Cody Grivno’s MRVP video “Thin Branch Series: Ballasting turnout”.
It has lasted several years without problems. I try hard NOT to get water based glue or alchohol (used in the rest of my ballasting) on the tape, ever. Duct tape does lose its great stickiness over time, but you don’t need much stickiness to hold ballast in place, and it is not like I am trying to rub the ballast off the tape.
Another technique I have tried (but am not prepared to commit to it on the layout itself; I have worked up numerous ideas as part of a clinic I give from time to time on ballasting track and in particular turnouts, and I bring samples of ballasted turnouts I can pass around during the clinic) is to use one of those “textured” spray paints. There is one that is surprisingly similar to the C&NW pink lady ballast I use on my layout. When installing the turnout I slice or mill out a thin gap in the cork underneath the points, about the size of a playing card. I spray the textured spray paint on a very thin shim (wood or styrene and I suppose even cardstock could be tried) and slip it into that gap after the turnout is in place. Am I making myself clear?