What kind of solder should I use for joining track sections and dropping feeders?
I am a retired newbie putting together his 40 year old DC HO scale set. It is comprised of Code 100 sections of nickel steel, steel, and brass straight and 18 inch curved sections. I have turnouts, bumpers and reraillers. MOst everything is Atlas, except the Tyco contorler. I will be laying the track on a Woodland Scenics bed using GE siicon 2 caulk. I have one decent locomotive, a Tyco Chatanooga in need of a pancake motor, and an even cheaper Tyco yard locolotive.
I tried soldering with my old Craftsman gun and melted everything. I then got a cheap 60 watt iron of of Amazon and it seems to work pretty well, but I think it may be good to get a different type of sodler than what came with it. I have heard of rosin core solder for which flux is not needed (if rosin is not a typer of flux).
Rosin is a type of flux. The amount in the ‘rosin core(s)’ of a typical product like Kester 44 will not be ‘enough’ flux for proper track soldering, although it may ‘do’ for hobby electronics.
I think I’ll recommend ‘eutectic’ solder and suitable compatible flux for this work (I used 63:37 for ‘lead-containing’ work) – the advantage is that it freezes all at once rather than sludgily, making it easier to keep the joints and wires aligned.
Probably the best device to use for drops (and arguably for joint fixation with a small volume of solder) is a resistance-soldering rig, which acts like a lower-temperature analogue of a spot welder, running electrical current only through the small area where you want the solder to melt. That gets rid of most of the potential with melting ties and cold-soldered joints alike.
Get a good no-clean flux (liquid or paste) and a good bronze wool tip-cleaning pad, whatever type of iron you use. Rule #1 for irons is: Keep your tip clean and tinned shiny.
I have never looked back from getting a temperature-controlled ‘soldering station’ instead of a pencil-type fixed output iron. Since the advent of lucrative cell-phone repair the cost has dropped and the capabilities increased greatly.
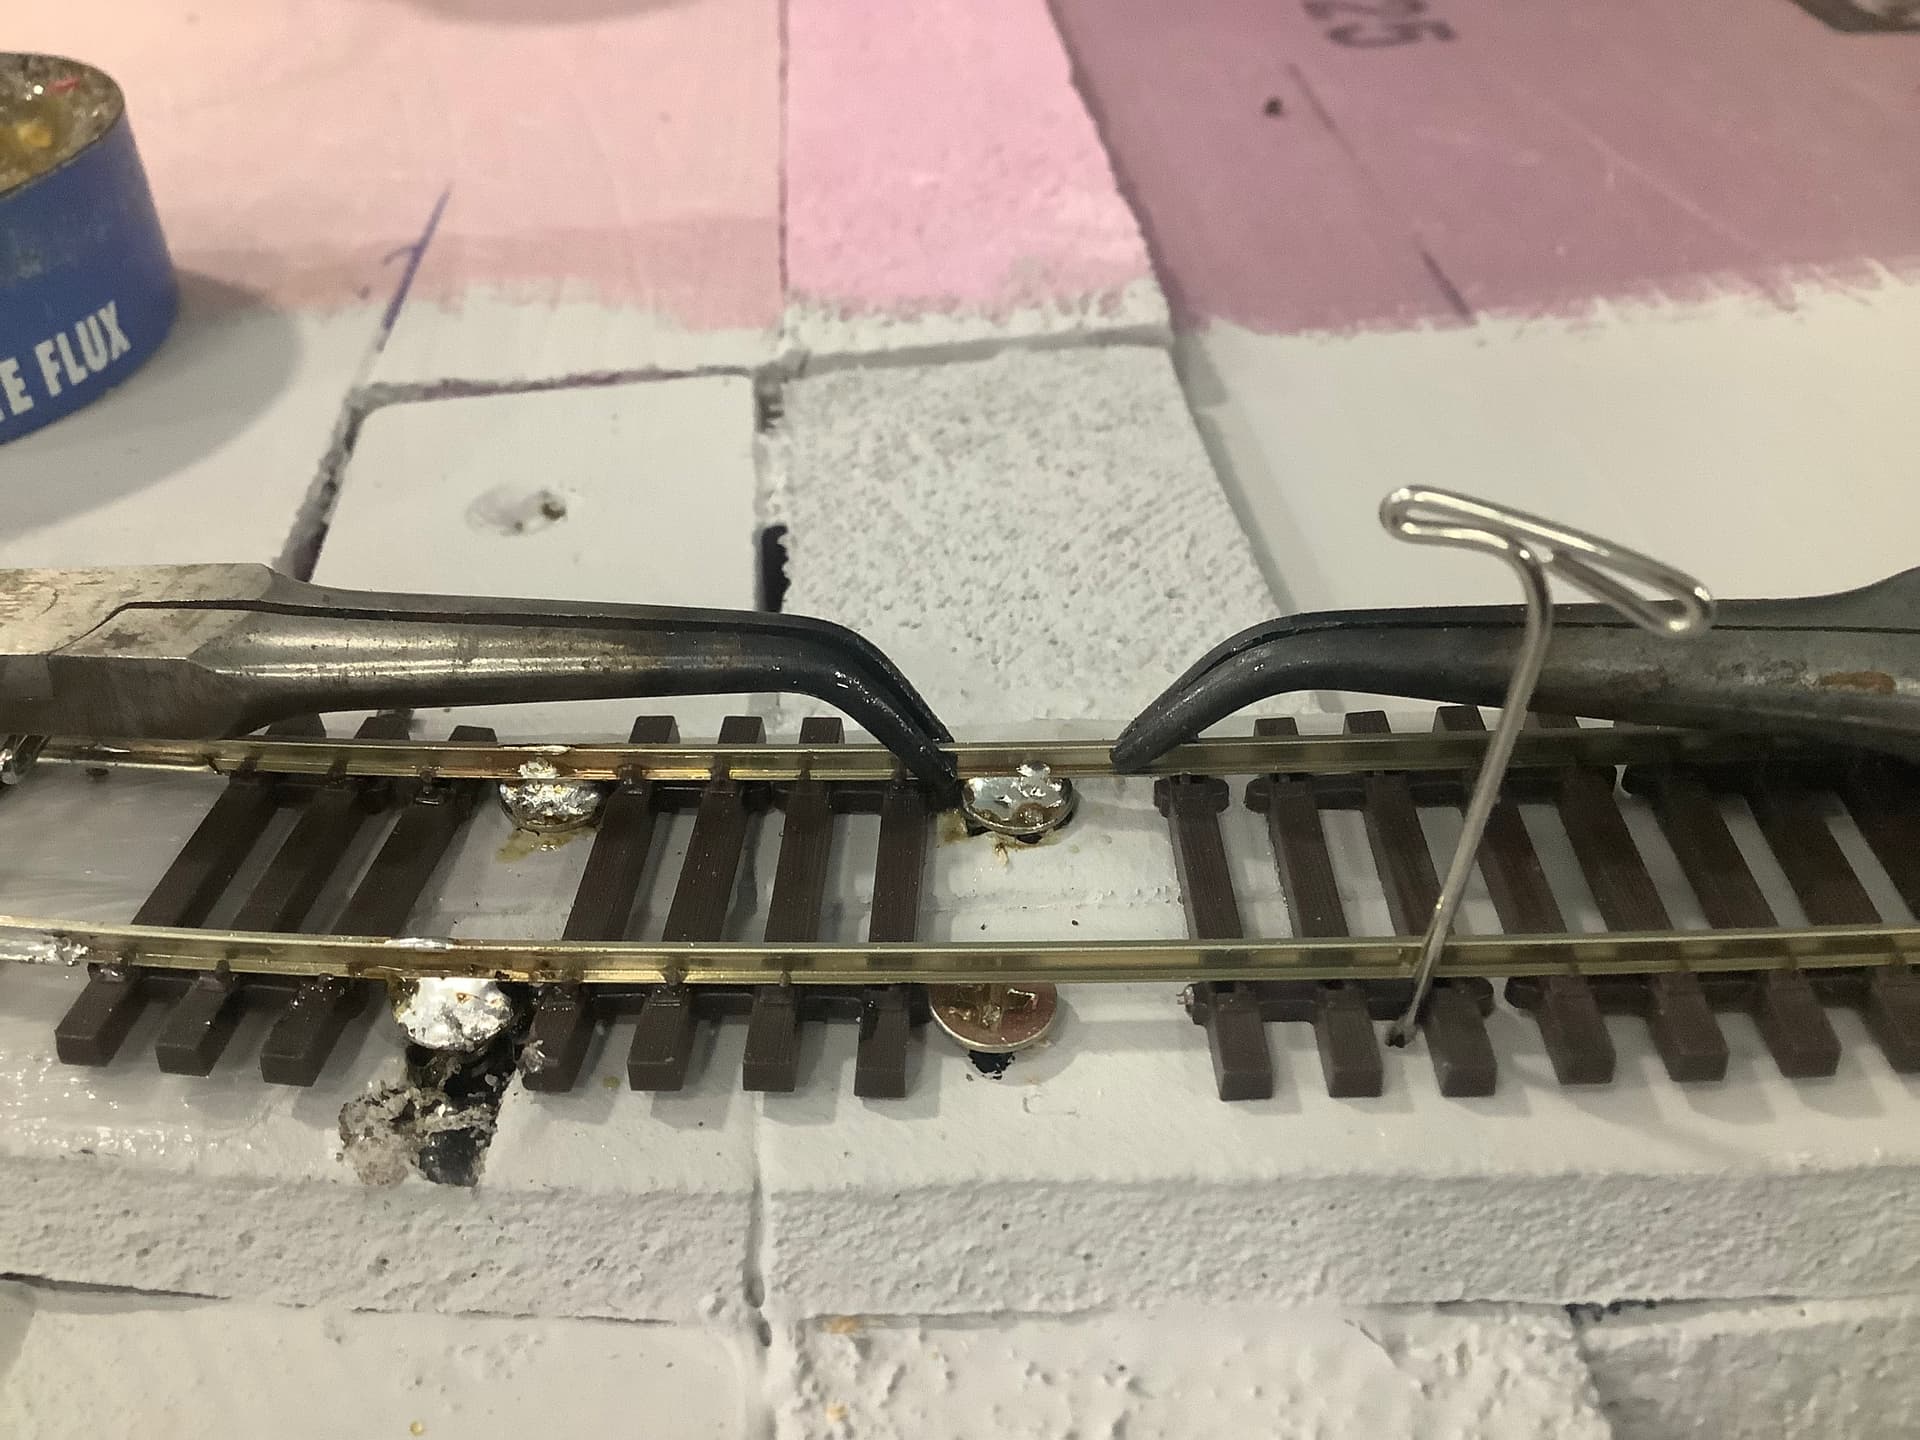
Welcome to the club. I would just add a few points to the great advice Woke gave already. I uses some bent needle nose pliers as heat sinks on both side of the joint i am soldering. Just wrap an elastic around the handles and they will gently clamp onto the rail.
In this pick I’m soldering the rail to a brass screw where there is a break between modules. So putting a lot of heat into the situation without melting the plastic ties. Same situation though when soldering rail joiners. I usually use a Weller 60watt pencil. With a 700F tip. Only a few seconds of contact are required to get the solder to flow into the joiner when using the extra flux.
You may want to look into getting some new rail instead of some of that old stuff as it can be really problematic requiring frequent cleaning.
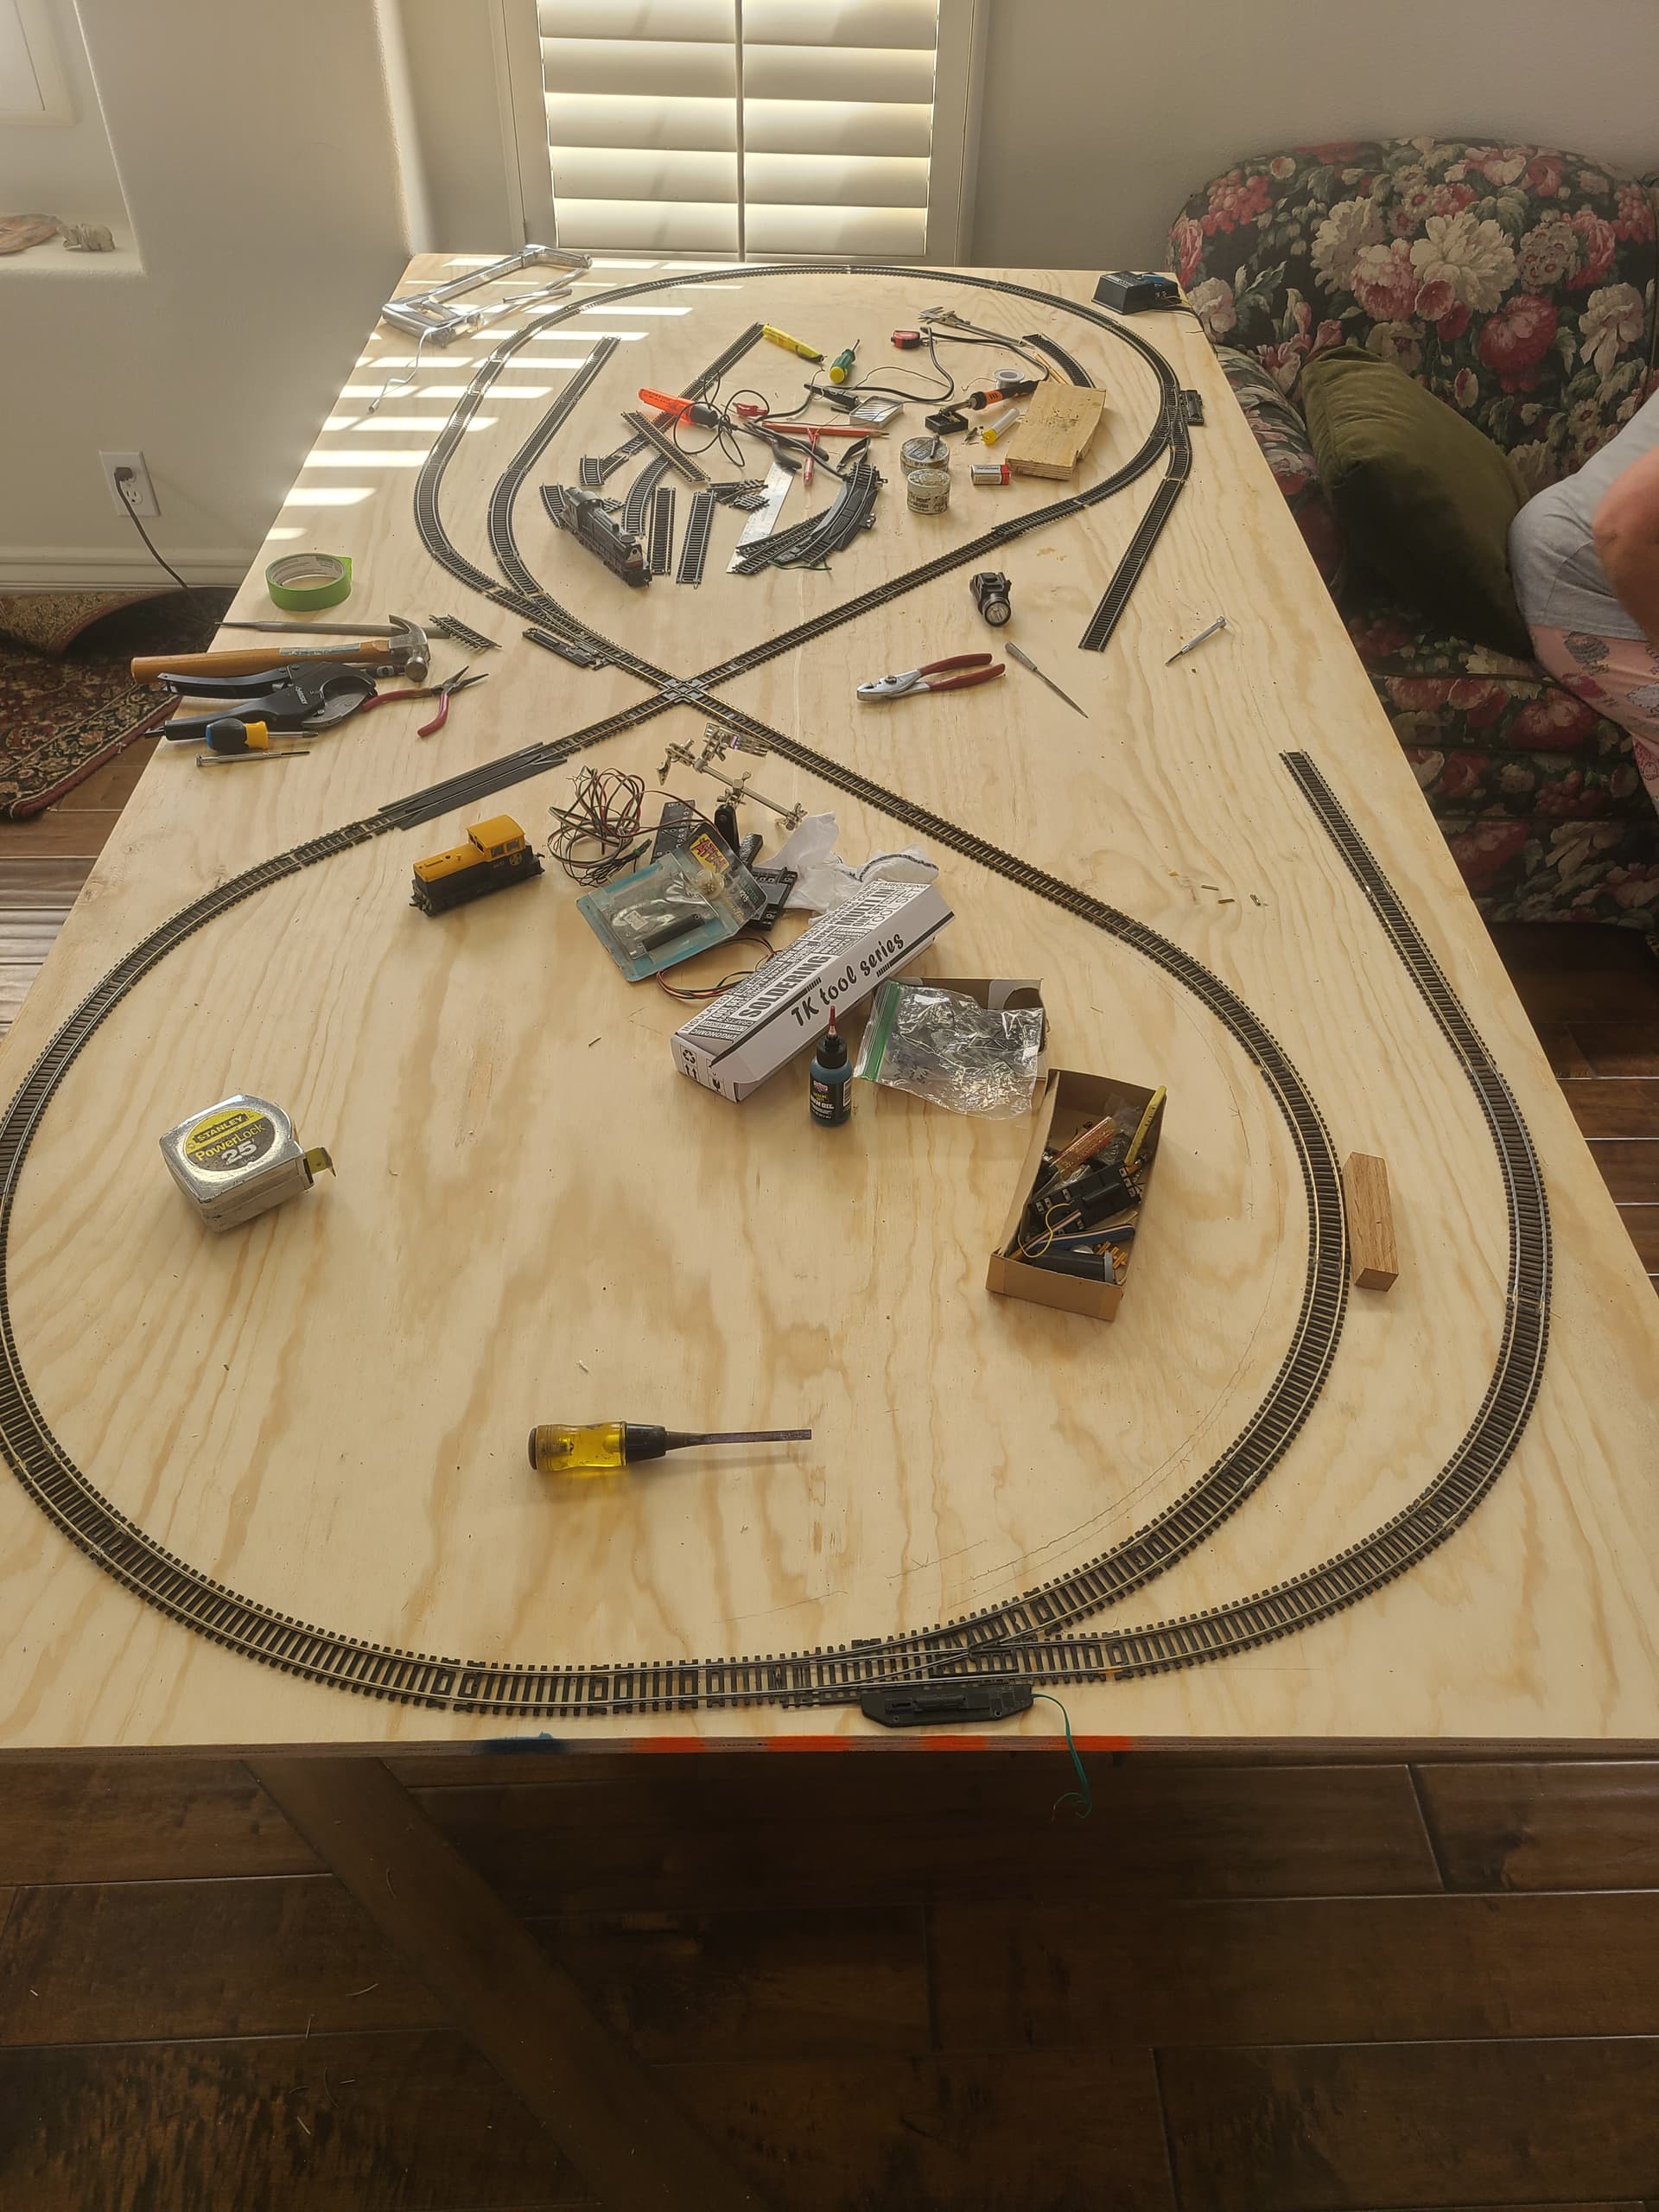
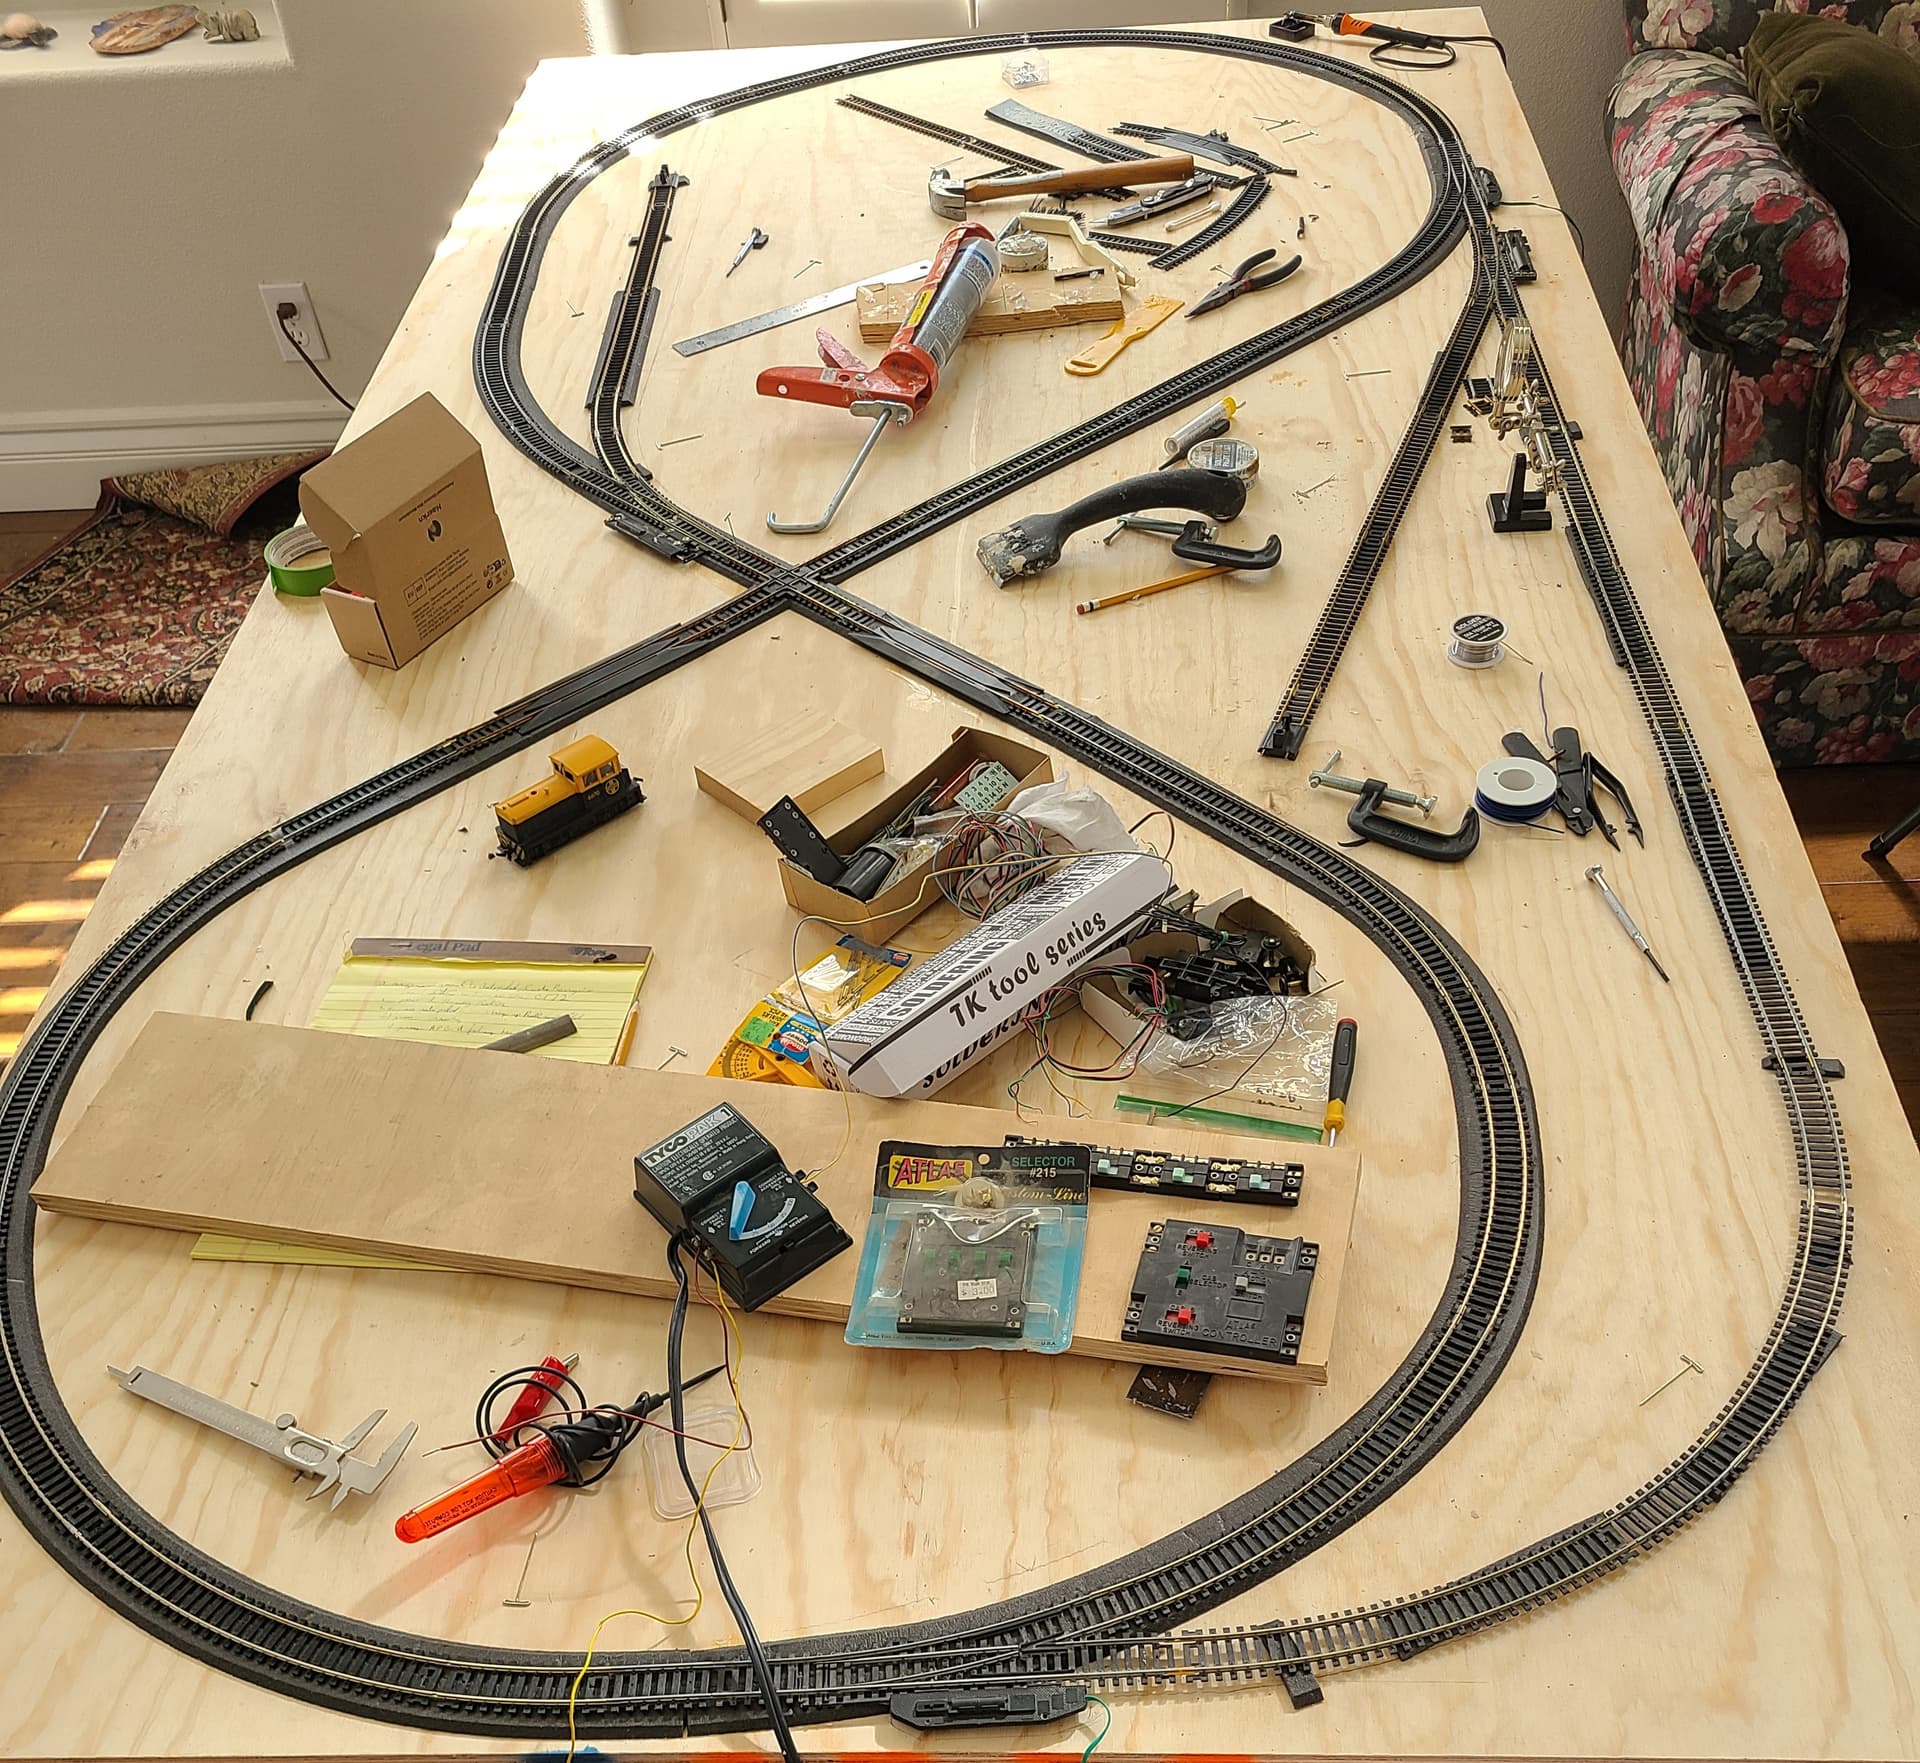
Very nice, Kim. PIctures really help. My soldering stinks. Speaking of pictures, get ready for a gut busing laugh for I am attaching a photo of what I am attempting. It is nothing like the craft you folks practice.
My plan is to trace the layout onto the 4x8 plywood, then remove the track and glue wood scenes track bed down with silicone caulking. Af
ter that sets up, I will caulk the track onto the bed. Since I do not have a foam underlayment I cannot use pins, but will pin the track in place with the spikes that came with the track They will not be pounded down flush with the track as I want to pull them after that round of caulk sets up.
I do not plan to solder the sections of track together and wiill only solder a few drop lines in a few places. If I am still here in a few months, I may want to pull things up and make a few changes and this should allow me to reuse most of the track.
No guffaws from here about your track plan. Quoting the late great Linn Westcott - “Model railroading is fun!” However anyone chooses to do it!
You can guffaw about this… I hate soldering! For anything! Along with anything associated with layout building! I know that all that is heresy! But I especially dislike soldering. And almost as equally, sawing wood for building benchwork! Ever since a Skil saw jumped back at me and nearly took my hand off.
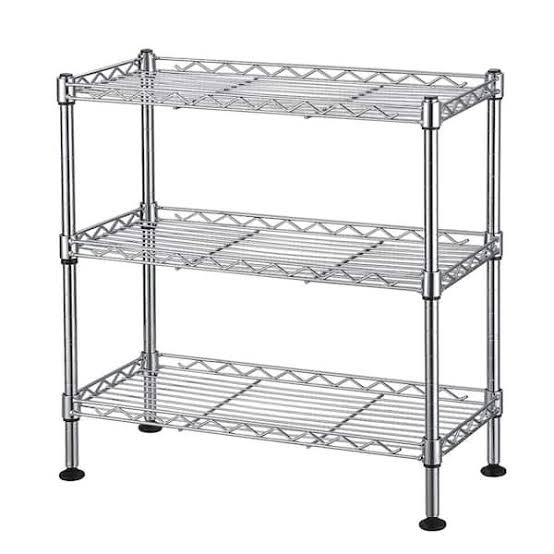
So. I completed my endeavor in building a completely solder- free and carpentery- layout system! In the attached picture you can see the metal shelving units I bought to hold up the pre-cut shelf boards I bought at the lumberyard. Here is a good picture of the shelving unit.
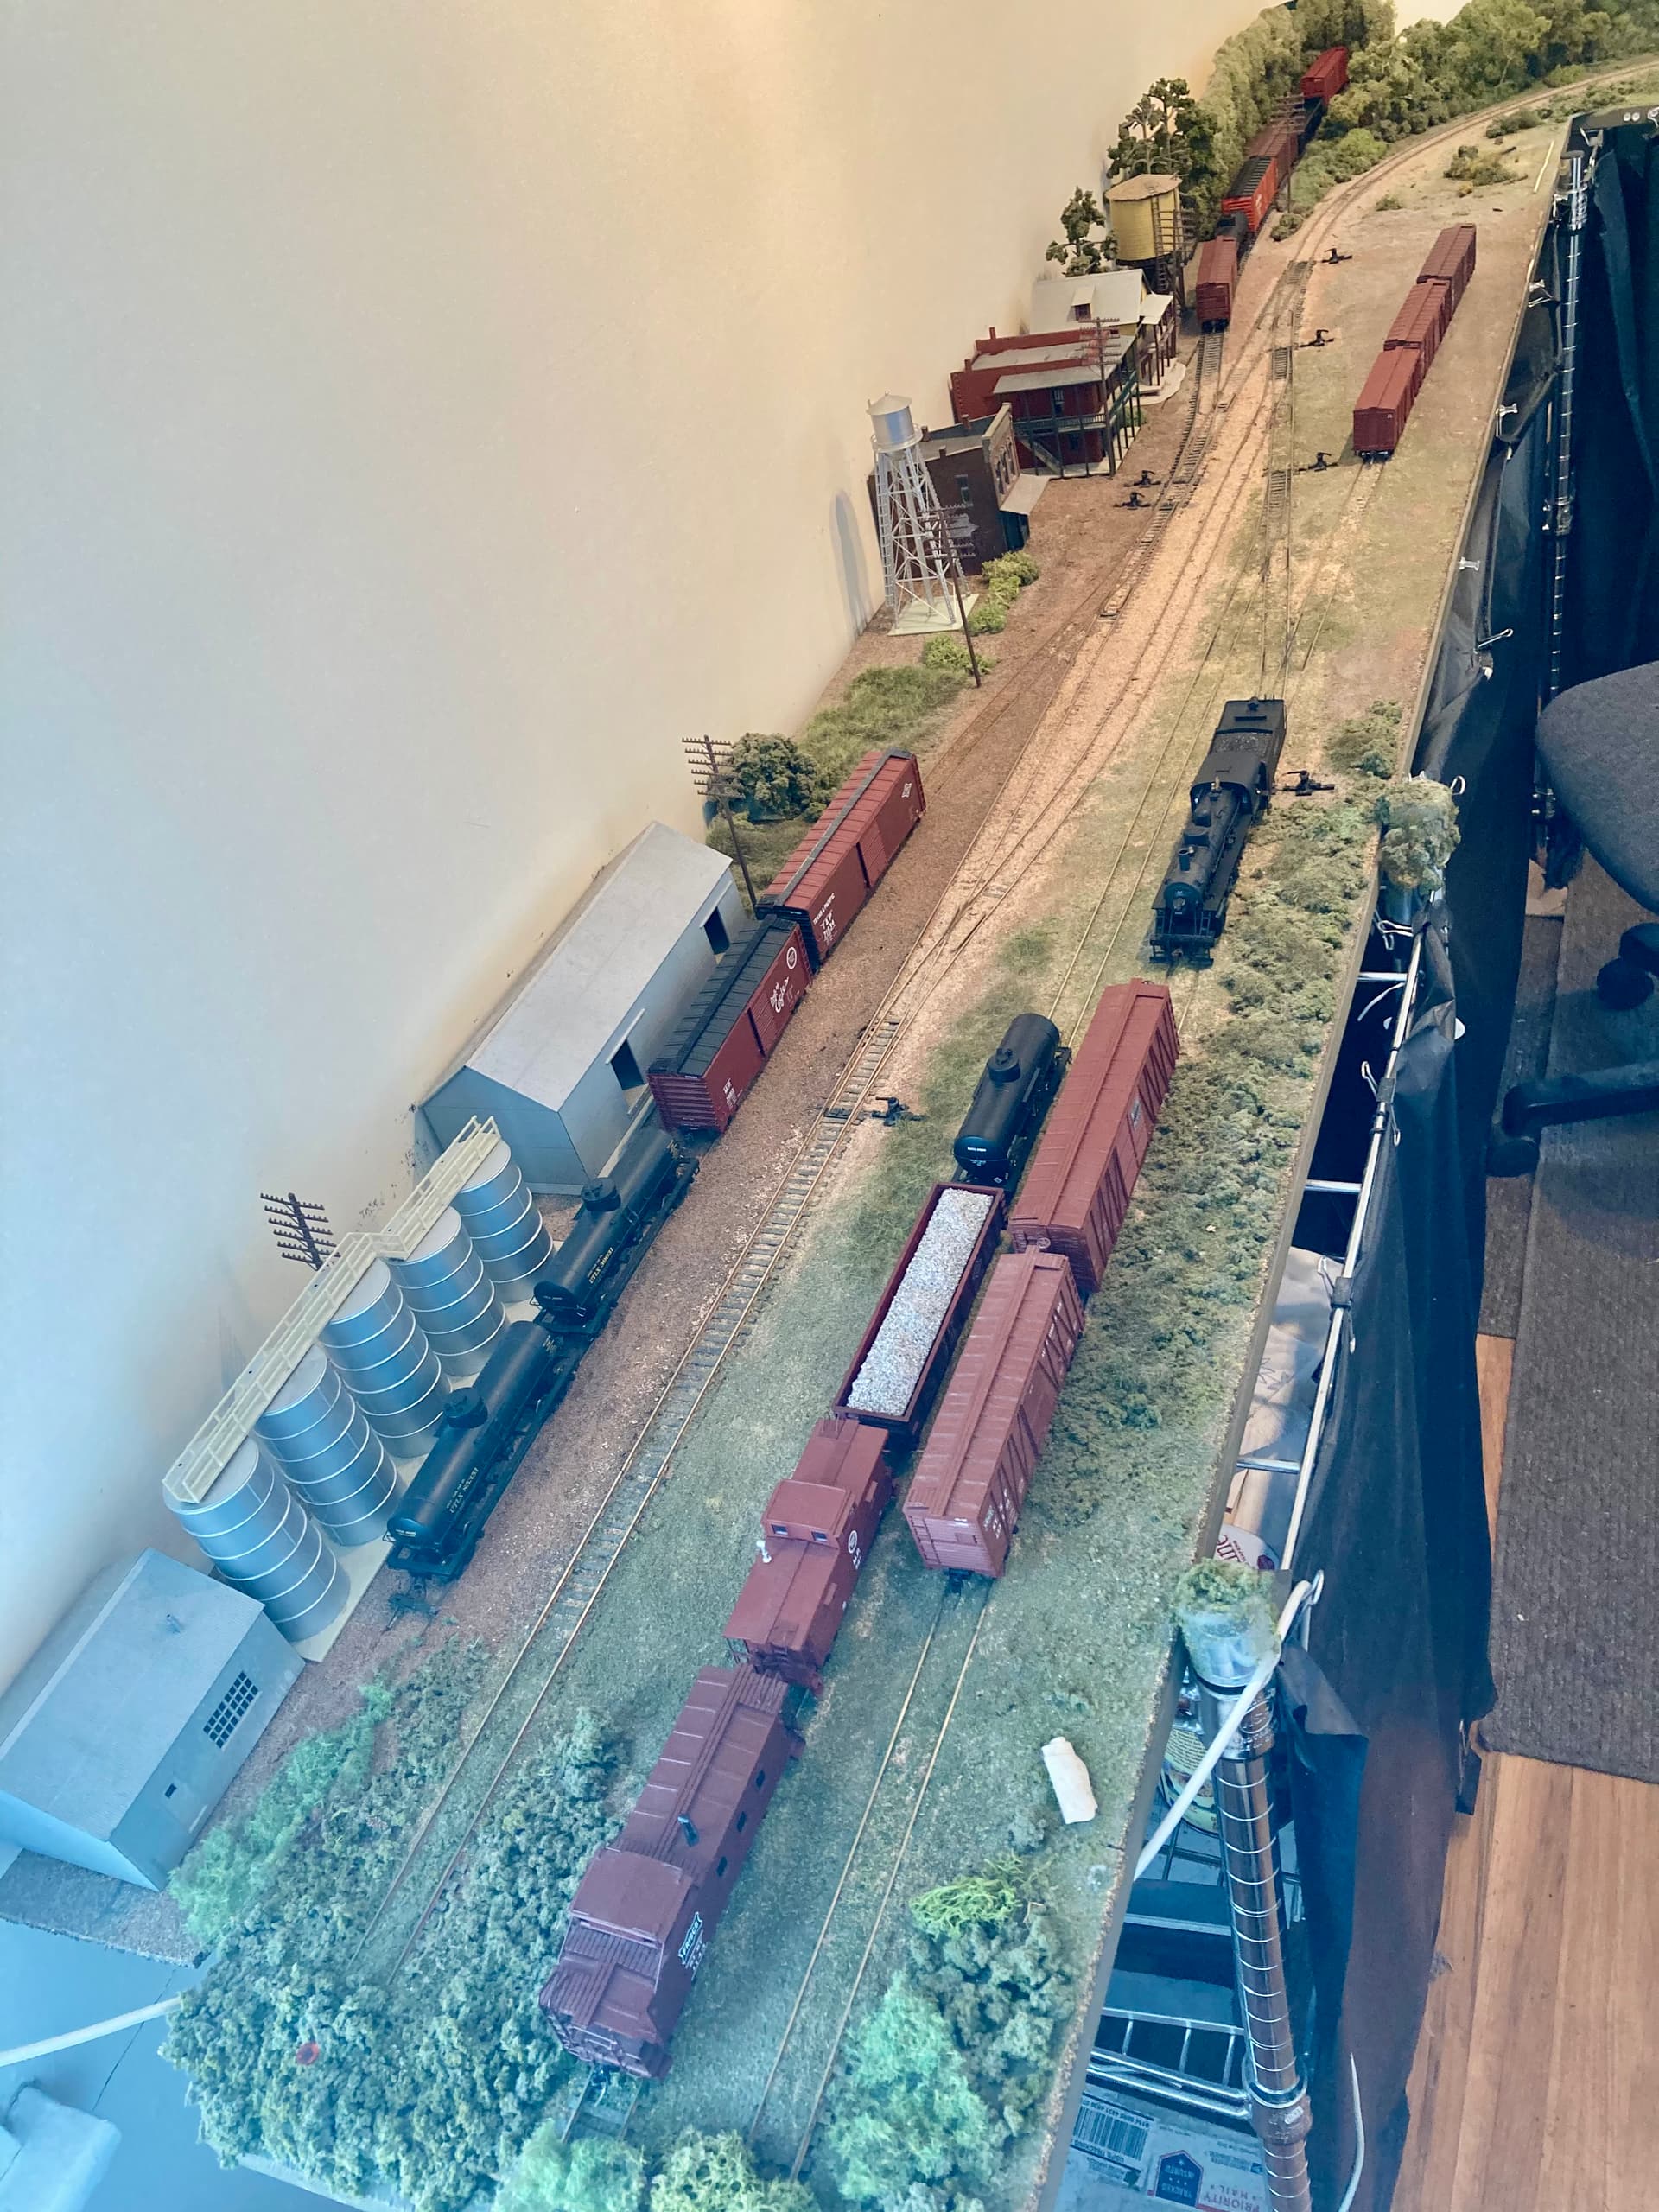
My enjoyment is running my short old-fashioned steam-era branch line mixed trains through the replicated countryside of my young days. I didn’t particularly enjoy building it, and scenery took forever, but now it’s mostly done And I’m happy with it.
One last tip (I hate the trendy word “hack”)….. I think it would be good advice for you to not use the steel and brass rail track you have if you can avoid it, Or try to limit its use onto the dead end spurs, where locomotives won’t run very far into. Don’t fasten everything down right away and you can replace it a few pieces at a time, but nickel silver rail is the state of the art these days and is much easier to handle, solder () and conductivity-wise is a whole lot better. I know, I had brass rail back in the Jurassic over 60 years ago when I first started modeling.
No guffawing from me. That is fine work. ( I have two of those sets of shelves in the garage.)
A skillsaw is one of the most dangerous power tools ever. (I almost lost a finger using a 10 inch bench saw. After that I learned about safety devices. I don’t believe any ready made were trhen available for the bench saw, so I build my own. Years later the experience helped me defend a wrongful death case for a factory workers loss of life. A long thin section of wood kicked back and lodged in the poor man’s temple as he bent over to pick up a dropped pencil. An anti kickback device was available but he didn’t use it.)
I believe I am going to complete this layout as per my picture, but later I may take it apart and add a layer of foam over the plywood and replace the intersecting straight aways with a section of raised flextrack. In order to get at least 2.5% rise within the confines of an 8x4, I may drop one section below the surface of the foam board while raising the crossing section above the foam’s level. But got now I am learning the rudimentary basics.
All this is being done on the one 8’ x 4’ sheet of plywood for which I havan’t a table. It just rests on two old HD sawhorses. I will muck about with it for a bit and then it goes on one of the walls of the garage.Perhaps this coming November I will set it back up and perhaps add a foot or so to its width and length..
If you hate track and structural soldering, buy or make a resistance-soldering rig. Some of the units I saw marketed from Asia actually featured Shotweld-style control over current and time to limit the spot heating; this is just as valuable for brazing as it is for alloys, and structural soldering is low-temperature brazing. Use solid solder and no-clean flux, and you will rapidly get the hang of how much of a chip or short length of wire assures strength and conductivity.
Who says T-pins only work in foam? You can hone the points, and a sharp rap will sink them into the plywood; you could also use wire nails or finishing nails and pull them out with pliers afterward.
The nails I have been doing came with the track long ago. I found that as long as I tap them in a hair short of flush,I can test run a locomotive over the track. Then, when I am satisfied that all is well, I can mark the center of the track on the plywood in preparation for gluing the bed down. After that sets, I spread glue on the foam, lay track on it, and use those tiny nails to pin it all to the plywood while it sets up. Of course I will only do a couple of sections at a time.
I still want to picik up some of the solder and flux you recommend as I will at least be soldering a few joints as well as a half dozen drops. Besides, I expect to try something more compicated down the road.
If you place your drops at joints you can get away with pre soldering them to the joiners prior to assembly so you don’t have to worry about exposure time on the plastic ties.
Yes for me to i know MRR is gonna pretty much be a winter pastime. I enjoy the outdoors to much in our summer season.
That bit about presoldering drops sounds smart. Precisely how? I am thinking to the bottom of the joiner.
Are you saying don’t solder all joints or solder all but reduce plastic tie exposure time where you have a drop?
Most every day is here in Southern California is good for outdoor. We almost got talked into Michigan a few years back, but our son got a residency in Los Angeles.
Thats correct. Bend the last 1/4 of the bare wire 90 degrees and pre tin it with some solder, Do the same with the joiner before you solder the wire to it and it will all go smooth.
Sorry i didn’t see your second question. Hopefully i got back in time. Initially since you plan on taking this apart next fall if it was me I would not solder any of the rails together with the joiners just run a few drops. If your using new rail joiners they should be stiff enough to make a good connection and this will make it a lot easier to reuse the track next time you lay it, being a 4x8 project with a few well placed drops you wont be to far away from them anyways. If you find a section that is temperamental you can either possibly pinch the joiners a bit to get the connection you need or run a drop to the section directly. Also if you do decide to solder the track together consider not to solder the turnouts into place. For ese of reuse in the future.
Kim, you nailed it. I may disassemble it all. More likely I will modify what has been done. Hence, in addition to being a poor solderer who is too prone to melt plastic ties, I am replacing many joiners.
In addition to the track being held in place by clear silicone caulk, I may use a few tiny brads, called spikes. I learned that if I tap them in so their heads are just proud of the ties, they can later be removed.
Should I make the improvements I have in mind, I may replace much of the nasty brass track with flex, but will reuse the nickel silver.
As a suggestion: a much better thing to use is ordinary acrylic ‘adhesive caulk’. Use a relatively thin layer, which will dry clear enough that it does not show when you add ballast. This is strong in shear but comes up easily using a putty knife without distorting the track.
‘Track fixation’ has been one of the timeless topics on the forum over the years. Unfortunately, I think many of the posts on best practices may have been truncated when they were transferred to the new Discourse platform a year ago.
Thanks Woke. I am nearly done with this layout but if I start another in a few months I will try the acrylic. It turns out that I have a couple of tubes of it in the garage. Acrylic caulk is also half the price of the silicone caulk.
I wasn’t going to do ballast, but I looked at a video about it and think it worthwhile. Meanwhile, I have laid all the track I can until more track bed arrives.Meanwhile I am going to drop some feeders and wire the four turnouts. To do so I will attach a piece of scrap plywood on which to mount my old controls.
My wife should also approve adding a little color by ballast.
A thought came to me. It is difficult for to run the track down the middle of the.road bed which is glued down per tracings of where the track will lay. What if it isn’t caulked down but slipped between the track and the plywood. At that point the edges of the bed could be slightly lifted to enable a bit of caulk to be placed under them. Then a light layer bit of caul is applied to the top of the road bed beore the track is laid on it.
After all is cured, any mess will be covered with ballast held in place with watery glue.
This is how things stand at the moment. I don’t know if I have ther reverse wiring figured out but there are both tracks are insulated just where the long siding meets the first of two turnouts. Near the partially pictrured couch.
One approach I’ve seen is to take advantage of ‘split’ roadbed (you can do this with some one-piece foam like the Woodland Scenics gradient sections by cutting longitudinally with a carpet knife or hot wire) to follow the line. Use a good adhesive to bond one-half the roadbed 'to the line, all the way through the section you want to lay track on. Then when you bond the ‘other side’ the gap between the sections will be following the line, and you can tap in finishing nails or T-pins to mark the centerline if it’s too hard to ‘follow the crack’ visually. The acrylic caulk is ‘the’ material to bond the track with ties to the roadbed.
Be careful when ballasting not to ‘overglue’ – if you create too solid a ‘shell’ you’ll have reverberation and noise when it hardens!
I advise sprinkling and spreading the ballast ‘dry’, then wetting the track area with a fine mist of commercial alcohol with a few drops of dish liquid added as a ‘water breaker’. You can then, while the area is still wet, apply your ballast fixative of choice (I’d tentatively recommend thinned PMMA glue or ‘matte medium’) taking care to keep it off the rails and ties – I used a glass dropper with a fine tapered tip for good ‘droplet’ control. The previous spray ensures the fixative will go into the ballast with capillary action rather than ball up, but will still be thick enough to bond underneath.
Sounds good, Woke. Any idea how much ballast is needed per linear feet of trrck/roadbed. I suppose it is a mafter of preference, but not having seen any in may years is it probably best to go with fine or course ballast? Since posting, I found a trains.com topic on the size of ballast and the consensus seems to be to use a fine ballast for HO.
You will want to have the reversing section as long as possible so you have time to flip your switches for polarity change on the main layout section as the locomotive passes thru that reversing track.
I use a product called Supercal for ballast it has about 70% particles roughly ranging from .5 to .8mm in size. It is available from farm feed supply places around where i live. (Its dirt cheap too.) It is crushed calcium carbonate (limestone) same stuff as the Rocky Mountains are made of so to my eye it is just the right colour for what i see used on the main CN line that runs by my place. But Ballast on real railroads can be several colours depending on where it is sources. So you may want something ells. I beleive several colours are avalible from hobby shops.