Hi everyone, looking for best practices for building wooden model craftmen kits like Ambroid, Quality Craft, Gloor Craft, Ulrich etc.
I collected a bunch of kits and first off I noticed the instructions say to sand seal all the wood pieces before beginning construction.
If one seals the wood, then what is the best adhesive to assemble the kit?
The kits also have cast metal parts that must be glued to the wood.
So, what have people found to be the best adhesive to assemble these kits that have a sealer on the contact surfaces and that lasts?
ACC, epoxy, silicone, construction adhesive, gorilla glue, Walthers goo?
I understand the point of the sealer sealing the pores of the wood so the car exterior looks like metal when painted. My thought would be to assemble the kit with wood glue and gorilla glue [non expanding] THEN seal the wood and then paint.
Just curious what people do. Thanks for taking an interest.
I haven’t done this in years. As I recall, I used sanding sealer on the exterior side only and polished it with 0000 steel wool.
This worked pretty well, but I did have some minor warping issues since I only did one side. I used wood glue for wood to wood and Walther’s Goo for metal to wood.
Good luck these are fun kits.
Paul
I have some that I started in 1967 and haven’t finished and I still buy more. I believe that I probably started with Elmer’s glue. Now I use Sig Bond which was made for flying wood models. I will glue cast metal parts with Beacon 527 (you can find it in the craft aisle at Walmart). From now on, I am going to paint as much of the inside of the kit to help prevent warping. Also make sure you get your weights inside before closing up. I bought a large can of sanding sealer at Menards. I won’t use sanding sealer if the kit is supposed to be wood.
Good advice above. I used sanding sealer. Now I would use CCA with accelerator where wood glue wouldn’t work. I used to build balsa airplanes and the CCA cut the work by about 75%.
Hi Joe,
I’m building (but have yet to complete) three Quality Craft Models (QCM) kits manufactured in the 70s. Here’s what I did…
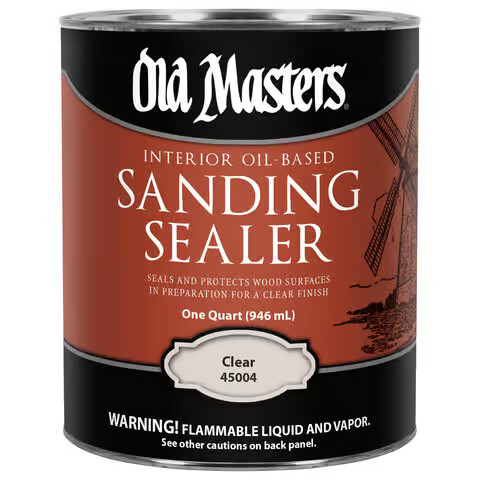
- Sealed the wood prior to assembly with two “light” coats of Old Masters Low Satin Clear sanding sealer (PN 45004):
- Sanded all surfaces after each coat of sealer with a very fine 3M Scotch-Brite pad to remove any high spots.
- Wiped down all wood surfaces after sanding sealer had dried with a rag dampened in mineral spirits to remove wood dust.
- Stirred sanding sealer VERY well prior to each application; at the same time being careful to minimize creating ANY bubbles as I stirred. Key: Do NOT wipe your brush on the edge of the can! Let the excess drip off each time you refresh the brush with more sanding sealer.
- Used a good-quality, natural bristle brush to apply the sanding sealer.
- Cleaned and wiped down ALL metal parts with white vinegar then 99% isopropyl alcohol to remove any oils or grease. I may have also used a tooth brush to get into nooks & crannies.
- Adhesion:
- Wood-to-wood - Wood glue or Gorilla CA - Depends on amount of surface area
- Wood-to-metal - Gorilla CA
- Wood-to-plastic - Gorilla CA
- Plastic-to-metal - Gorilla CA
Joe, I would discourage you from applying the sanding sealer AFTER assembly because it’s more apt to pool in corners, which will be difficult to remove and has the potential to cover up detailing. Scuffing the surface with the Scotch-Brite pad after your 2nd coat of sanding sealer should give the surface enough tooth for your top layer of paint.
FWIW,
Tom
Here’s one of the QCM kits that I still need to finish: PRR 50’ auto boxcar…
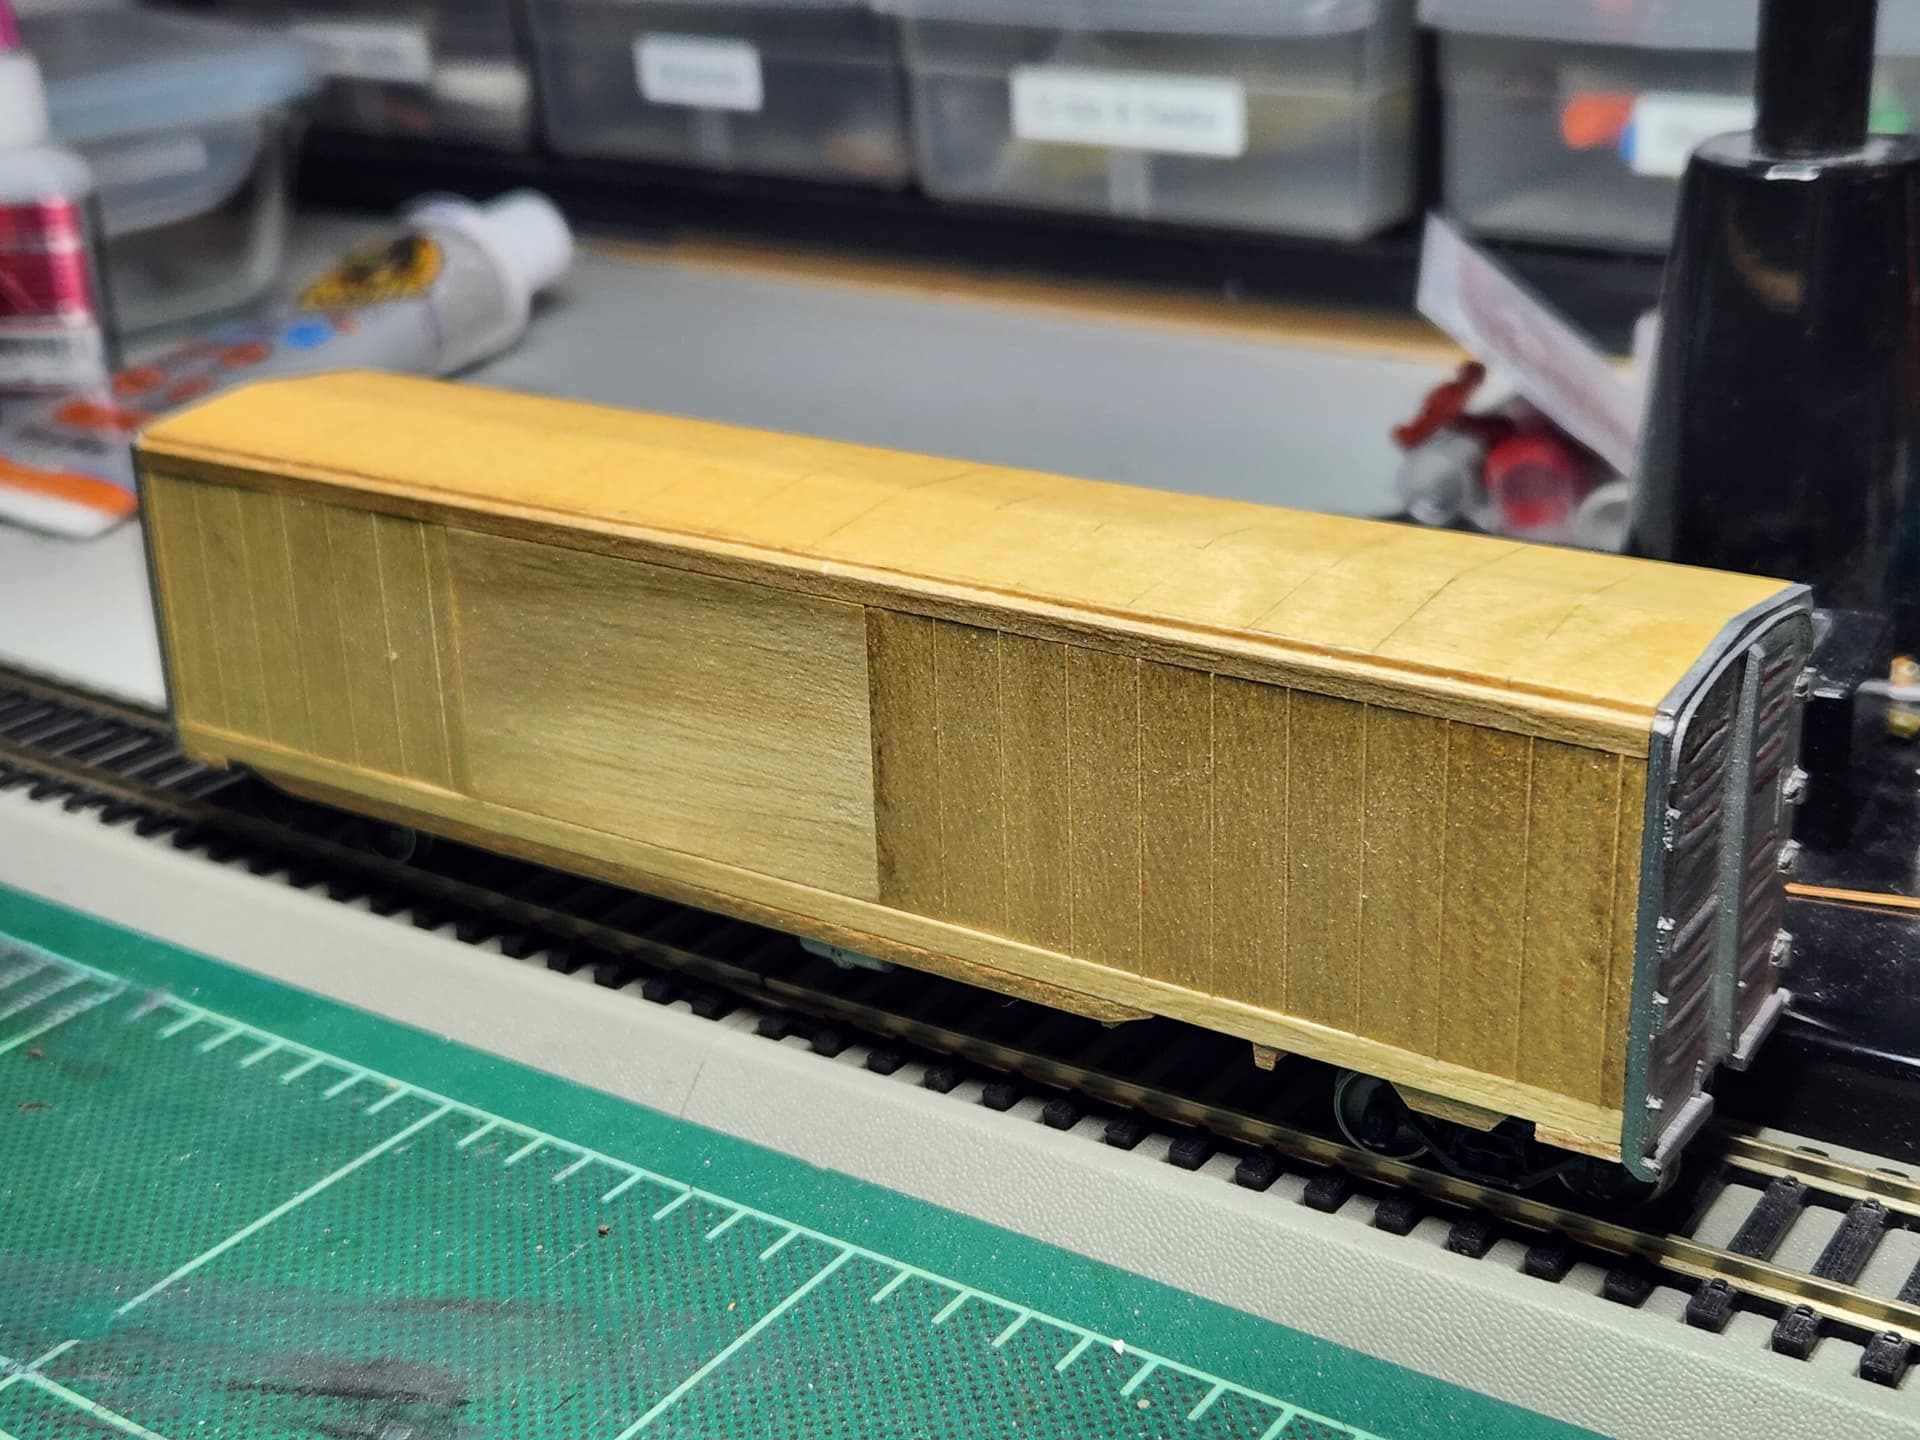
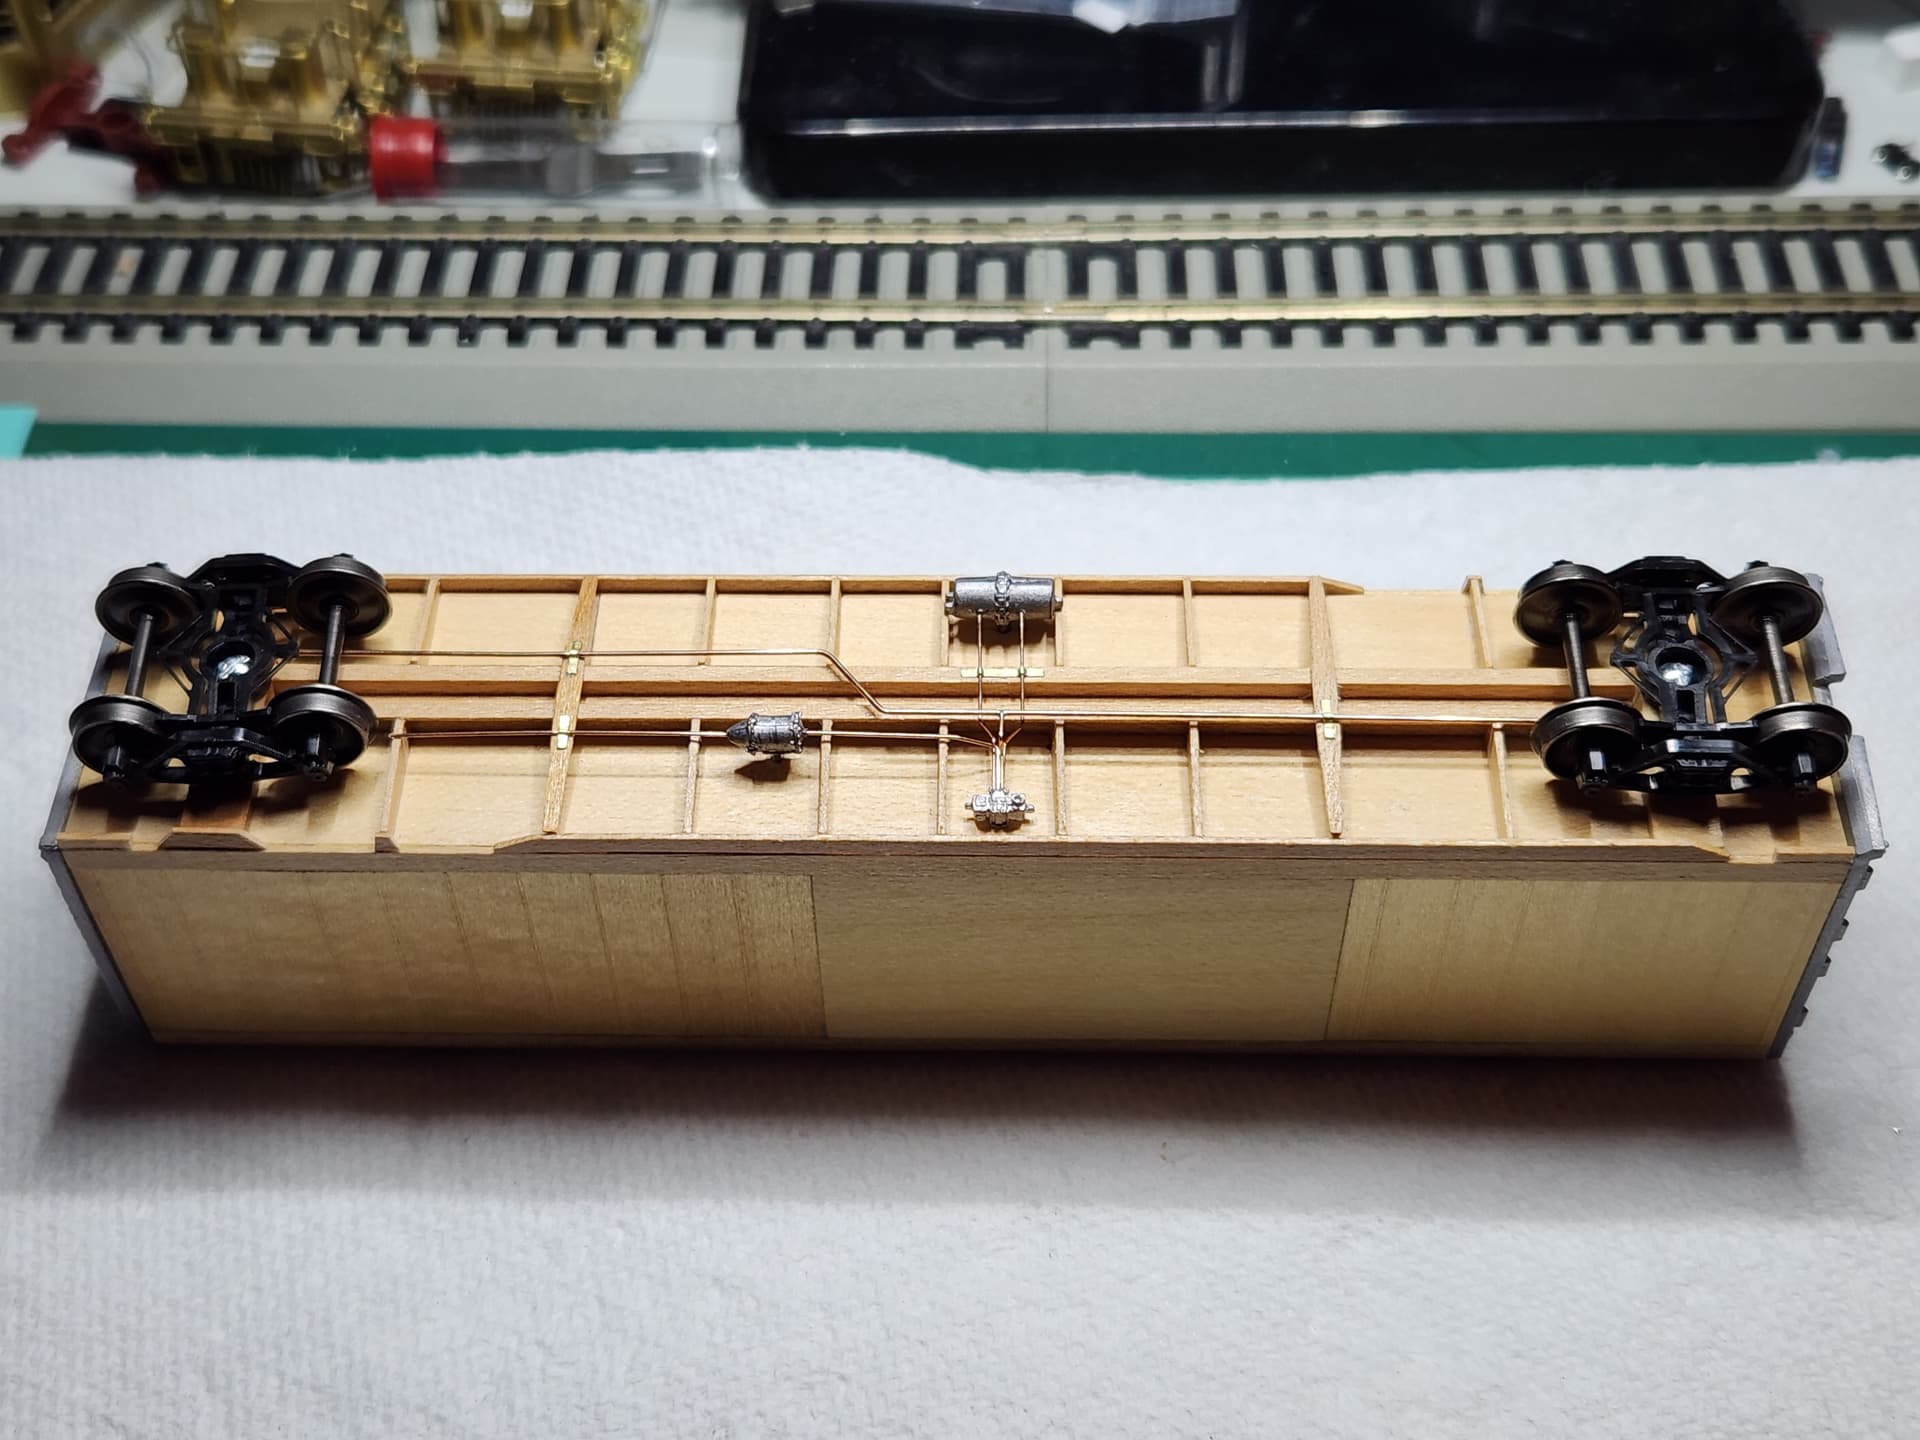
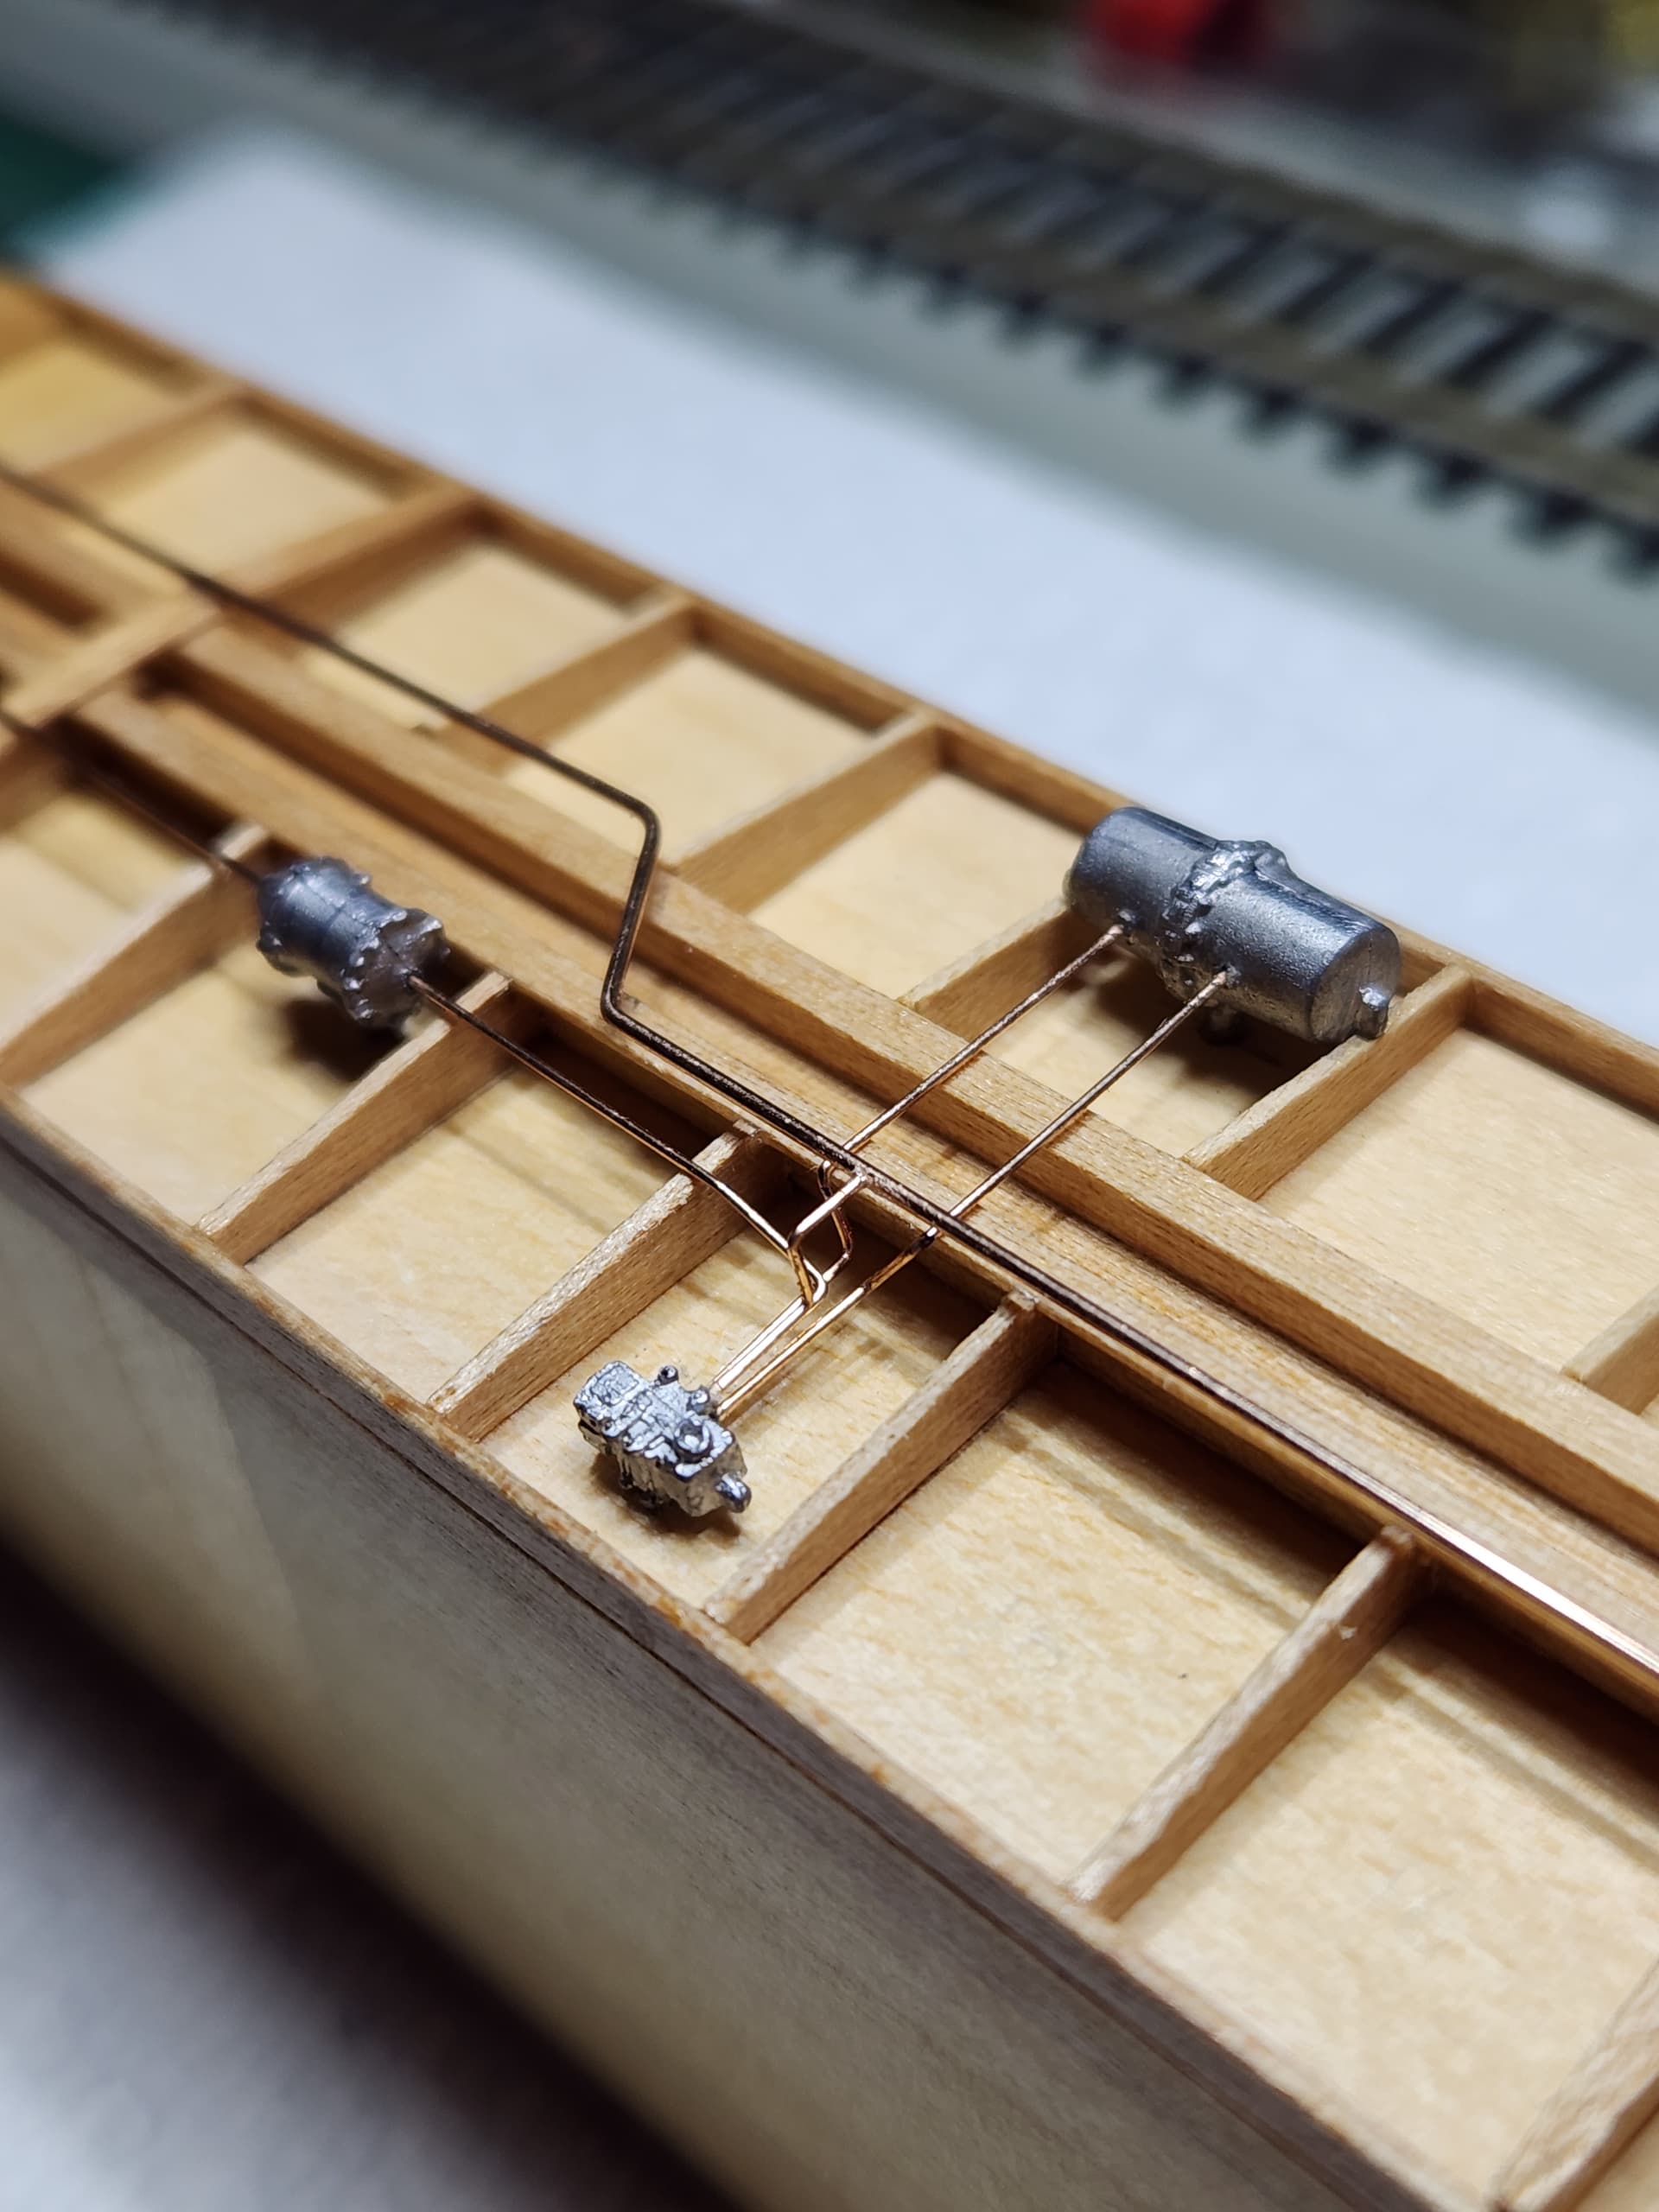
I’ve enjoyed assembling these kits. They are challenging…but they are also rewarding when done well. And I’m surprised how well the bass wood is after 50+ years of sitting in closed product box.
Yepper. Need to get this one done. 
Tom
Hmm wow okay so as long as I burnish or sand off some of the sealer at the glue joint, the glue will adhere and form a bond. Thanks great detail.
Everyone had great input that I can use. Thanks. I’m intrigued by two unique kits, quality craft model 362 the well flat car and 318 the can stock car.
The well flat car is one of the other two kits I’m working on. This is the NYC 61’ well-hole flatcar…
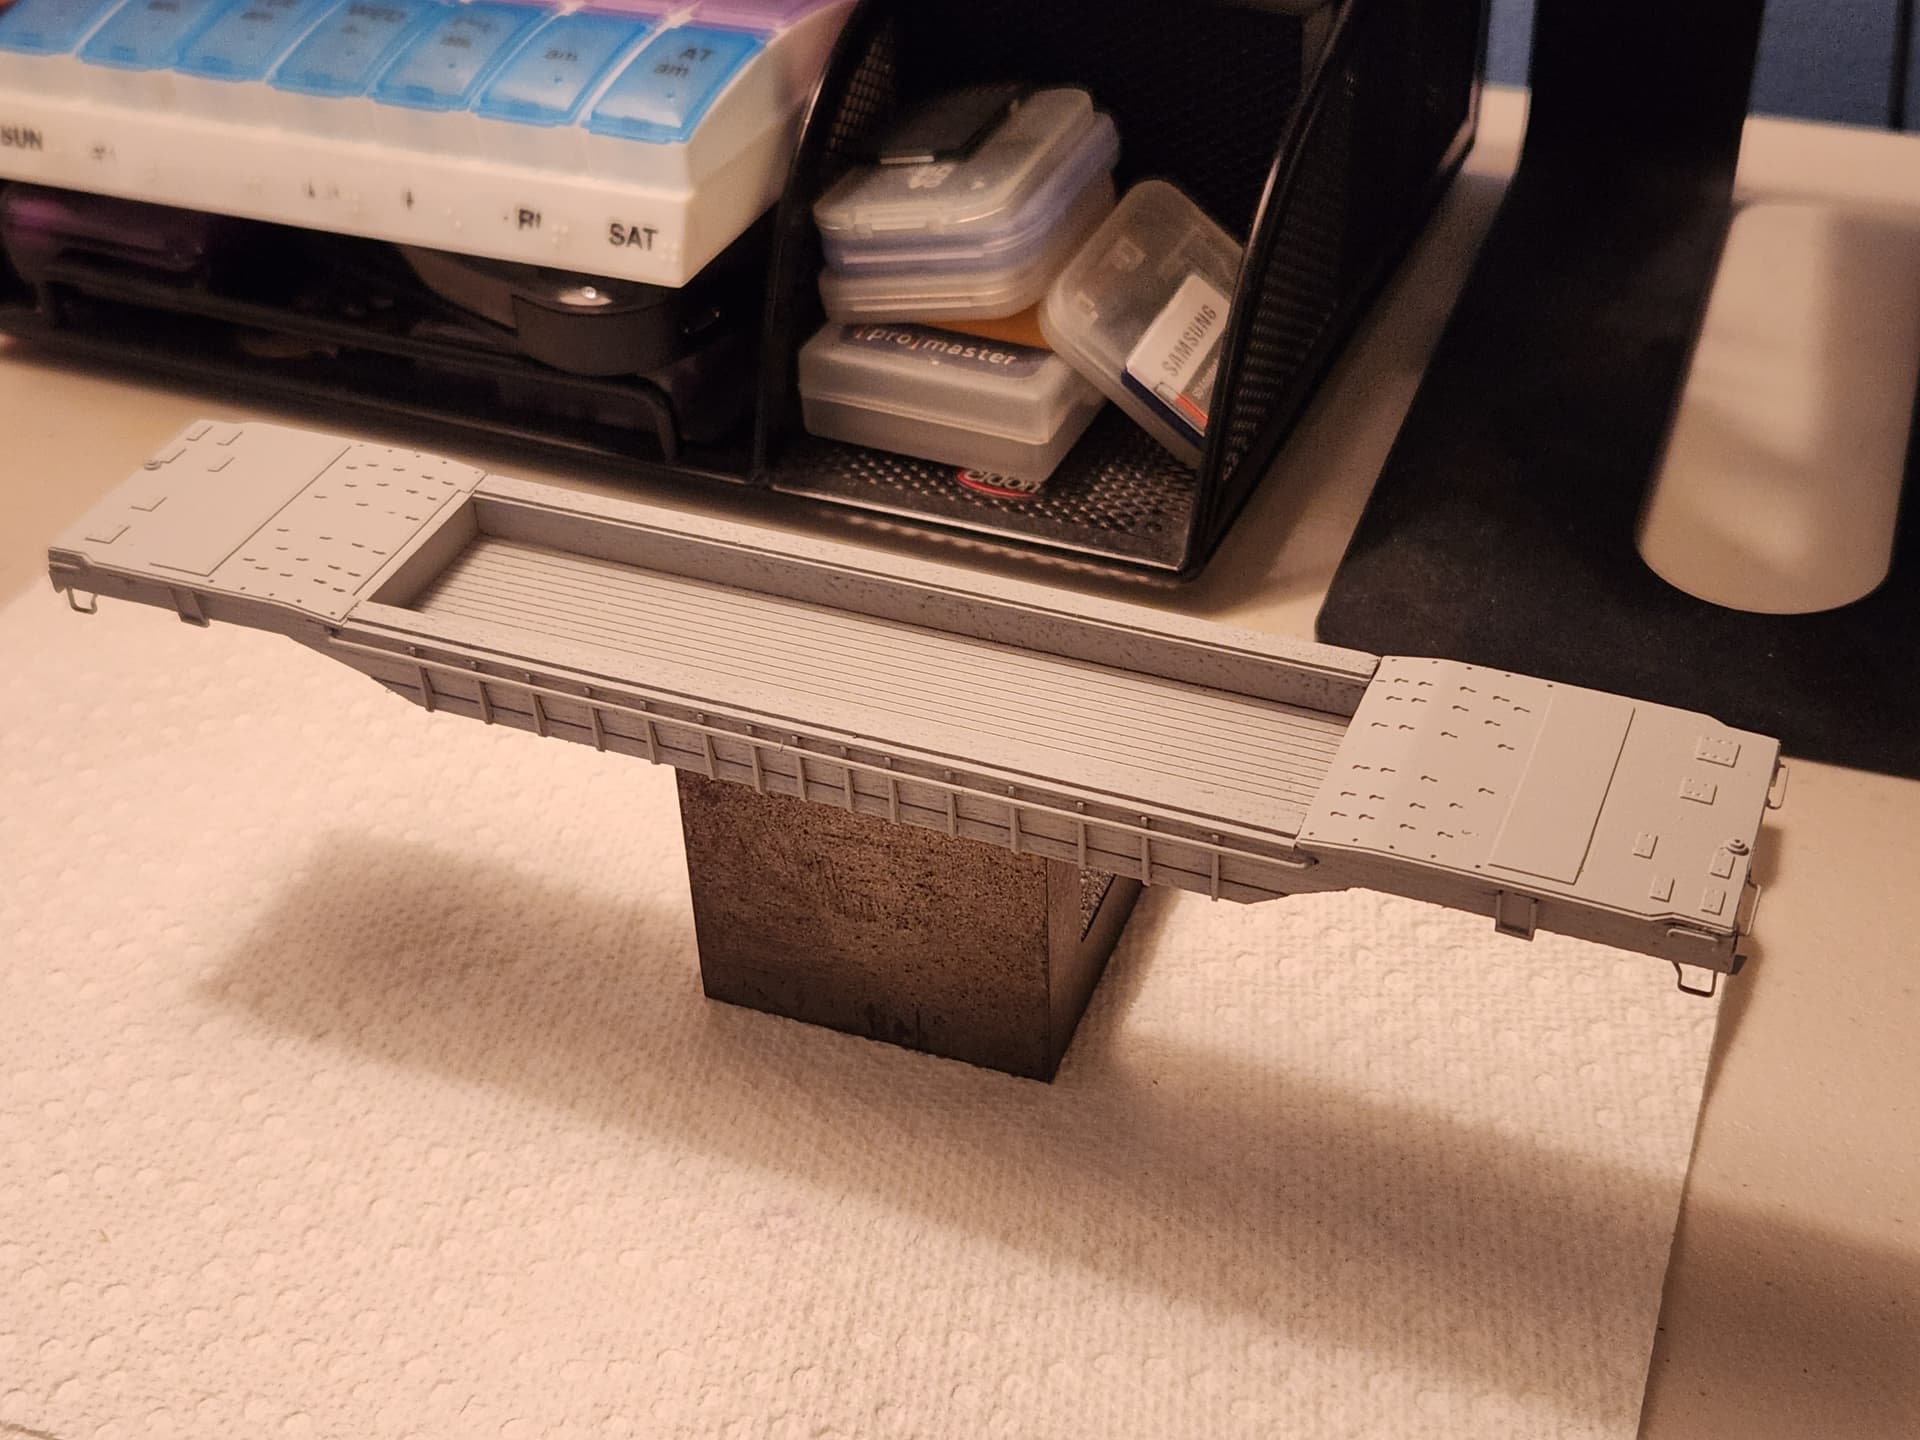
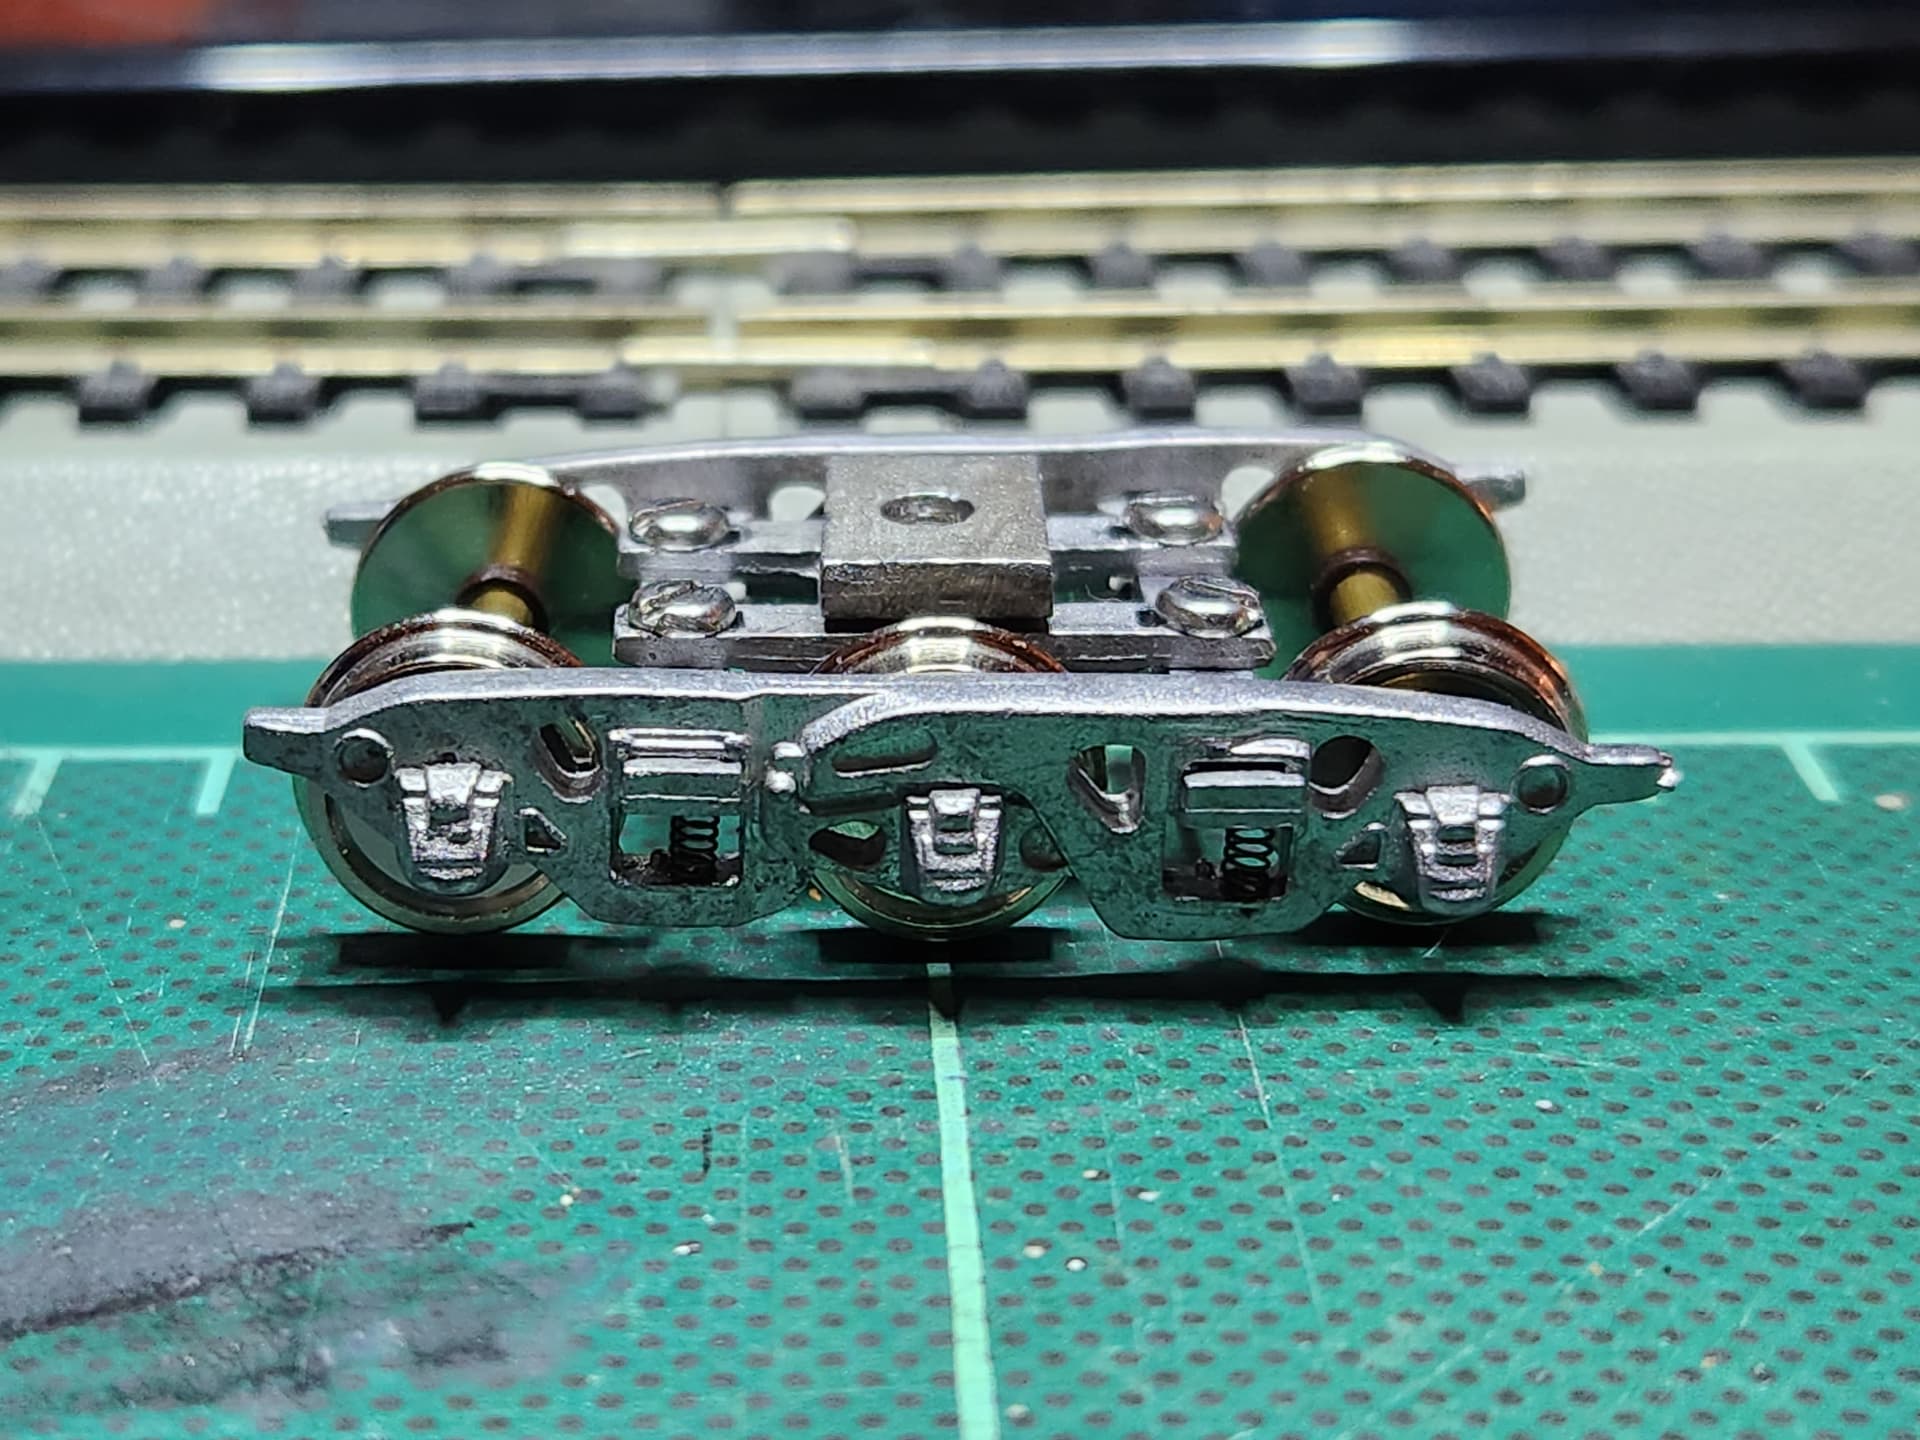
The trucks are challenging to assemble and install - especially if you want to be able to remove them later for maintenance.
Also, one thing I neglected to mention: I only applied sealer to the exterior surfaces of the boxcar. Any interior surfaces remained bare wood so that the wood glue or CA could bite into the surface.
I’ve found the 50-year old plus bass wood to be very stable with these QCM kits so I’ve never experienced any warping with the wood after applying the sanding sealer.
Tom
 WOW! That looks great! From EBay I picked up the C&O version NYC version. I plan on drilling out the tie down chain holes on the end plates to give the model added depth. Spring Mills Depot made some really awesome tie down chains that would really enhance the model. Here are some pictures of the tie down chains. Go to springmillsdepot.com and under DODX flatcar tab for tie down chains. SPRING MILLS DEPOT - DODX Heavy Duty Flat Car - Tie Down Chains
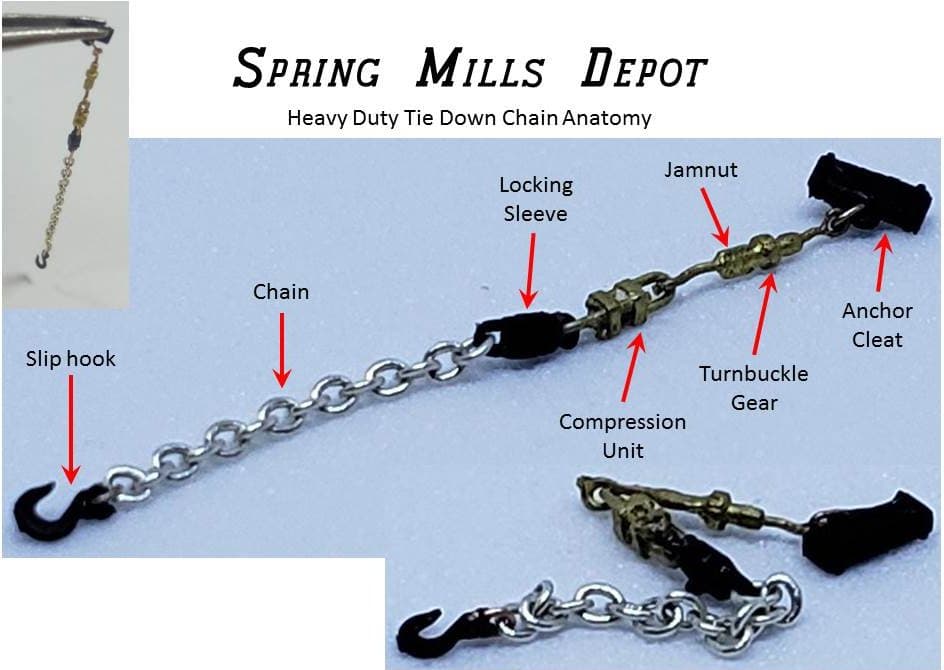
FYI… I have no affiliation or connection with Spring Mills Depot. I just never seen such an accurate creation of a tie down chain. Again the item was well done and I wanted to share.
Could you expand about this a bit? Did the trucks come with the kit and require assembly, or do you mean an issue with attaching the truck to the body?
Thanks
Dick Y.
The trucks have to be assembled. I think they are made of white metal. You have the truck sides stabilizer bars, springs to install and then assemble it to the bolster. Then attach it to the car frame. Here are some pictures of the pieces.
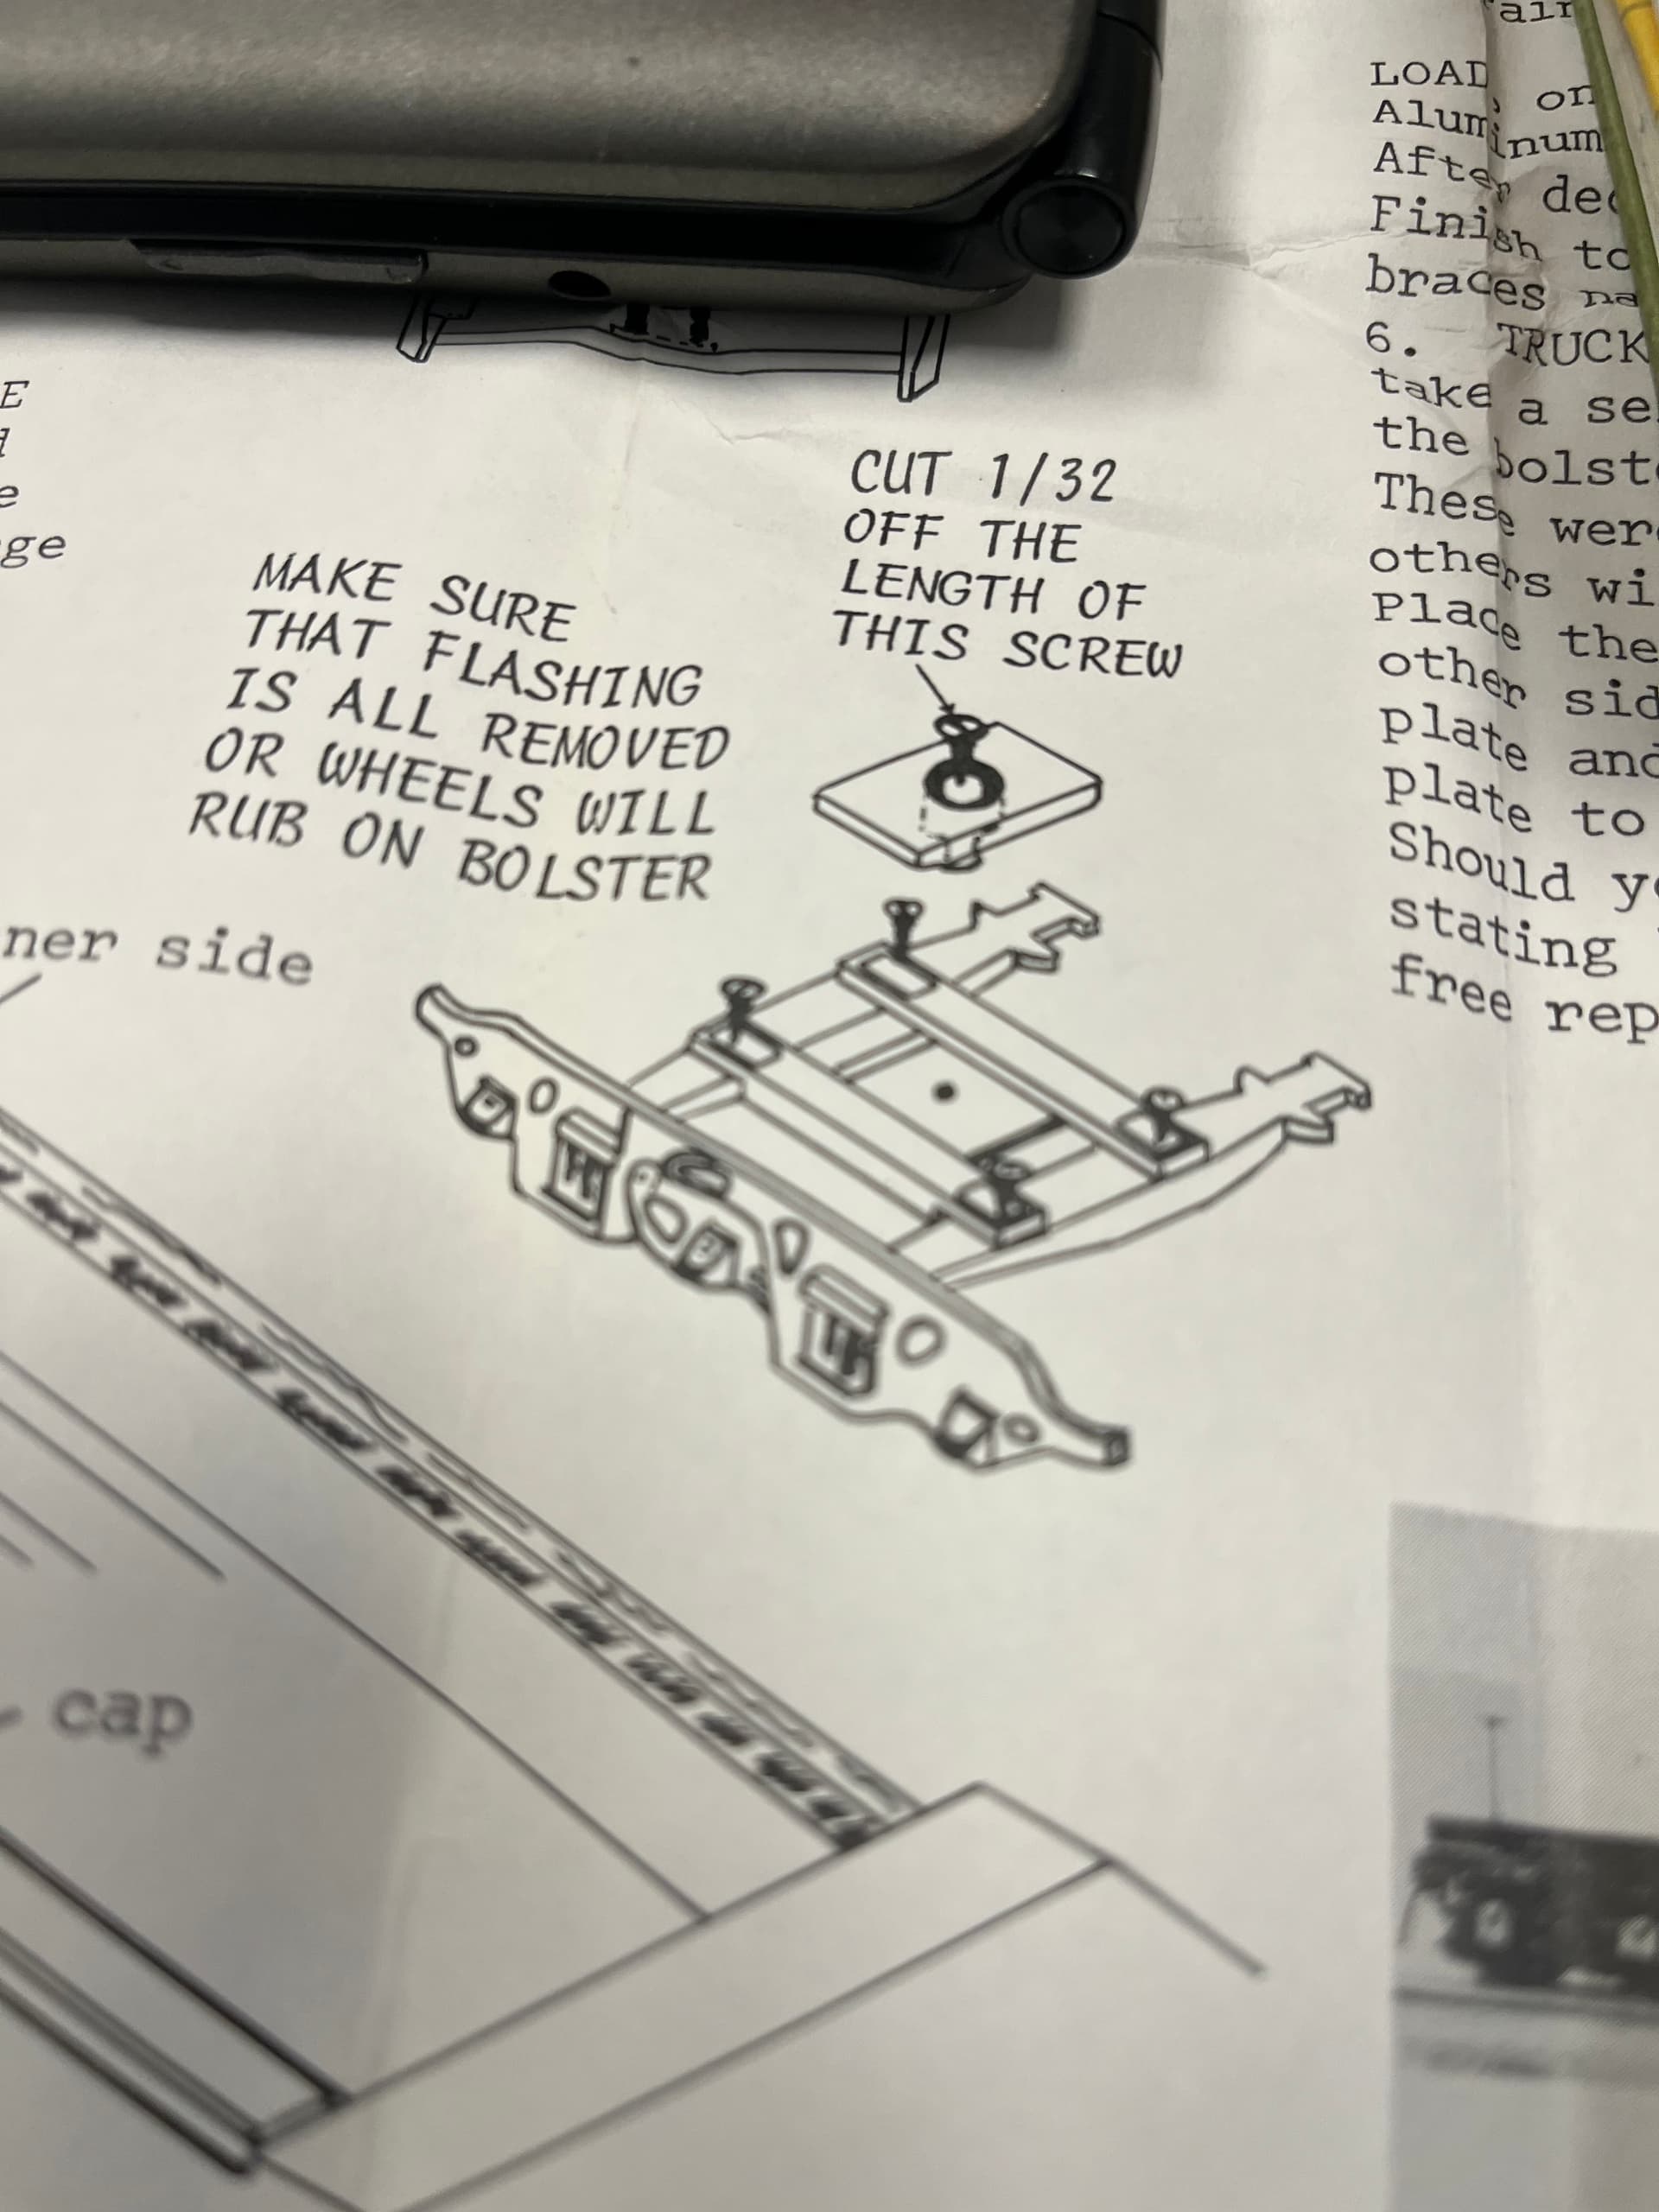
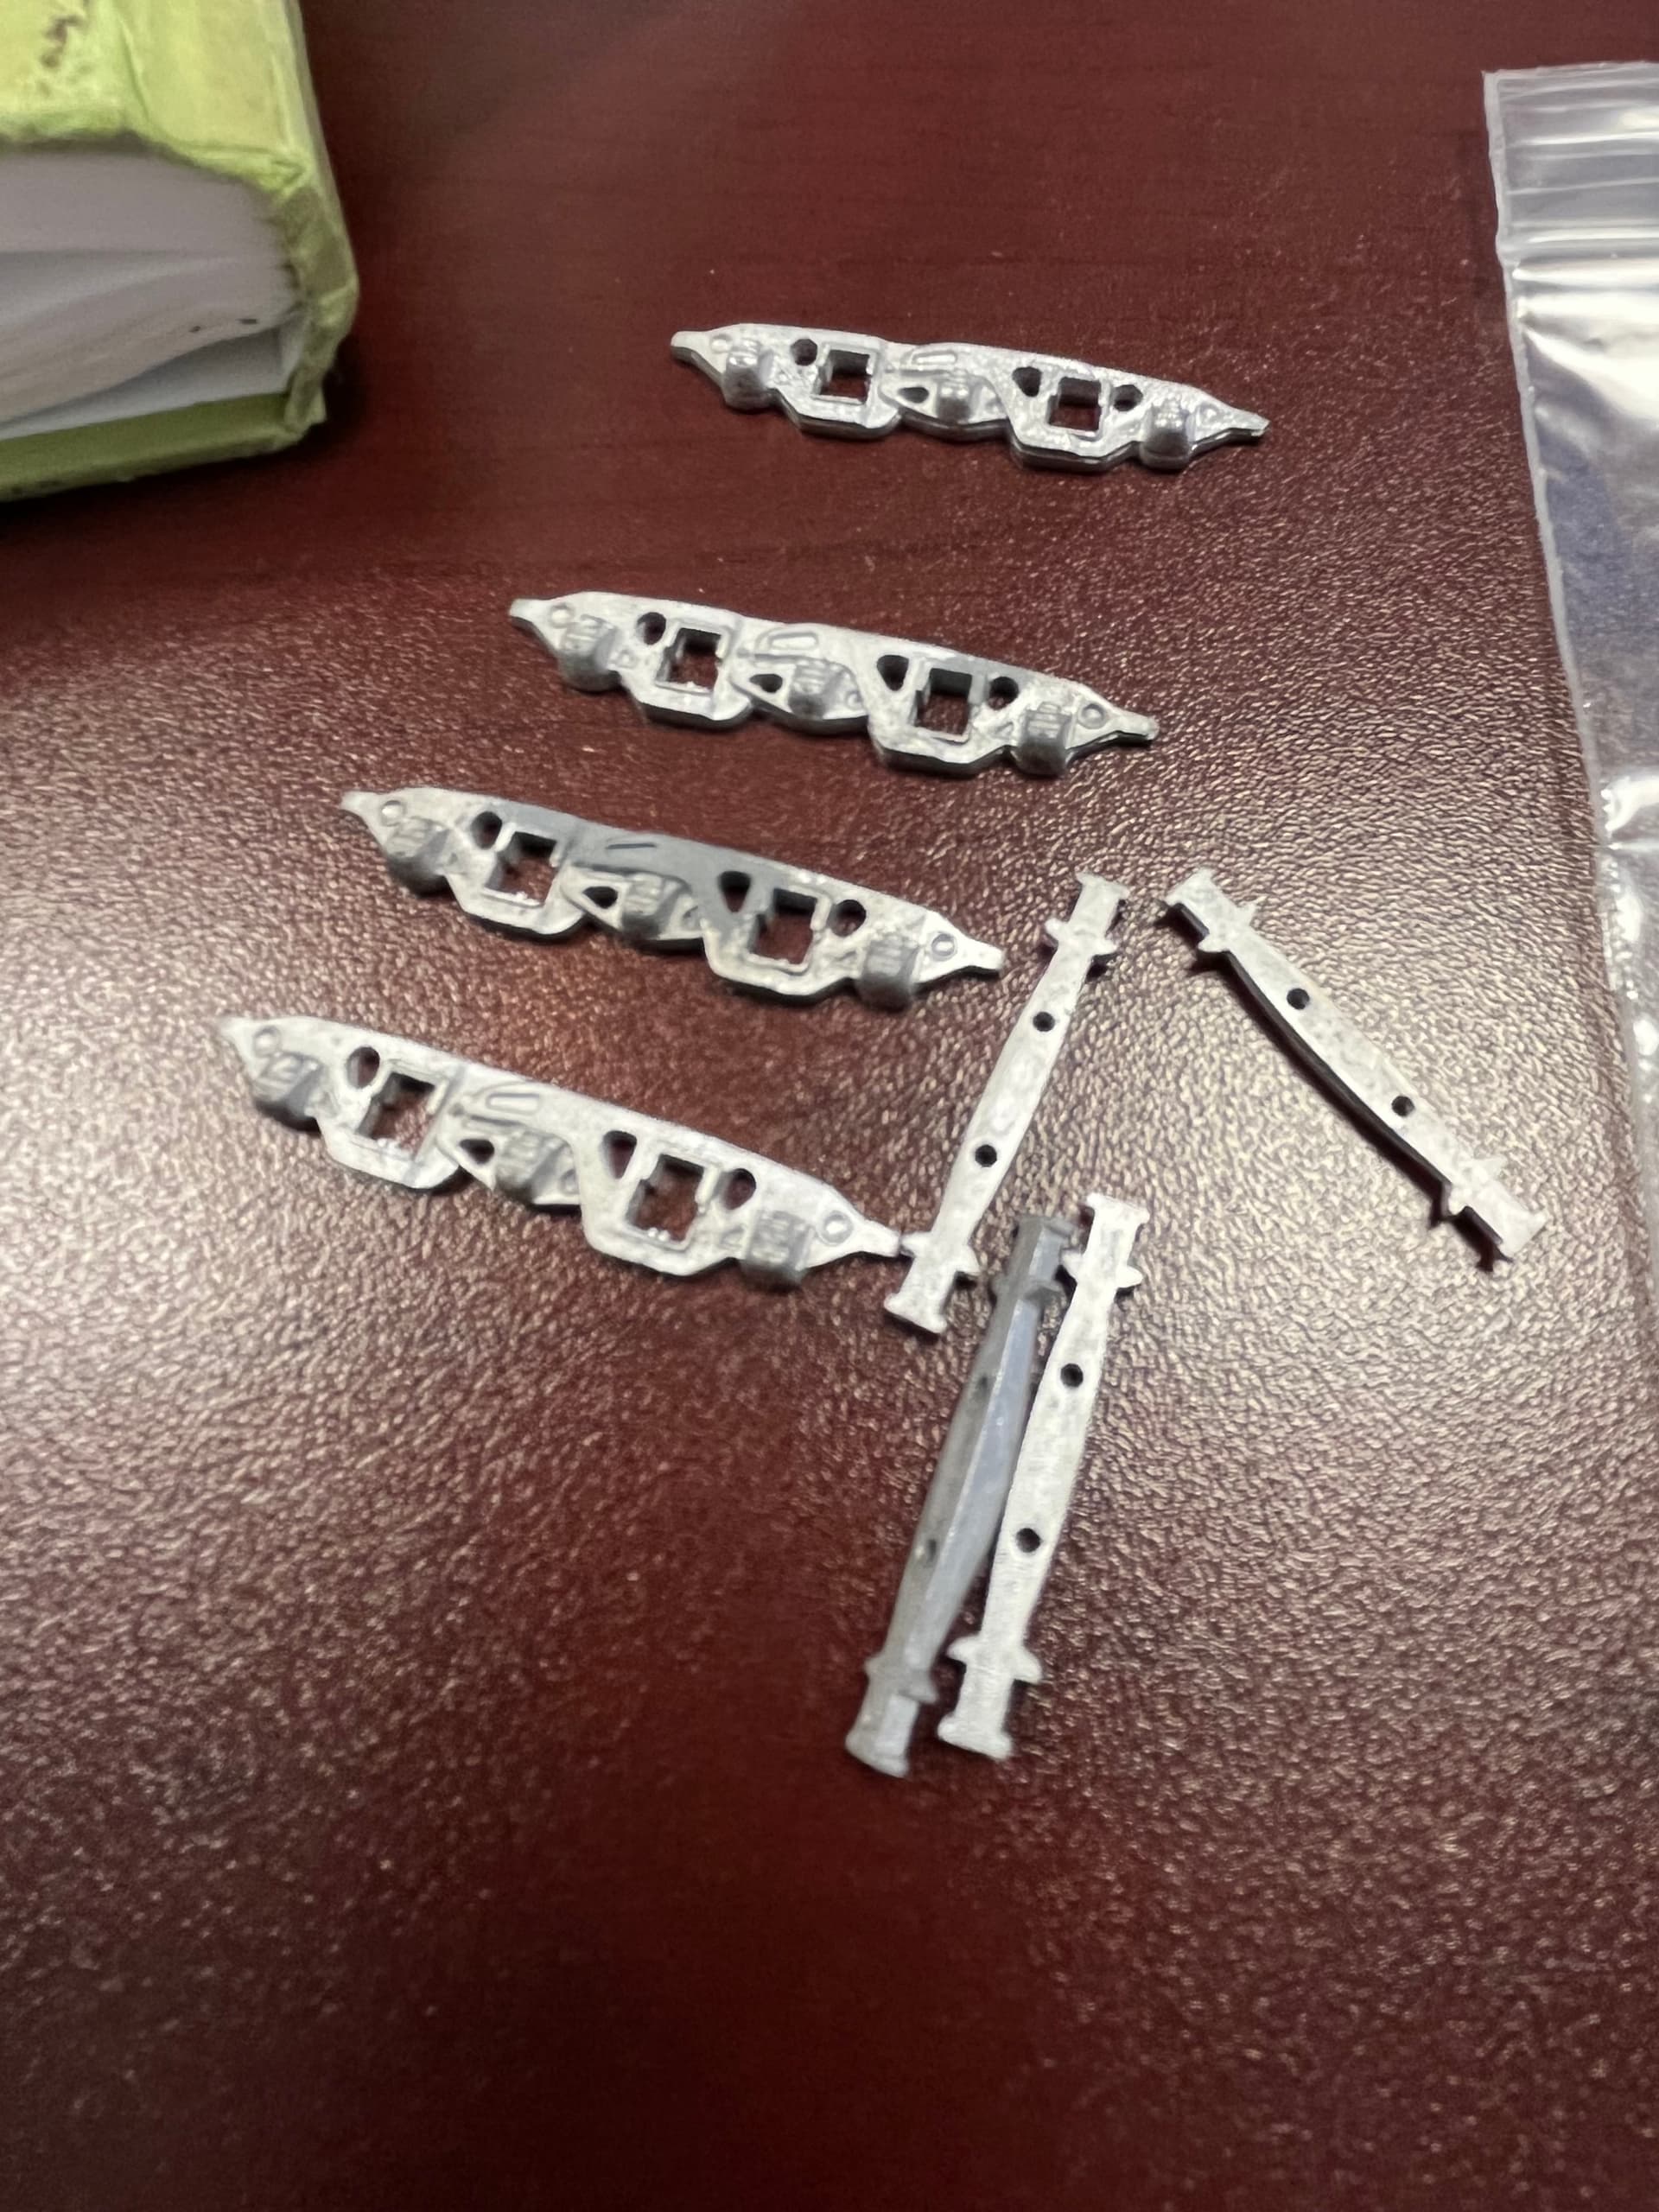
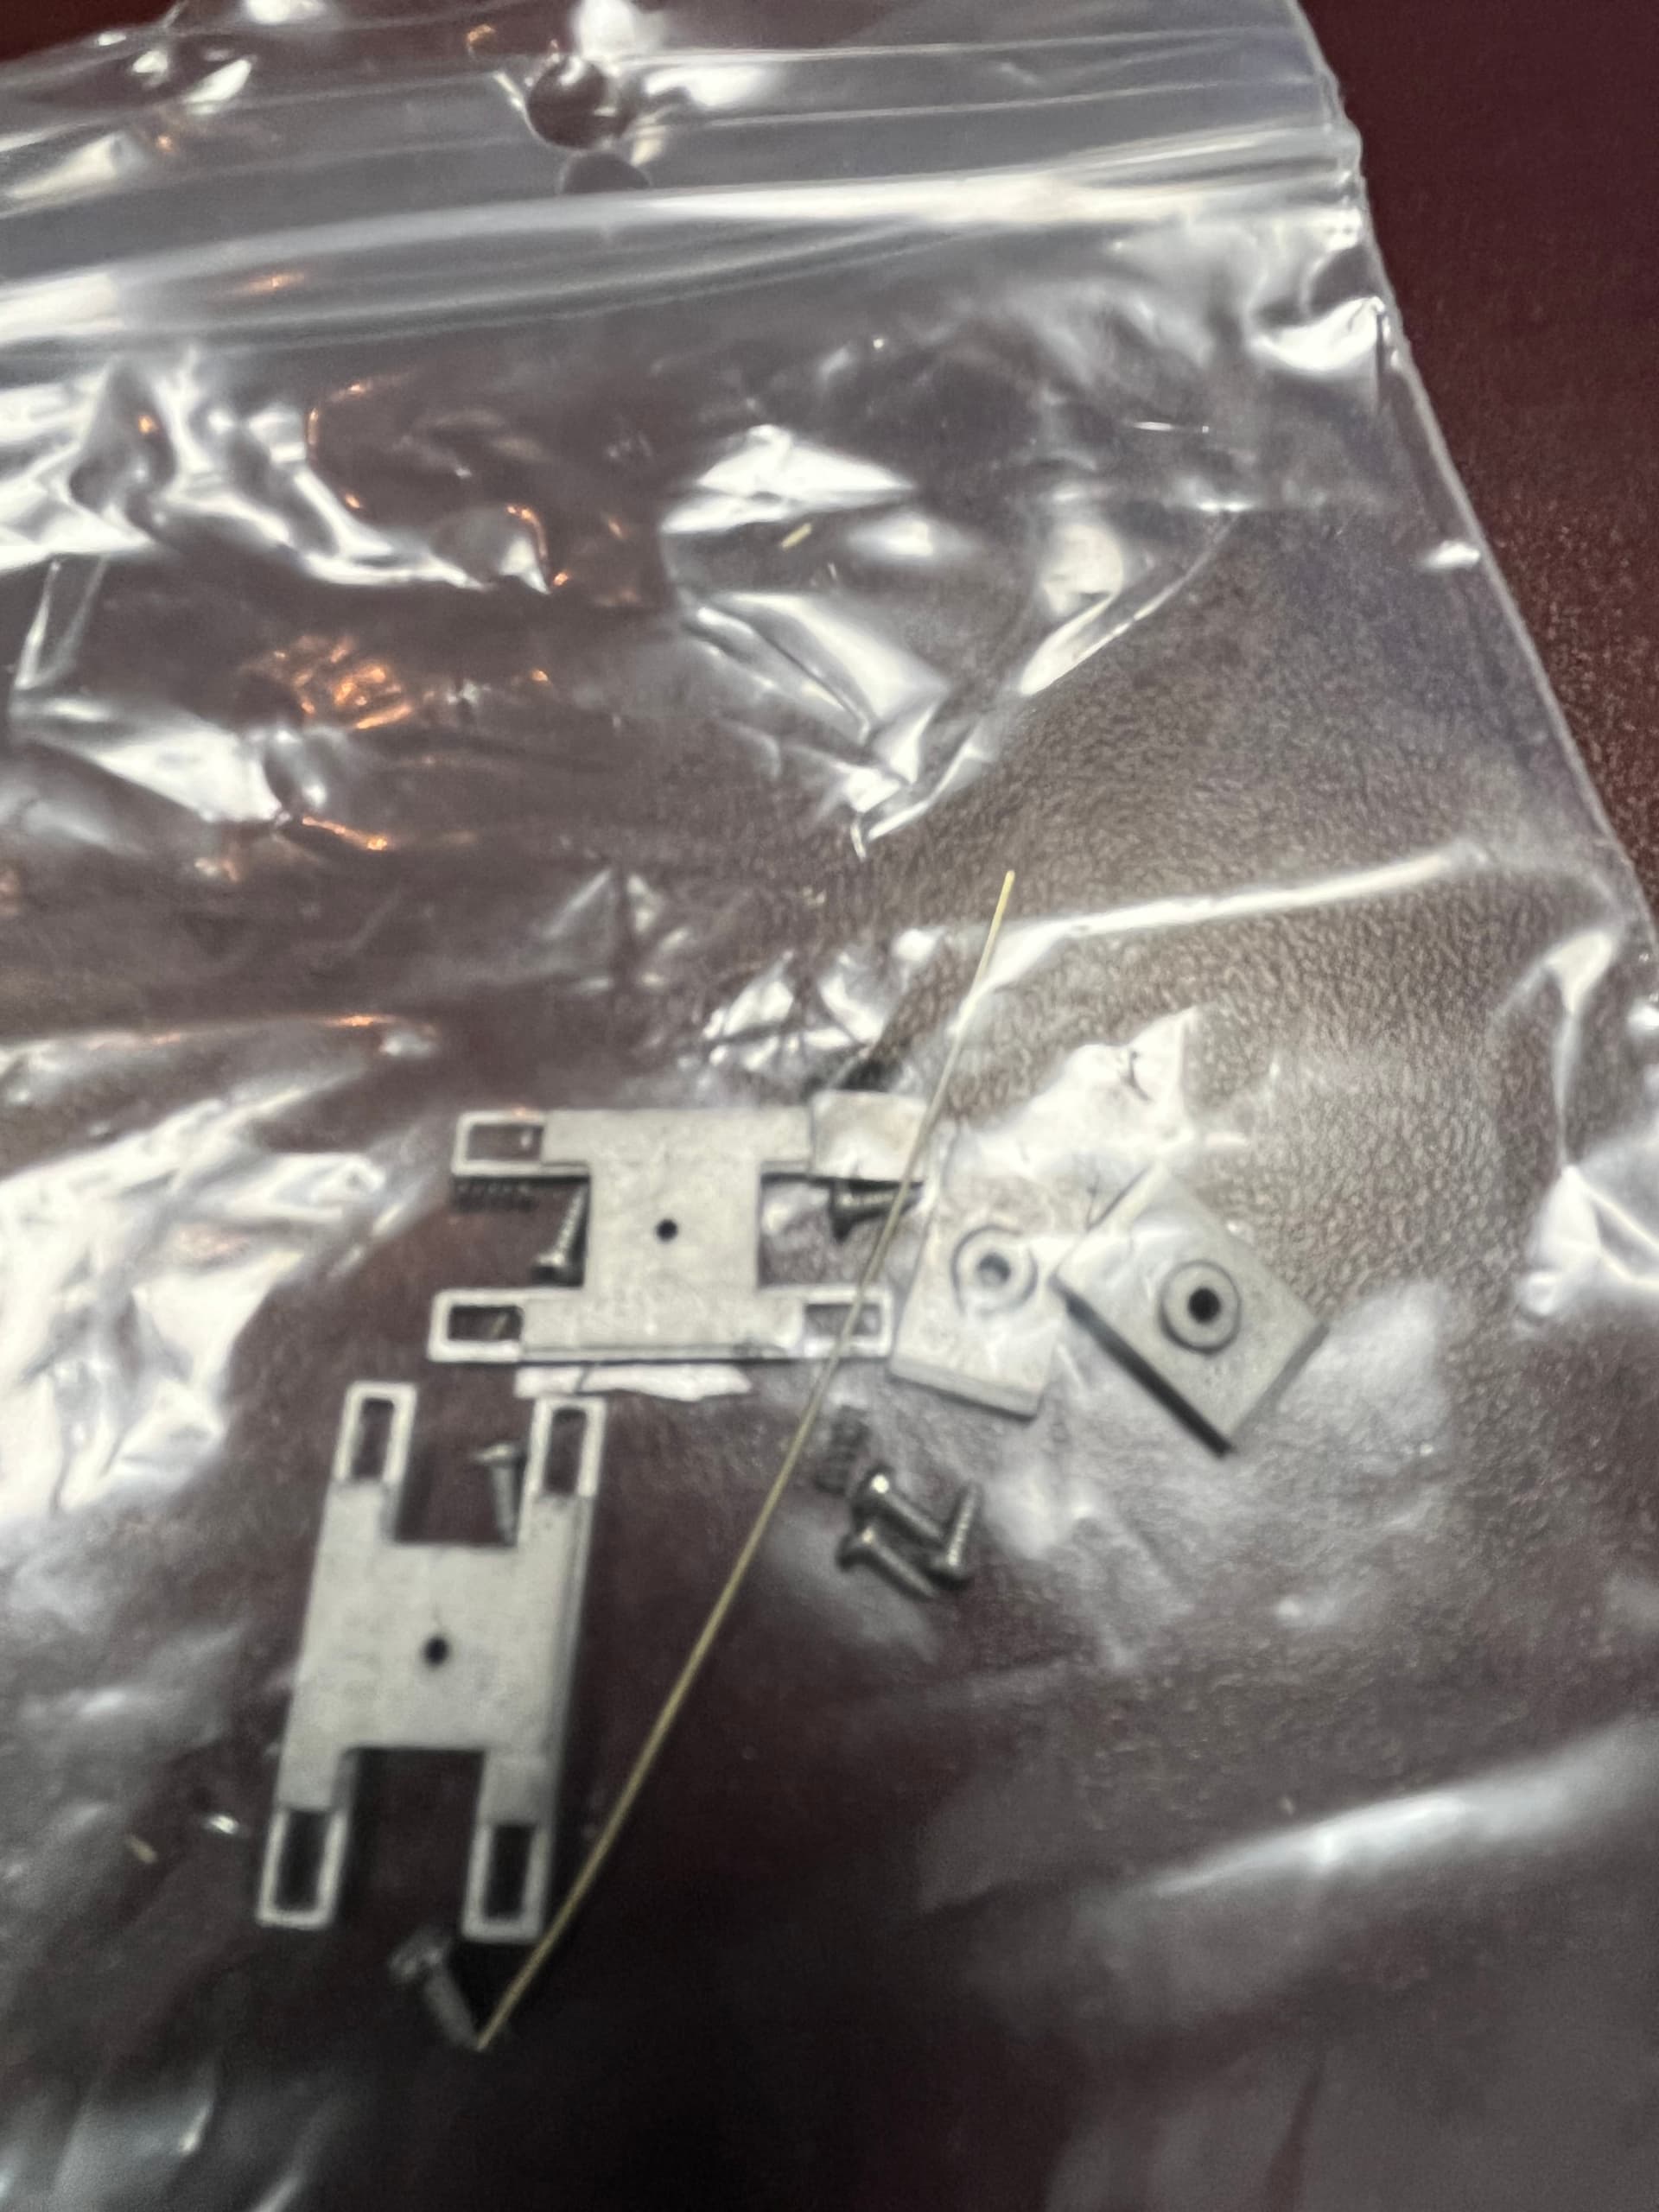
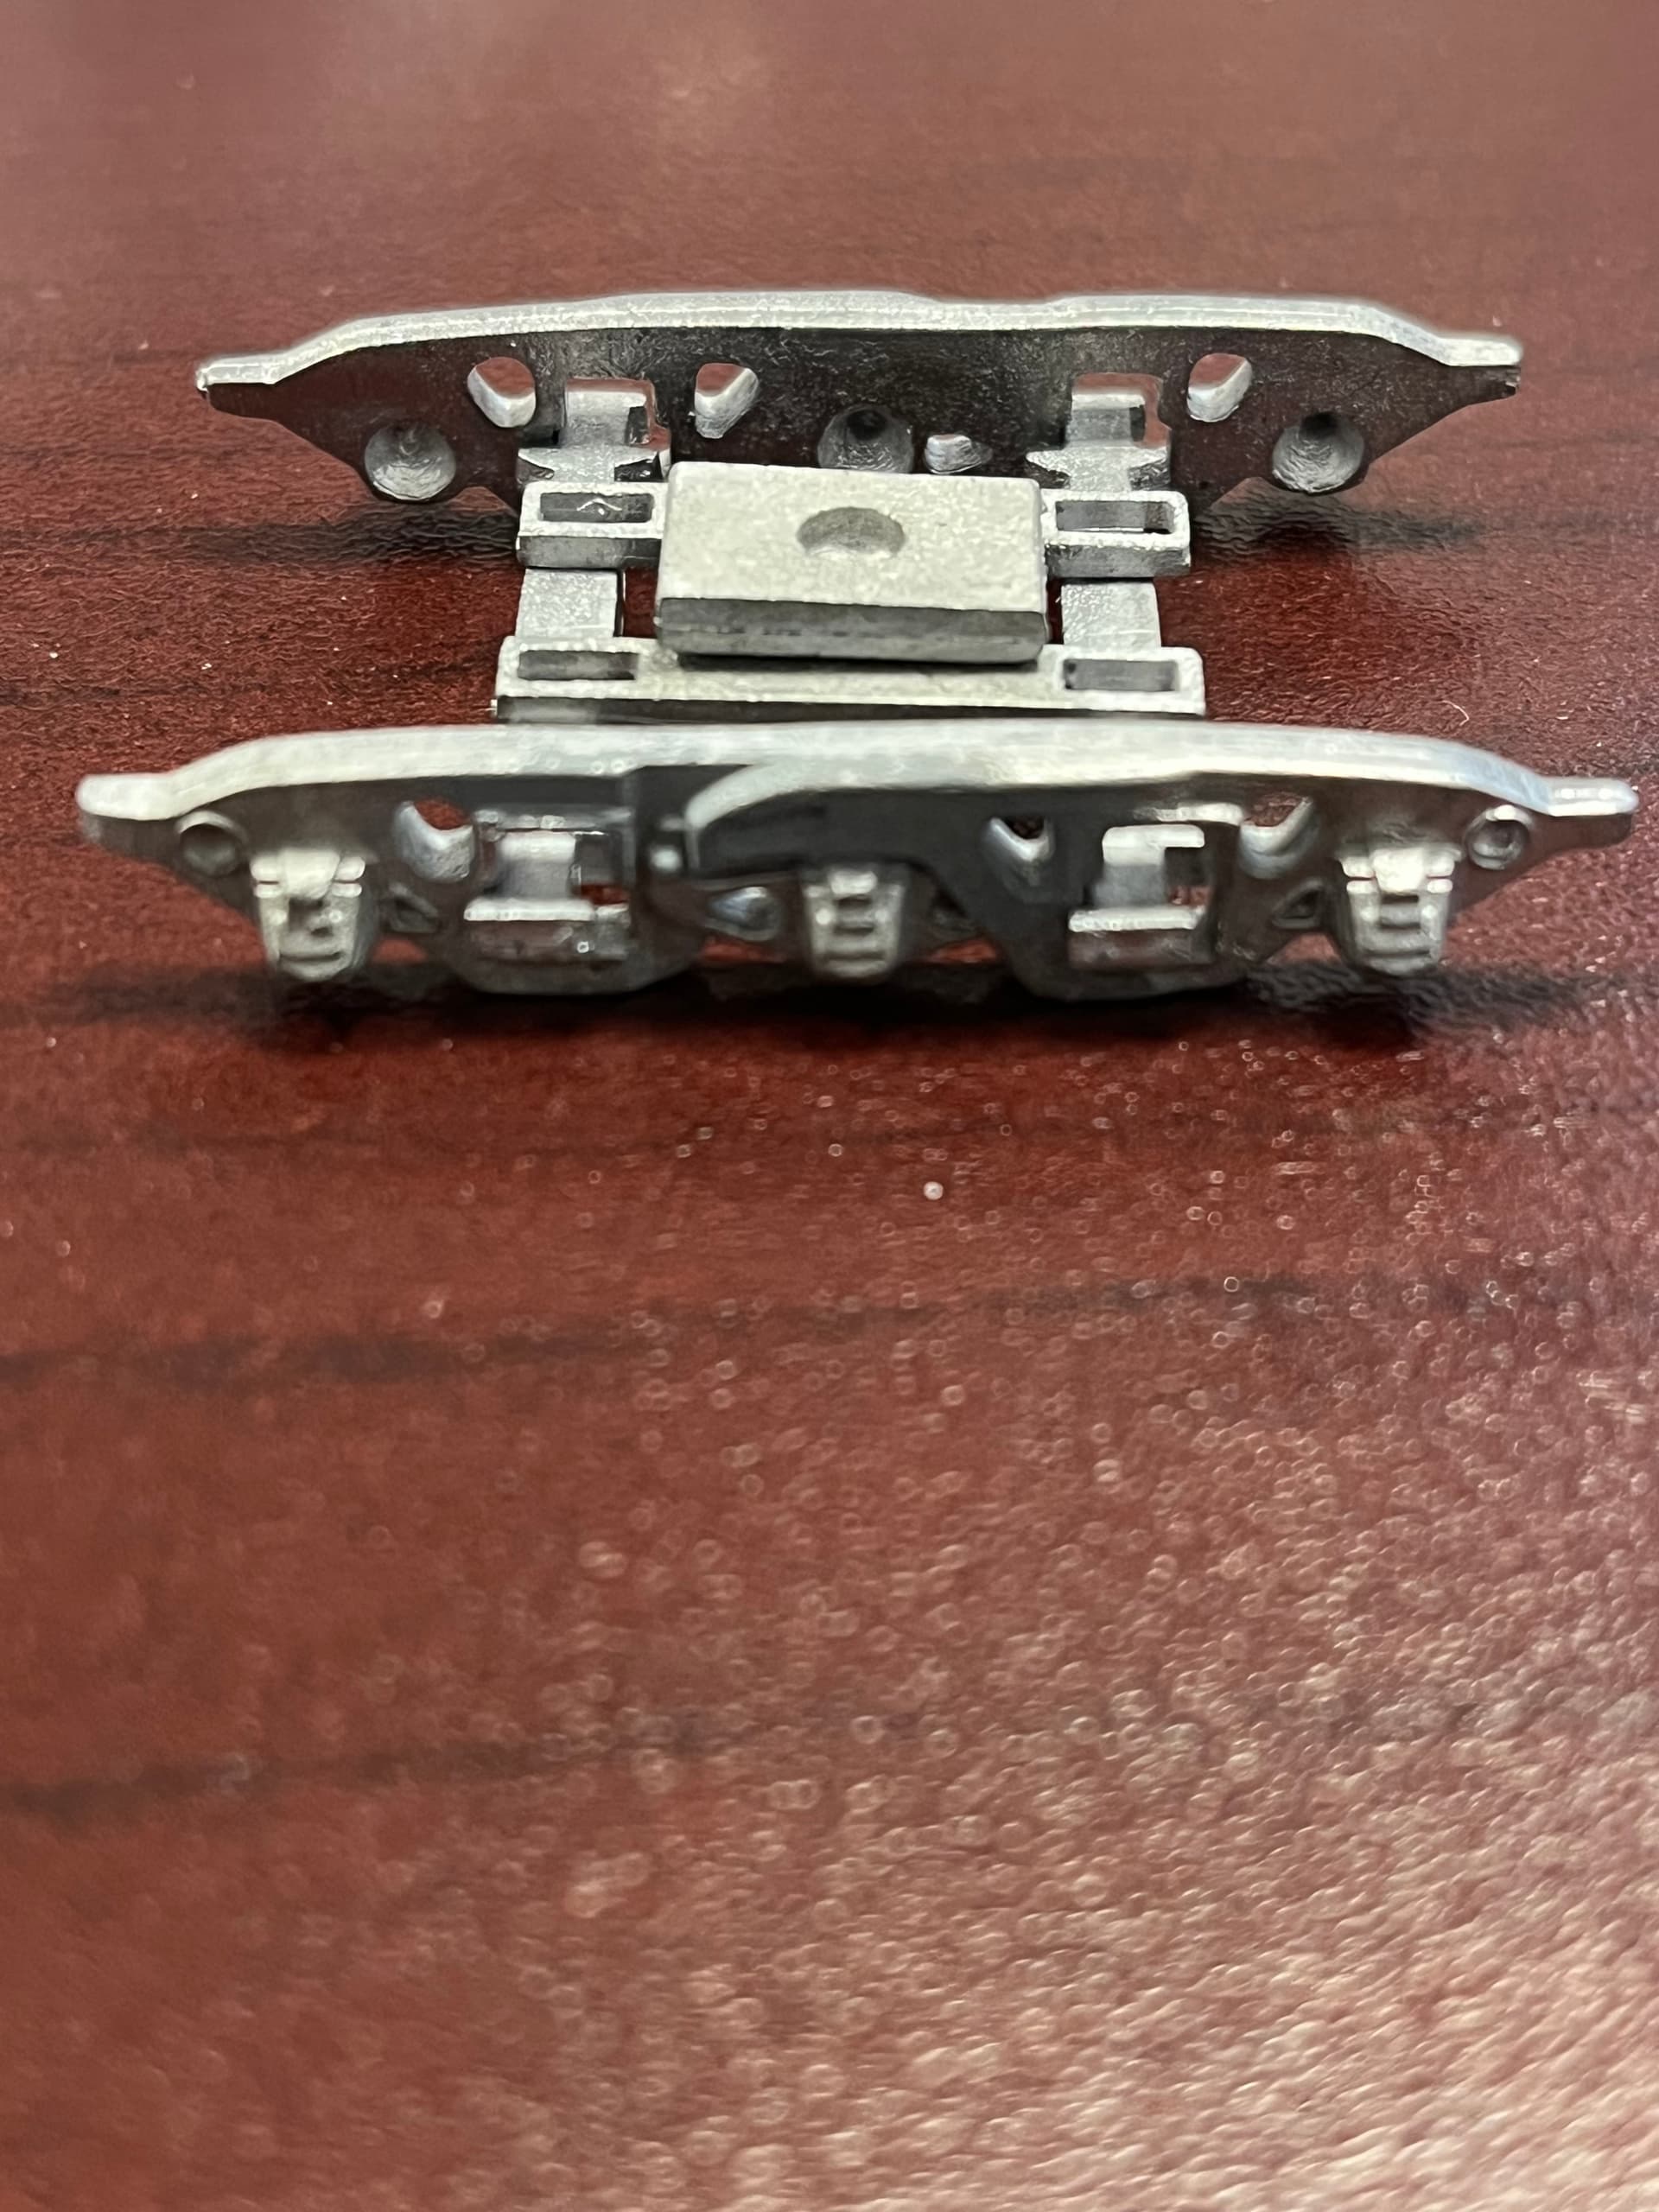
Now after it is all assembled, you have to install the truck springs, four for each stabilizer bar They are the size of kadee coupler springs. A real “pip” to put together, but really cool!

To answer your question, the trucks are part of the kit. Double check the kit before you buy it.
Thanks!
Hummm. Looking at the full set of instructions on the hoseeker website it appears that the completed truck assembly gets glue to the car body.
Doesn’t seem like a good idea to me.
Looks as if a 'better’approach would be to use a suitable nut in the recess of the plate, and drive the (shortened?) screw in from below, probably with a washer under the head. Then glue the plate in place as the instructions indicate.
Hummm. Looking at the full set of instructions on the hoseeker website it appears that the completed truck assembly gets glue to the car body.
Doesn’t seem like a good idea to me.
Exactly! And Woke’s suggestion is the very same approach I took when I installed the trucks on my well-car. (FYI: That’s a 1-72 nut in the photo below)
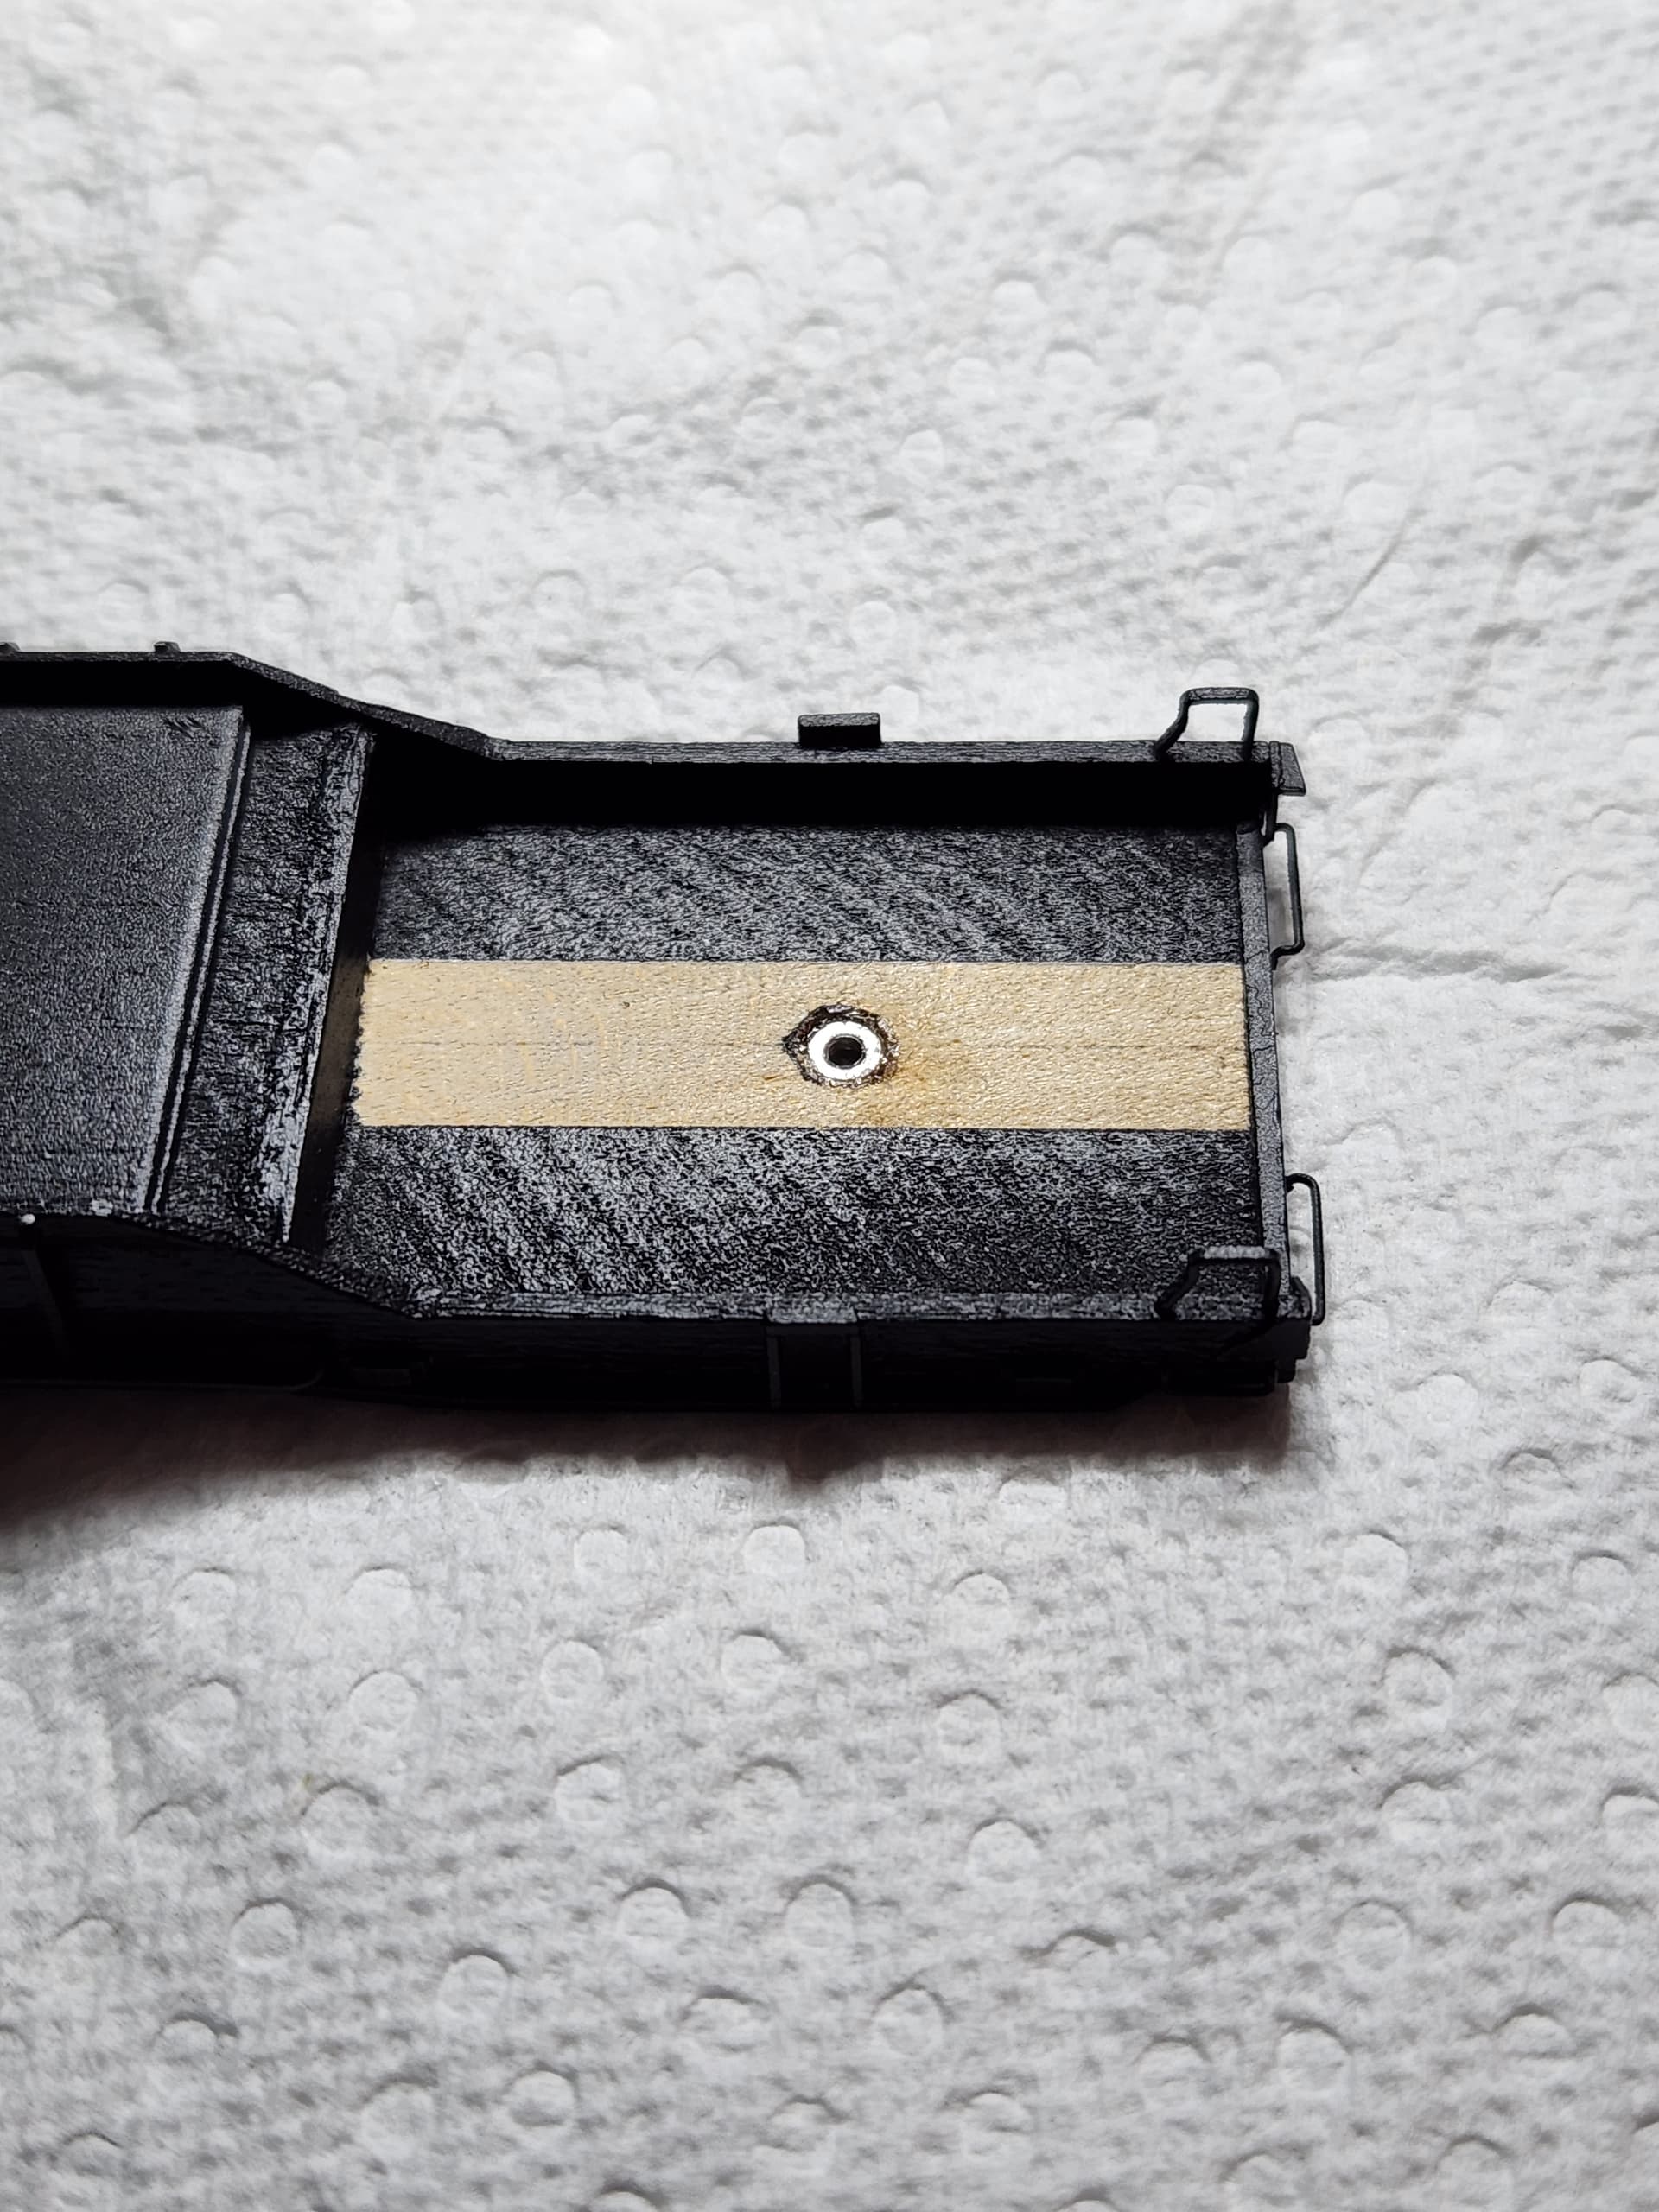
I enlarged the center hole of the “H” and countersunk it from the bottom side so the screw head would be flush with the bottom and clear the center wheel axle when installed:
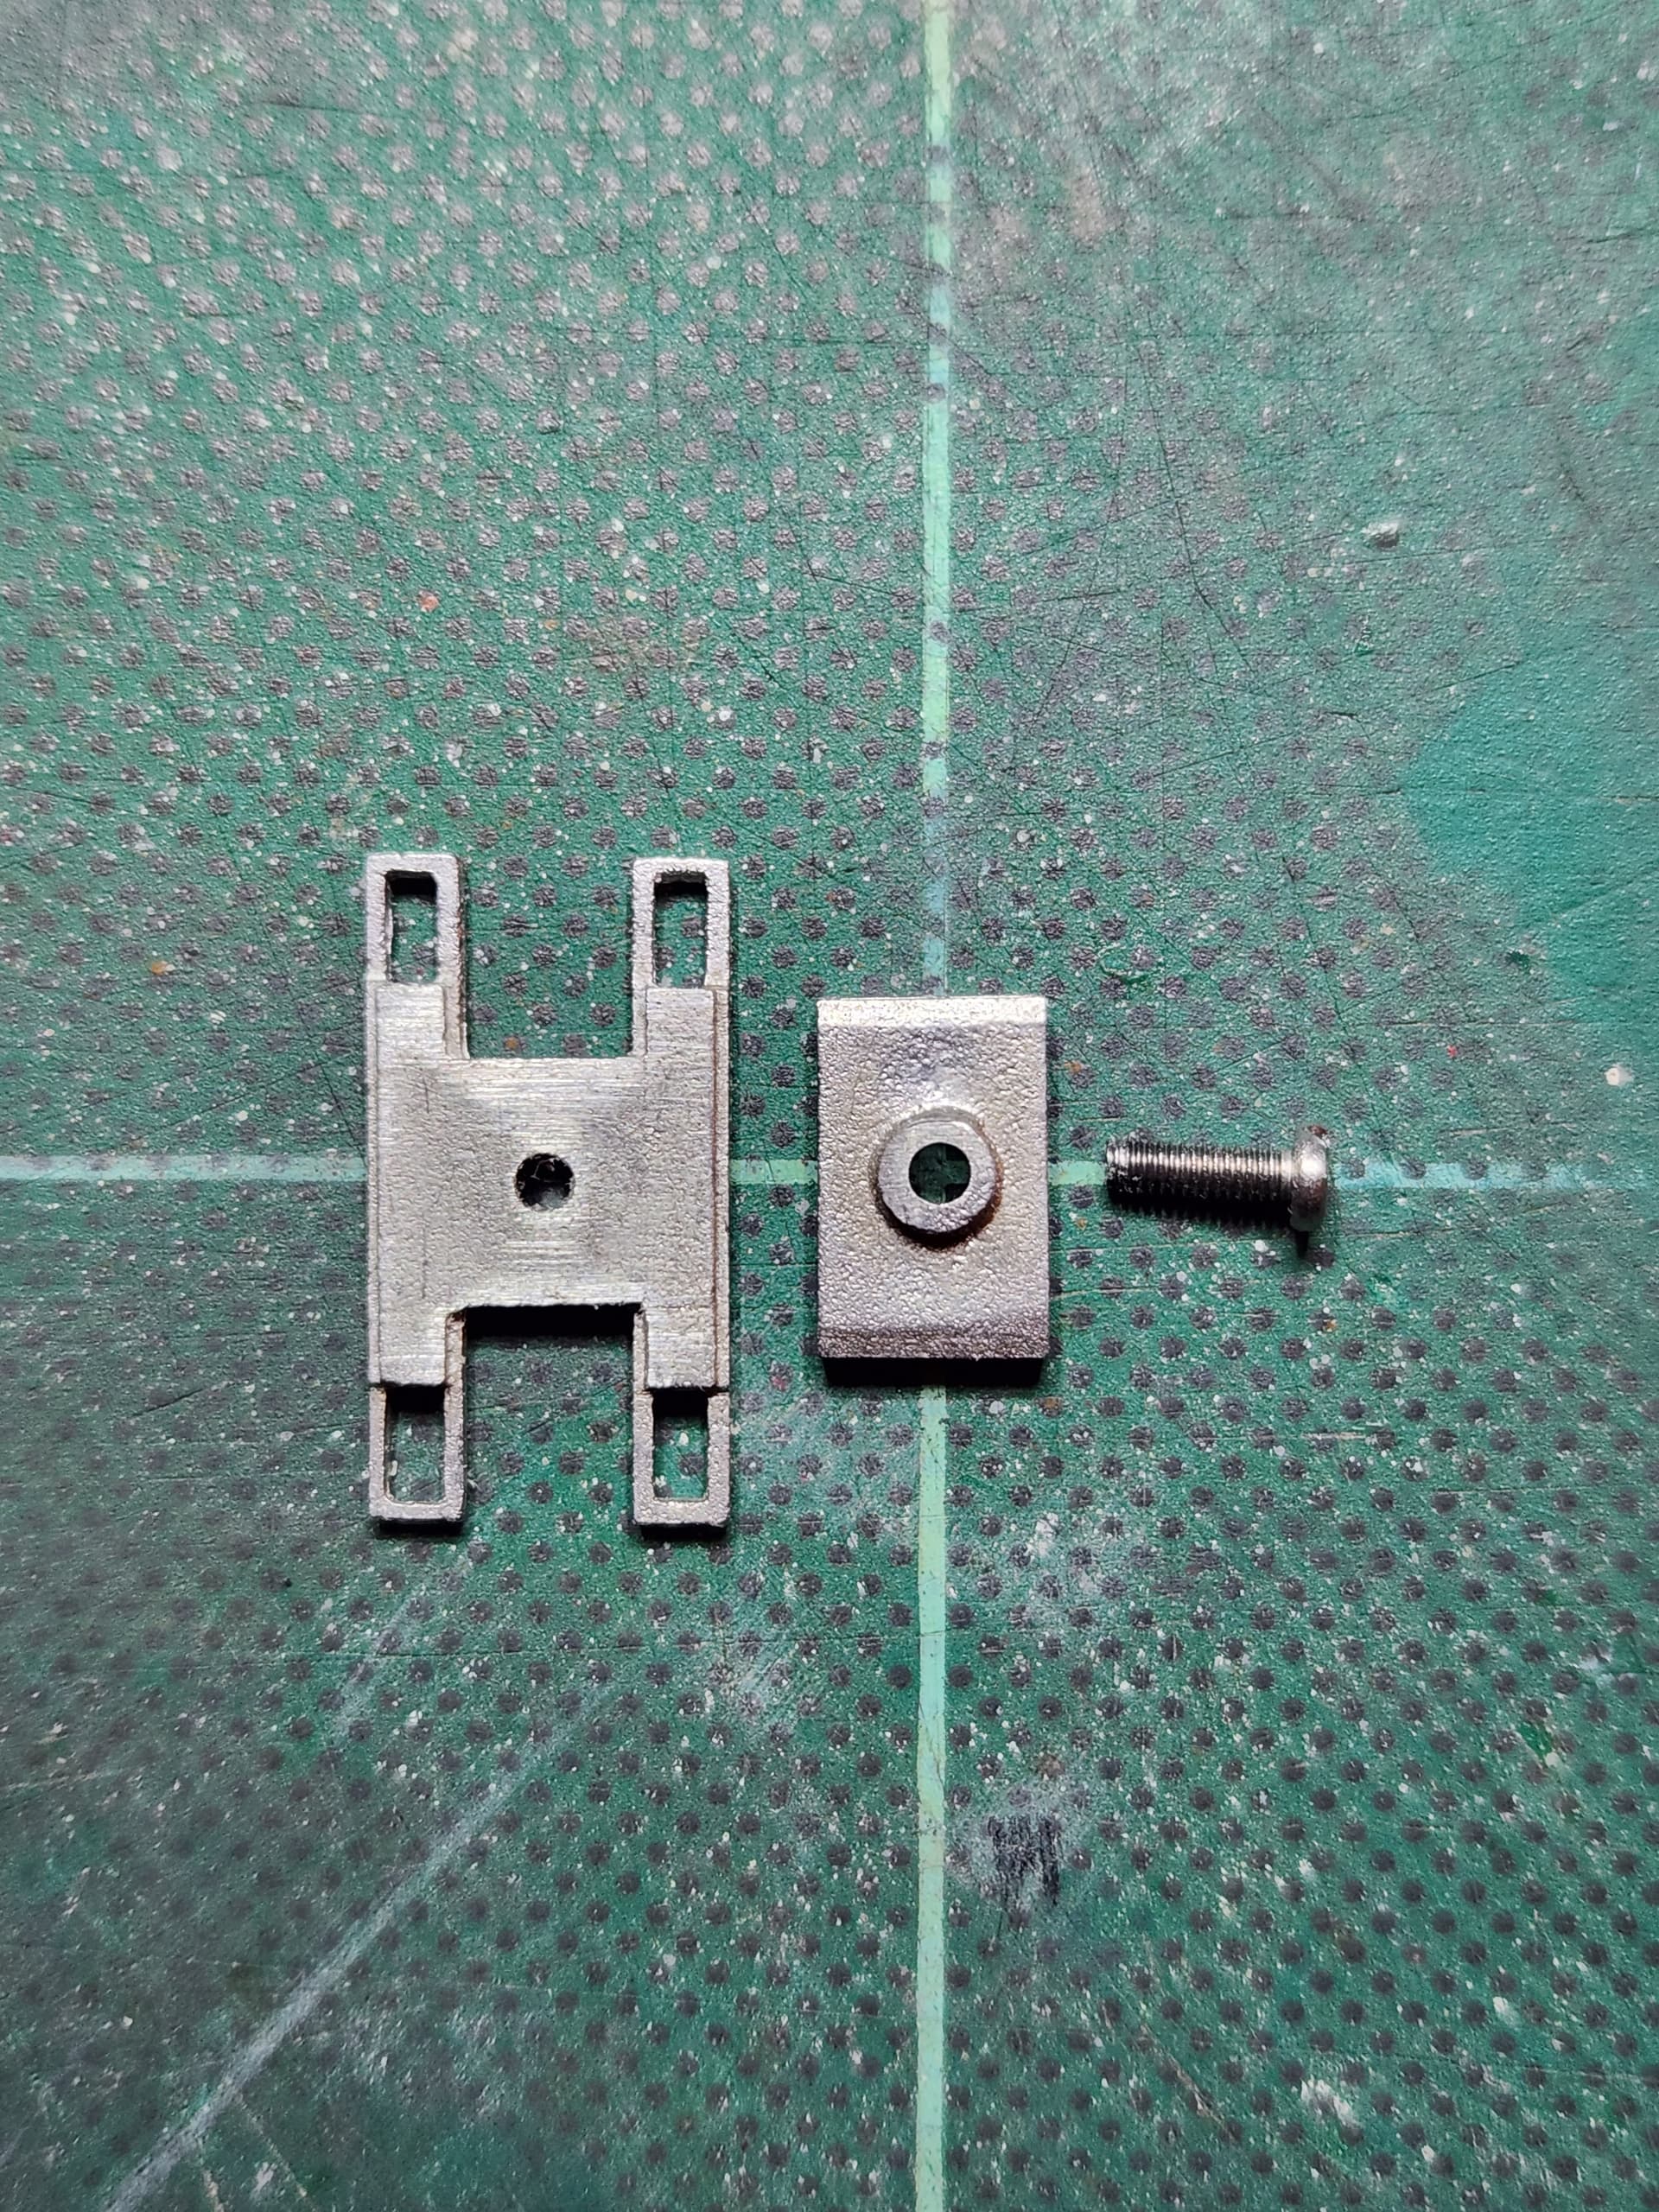
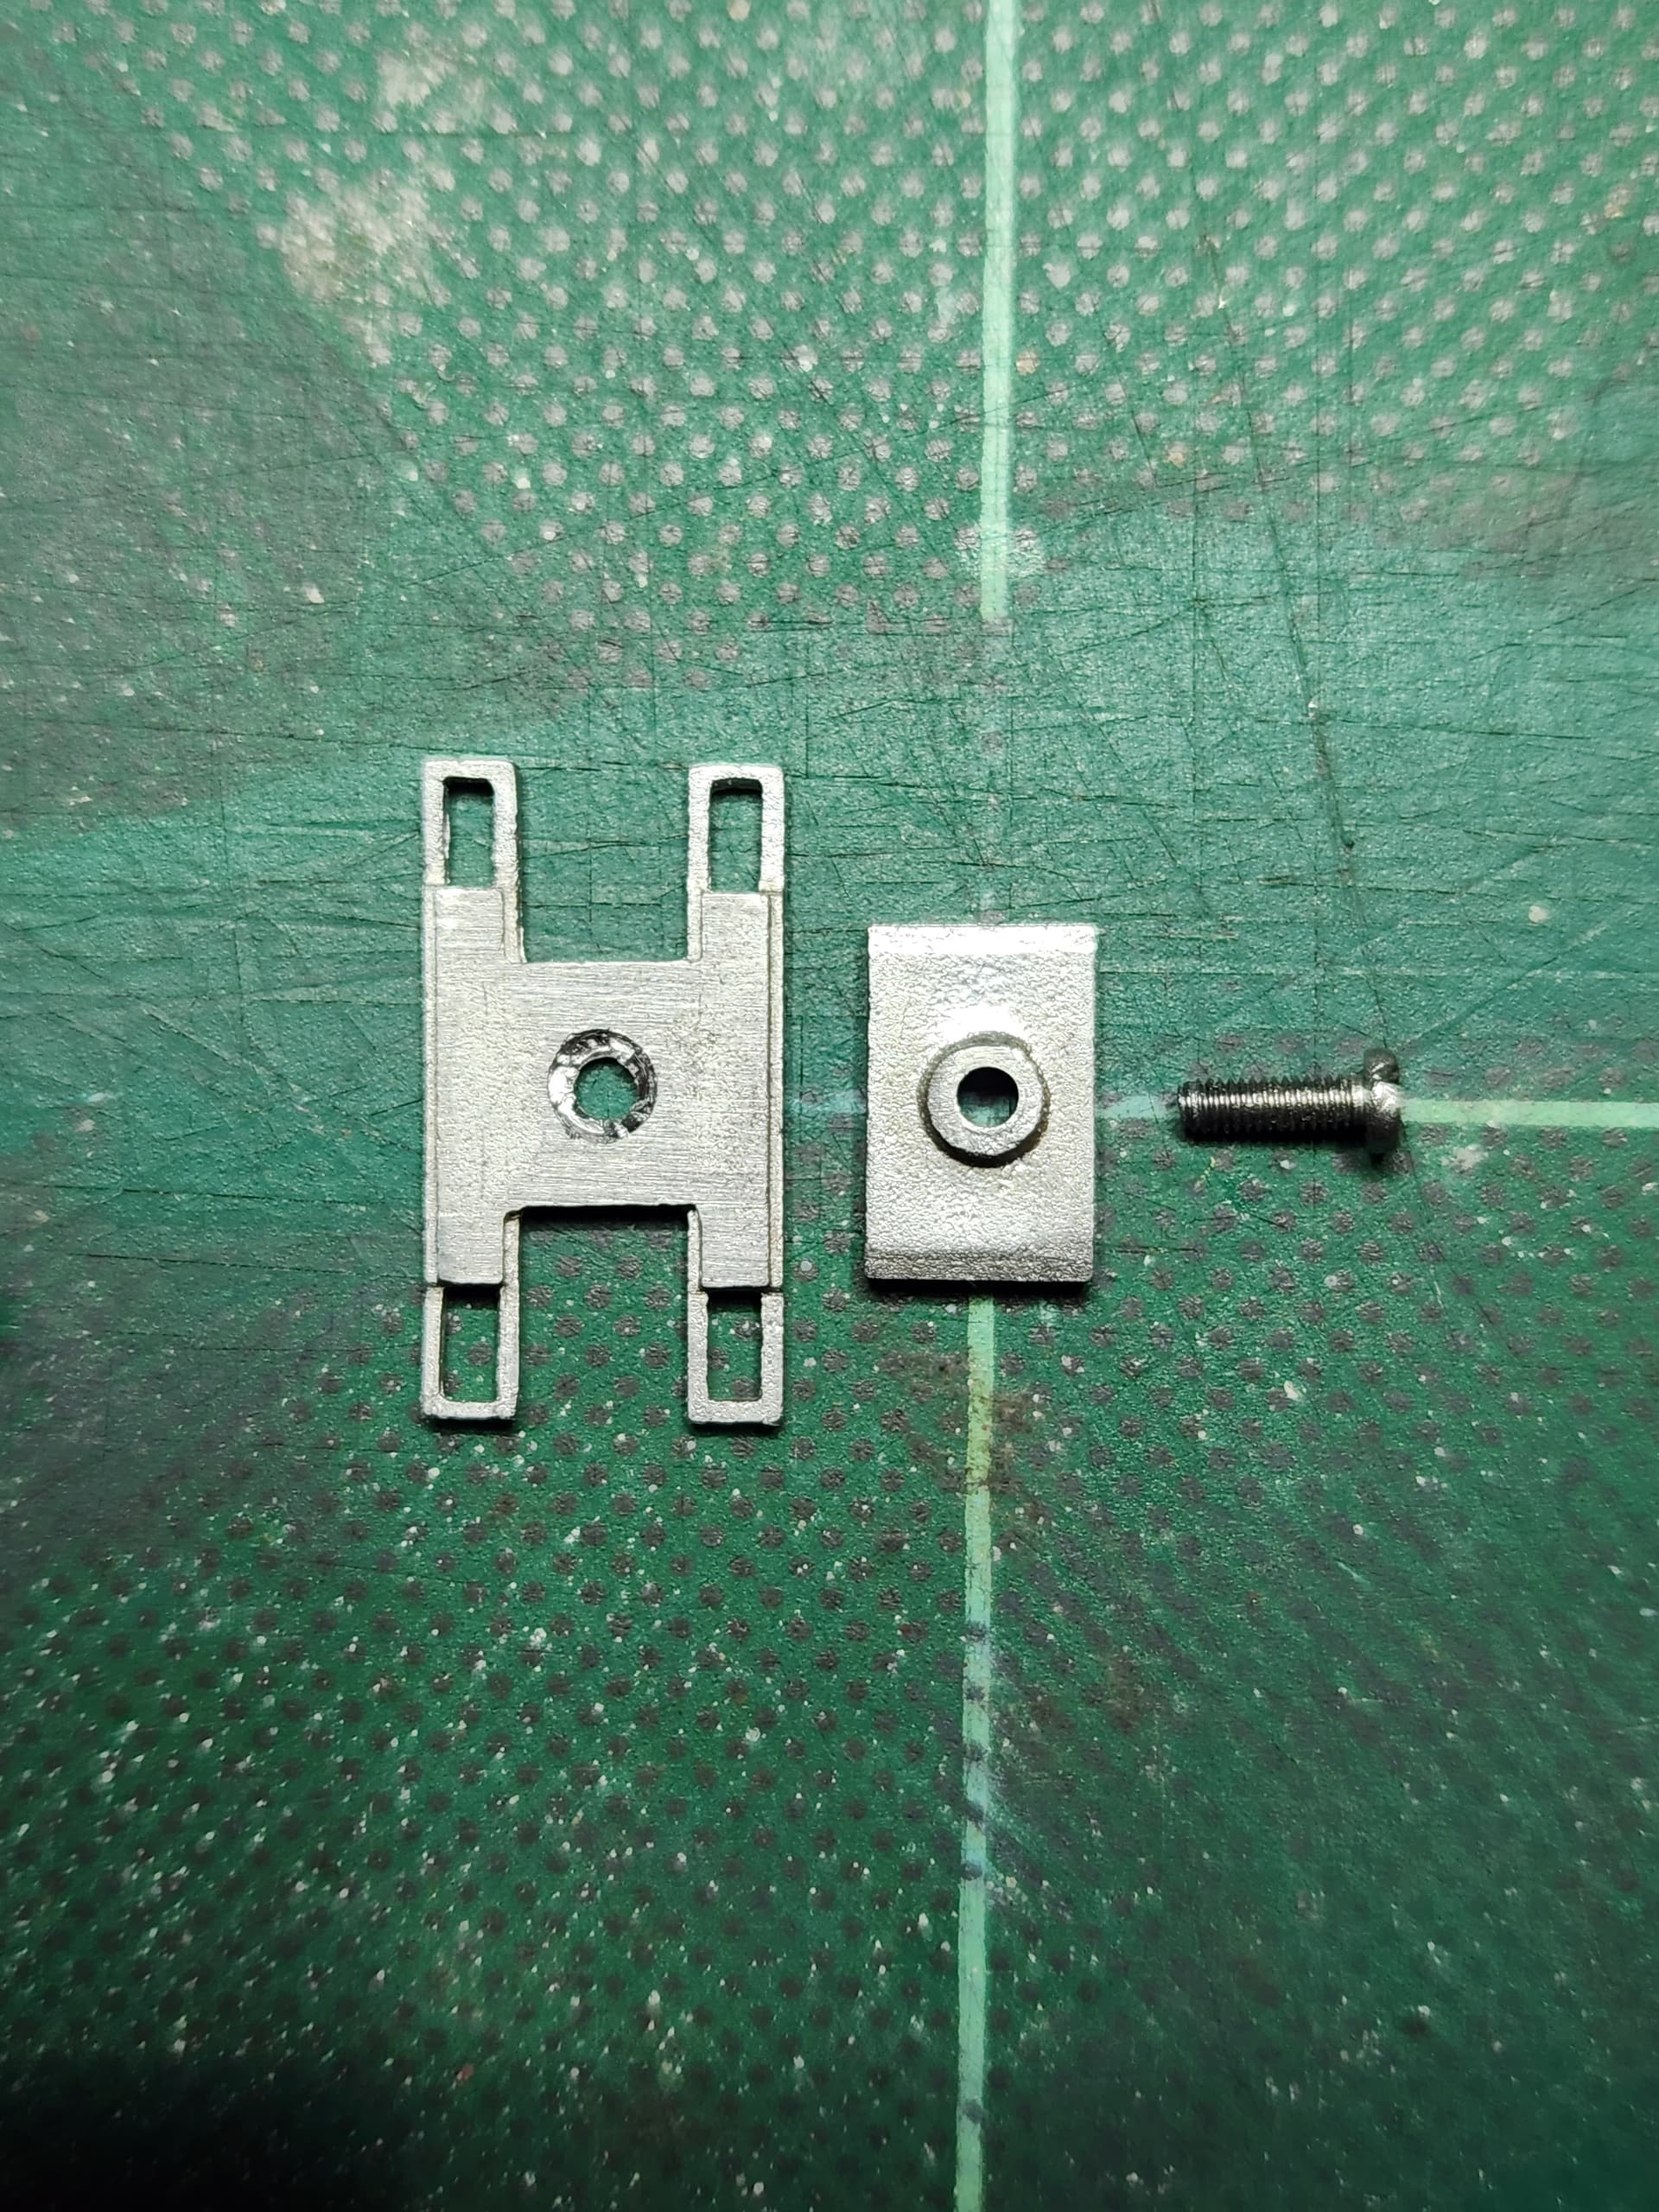
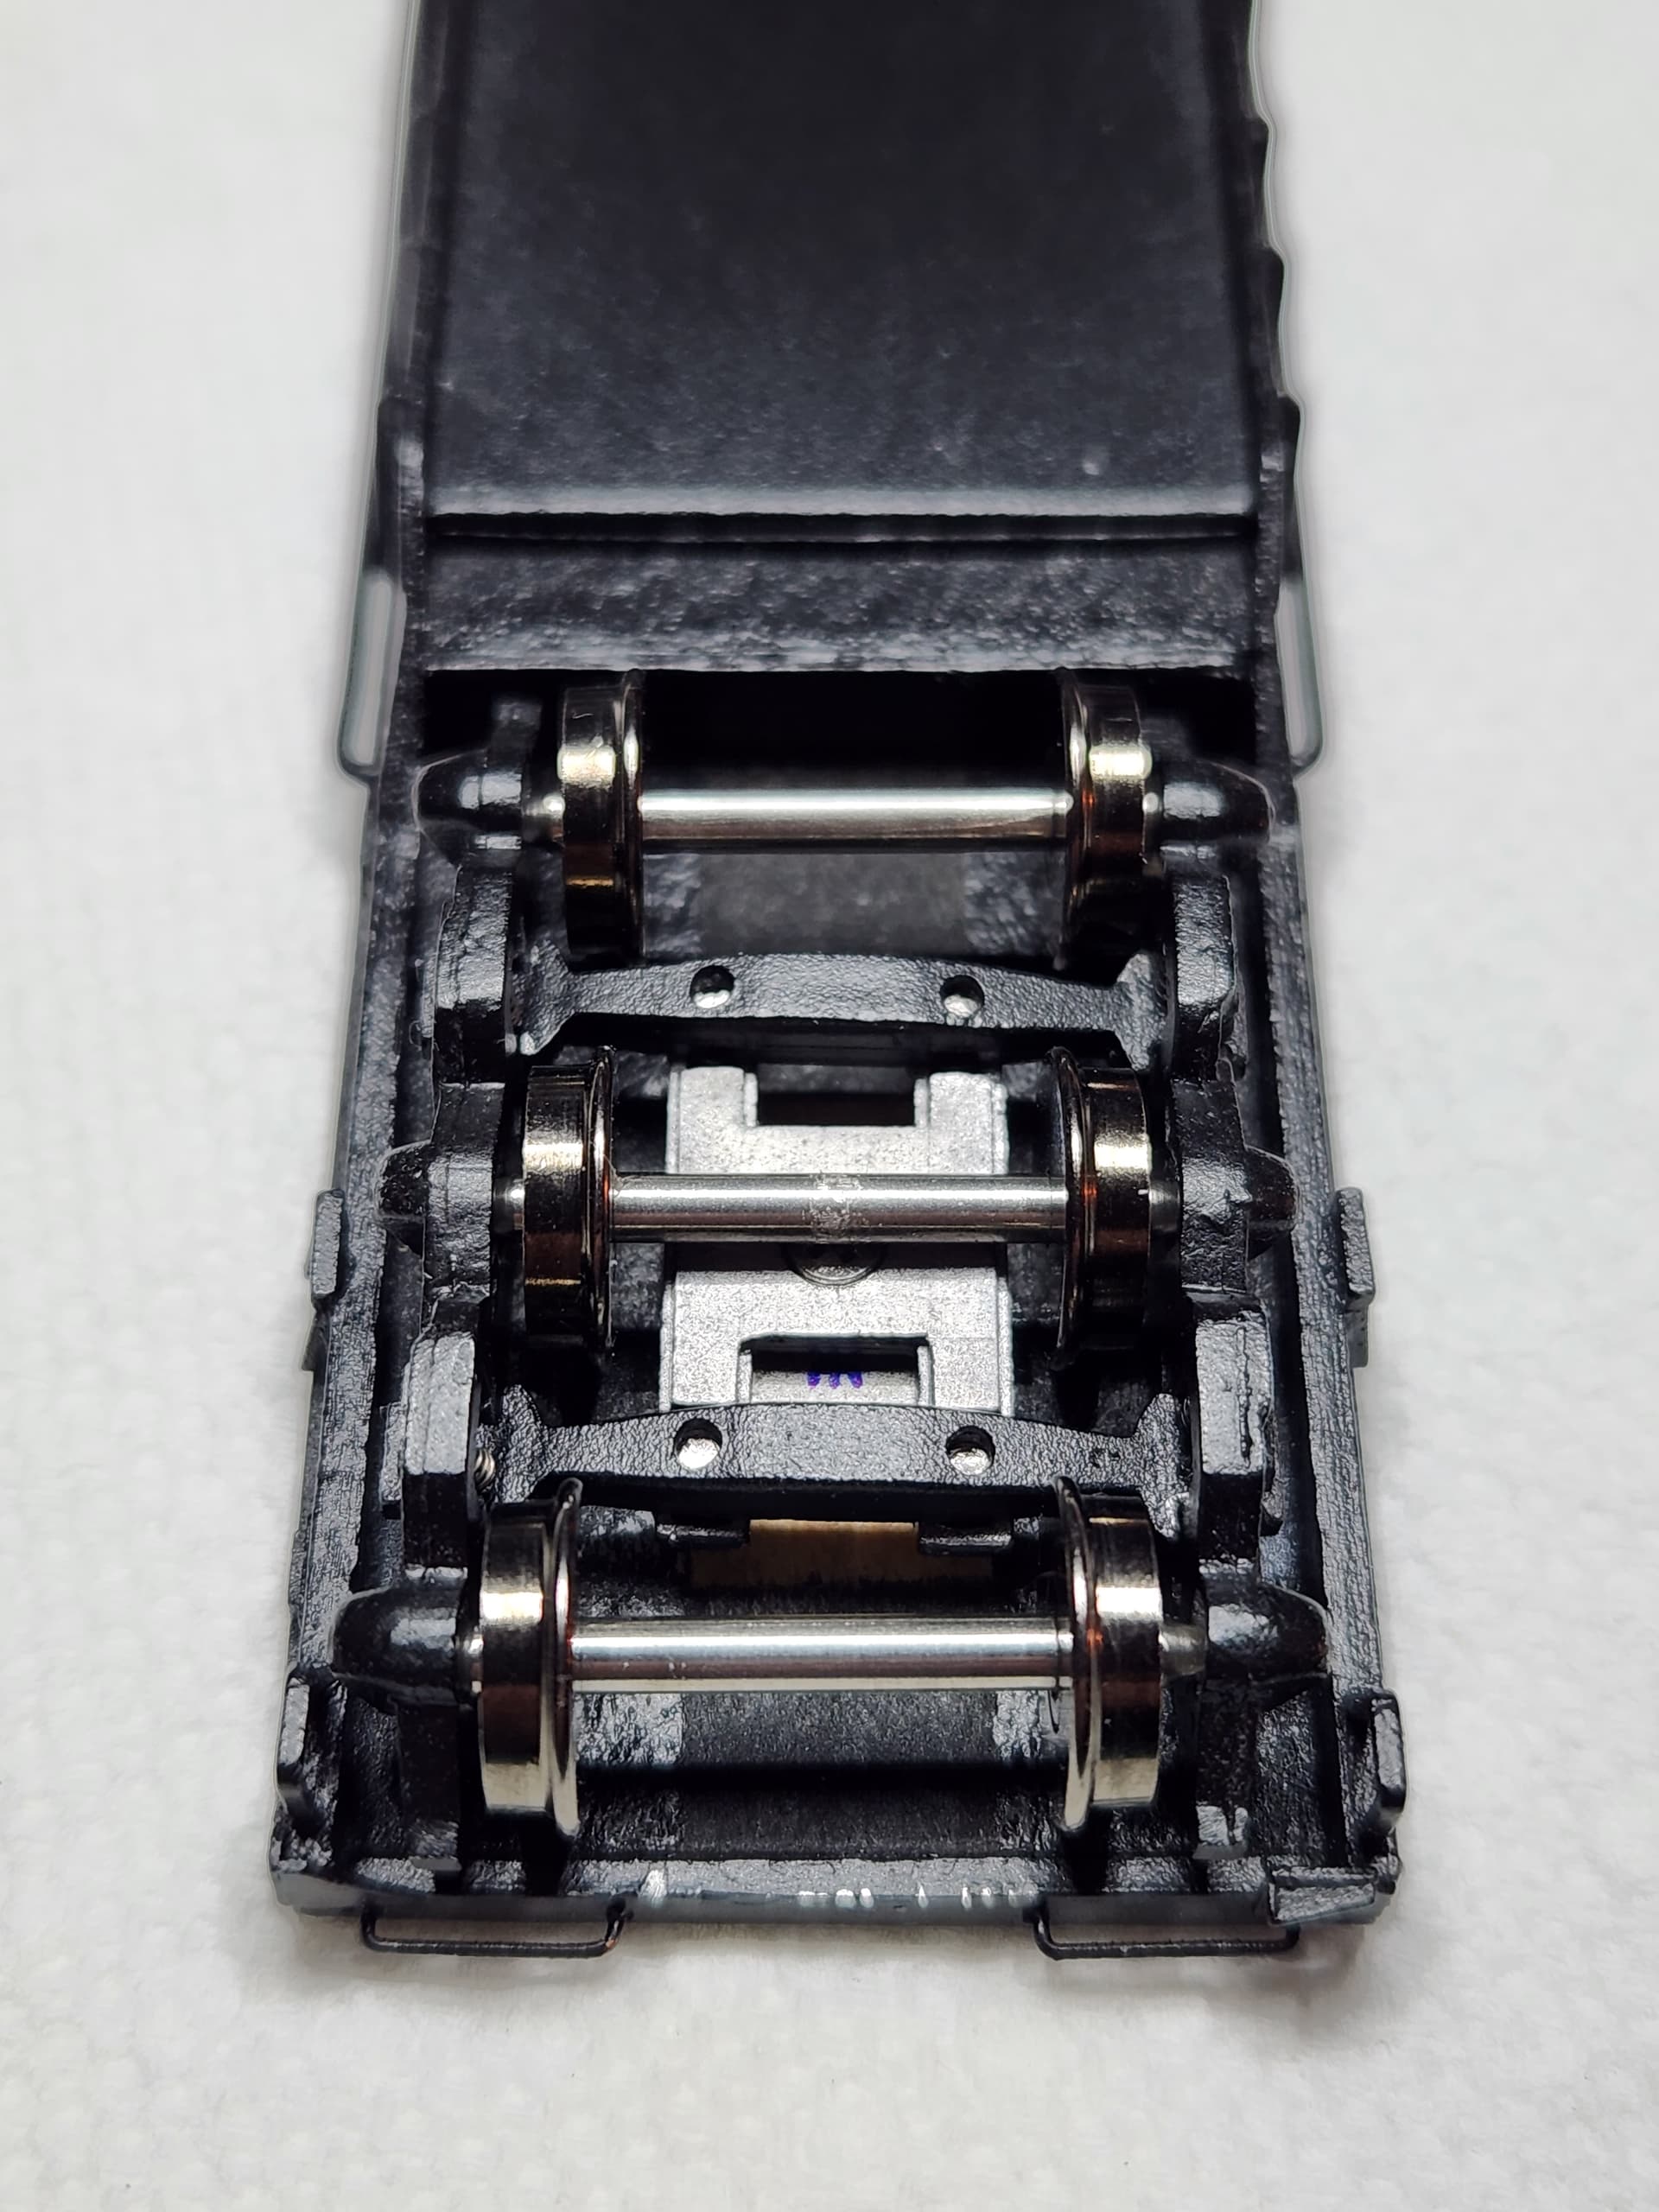
The bolster (“E”) is flush with washer “A”. Blocks “C” keep “D” from rotating and the bolster (“E”) pivots on the washer.
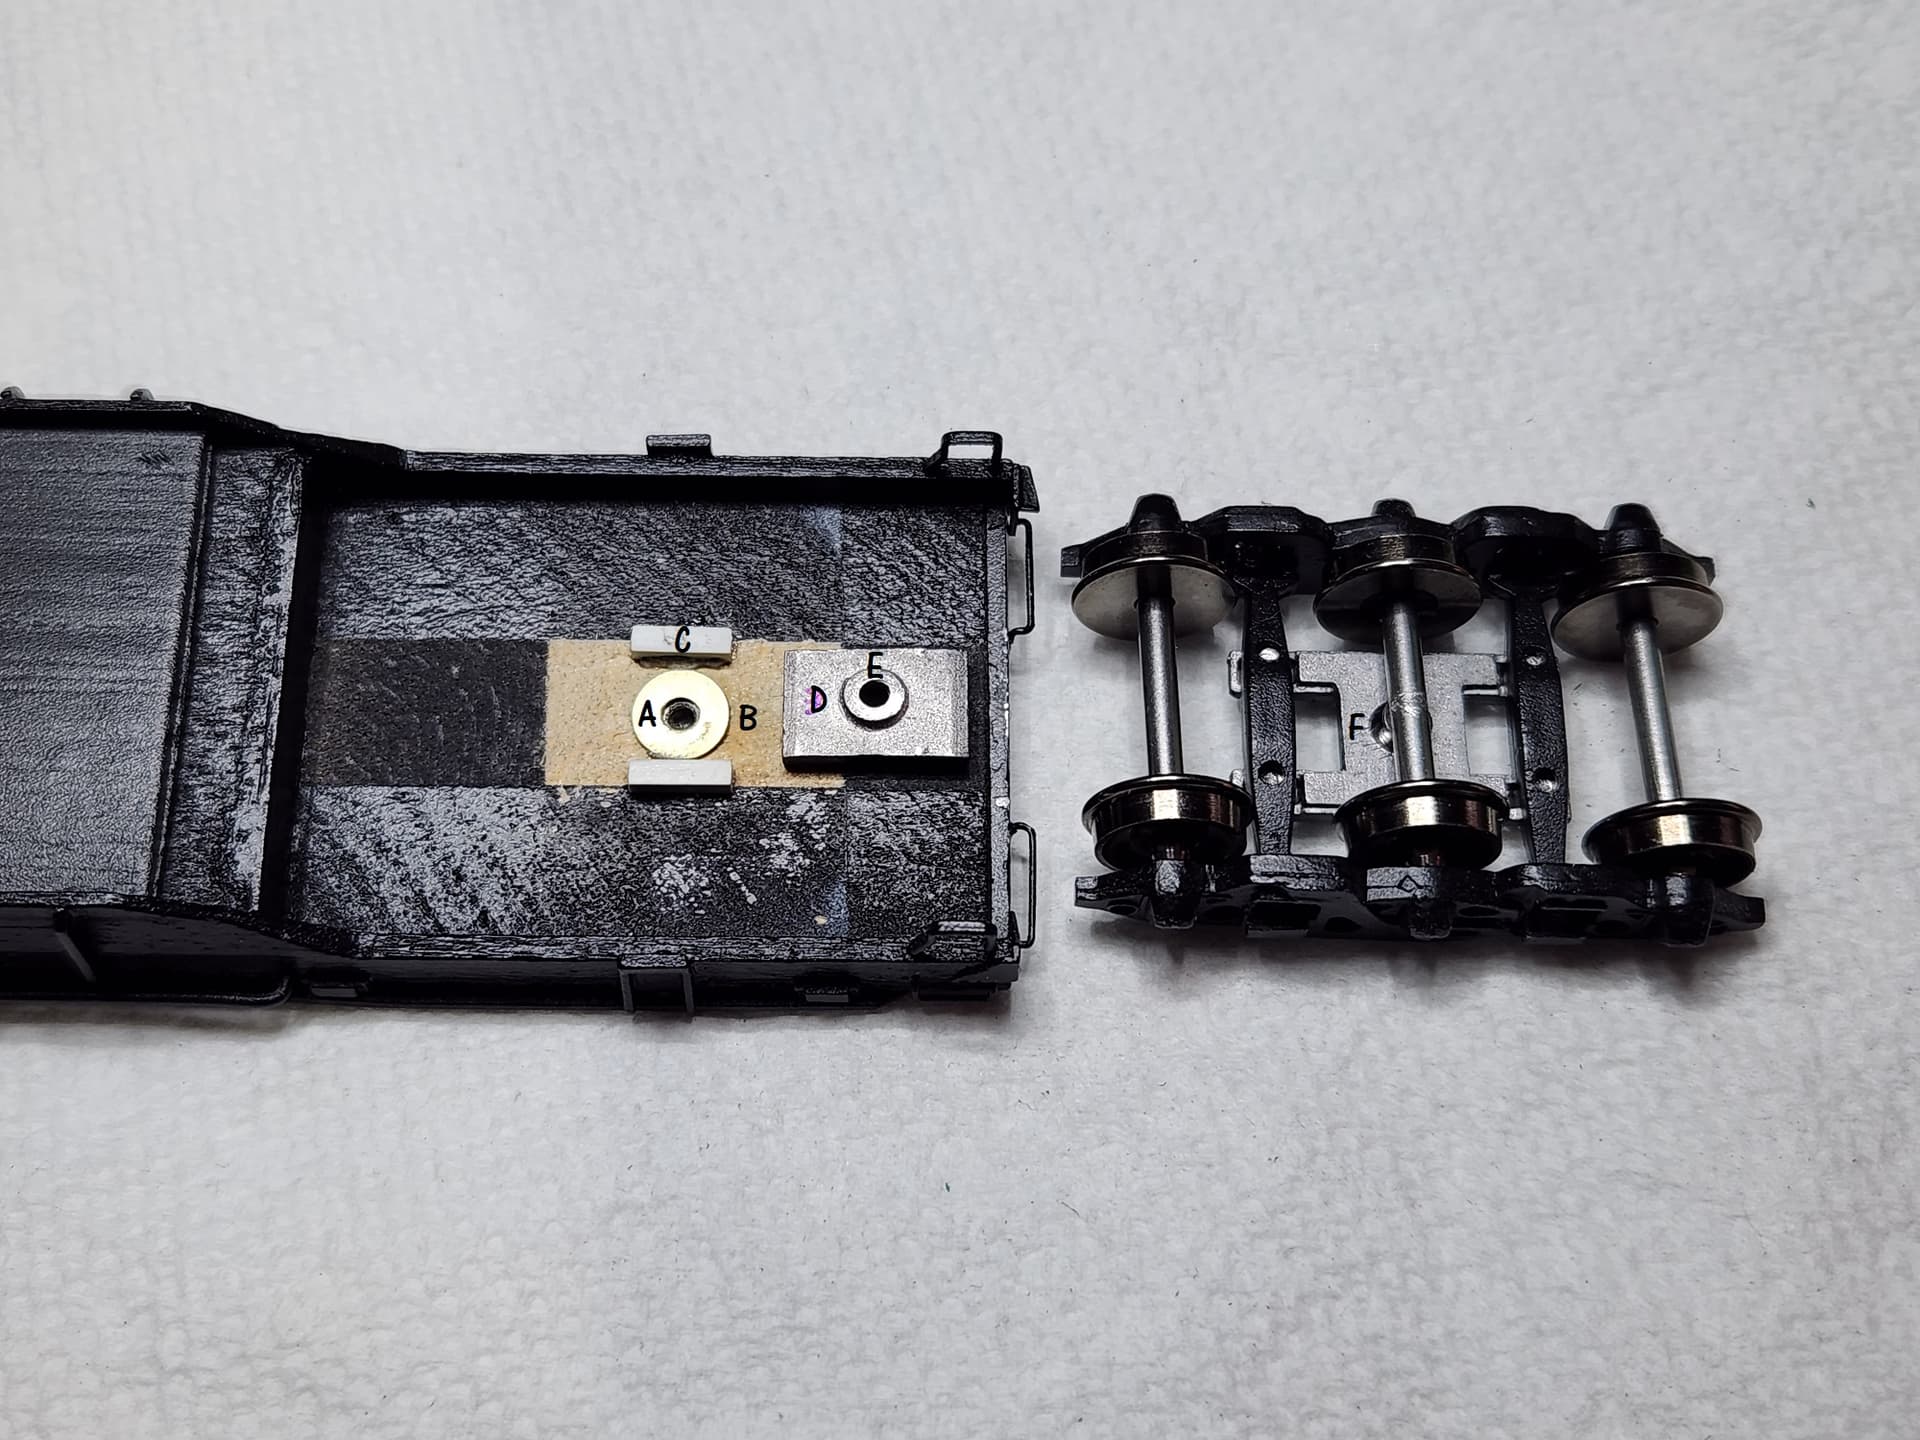
It’s been a while since I had this out so I’m not entirely sure that the idea was completely successful. I do know it’s a better idea than taking the kit designer’s suggestion and gluing the truck to the car body. All the screws to remove/disassemble the truck would then be completely hidden and inaccessible.
That’s a bad design in my book.
Tom
That visual is a clearer explanation. But then my next question would be how did you manage to install that screw? Looks like the center axle spans the screw head. Do you have some sort of ratcheting miniature right angle screw driver? 
And a very legitimate question, Dick.  IIRC, I installed the truck with both screws holding one truck side slightly loosened so I could push the center axle just out of the way to tighten the bolster screw then re-tightened the truck side screws - if that makes sense.
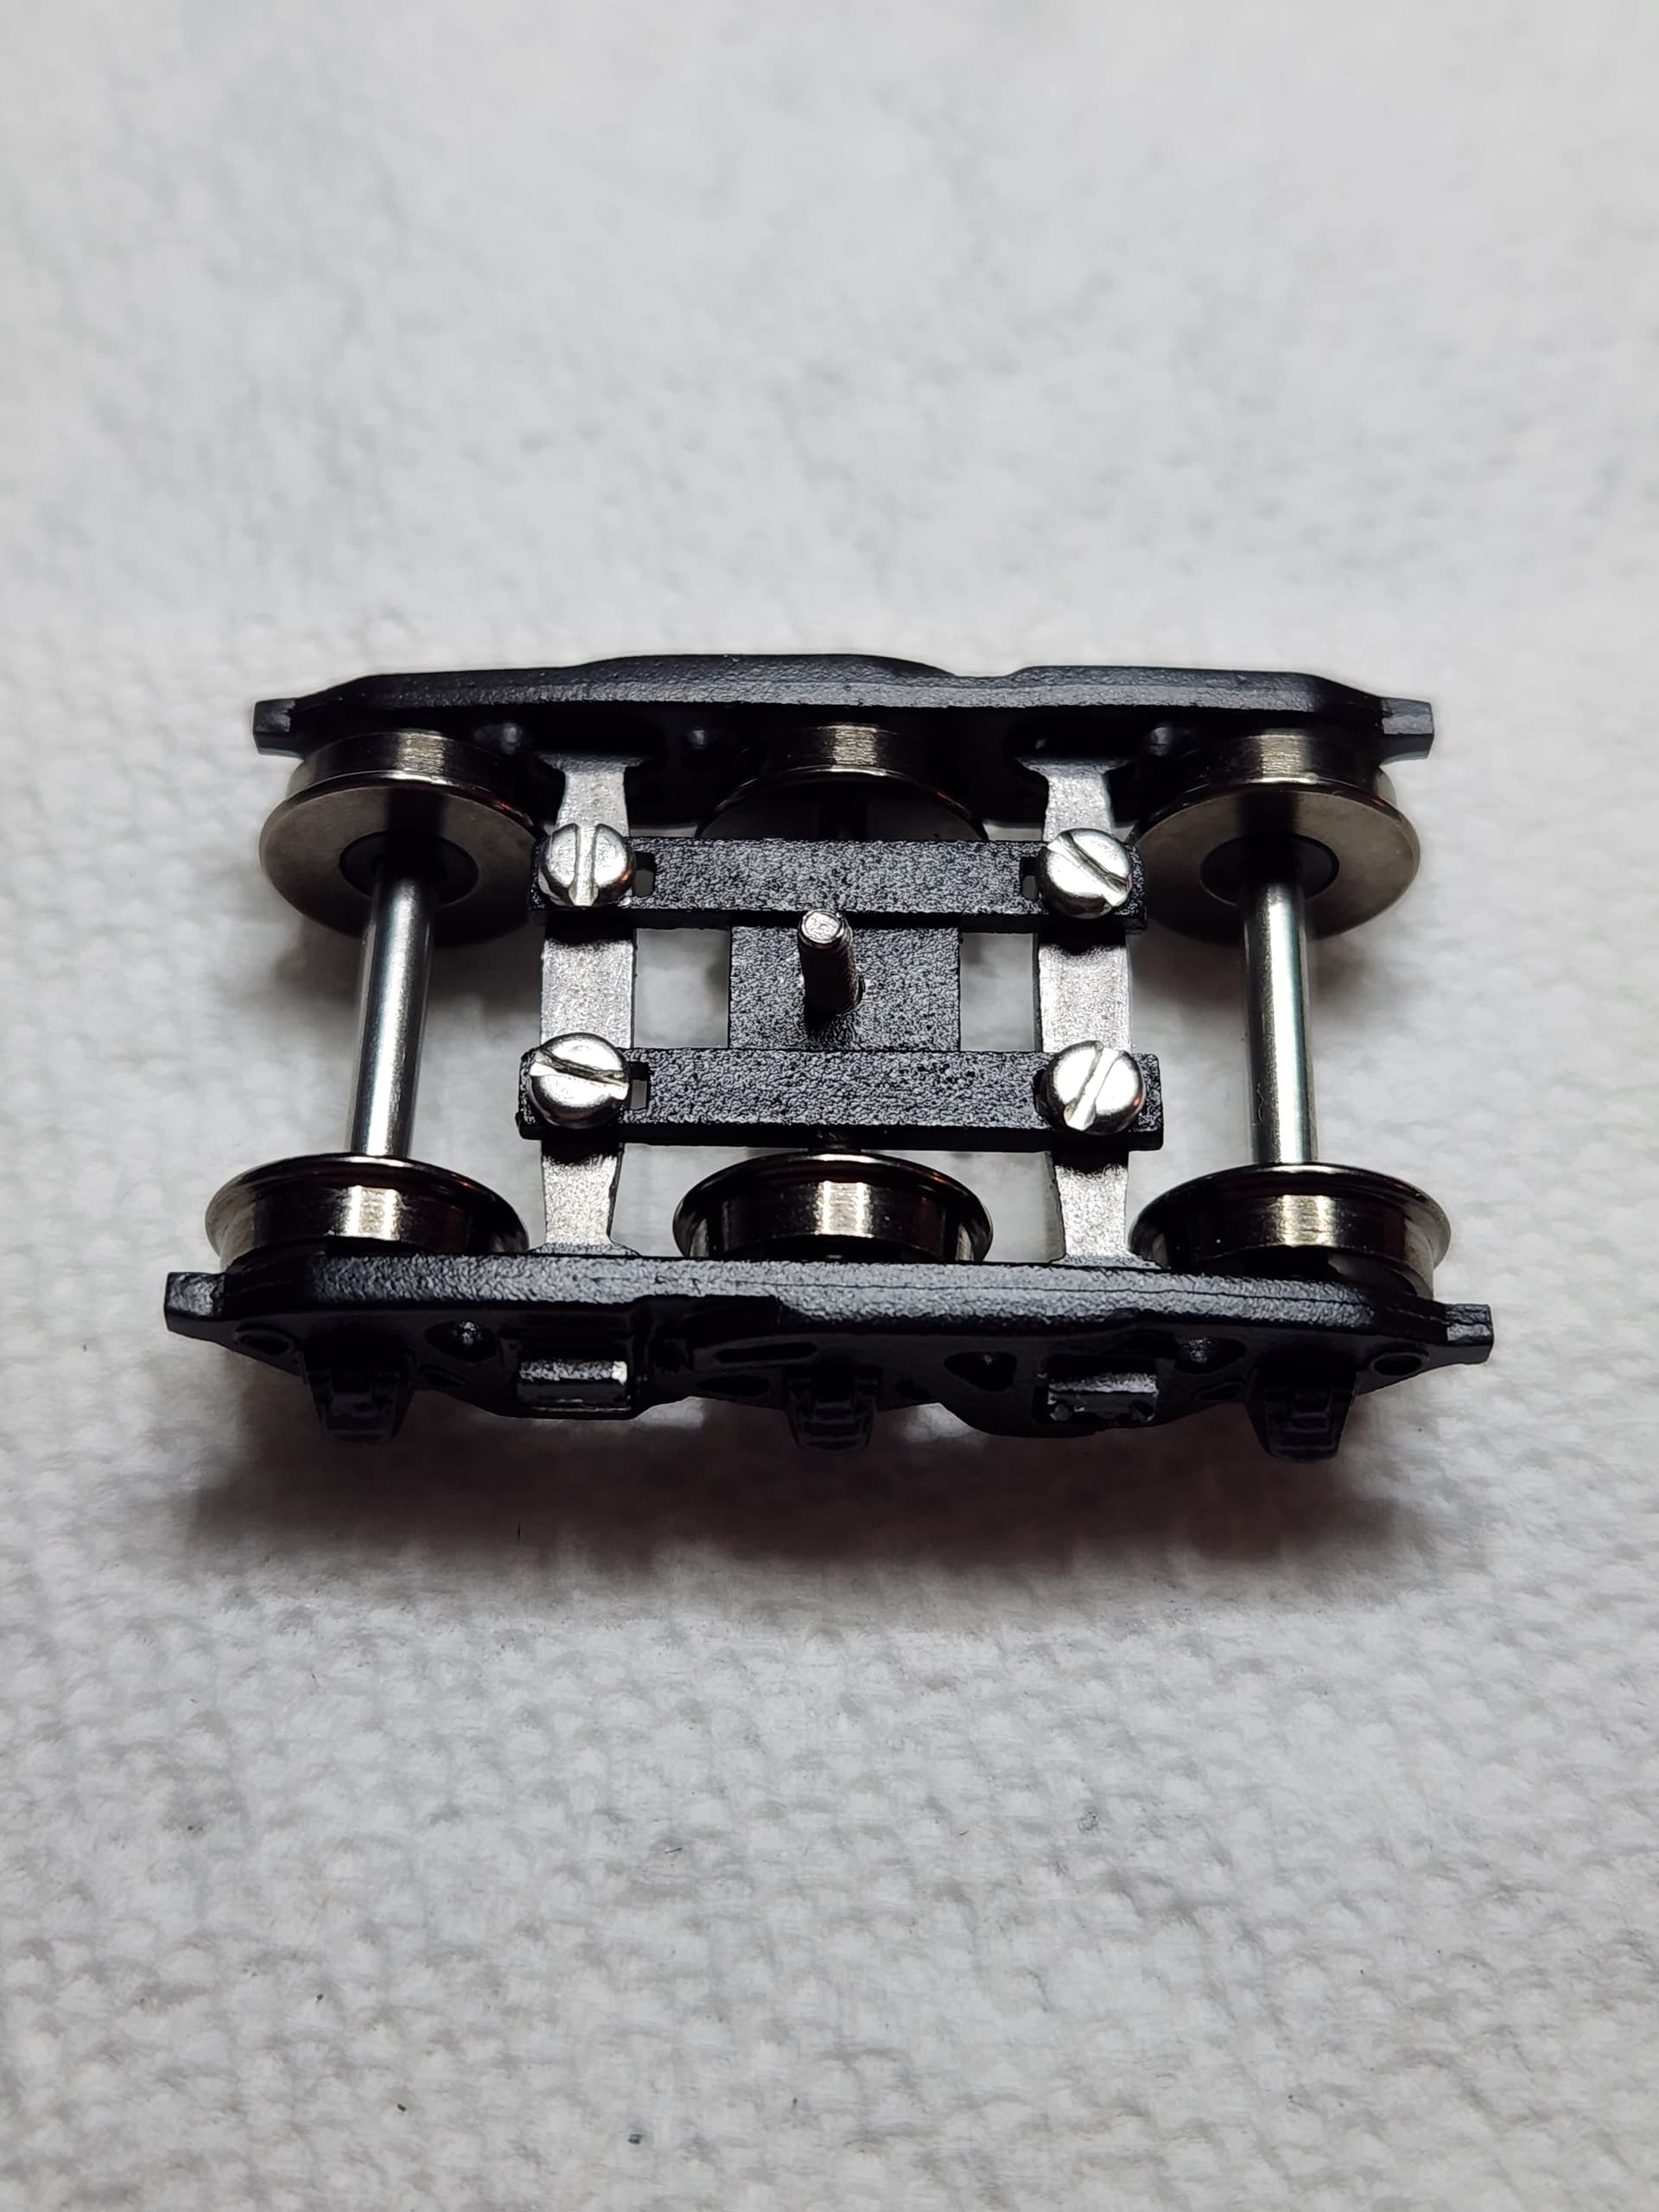
The trucks included in the kit are quite nice. Assembling them, however, is test of one’s patience and hand skills. When it’s assembled, it works great. Getting to that point is the challenge. And then you get to add the side springs. 
Tom
I’m afraid that at this point of my life, if I wanted a challenge, I might start with the similar F&C kit.