About ready to try envirotex for the first time & was wondering if it would work if I placed my dock with pilings into the wet envirotex instead of trying to push it around them after they are glued in. Also, would the second pour level itself around them? I have over 100 pilings & some of the braces are pretty close to water level. THANKS
I will caveat my resonse by saying that I have never used Envirotex, but have used several products which go in viscous and then harden. My gut feeling here is that trying to push things down into the resin is asking for trouble. You risk things not being level, gaps between the seabed and your pilings and not being able to fix things like rock or vegetation that move. My personal rule is that the water goes in last of all. I even add things like cattails beofre pouring water. The only things that go in after the water are things that are on the water, like boats, birds, and lily pads.
As to the other part of your question, yes, both (or all) pours will self level. The will find low spots in the previous pour and fill them in
Id put the pilings in first. Keep in mind the Envirotex will creep up the sides of the pilings a bit. Also make sure you follow the directions when mixing the Envirotex, to stir it vigorously for the indicated time. It needs to be well mixed before pouring. A friend of mine didnt stir his enough, and it would not solidify - twice! Had to make the small wharf two times before he did it right!
Envirotex will flow around the pilings and will seek its own level. Still, you will be better off pouring it slowly in a distributed fashion, rather than dumping it all in the middle at once. I’ve done pours around pilings and trestles, and it always seems to come out well. You should do several thin pours rather than fewer thick ones.
Envirotex does need to be mixed thoroughly, but I wouldn’t use the term “vigorously.” If it’s stirred, not shaken, it will “bond” better. You don’t want to get air bubbles into the mixture. I did a pour once where I did not mix it sufficiently, and it remained sticky for days, and wasn’t getting any better. I added another properly-mixed thin pour on top of it, and that worked out fine.
I’ve used lots of epoxy resin (Envirotex is one brand name). It will flow a considerable distance, and there would be no need to work it around pilings.
If your concern is that you’ve built something with bracing so low that resin will cover too much of it, there are ways to handle it. If the resin is sufficiently tinted so as to be only somewhat translucent, as much real water is, and you need some depth to start with, you could pour most of the resin, then wait for it to set up and provide a level surface. Attach the structure with pilings on top of that, then add a very thin coat of additional resin to flow around them and blend them into the finished water. You could possibly pour on this last coat before adding the structure above it (if your substrate is colored appropriately, and perfectly level, you may be able to do as you initially asked and just add the structure into the thin resin coat while skipping a thicker base pour). I’ve seen model wharves installed atop a resin base, and the fact the pilings don’t extend all the way through isn’t at all obvious, but it will depend on how well you can see through the water.
Other water modeling methods, like gloss medium, may be good solutions if you can pull off the water by only adding some shine to the base already in place. That would remove the potential issue of resin creeping up the pilings. If resin does creep where it isn’t wanted, the effect can be mitigated with some paint and/or flat finish like Dullcote.
One of the problems modelers most often encounter with epoxy resin is failure to set. Attempting to get a perfect 50:50 ratio of resin and hardener often results in a batch that won’t fully polymerize under the conditions we subject it to on a model railroad. To prevent a batch fram staying sticky, make sure to mix a bit over 50% hardener (part B). You can go quite a bit over 50%, although the more hardener is added the greater risk of color turning slightly yellow (depending on how you color the resin that may not be a concern). I’ve never had a batch mixed with over 50% hardener fail to fully set. I HAVE had batches mixed precisely at 50:50 remain sticky, regardless of how well they were mixed.
Another fix is to mix a batch with plenty of extra hardener and apply it over the sticky earlier one with a disposable brush. That will almost always result in a hard surface, and you won’t have to worry about losing anything under it.
Great advice on the use, I do advise tinting the resin layers. Pullman green or olive along w/ light browns will tint for that harbor/ waterway. You may need to experiment w/ amount and mix to the color you like. First pours can be done darker and lighten the sucessive ones. Submergered objects can be placed first or between layers. You will experience some “creep”, but touching up or flat finish will knock down that shine. Some re landscaping @ shore etc may be needed also.
Does all of this apply to Envirotex Light, also?
Sure, the only difference with Envirotex Lite is it’s half the calories.
Two part epoxy-type resins all work essentially the same, regardless of brand. Used to be I’d mostly see Envirotex brand and Crystal Sheen, depending on the retailer. Now the former is gone and I only see Envirotex with the “Lite.” They’re both currently offered by the same company (Environmental Technology, Inc.), so I don’t know for sure if it’s nothing but a name change or if the formulation is somewhat different. It works just like before. I’ve also used Amazing Clear Cast and it’s the same too.
I’ve only used Envirotex Lite, but as I recall, the original formulation was said to be very smelly, indicating the presence of nasty gas so that using it in a well-ventilated space was recommended. That does not seem to be the case with the Lite version.
That brings up another tip - this time of year for our northern hemisphere types, keep your windows closed! Yes, closed. What you do not want is pollen settling on your Envirotex while it’s curing. Once set, it’s easy enough to keep clean, but until then you’ll never get the pollen out. Consider using a cover over the area after each pour.
Thanks everyone…seems the concensus is to glue everything down & pour. Seems everyone believes that the resin will level out around the pilinge. Just remember pictures in magazines of people guiding it around things.
How about “Magic Water”? How does it compare with the epoxies?
Jim
Not only will Envirotex find its own level, it will also find any pinholes in the substrate and leak out onto the floor! [:O] Thin pours work better than thick, keep the windows closed (see above) and the result will be great. Also air bubbles will pop up as part of the hardening process. Carbon Dioxide will pop the bubbles. Breath gently (don’t blow) so that local foliage wont get pushed into the “water”. For large area a butane torch can cut down on the heavy breathing.[;)]
As far as drying time…The layout is located in an attic that is neither heated or air conditioned. Would it be best to pour it when it is hot & humid or cold & dry?
I’ve found Magic Water to be less smelly than the mentioned epoxies. I prefer how it flows and find it easier to get good results with it-- it’s less “fiddly.”
If you think that Envirotex does a good job of finding pinholes and other leaks, Magic Water, being generally thinner, is the all-time champion at finding pinholes, gaps and any kind of leak that’s out there.
Thanks. I’ve really liked still water ponds I’ve seen using Magic Water but no rapids with acrylic gel waves added yet. I’m considering using it if I don’t like my modge podge look/rapids when I get to them down the road. I need to go find some magic water streams/rapids before deciding for sure. I did sniff a bottle of A & B and being a fume sensitive guy, it was fine. (No windows in train room/adjacent to family quarters).
The proprietor of Magic Water has updates/news on his site which is worth looking at. I believe there was a recently discovered issue when using Sculptamold (rather than other plasters, etc. for sealing) with Magic Water via feedback, but can’t remember for sure and don’t want to start rumors! Anyway the site is worth perusing for that alone.
Anyway, for bottom detailing (old tires, anchors, junk, what have you) the Magic Water’s transparency was awesome for viewing them.
Jim
Jim
It sounds like you’re referring to gloss gel. I have been using Liquitex Gloss Medium to make water. It’s very fluid, and self-levels jst like resin products. The only thing that makes it tricky to use is that it shrinks when it cures, so you generally need more pours than you think you will.i use gloss gel for ripples, waterfalls, etc
I’ve used gloss medium from Liquitex. I also like gloss Mod Podge, which is somewhat thicker and seems to go on with fewer bubbles.
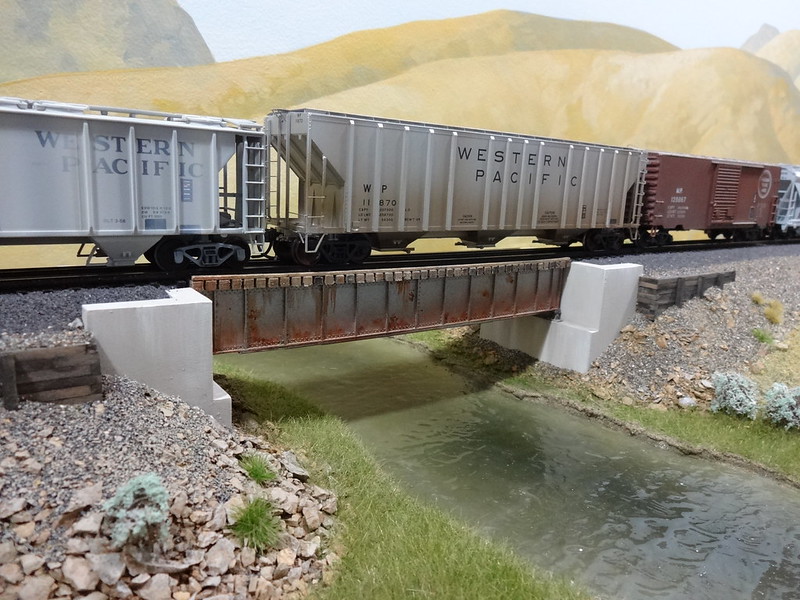
This creek is Mod Podge over painted plaster.
Looks good, but will it flow aronnd pilings etc.? Too many (over 100 ) to try to paint around them.
Rob, how transparent is Modge Podge or gloss medium? Can junk/tires, rocks, etc. be readily viewed through slightly tinted medium?
Thanks, Jim