We are getting ready to build our 2nd layout- the first was done in n-scale unitrack. This time we’re going to try atlas code 80.
What are the pros and cons, advantages\disadvantages of sectional vs flextrack (in n-scale)? We are not accomplished modellers at this time, and one of us is 8- so keep that in mind.
Sectional, more joints, every joint is a potential kink, bump, etc. But you know the radius, and it is not hard to lay. Though it is harder to lay well than you might expect.
Flex, fewer joints, smooth curves, easy to do easments, more “flexibility”. It takes a little more skill to lay, in some ways, but in other ways, not really, as there are fewer joints. You catch on pretty quickly.
I’d agree with all of that, sectional track isn’t as easy as you might think and flextrack isn’t as difficult. I’m about to start my 7th layout (lol, maybe 8th I think I’ve lost count over the years) and I plan to use a combination of both (in N scale with code 55). I’m by no means an expert, but here’s a few suggestions:
If you are nervous about using flextrack, at least consider using it for long straight sections. every joint you can eliminate is one less to worry about.
Having said that, look at the straight sections of your plan and see if they can be replaced by large radius “lazy” curves. Try to include one curve of a 6 ft radius or more (in N scale) if possible, even if only for a short distance. You’ll be amazed at how great your trains look snaking through a large curve. (But watch out for s-curves!)
Which ever you decide on, take some extra time to make sure your roadbed is nice and smooth before laying down your track. This is important for either track, but even more so with sectional track.
If your track plan has grades, try to use a section of flextrack over the transition from level track to grade. Sometimes if you use sectional track at transition to grade you end up with a “vertical” kink in the track that looks horrible, and can cause you derail problems.
If you do use some flextrack, you’ll probably have to trim it. Make sure the cut is clean and flush. Use some good rail nippers and clean it up with a file.
My best suggestion is to take your time. I’ve built a layout or two where I just couldn’t wait to get things running, threw it together, and then regretted it later. Take your time, do your best to make sure your rail joints are nice and smooth. You be happy you did later.
Hope that helps and best of luck! Let me know when you lay that golden spike!
The only other thing to add is that there is a learning curve with flex track, but nothing Dad and an 8 year old couldn’t over come with a little practice. You need to be skilled with laying out curve radii (Dad) and reading books on laying track will work wonders to shorten the learning curve. Should be a lot of fun.
A couple of notes in the margin, from one who models in twice-N scale (1:80, aka HOj)
I use flex. I also like transitions, both horizontal and vertical, and build to curve radii that aren’t made in sectional track. One trick I use is to lay out my trackwork full size on thin card stock, marking my curve radii on both the centerline and the outer ends of the ties. I trim the card to flex track width, then lay the flex right on top of it (both cardstock and flex are fastened to the roadbed with grey latex caulk.) While the centerline might get lost under the caulk, the step marking the outer ends of the ties is very easy to follow.
One other thing. Take a fine file and knock the sharp corner off each rail at every rail joint. You don’t want to remove much metal - a barely-visible facet less than 1.5mm long and perhaps .3mm deep at the rail end is adequate. This prevents wheel flanges from ‘picking’ less than perfectly aligned joints and climbing over the rails.
Last - if one rail of your flex track slides and the other one doesn’t, put the sliding rail on the outside of the cu
Having the sliding rail on the outside spreads out the ties on the outside. Having the sliding rail on the inside reduces the tie spacing on the inside. I prefer the look of the latter and have no issue with trimming ties. [2c]
[bow] Flextrack baby, You can’t go wrong with it, smooth easements,no kinks, smooth curves, A better running layout my brother. I can’t spell it out any clear!! F-L-E-X-T-R-A-C-K it’s the the way to go!!!
i used flex track on my first layout, its not very hard at all and i must say easier than sectional track cause you can make the track where you want it to go rather than where the sectional track will take it
Obviously once you have gone to flex track you do not want to go back to sectional track (except maybe for the turnouts to avoid ballasting them). But say this for sectional track: it has good geometry so it is fairly easy to follow the track plans that are published for sectional track. If laid correctly with all the rail ends meeting evenly – no cheating with gaps or kinks to make things fit – it avoids some of the little oddities that can happen with flex track. It makes it easy to change your mind. And unitrack looks nice right out of the box so it offers more or less instant gratification.
Flex track is not just for super advanced model layout builders. It is likely to be well within your capabilities right now and it is fun to lay the subroadbed and then the track – things do not look so rigidly uniform and toylike. But at the particular stage you and your boy or at, maybe this layout should still be sectional track – and give flex track a try for a siding or two.
Being very inexperinced at the whole modeling game My first layout which I am still in the process of working has a combination of flex and sectional atlas code 80 track. My advice is ask lots of questions you get some real good advice here. Secondly when doing curves with flex if you have to make a joint in the middle or at the very end of the curve I would suggest soldering it first before laying otherwise you may get an akward little kink that will cause you lots of greif (personal experince) Otherwise just follow the simple rule take your time
You can get around a lot of the problems with snap track by laying it carefully. I laid my current V&E with snap track, and it was a great way to work out the bugs in the track plan by “analog computing” (build, run trains, alter plan, run trains…). I didn’t even nail it down until I had a plan that I liked. My eventual plan was to replace it with flex-track on cork roadbed, but I still haven’t.
The track was secondhand brass and steel with some new NS. I cleaned and “GLEAM’d” it, and replaced all the rail joiners with new ones. I think these last steps are quite vital in making used track work without the headaches it used to give me.
The biggest problem with snap track is that it’s hard to get cheap used stuff with more than 22" radius.* Of course, everything I have runs fine on correctly laid 18", and I don’t have much room anyhow, so no sweat.
If you know exactly what you want, use flex track. But I wanted to railroad fast, I wasn’t sure what I wanted for a track plan, and I wanted to leave funds for the purchase of better track later, so I used what I had on hand or could scrounge up for minimal outlay.
(N.B. I am speaking of classic HO snap-track without roadbed. I have little experience with roadbed-type track, because of the cost and lack of real cross-brand compatibility.)
*Biggest problem for me, that is. There was a time in my wild youth when I sliced the under-rail plastic web, soldered several pieces of curved track together, and bent it to a larger radius, but I don’t consider this a useful practice today. However, I /have/ run across track in used lots that got the same treatment, so I’m not the only one out there…
My recovered sectional track(The Plywood Atlantic was 90% Atlas snap Track) will be used in the staging yard. The new layout will have wider curves and easements, etc. Flex track a must. Although I’m still contemplating a tight loop with 15" radius sectional track to show off my very first train set, high and at the back of the main layout. Flextrack that tight may be difficult to get right.
After using both for many years (in O and HO) my new HO layout is using Kato Unitrack. Given that N scale has so much more available than N, there’s no question if I switched to N I’d be using Unitrack.
I managed to work my Kato track in the industrial area pretty well. It is most in need of some wriggle room. Example the Grind Shop has room for two boxcars and then some to accomodate a crane track beyond. But to get to both requires a switch back.
I like flextrack as well. But chose Kato because the radius of curves is set and easy for me to think total availible space in my head. Also it is mobile and not too pernament. Flextrack will go here and there where necessary.
I actually raised the industrial area to get it above the main and clear the room to access all the buildings with the necessary trackwork, runarounds, curves and switches. At the end of the day the plant can be switched effectively and Im happy.
We did our first layout using unitrack- because I was new to the hobby, and Nik at the time was like 5- so no strong opinions there
Why wouldn’t I use unitrack again?
it’s more expensive
while it’s great to have the turnout motor in the turnout, when it goes bad, you’re ripping up scenery and track
it was really hard (impossible for us anyway) to build a layout without gaps between tracks
while there’s a great set of curves, just messing around with flex seemed like we could do layouts we couldn’t ever conceive of in unitrack
you have to do more to make unitrack look really good in a layout
have read too many times that it’s not ideal for dcc (for a variety of reasons)
What we did like about unitrack:
no ballasting
it basically just works- we will always use it on our “temporary” layouts on the dining room table
anyway, we love unitrack for the “other layout” that gets set up and taken down a dozen times on the dining room table. But for the “real layout” we’re going atlas, just trying to decide when and where to use flex vs. sectional
I agree, that Kato is more expensive. I buy about 2 switches every two to three months. If one should fail, it is rather easy to get them straight up and out of thier track bed and reballast/rescenic around the new replacement.
Makes you think and think to make sure that every switch you buy has a identified benefit to the railroad and meets a need. Sometimes you dropped a switch in a spot to make switching easier and faster… if you think you can pull a string of cars out of thier spots one time instead of digging them out one by one, it works.
However, when you master flextrack and all the possibilities on a GOOD benchwork… the beauty of the trackwork will show in the smooth move of your trains flowing through.
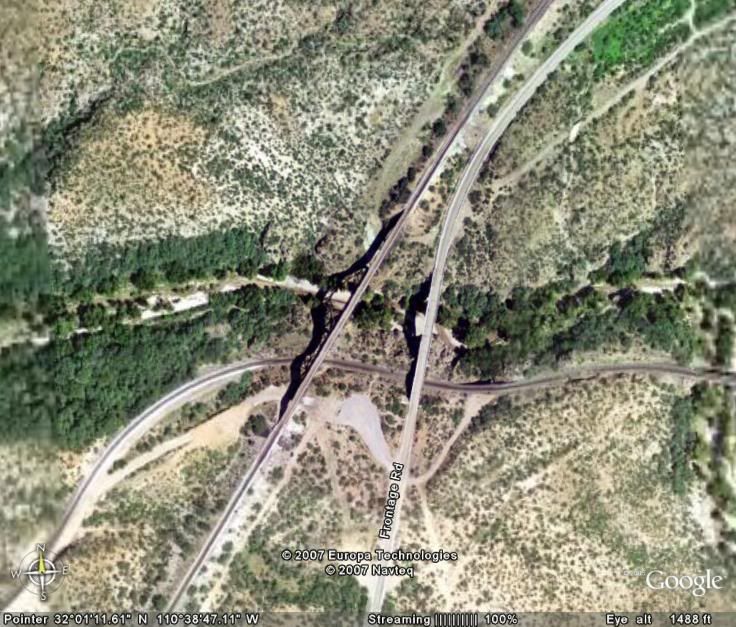
Excellent photos! Thanks for providing the Google Earth Photo, as soon as I’m done here I’m going to check that out.
Now Nik and Dad,
Just curious, how big is your space? A lot of guys in here (including myself, lol) have been talking about big curves, easements, etc. Just want to make sure that is the kind of thing you are looking for ( and are looking for), and we aren’t getting off topic.
One more suggestion. This may be a little goofy, but I know you are building this with an 8 yr old and he might enjoy it (lol, I’m 43 and I enjoy it!), but when you start laying track, hook up power and start running something right away. I fill one gondola with track pins and another with rail joiners and push it around with a work locomotive. It not only motivates you to lay more track, but it also checks your work while you are doing it. Some guys may think this is common sense, but when I was new to the hobby there was a couple of times when I laid all my track on a small layout before testing any of it and then regretted it later.