I really need some better information than what the current issue of MR provides for fabricating a gauntlet track. The photo’s did not show at a good angle and were not clear enough (for me). I would really love to see a video on the subject. Or at least some easier to understand text.
I agree; it seems like they left out the “this is how you join the trimmed turnout to the gantlet section itself” – which is the only difficult part of the whole shebang!
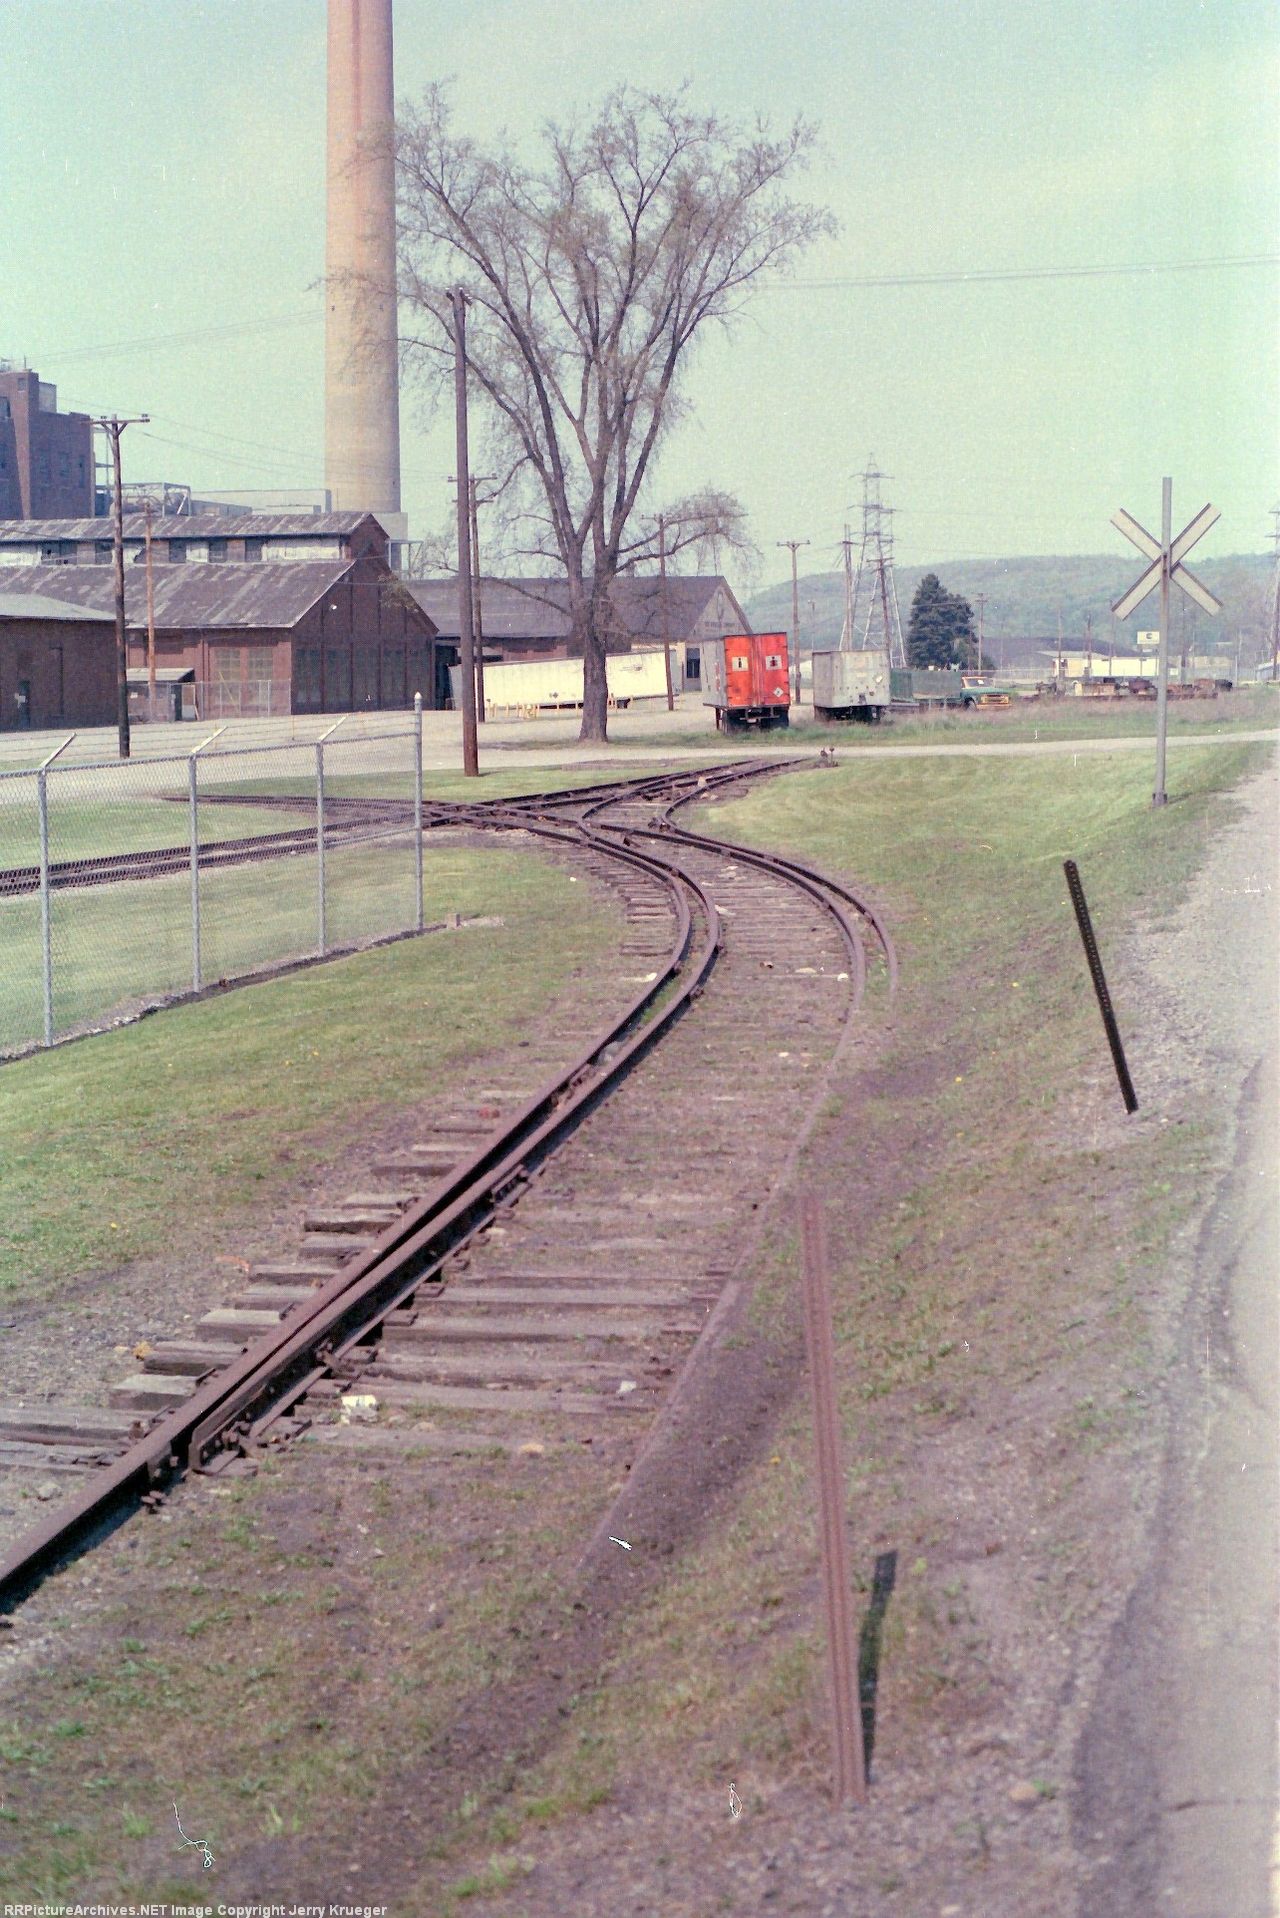
What seems unclear? Between the title illustration of the completed project and the prototype pic, seems clear enough, but then it’s not the first time I’ve seen one and I maybe presuming things those not familiar with the concept may have difficulty with.
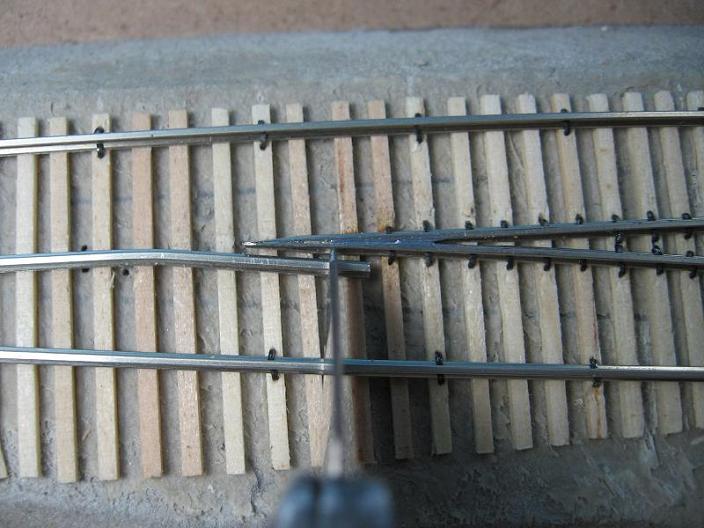
In Fig. One, the piece on the left is what is used, while the piece on the right is scrap. Instead of the points bringing the two sets of rails back together as in a turnout, the two sets of rails are attached so that they run in parallel through the gauntlet. At the far end, the arrangement is mirrored so that the tracks diverge back into separate parallel tracks
If you’re really interested in building a gantlet, why not try hand-laying the frog from scratch instead of sacraficing two turnouts and trying to fit the turnout frog into the gantlet? This might be a good stepping stone toward build your own turnouts if you haven’t tried already.
I’ve got nothing against handlaid and it’s a good option to consider. On the other hand, doing your first 2 pieces of special work right before the tracks cross a chasm could be the source of frustration and costly accidents. I thought the article presented a neat and effective solution.
Besides, hacking track is the first step to laying your own. It was for me anyway. If I’m getting thrown in the Pool of Experience, let it be the shallow end. It’s confidence building to be able to put your feet down to get your head above water. If the waters are too deep or unknown, you may never get in the pool to begin with.
Although to be fair to the person suggesting handlaid turnout, the rest of the track in the article is handlaid using FastTrack gauntlet track ties in the first place, so since you’re handlaying track anyway…
He told us how he did it, not how you or Greg would do it.
In fact, hand laying the bridge track was just the sort of small steps one takes in acquiring a new skill. I just don’t see the benefit in discouraging people from taking intermediate steps, when the biggest problem most people have with skill acquistion is taking that first step. Perceptions of comfort level with skill acquisition are calls only the person involved can make.
I noticed from the MR photos that there was a fairly abrupt angle between the closure rails of the commercial turnout section and the straight rails of the handlaid gauntlet section. It would be interesting to see a video of a train passing over this trackwork to see whether the abrupt angle causes the train to jerk its way through the gauntlet.
Having learned to hand lay turnouts using Fast Tracks products (its far easier and more rewarding than you’d think), I would have hand laid the entire track segment ensuring smooth frog transitions and continuous rail to eliminate the abrupt angles of the MR article’s specimen. At the very least, I would have curved the ends of the gauntlet section rails (and maybe a little of the ends of the closure rails) to minimize any noticable angle.
I agree that using the Fast Tracks Jig for the entire project would probably be easier, and would eliminate any potential problems. The one downside is the cost of the thing is kind of prohibitive, especially if you are only doing one. The gantlet track jig can also be used to make a freight scale.
The finised product photo in the MR article isnt from the correct angle to determine if the angle is very abrubt or is relatively smooth. Personnaly I think you could go either way on that (it may be fine or it may not be), its hard to tell. It would be something to watch out for, but relatively simple to correct with a soldering iron and a pair of pliers.
And the seven people killed in the accident would too!
January 18, 1993
In the first passenger fatal accident since 1926, Train 7 from Chicago ran a red signal on the western approach to the gauntlet bridge, went into emergency stop, and paused for 5 to 30 seconds before being hit by Train 12 from South Bend. The lead cars, Car 27 eastbound and Car 36 westbound, sliced into each other killing 7 passengers, including a 10 year old boy. 95 people were injured. The NTSB held both engineers at fault, Train 7 for running the red light and Train 12 for failing to react.
A second bridge was added at the site in 1997 and the gauntlet is no longer in operation. The engineer of Train 7 was the dispatcher in the 1985 accident. NO CRIMINAL CHARGES WERE FILED, but both engineers were fired. Damages were estimated at $854,000.
(Cars 27 and 36 were destroyed. These cars were rebuilt in 2001. Cars 14, 16 and 31 were also involved.)
(Photograph of the gauntlet bridge in 1998) NTSB Report (1.46m PDF)
The signaling and operational aspects of the gantlet section would be interesting.
I remember the Erie’s gauntlet track in Warren, Ohio. I really don’t see much of an advantage over single track with spring switches. Maybe less maintenance at the switch points?
A gauntlet is also “A form of punishment in which people armed with sticks or other weapons arrange themselves in two lines facing each other and beat the person forced to run betweenthem. i.e ‘To run the gauntlet’”
It is this meaning of gauntlet that the rail-track usage is derived from.
So besides the more obvious uses such as to cross a single track bridge with double track mainline, what other applications are there for a ganlet track on a model railroad?
here are some examples of extending the closure rails. In the left image below, the switch points are on the far side of the bridge.
I don’t know if Fast Tracks even offers a gauntlet track assembly jig as the necessary dimensions would need to fit each individual application. However, the Fast Track hand laying methods using PC ties, bare rail, track gauge(s) and some form of template would allow you to build any track configuration you need. In fact, the only Fast Tracks tool I own is a #6 frog and point rail filing jig and I have built over 50 left and right #6 turnouts, several left and right constant 22" radius diverging route turnouts, one curved turnout and one constant 22" radius “wye” turnout. I use copies of the #6 turnout drawings supplied by Fast Tracks as templates for my #6 turnouts and used a CAD program to create paper templates for the other style turnouts. A little rubber cement holds the PC ties to the paper template and allows you to solder the rails in place. It is quite possible to file the frog rails without the Fast Tracks filing jig but having so many turnouts to build, I figured it was a good investment for me.
The only other use I know of would be at a scale for weighing rolling stock. The locomotive would use one set of rails that are not connected to the actual scale, and the rolling stock would use the other track, which is connected to the scale, because the locomotive may exceed the weight capacity of the scale.