I am building a lake and a wide river on my layout. I would love to see photos from everyone’s lakes and rivers on their layouts. Got any lakes and rivers photos? Please show them off and give me some ideas! Thanks!
No takers for their lakers? I guess I’ll go first, then…
This river was gouged out of extruded foam, and the riverbed was then lined and sealed with hydrocal. While it was still sloppy, I sprinkled some pebbles over the pour to keep the pebble tops clean.
The hydrocal had a dollop of tan paint in it, maybe a bit of burnt umber, I forget which. Maybe a mix of both.
Once it was dry, I sealed the edges with masking tape and then poured two layers of a two-part finish quality epoxy available at paints stores and hardware stores. Each pour was about 1/8" thick. A couple of years later I added one more layer (got tired of the glassy unrealistic water surface that was also drinking water clear), but this time I added a half drop of Hauder Medium Green acrylic craft paint and a pinch of plaster of Paris powder. It foamed a bit during the mix, and went on opaque. It dried nicely with no bubbles. When it was set up, I covered the surface with a thin layer of gel gloss medium and stippled it with the side of a small foam brush applicator.


John,
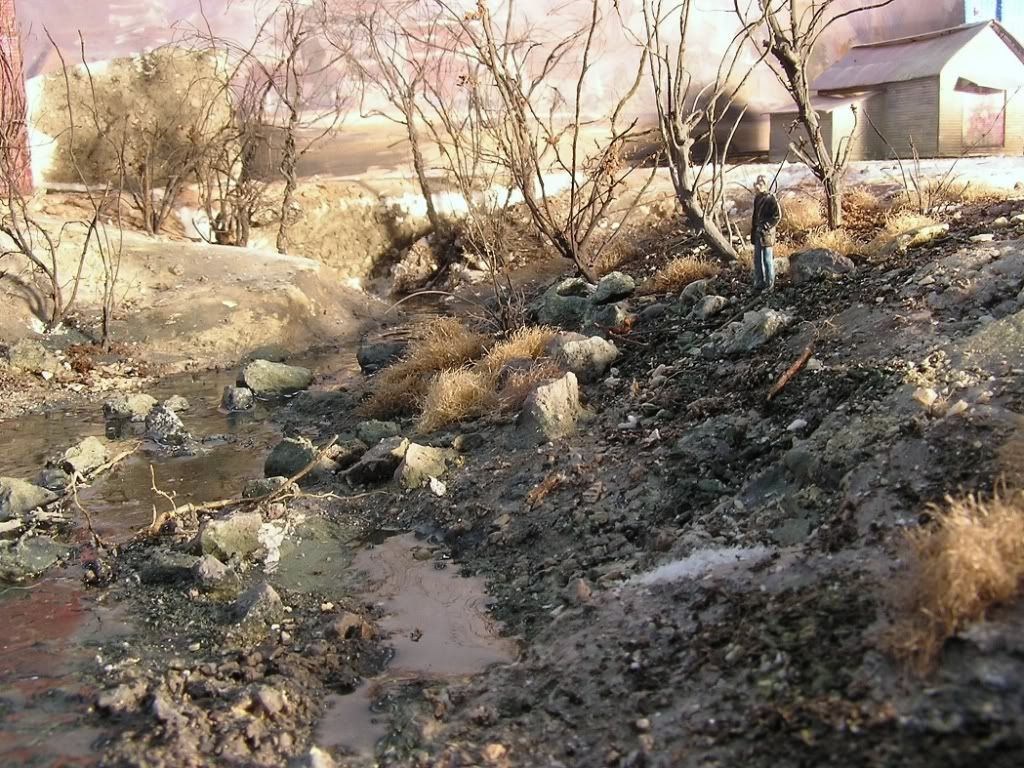
You will get replies from people who are both much better modelers and much better photographers than I am, but I’ll start things off:

This was a diorama that I made for a demonstration a couple of years ago. The river is made from acrylic gloss medium over painted plywood. The stream coming down the hill is made from acrylic gloss gel, dry-brushed with white gloss acrylic paint to simulate rapids.


Nice river scene Rich!!! I still can’t believe how great the turned out, with the tugboat.
A view from the north shore of Lake Erie:
…and the same area from a different perspective:
…and from overhead:
A river scene:
…and from overhead:
Another river:
…and the same scene as viewed from the air:
All “water” is Durabond 90 patching plaster on plywood. It was worked with drywall knives to create ripples, waves, etc., then brush-painted with latex house paint. “White water” effects were added with a small brush and Pollyscale paint, then the entire surface was given three coats of high gloss water-based clear urethane, applied with a brush. The surface is very tough and has withstood several years-worth of cameras placed on it for pictures like the ones shown.
Wayne
Thanks, Michael, I was pretty pleased how that all turned out.
Rich
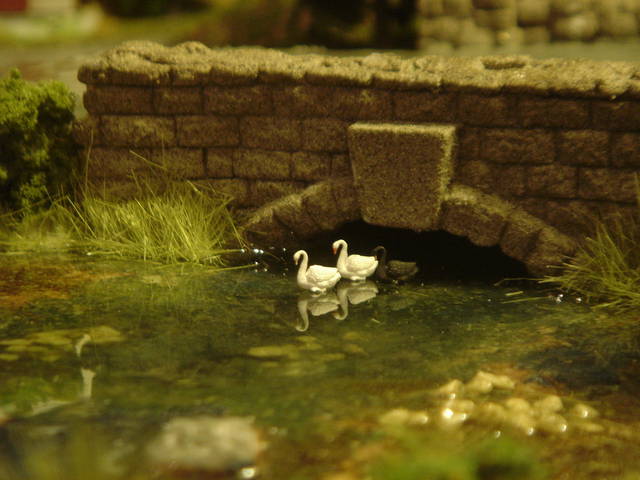
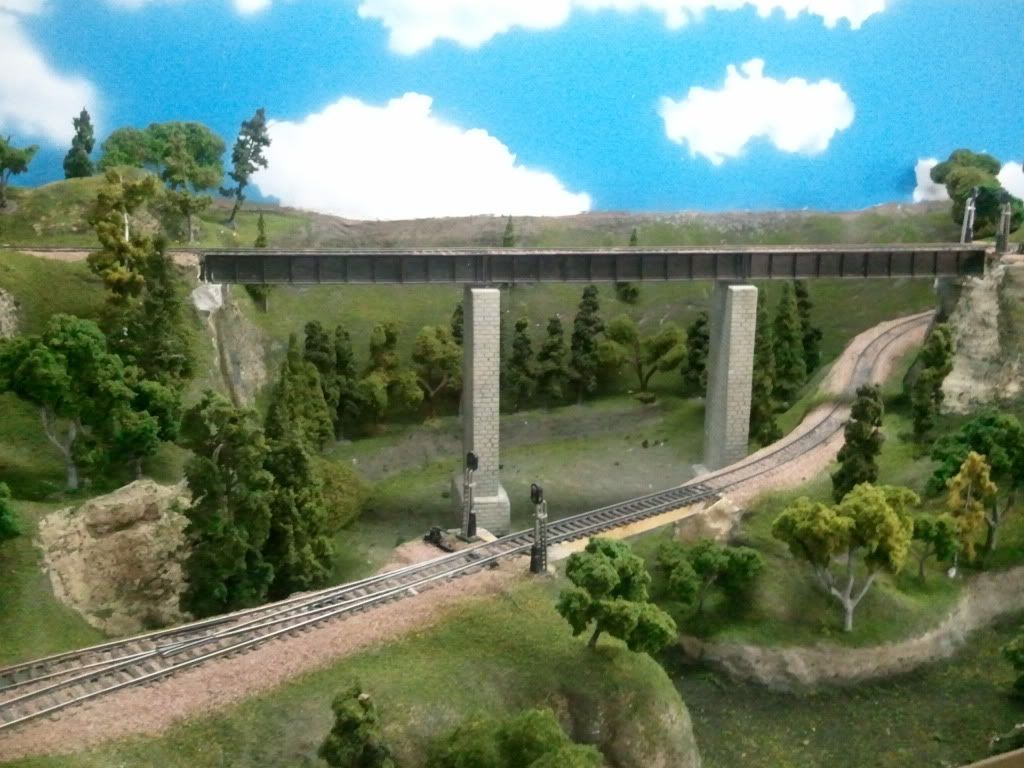
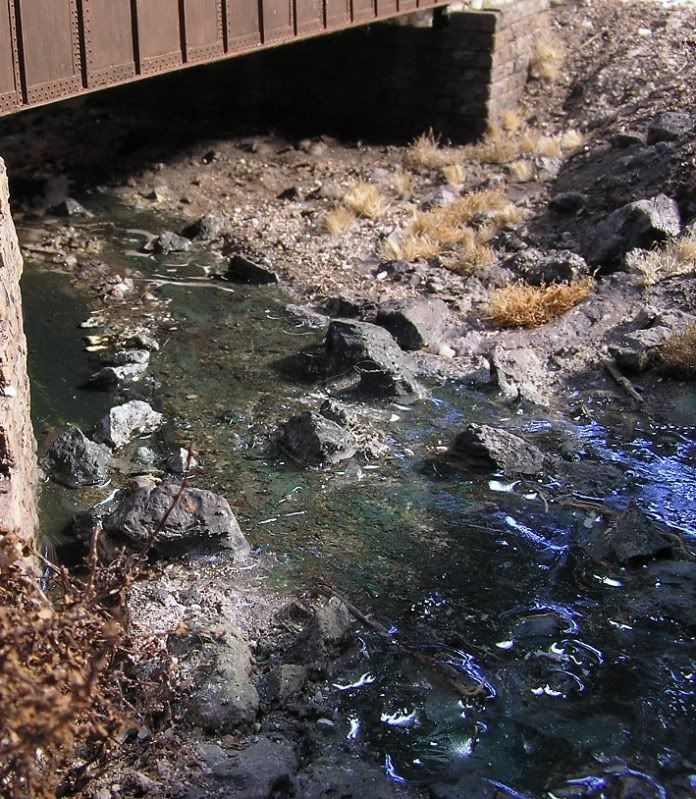
This quiet stream flows under a trestle at one end of my layout.
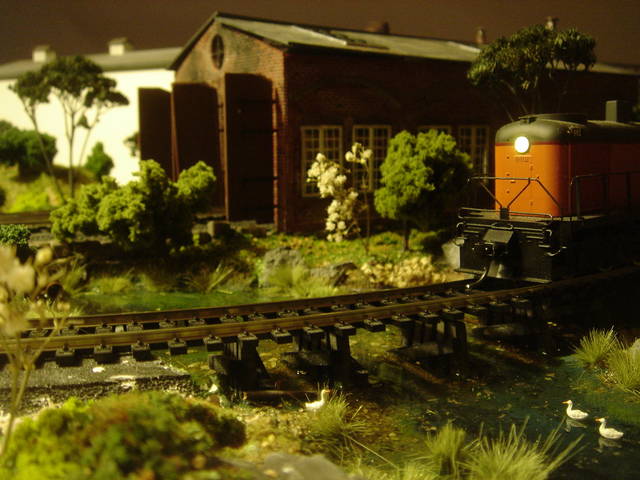
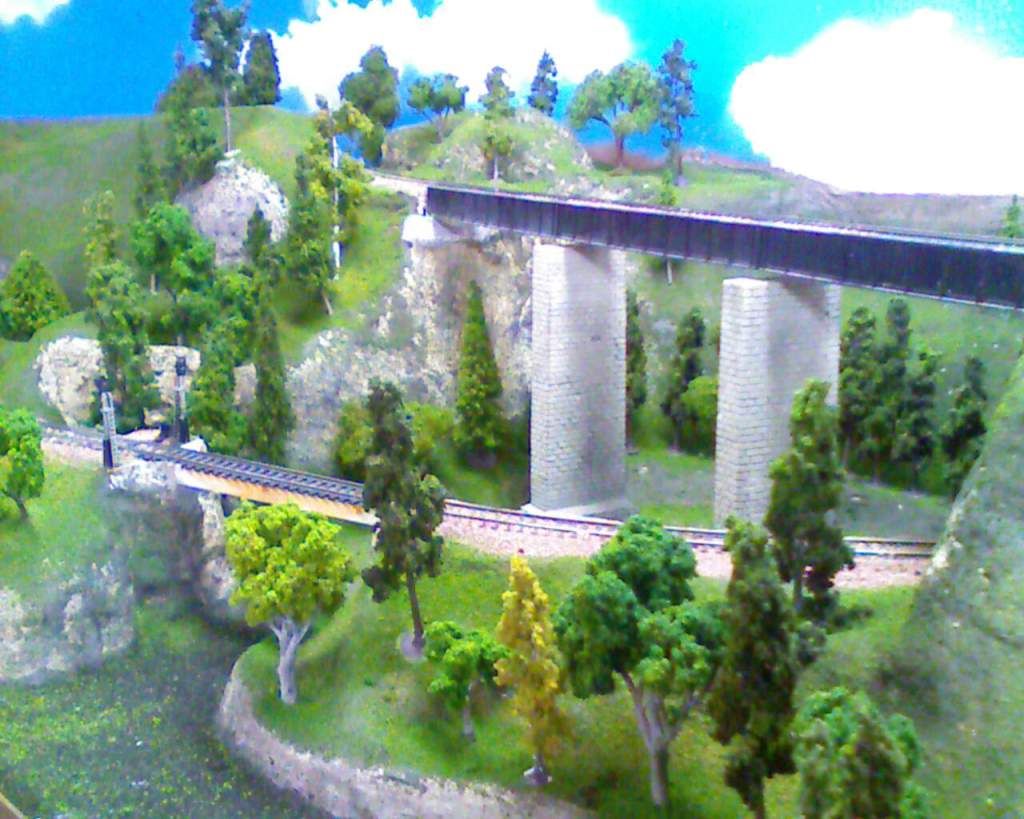
Beyond the trestle, it gets narrower:
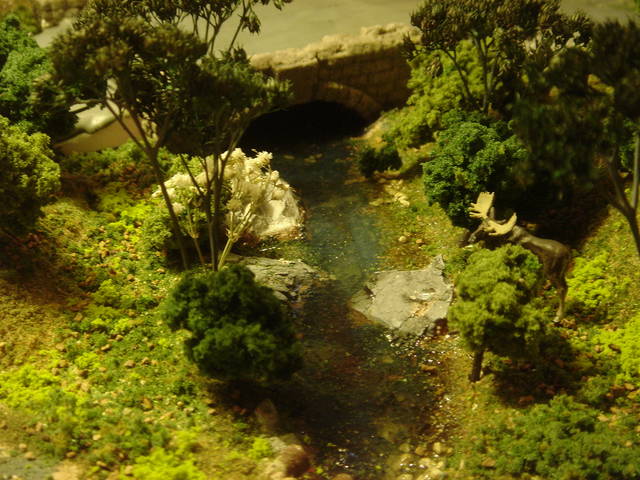
On the other side of that stone road bridge, it becomes a mill pond.
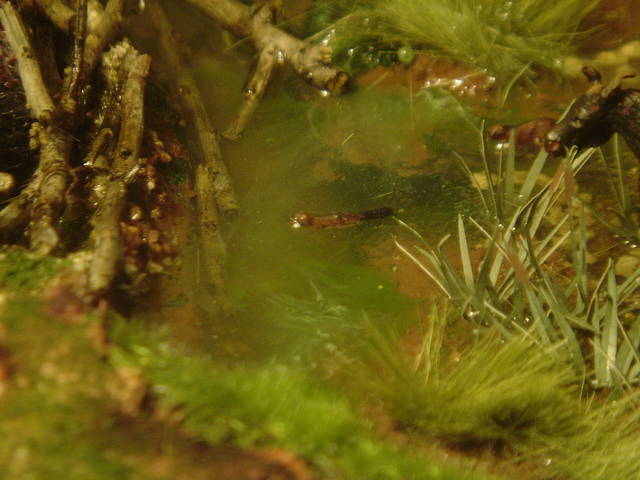
At the other end of town, there’s a swampy area. The beavers have built a dam and created their own swimming hole.
All of these were dug out ouf pink foam. I covered the rough foam with plaster cloth and then sealed that with white glue. Next, I added a skim-coat of Gypsolite to provide a gritty surface, and painted that. I typically used 3 or 4 thin layers of Envirotex. Each layer was tinted a bit differently with a drop or two of craft paint - dark colors for the deeper water, up to a light green for the top.
I added various flora and fauna as I went along. Envirotex is quite reflective, so having overhanging trees gives a nice effect. For the final shot with the beaver swimming, I took a Musket Miniatures casting of a beaver and shaved the “hull” to produce a “waterline model.” I glued that to the previous pour of Envirotex and then did the final pour around it, so that most of the animal was under the murky swamp water. Preiser makes the waterfowl, which are just glued to the top layer.
I had an area deeper than 30", so built my saw mill pond on a pull-out drawer. This gives me access to the rear. For a rather large harbor I use a sheet of random pattern plastic that on uses in doors. I painted the back a uniform blue green like a n equal depth harbor. For cascading rivers, I prefer to use Magic Water and WS Water Effects. Bob Hahn 

Though the trackage of the Yuba River Sub often follows the course of the aforenamed river, the river itself is modeled largely ‘off-set’. However, I do have one fairly large reservoir that the railroad crosses–Bullard’s Bar, which is on the confluence of the Middle Fork and Oregon Creek.
It’s great for fishing, swimming and playing hookey from school.
Tom
Here are some of what I have been working on…
Jim
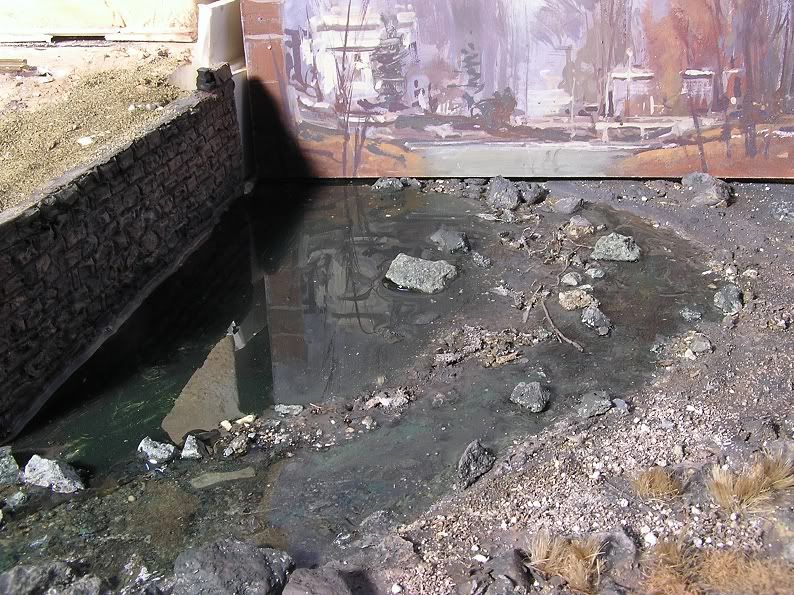
Well this is what I ended up doing today after some inspiration from you guys. It’s my first river so don’t be too hard on me. I still have to buy and apply some woodland scenics water effects around the rocks.

I think that your water looks pretty good, John, but I’m not sold on the rocks. Perhaps the addition of the water effects will make them look less incongruous.
I do give you full marks for your first attempt: too many modellers procrastinate until they become too scared to even make an attempt. And bear in mind that while it’s nice to get compliments on your work, you are the one that needs most to be impressed with your efforts.
Wayne
John,
I have to agree with Wayne on this one. The water looks terrific, especially for a first time effort. But, the rocks don’t look realistic. They appear too big and sporadically placed in the water. You might try removing them and using similarly dimensioned rocks of less height. But, overall, the scene looks great. My compliments.
Rich
I pulled the rocks, but it pulled up the paint and the water directly around it. So I’m repainting the area where the rocks were since it shows white underneath. Then I’m going to apply a little puddle of realistic water to each area. After that dries I’m going to apply another 1/8" layer of realistic water to hopefully make it look smooth on the surface again.
Have to compliment you on your water ways Dr. Wayne!!
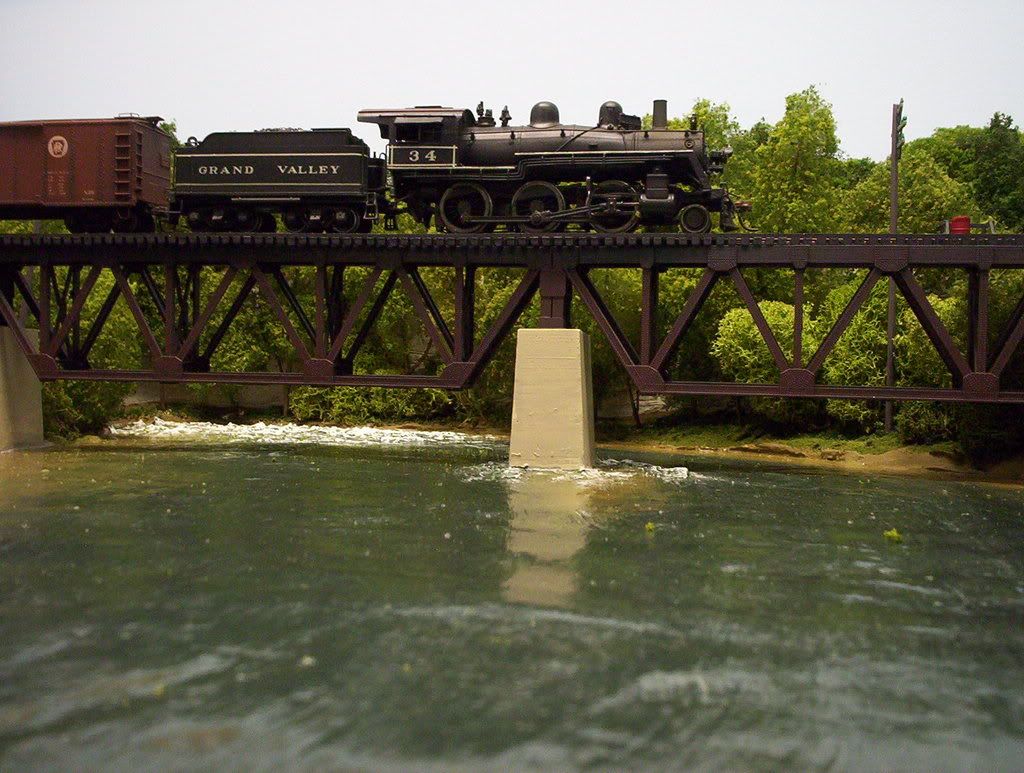
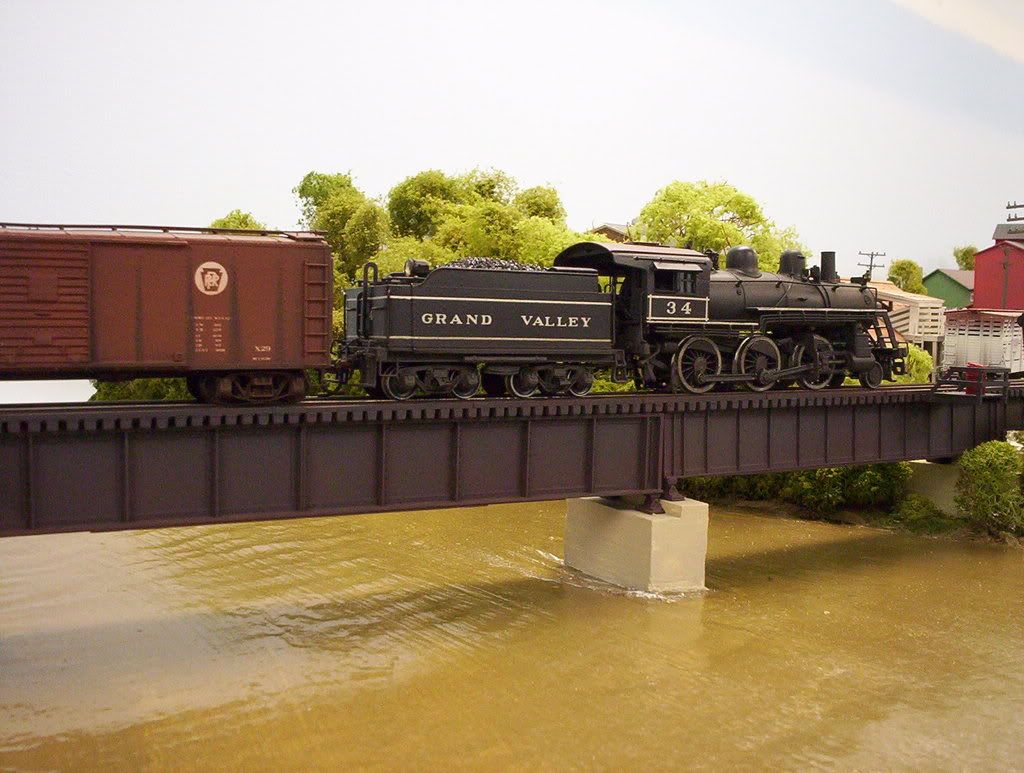
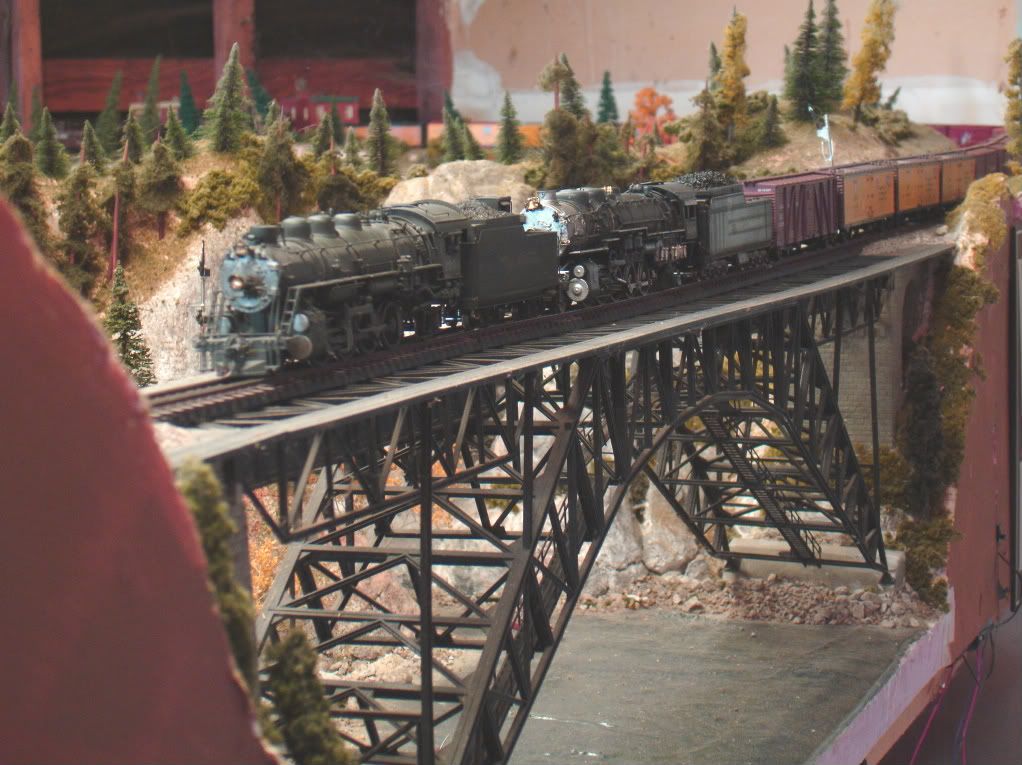
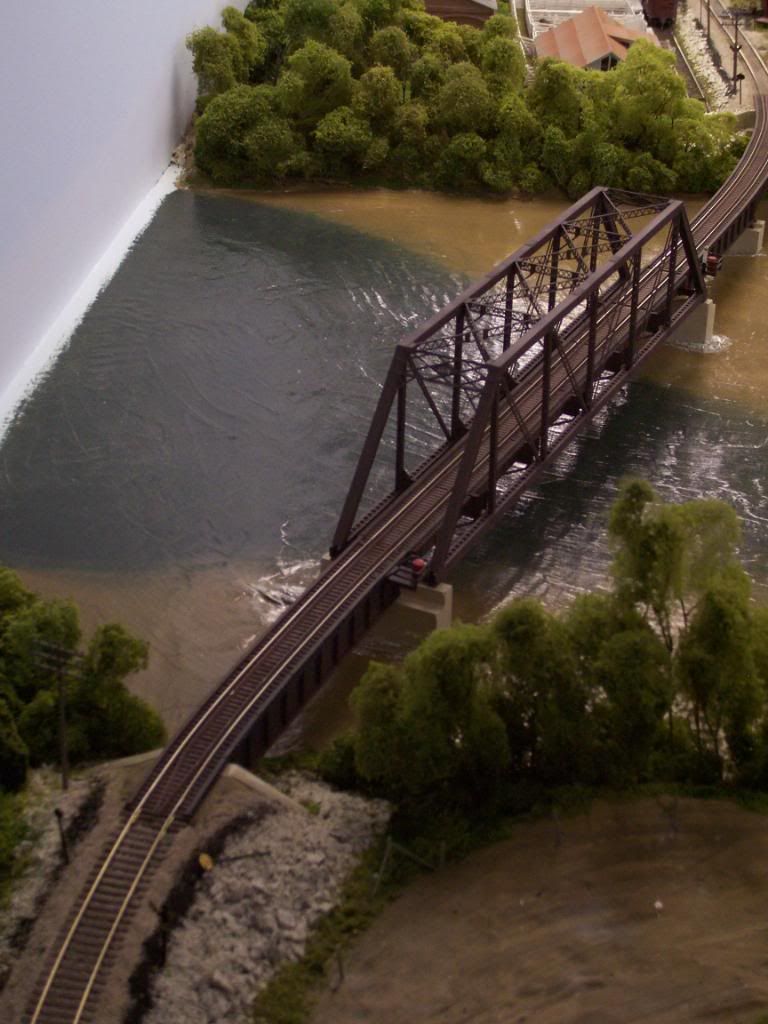
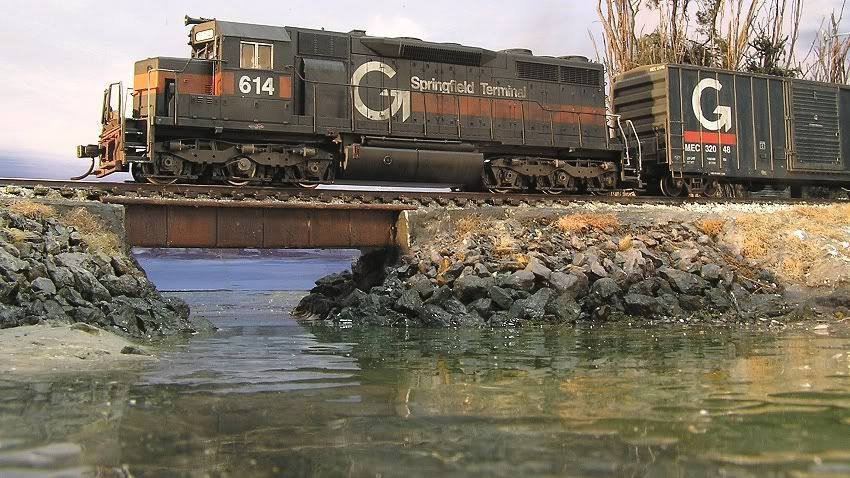
My Other Half {MOH}, looking over my shoulder, thought that these were real pics…well they ARE real pics…I mean pics of a real loco and that the water was real…until I revealed that it was fake water! and it was a model train!
The “muddy water” looks like our local river, the Susquehanna, which is supposed to mean “muddy waters” in Native American tongue.
If only all model water could look this way. [bow]
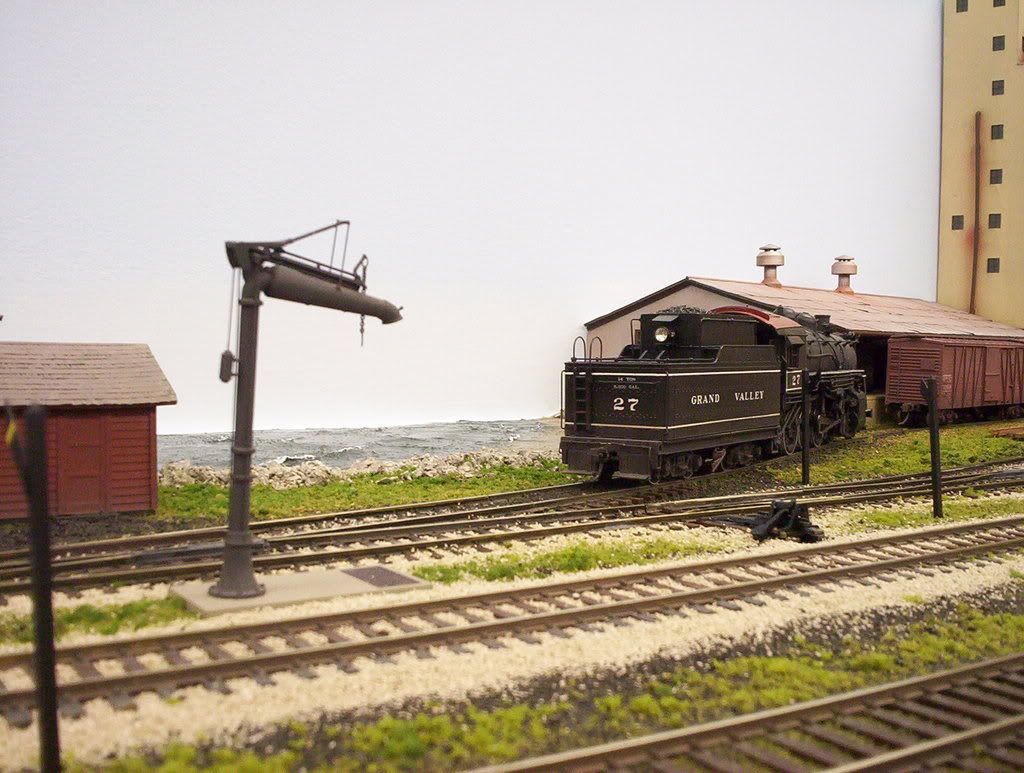
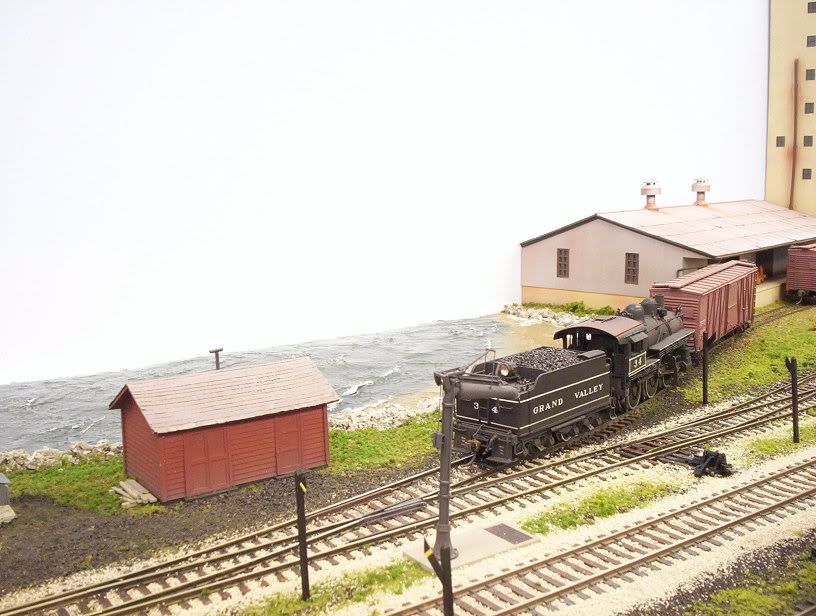
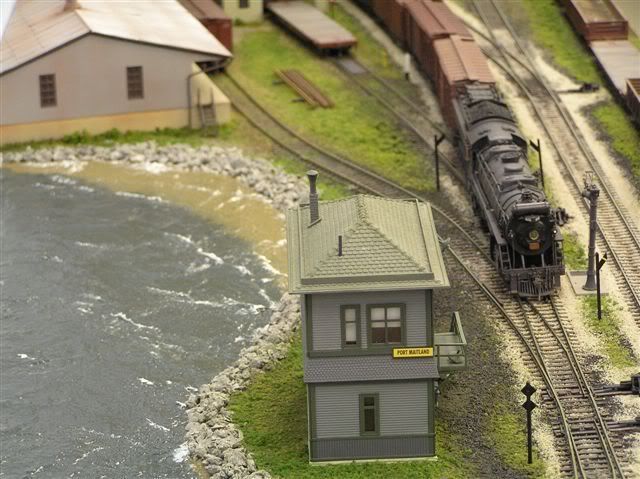
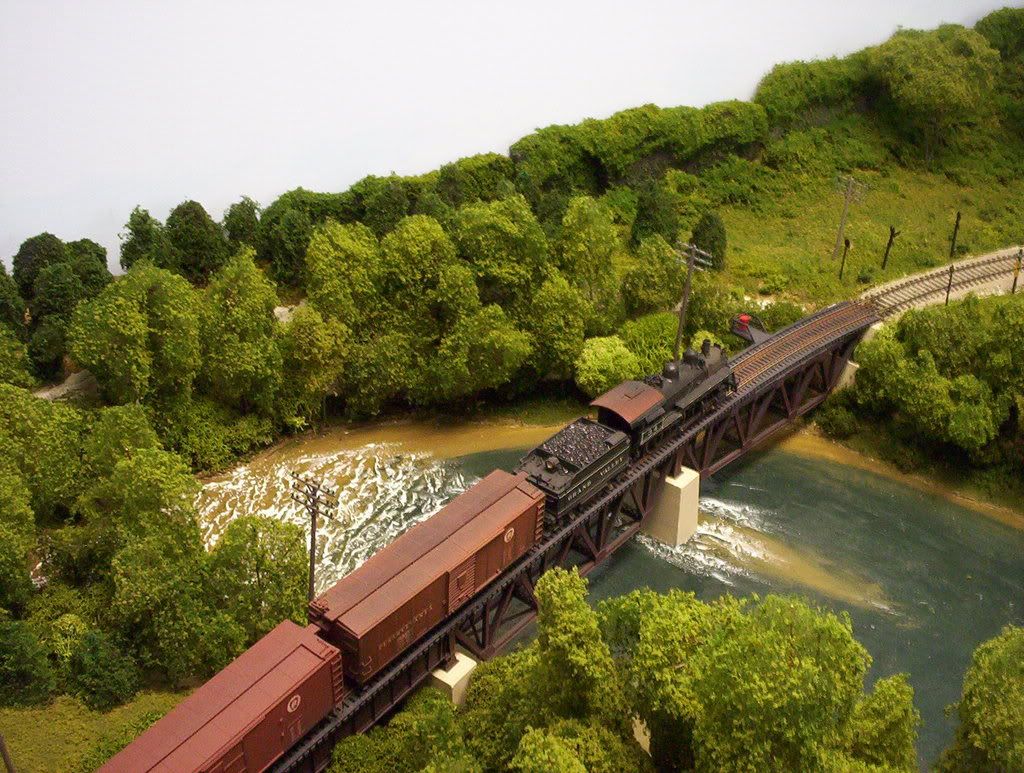
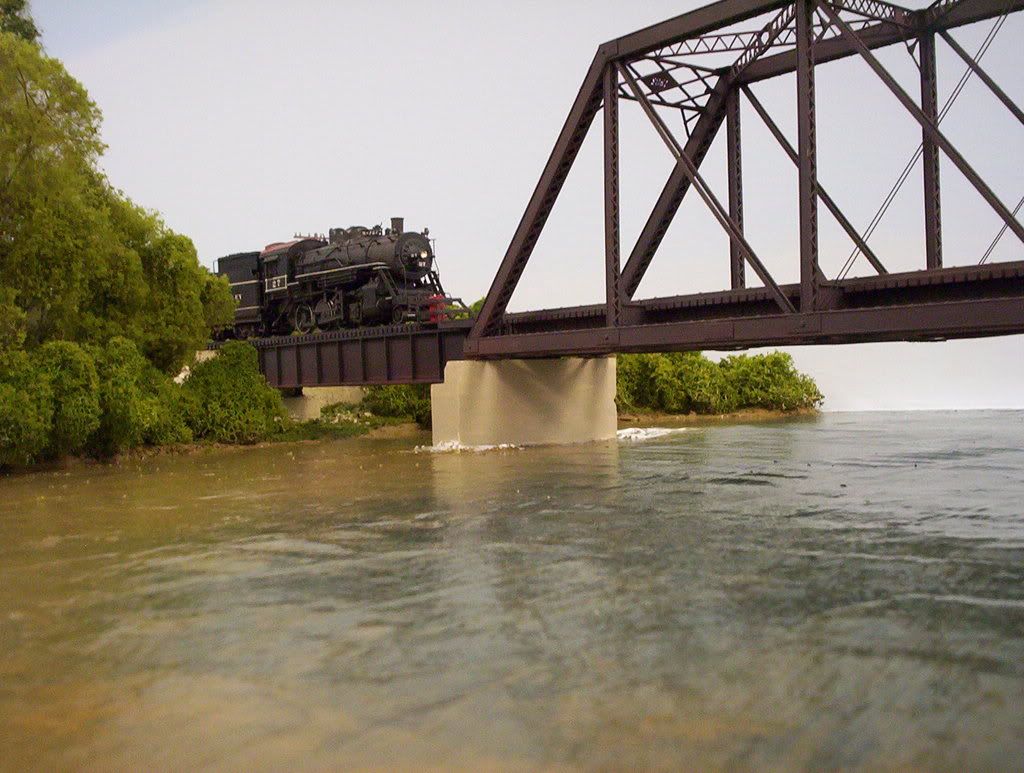
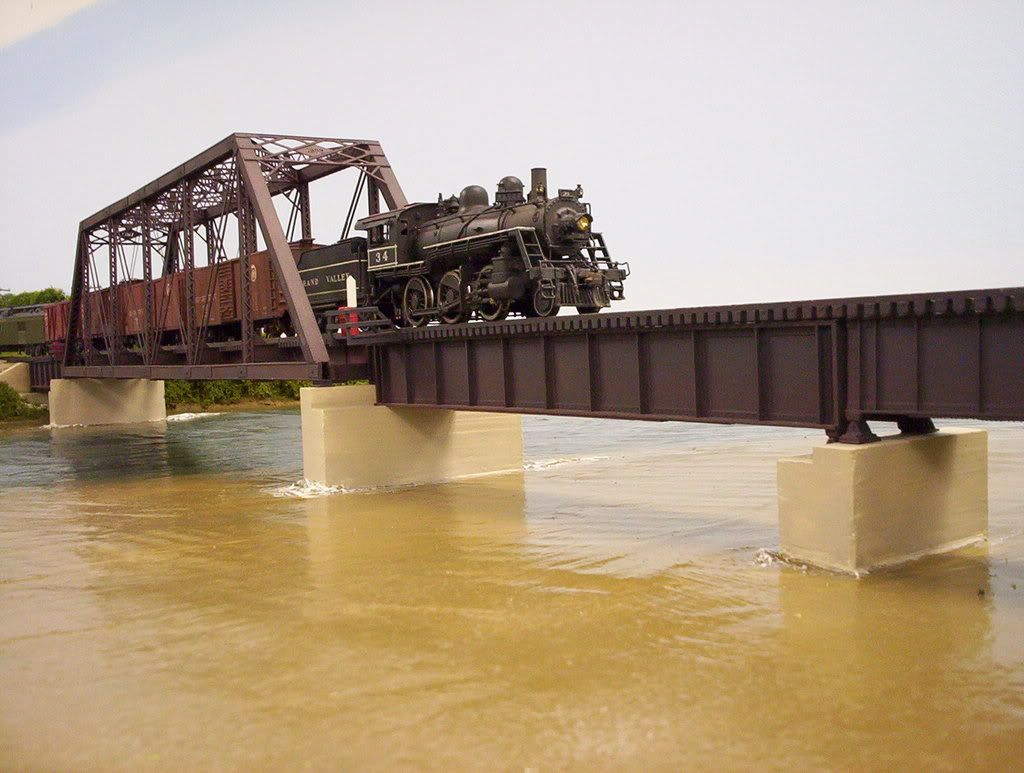
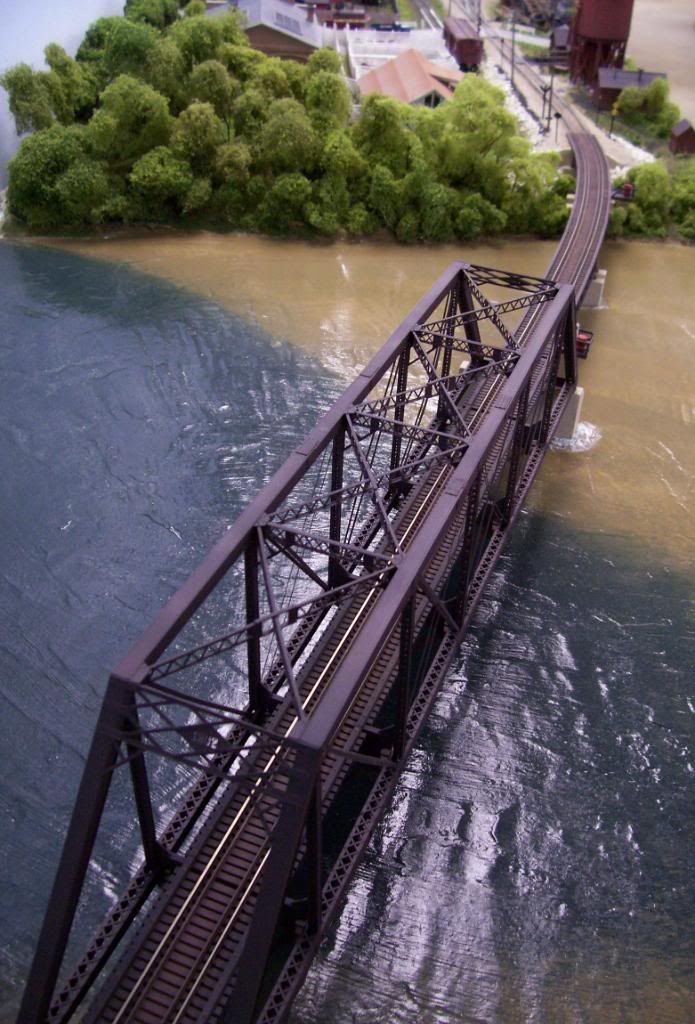
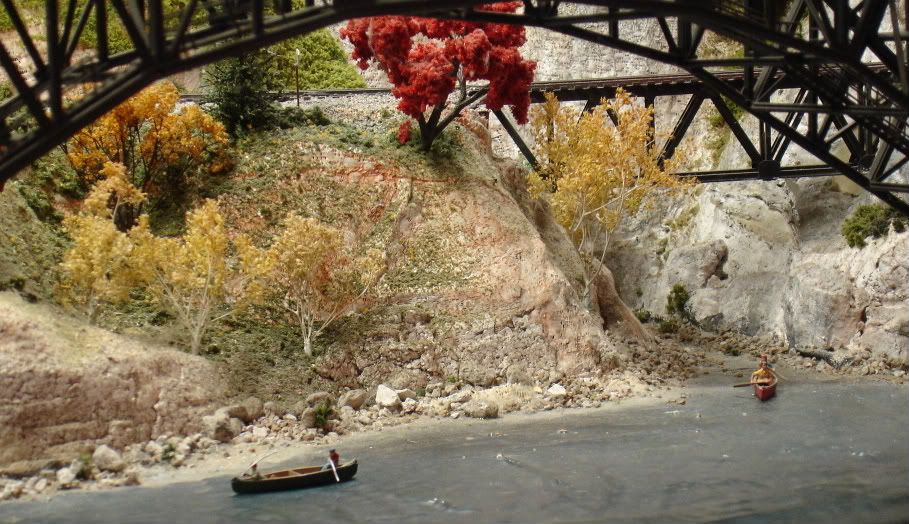
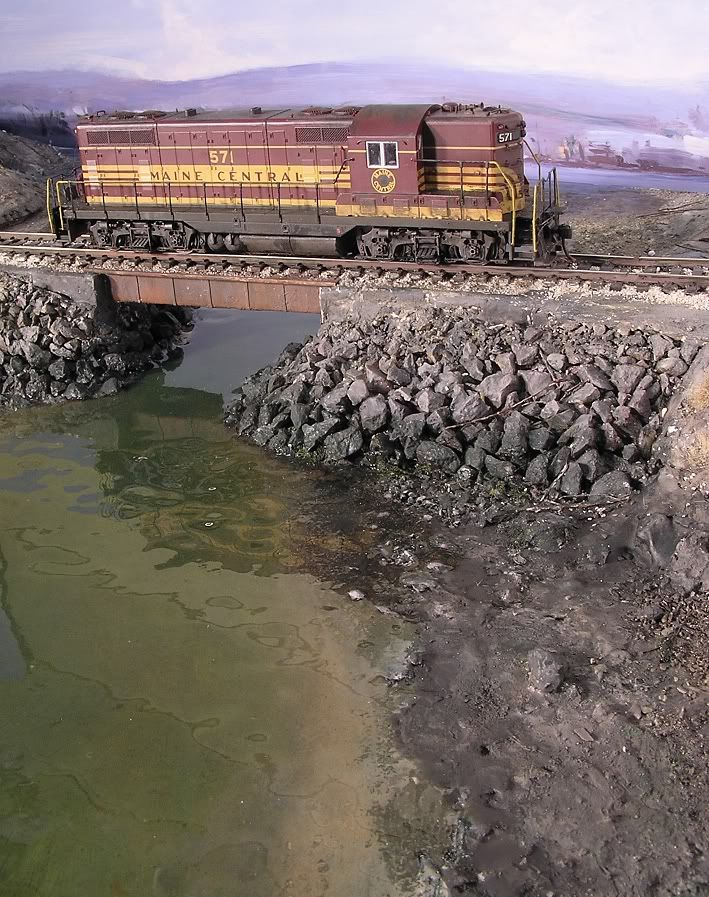
Thanks for your very kind words, Galaxy. [:)] I based that particular river on the Grand River in southern Ontario, about 25 miles from here. I happened to cross it yesterday, and it’s in its usually springtime state of muddiness. After the excess water has made its way to Lake Erie, it’ll return to it’s normal (in this area, anyway) placid state.
On my layout, I called it the Maitland River, another southern Ontario river, although that one runs into Lake Huron. (The Grand River, on most areas of my layout, is actually represented by the aisle.) [swg]
I modelled the fictional Maitland to hopefully represent where it empties into Lake Erie, and when viewed at eye-level, I think that it looks reasonably believeable. (Layout height here is only 34", with a second level yet to be built over this part of the layout.) However, when viewed by standing visitors, they often ask what I have in mind for a backdrop. [banghead] I’ve considered adding a smudge of smoke (painted) on the “sky” to represent a passing laker, but am afraid it will begin to look tired pretty quickly. I do have to admit, though, that when viewed from above, the illusion is pretty-much shot. [(-D]
Wayne
Dr Wayne, you do some mighty fine work ![]()
John Rocks will tend to gather in spots where the current is slower. You might try some smaller gravel along the river banks and make a shallow beach . Or another good idea would be a sandbar somewhere in the middle of the river. Using larger rocks like you did is still OK , but you want to think about where the water would be more shallow and where they would naturally come to rest. HTH…Mike
Looks great, Wayne.
My water is two-part epoxy resin. I usually tint it if I want it to look deep. I spend a lot of time preparing the riverbed with sand, small rocks [glued down with PVA] and paint. Ripples can be worked in with a skewer as the resin sets, or created by trailing small amounts of resin over the surface after it has dried.
This water was poured in three tinted layers - brown then green then blue-green
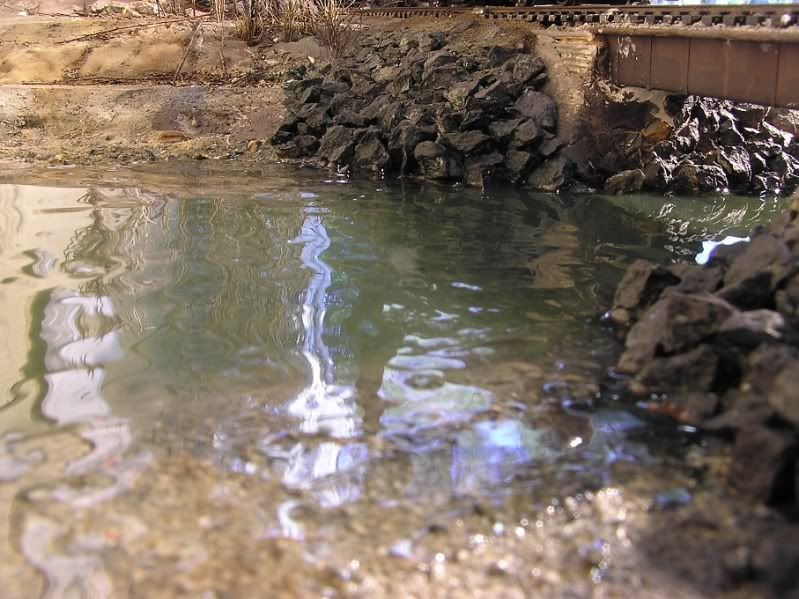
A view of the shallow river before the bridge is installed. Backscene is only temporary