These panels are made of PVC and are quite stiff and durable. They come in the standard nominal 2x2 and 2x4 drop ceiling panel sizes. They are just less than 1/4" thick. The smooth surface ones immediately caught my eye as fodder to make portable layouts. These could be made on the panels directly, something like T-track, but I needed something to provide a stand-alone public display, in this case a 4x8.
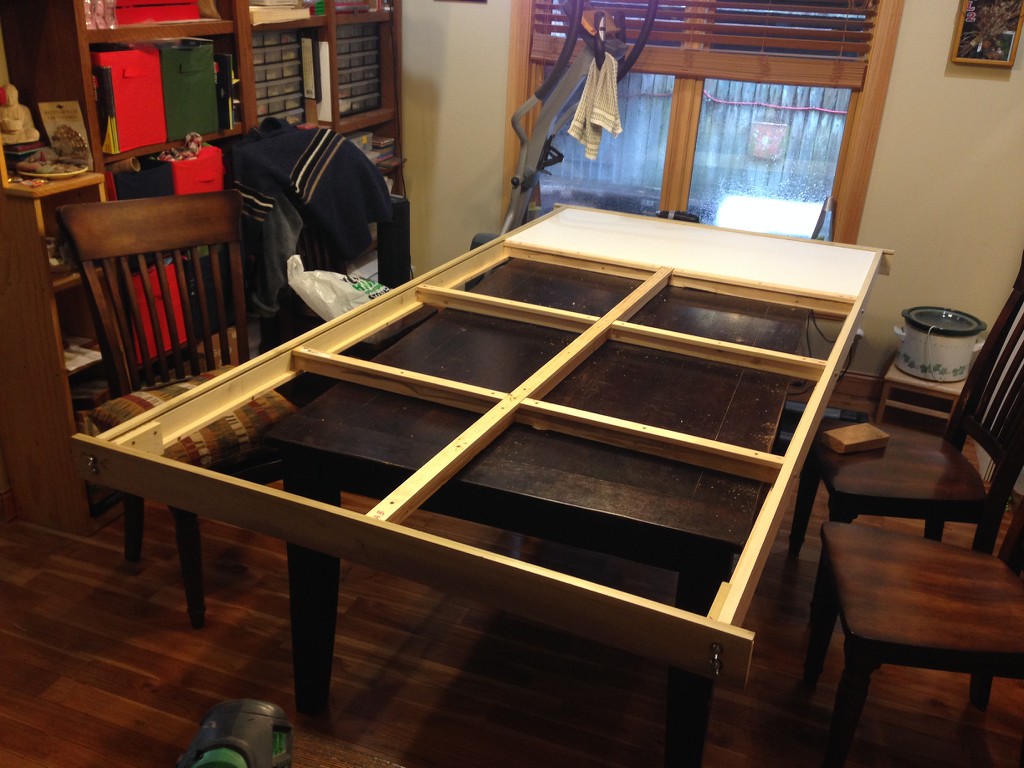
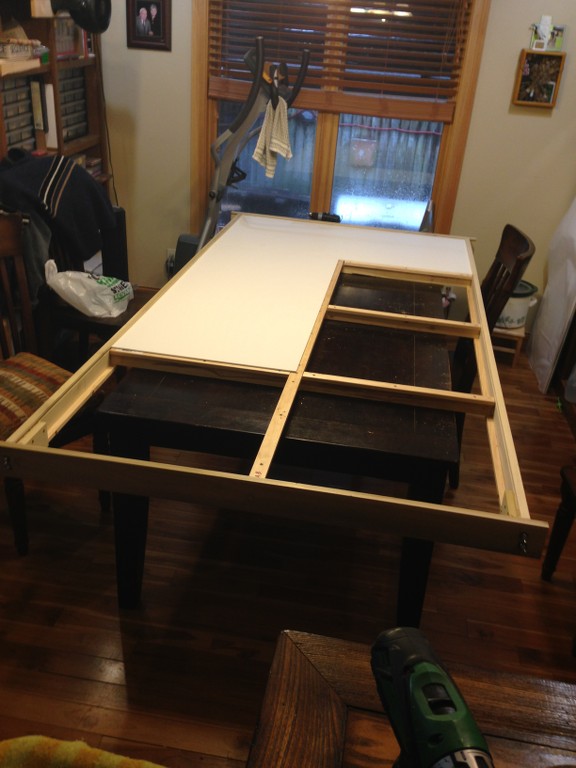
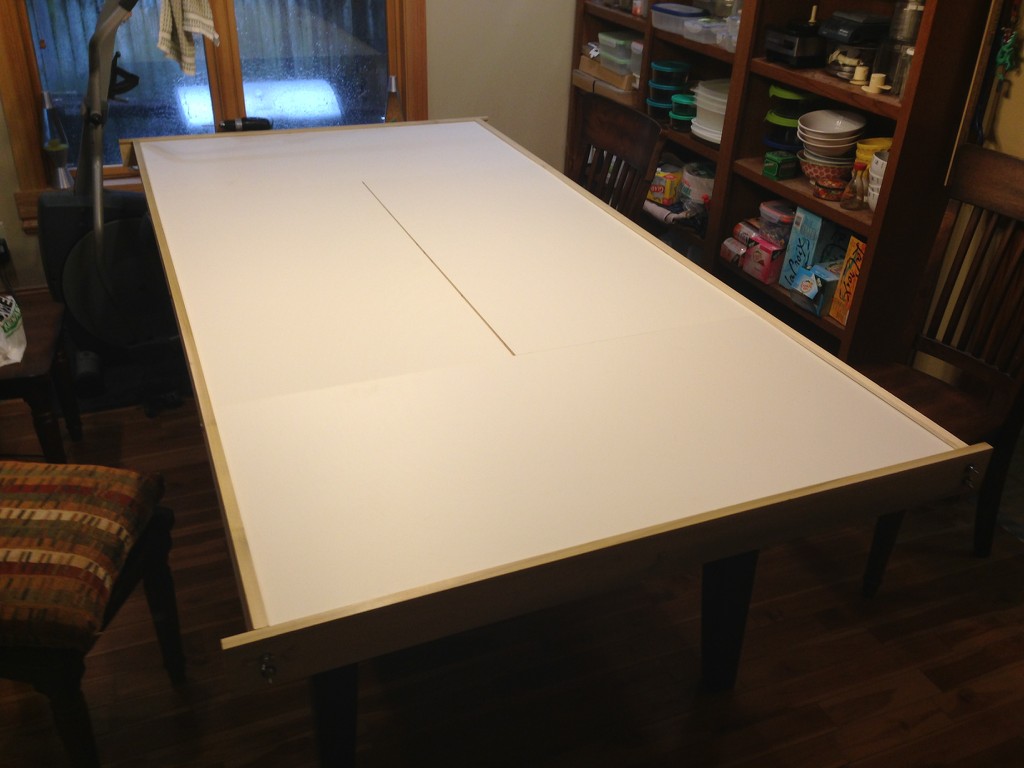
I used 1x4 poplar for the outer frame and 1x2 pine furring strips for the inner, along with some pine door stop material. The frame breaks down for easy transportation. Here’s the basic frame, with one of the Genesis panels sitting in the perimeter slot I cut to hold it in place inside the frame.
The end panels go parallel to the ends and the middle panels are parallel with the sides. This allows you to lay track on the panel, then push it together with an adjoining panel’s track.
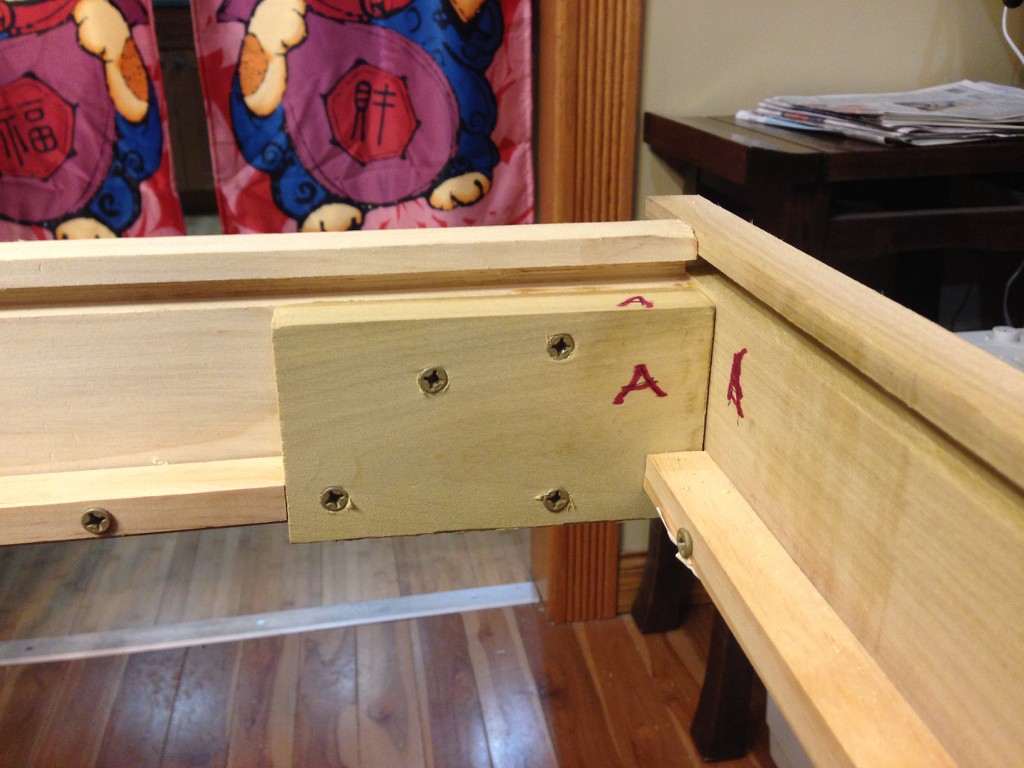
Here’s a couple of details shots of how the corners go toether and the slot and rib work to hold things together.
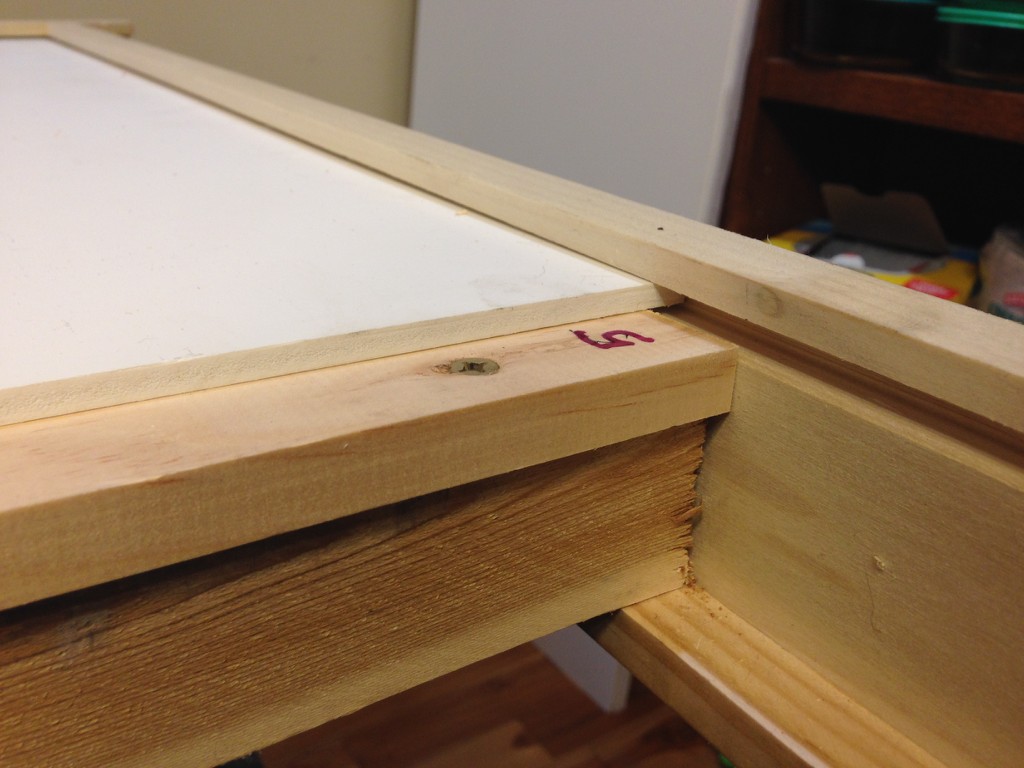
This pic shows one of the 3 crossmembers and its connection to the side rail.
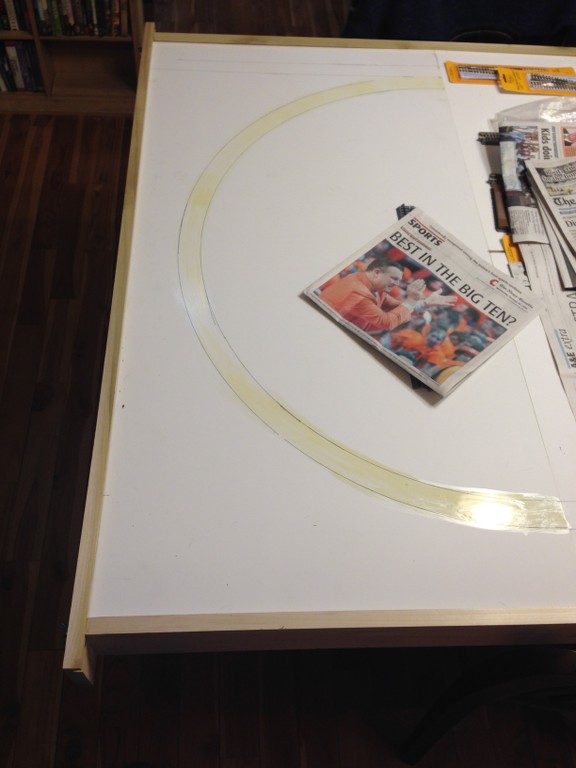
Finally, all 4 panels slid in place for a full 4x8 of fun to come.
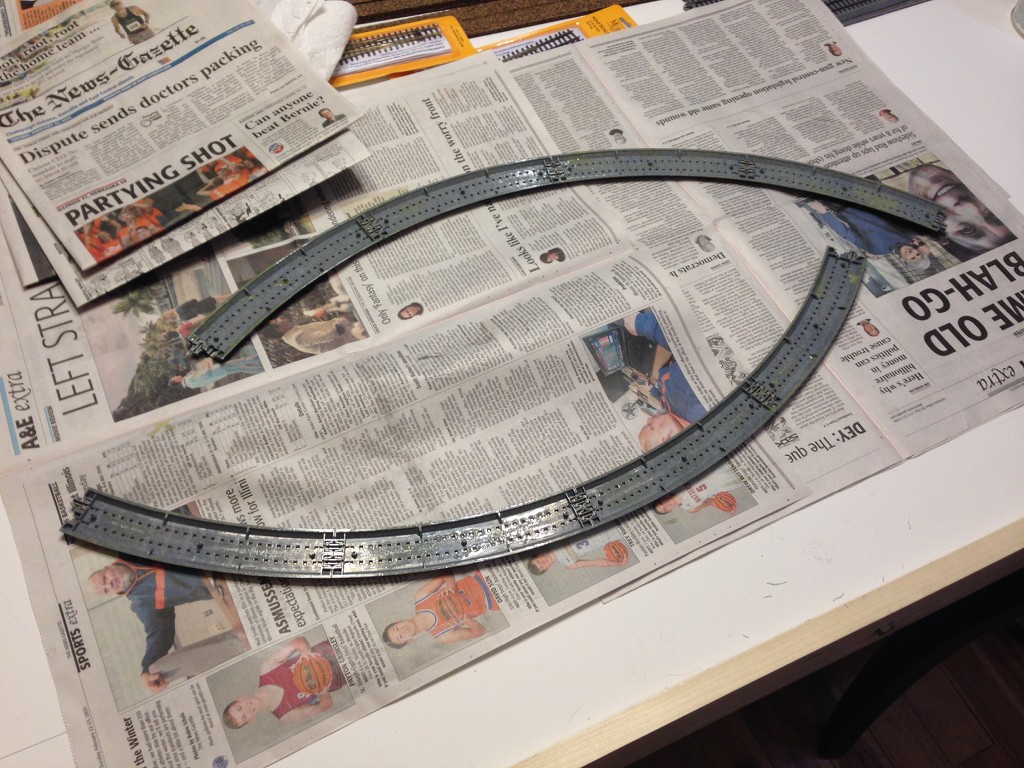
Next step? Lay some track. In this case I’m using HOn3 Protraxx, made for Blackstone by Kato, so it’s essentially the same thing in terms of how the track sections
Only the standard curved and straight track is available. The base is the same height as cork roadbed, which is what I plan to use to lay ME code 70 flex and #6 turnouts on so I can have something more than just roundy-round.
On the Protraxx sections, I’m going to pre-drill through the nubs underneath from the bottom side, glue it down, then come back and drill down from the top through the Genesis board. Finally, I plan to run a screw from the bottom up through the Genesis board. Between the glue and the screws, it should come out solid.
The Genesis panels make things very easy. If you provide support every 2’, whether from the slot in the outer frame or from the crossmembers, it’s stiff enough that’s all the support it needs. I am keeping this simple, since it’s a display layout, so am planning on depending on the latching end connectors on the track sections to “snap” the panels together as well as to carry electricity. Assuming I can get everything to stick and stay in place, that’s all it needs.
The only constraint is that the track needs to cross to the next section perpendicular to the edge so that it will snap together as the panels are slid into place. The way the frame works is that it is assembled with one of the end frames left off, then the panels are slid in from that end, then the frame end is attached.
I used the 1x4 for framing because it needs to be heavy enough to deals with crowds at a train show. I’m working to get this put together enough for display at our local show coming up on March 28 and 29 for those close enough to make the drive to Urbana to our downtown mall, Linclon Square.
However, much lighter framing will also work, so it can be adapted to T-Track, Freemo, or what have you by making sure the end connections are to suit whatever spec you’re aiming for. I left about a 3/8" lip above the grade to limit the chance something could end up on the floor in case of derailment or kid grabbiness. However, this could be notched as needed if a connection to another module is needed.
The Genesis panels cut like any other plastic, so could be likewise cut down to suit your needs.
The pricing on these in the US is about $13 for a plain, smooth 2x4 panel, so they’re not really pricey.
That’s an interesting layout you’re building, Mike, taking advantage of the properties of that material.
While I’ve long been a proponent of contact cement in appropriate situations, I wonder if the cement used for PVC plumbing might give a better bond, given the slick surface of the Genesis tile.
I have been thinking of that as backup, but hoping I don’t need to go there. The plumbing stuff is kinda messy in my experience, but I’m not much more than a messy plumber and try to avoid plumbing whenever possible. I find contact cement easier to handle get to go where I want it.
I suspect you’re right. It should make a good bond.
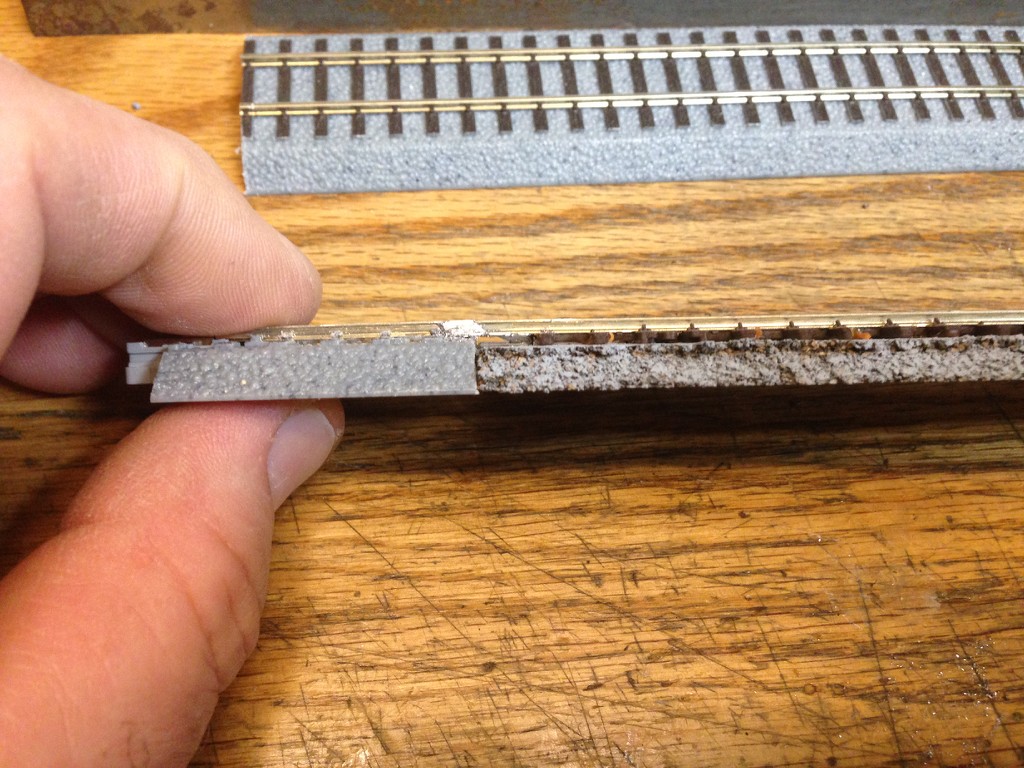
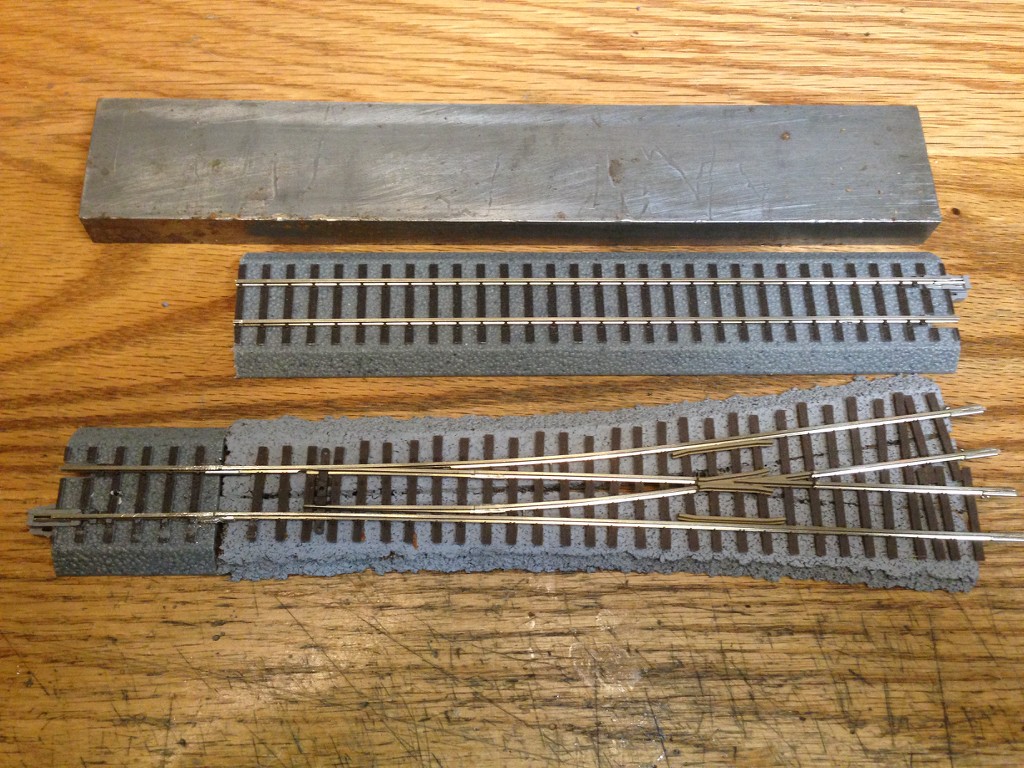
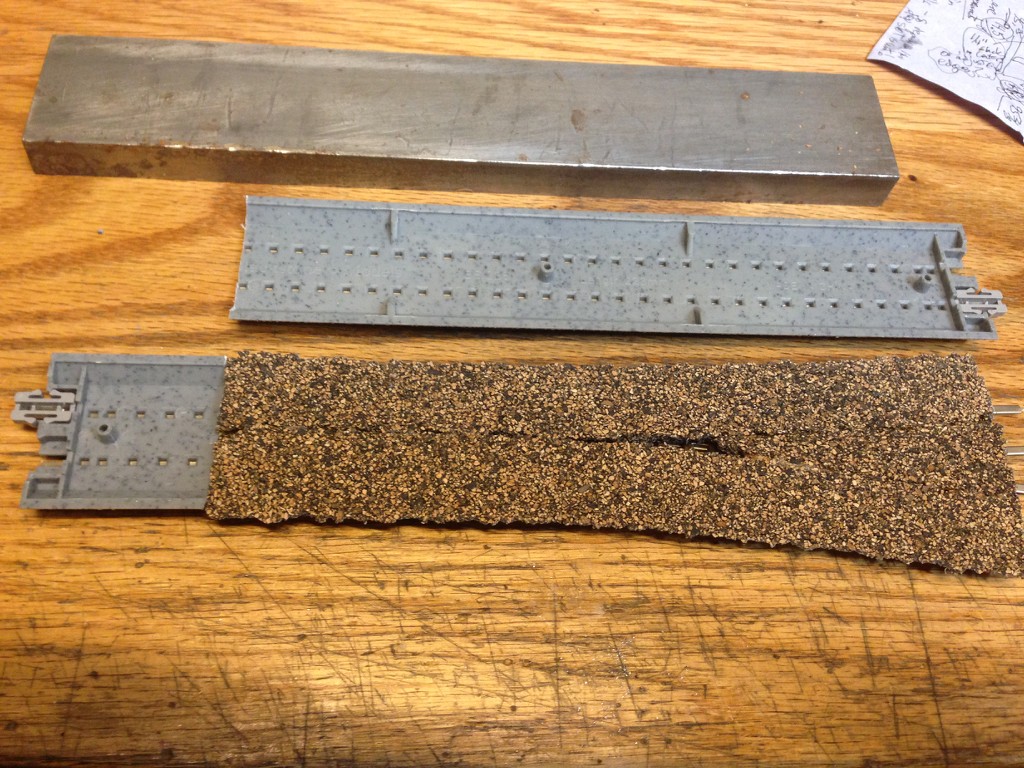
Worked up an example of how I plan to handle adding turnouts. The thickness of the Protraxx track equals the height of ME code 70 flex track and Midwest HO cork roadbed, as seen here.
For appearance sake, I sprayed the top of the cork with gray paint to proviide a rough appearance match with the Protraxx track’s base/ballast. I cut the Kato-made track to provide a piece with the end connector that made the overall length of the modded turnout about the same length as the 228 mm long straight Protraxx track section. The other end of the sacrificial track section will be used at the other end of the panel it will be installed on to connect to the next panel. I soldered the cut-off segment to the common end of the turnout.
After the paint on the cork dried, I used good ol’ Goo to carefully glue the turnout to the top of the cork. Take care not to glue the bridle! After setting it in place on the cork, I used the metal bar as a weight to keep everything flat while the Goo set up.
You can see one of the three nubs on the underside of the Protraxx, apparently meant to be a place where a track nail can hold them down. I used a 1/16" bit to open up each of these. ONce the track sections are glued down. I will use a bit to drill downward and through the Genesis board at each, followed by a screw up through the Genesis board and threhaded into the nubs from below.
Pretty much. It was designed not to sag when supported on 2’ cemters in grid ceilings. It also not really light, so it is pretty sag resistant just holding itself up.
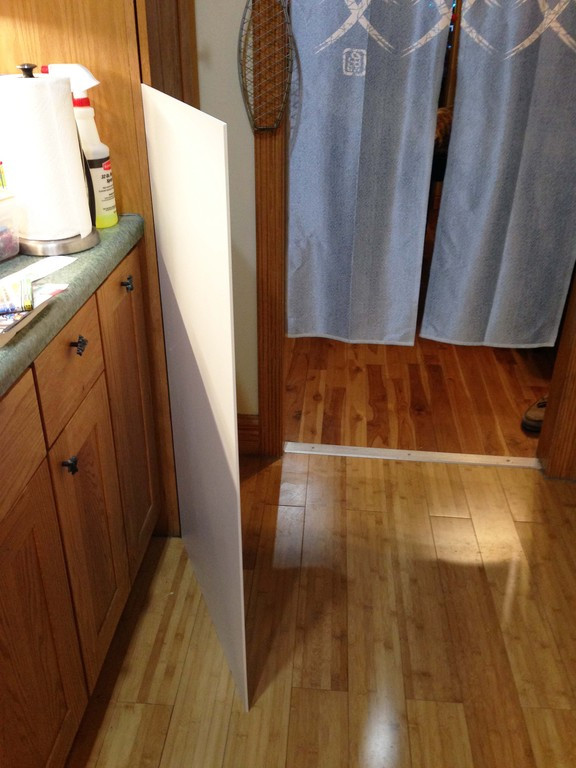
I first encountered this Genesis stuff when looking for somerthing to mount tape lights on and stick into place above Crater Lake on the layout. It’s tucked into a corner with very limited access. I’ve written before that it was like building a ship in a bottle.
I hot glued the tape light to the bottom and slid the panel into place. It’s supported at one narrow end and by a nail at the opposite end on the long side. Despite this, it’s looks the same after a year just hanging there. Here’s another pic it just standing up straight on its own.
It does sag just a little when one of our fat cats curls up on it, but then returns to flat and true when they move.
I used the Genesis tiles in a basement bathroom, 2’X2’, and they were exactly what I needed. Along with plastic grid instead of metal, the entire ceiling ends up being plastic – perfect for a basement bathroom with humid air.
Yeah, damp locations was one of the reasons they came up with this stuff. Makes it ideal as a base layer for water-based scenery treatments, don’t you know? [;)]
I will throw a note of caution on the 2x2 panels. Consider your potential track arrangements in light of the need to create a snap toegther joint like Kato provides at every track on every junction. If you go with 2x4 panels, it reduce the need to build these by about 50%.
I’m currently cutting the Protraxx straight sections in half to provide these snap together joints. Seems to work well enough, but needs more real world testing, coming soon…
To help visualize, here’s some pics of laying down some Protraxx.
Underside of the Protraxx shows there’s very limited contact area between the track and the Genesis board.
The contact cement seems to work well. I thought it might craze the surface of of the Genesis board, but it didn’t. That makes attaching stuff easier, although I’m sure the contact cement is on there permanently.Once I get the other track laid on this first panel, I’ll take it out and run screws in the Protraxx segments from the bottom to even more tightly bind them down.
I plan to paint later after the track is in place. Being able to break the panels out of the frame and take them outside will make spraying them easy and less annoying than inside in the basement on the perma-layout.
As always, get things lined up first before laying them down with
Looks good MIke, just a question, so the object of this method, is to be able to take the layout apart, without picking up the track first? and for reassembly, with the track fastened to the panels, it all goes back together at the same time ?
Yes, the idea is that each panel is like a mini-module. The various panels can be taken out or have new ones subbed in. With the end of the frame off at one end, they slide in suspended by the slot and supported by the crossmembers underneath.
If I play my cards accurately, the track plan will also allow a rearrangement of the four panels here, provided I’m accurate enough in locating the track ends at the edge of the panels. We’ll see if I’m able to achieve that, but the notion it’s possible came to me in the midst of thinking about the trackplan.
Mike, I have built an N scale mini-modular layout using Kato Unitrack as the connection between the modules. It is important, that you factor in a gap of about 1mm between the modules, if you want to be able to disassemble the layout. You wouldn´t believe how strong the connection is. You need to have that gap to be able to kind wiggle the track loose.
Thanks for that tip. I probably have that much slack, but will take care to allow for some wiggle room. It may that once I pull the panel out of the end of the frame that working it up and down will help with this. At least that’s how it seems when holding the Protraxx sections in my hand and trying to separate them like that. Thing is there will be 4 to 6 of these connections to break apart, so not sure how well that will work in practice. Will report back.
Thanks for posting the pictures. Looking at it, the integrated roadbed will probably contribute to strengthen the structure. I’m looking forward to see how you will finish the scenery.
If things seem like they’re going to stick, I think modifying the connectors by filing on their sides will substantially help with release. That locking feature is needed when it’s just the track itself holding things in place. It’s less necessary once the track is mounted to something else that will locate things. The rail joiner that connects electrically is independent of the mechnical lock provided by the connector, so I think the locking feature could go away entirely, if need be.