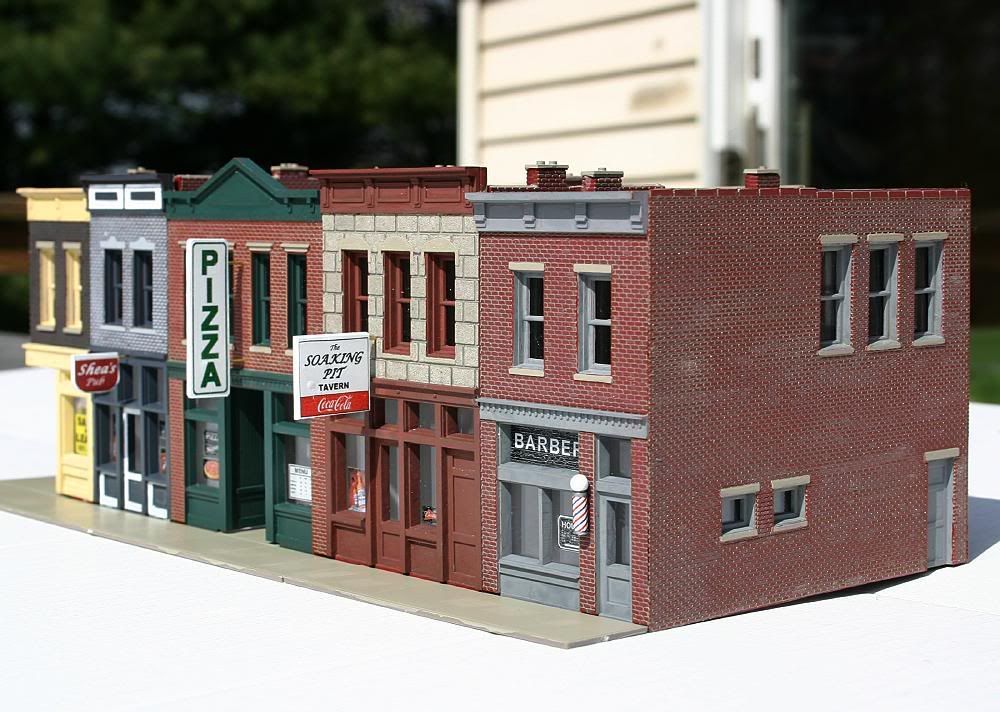
Somebody on WPF asked me for advice on painting and detailing a Walthers Merchants Row kit. I didn’t want to hijack the WPF thread so I started my own here. I’ll share what others have told me, and what I did - FWIW.
Rule #1: Give yourself all the time you need to do things properly, don’t try to meet a self-imposed deadline
The Walthers instruction sheet is flawed - they say to glue the window ‘glass’ in first. DON’T!!.…painting the window frames will be much more difficult if you have to worry about getting paint on the glass. Installing the glass panes should be one of the LAST steps of the project.
Get 10 swatches of junk styrene; paint 5 of them in the same colors you plan on painting the bricks, and paint the other 5 pieces in the colors you want for your wood trim. Hold the ‘brick’ pieces beside their corresponding ‘frame’ pieces to see if the colors compliment each other, before
Thank you for posting this valuable information[tup] I am going to assemble the Walthers City Station in the summer after I am finished with school for the year and will use the same techniques that you mentioned. I am going to add an interior and will find a way to make the roof removable.
Another possibility for windows is a new product from Miniatronics. They have had some window signs for a long time, but are releasing some of them as electroluminescent (EL) signs. The windows are 1-1/8" W x 1-5/8" H and run on 3V DC. I have not used any, but saw them at the Springfield show a couple of months ago. They look good
For lighting, the have a lighting kit using Yeloglo LEDs. The surface mount LEDs come on a circuit board strip that can be cut and rewired to light up to 7 buildings or rooms. It runs on AC or DC power. I have the passenger car version of this, and it looks great.
Thanks for posting. That’s pretty much the same way I do mine except I paint my brick first and then do my windows and trim. I mask off what I can and airbrush. Paint the rest by hand.
City Classics has some real nice window treatments that are printed on plastic. Much easier than printing out drapes and blinds on the computer.
I will be purchasing some of the Walthers DPM and Cornerstone kits soon and will definetly refer to this thread. I have the Walthers Car Shop kit, which I’m going to convert into a diesel shop on my new layot. The tips on the brick coloring and mortar effects will come in handy. [8D]
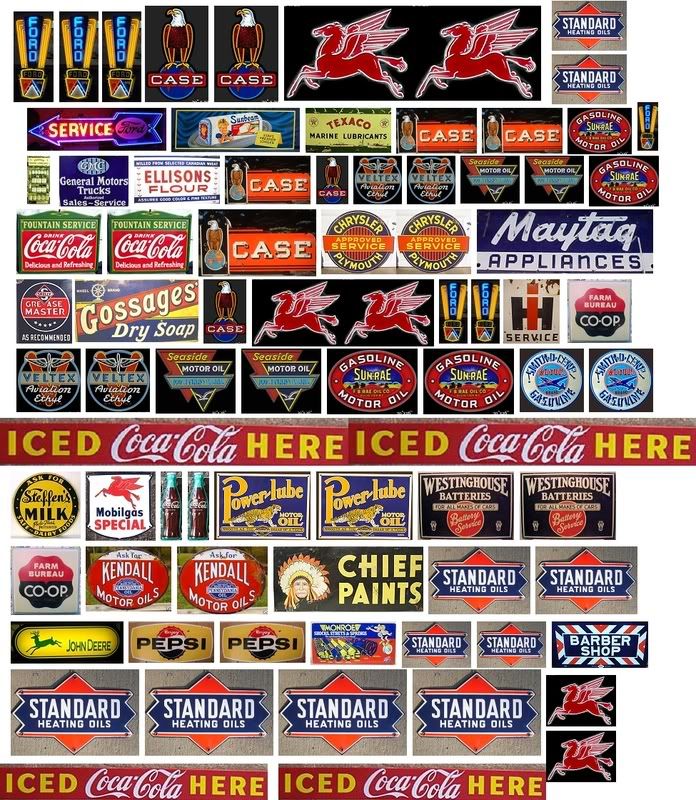
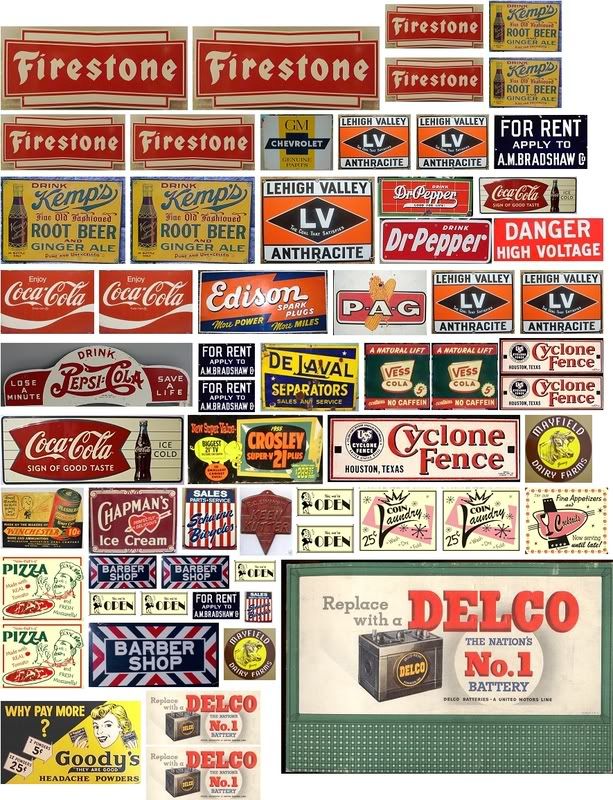
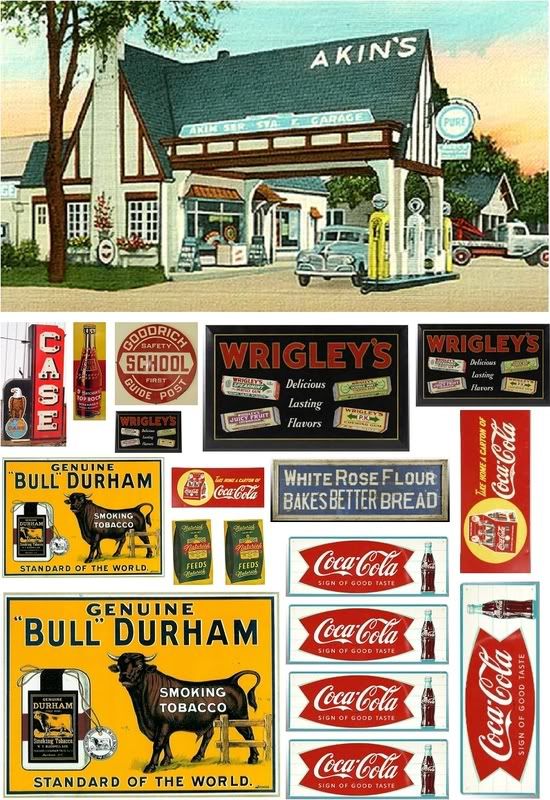
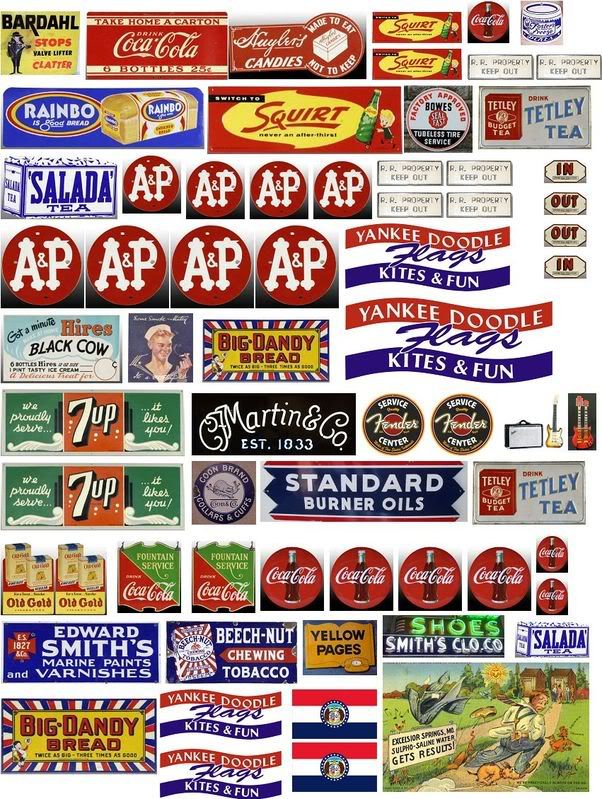
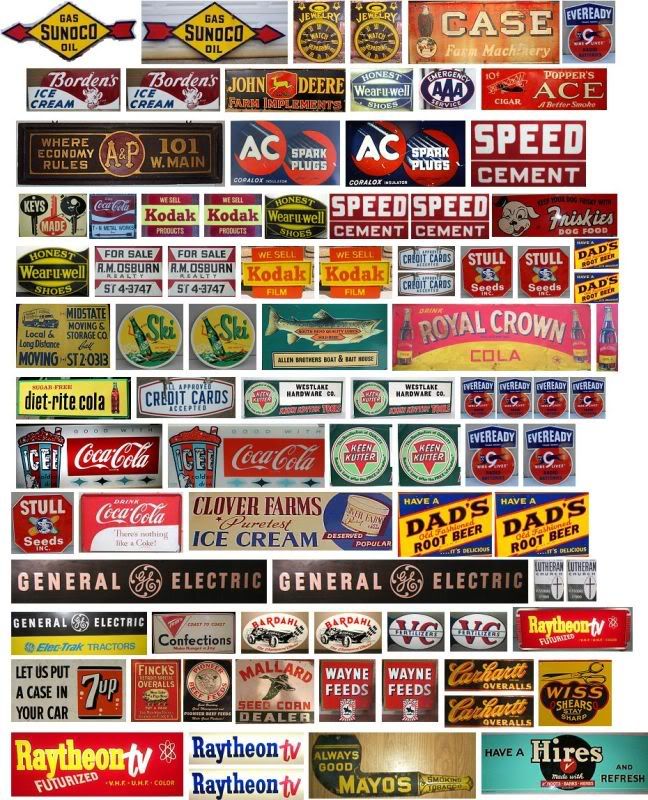
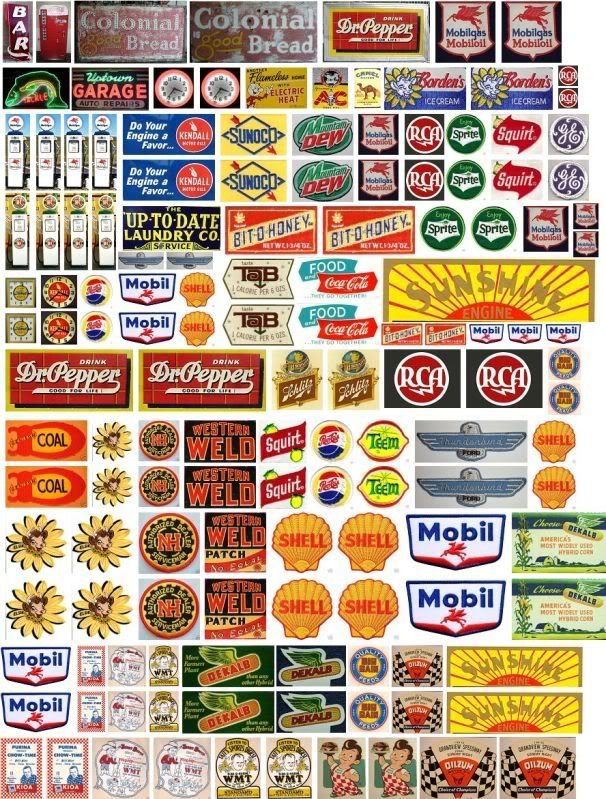
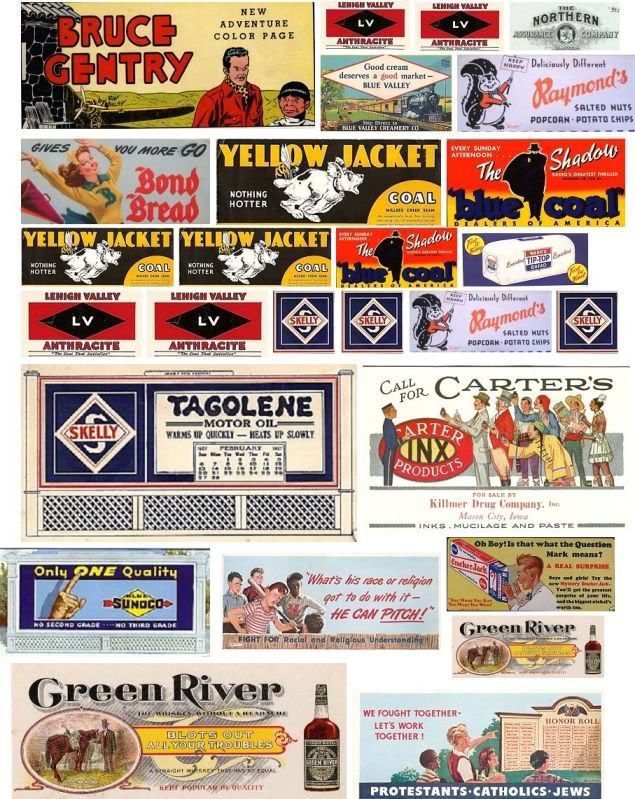
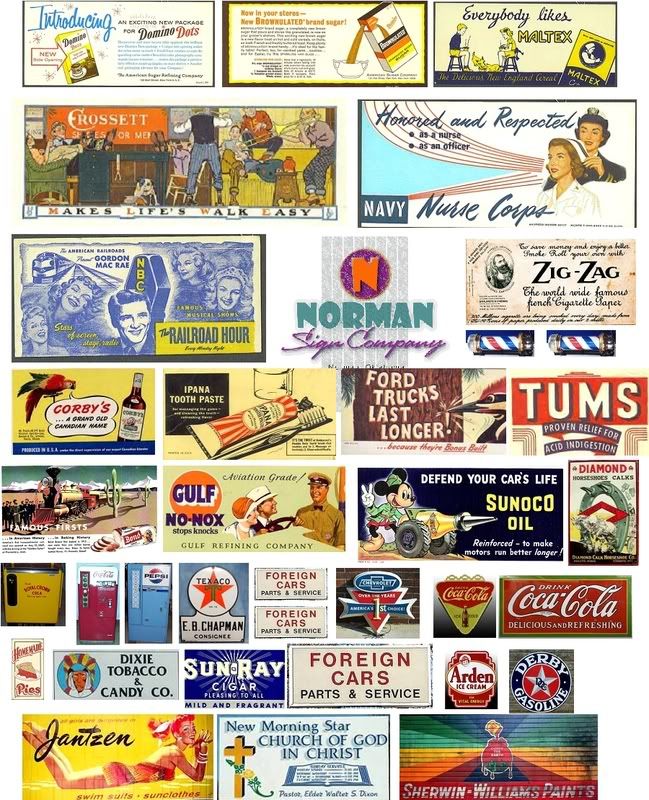
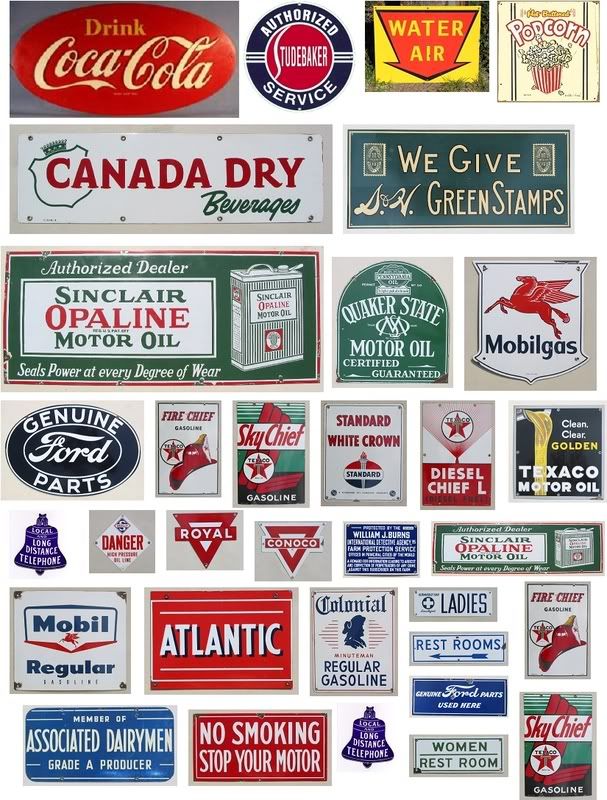
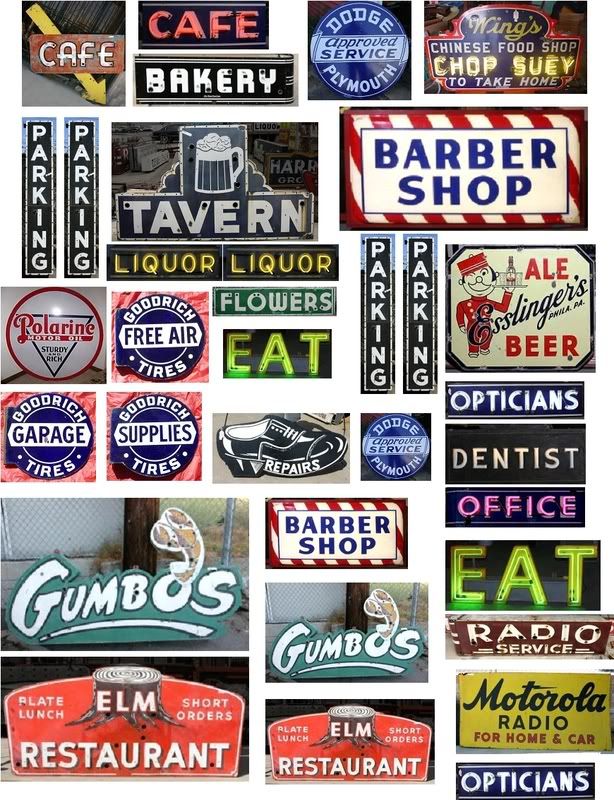
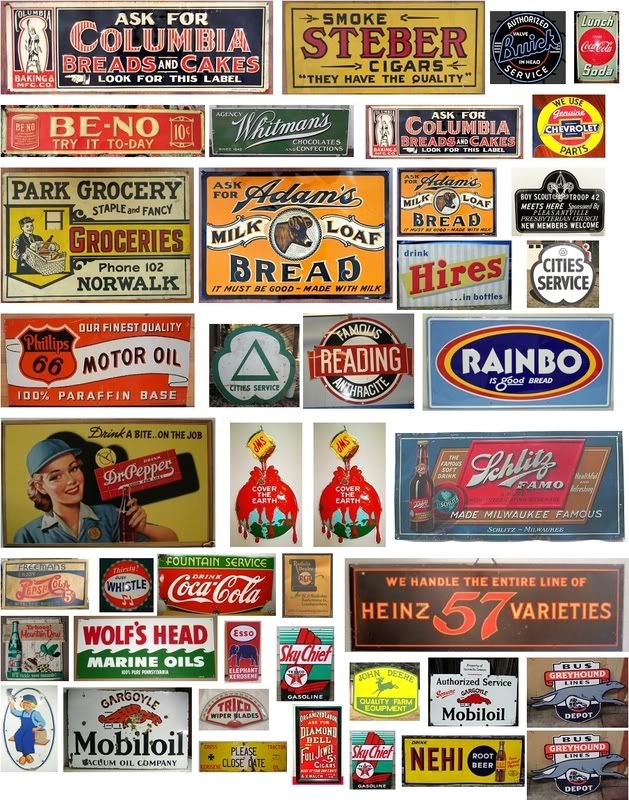
I like to paint the brick first & install the windows last. For signs I like to copy & paste signs I find on line, resize to my scale, print on photo paper for glossy metal signs, or cardstock. Here are some I found.
Hey guys, thank you all for replying - glad you found it useful!
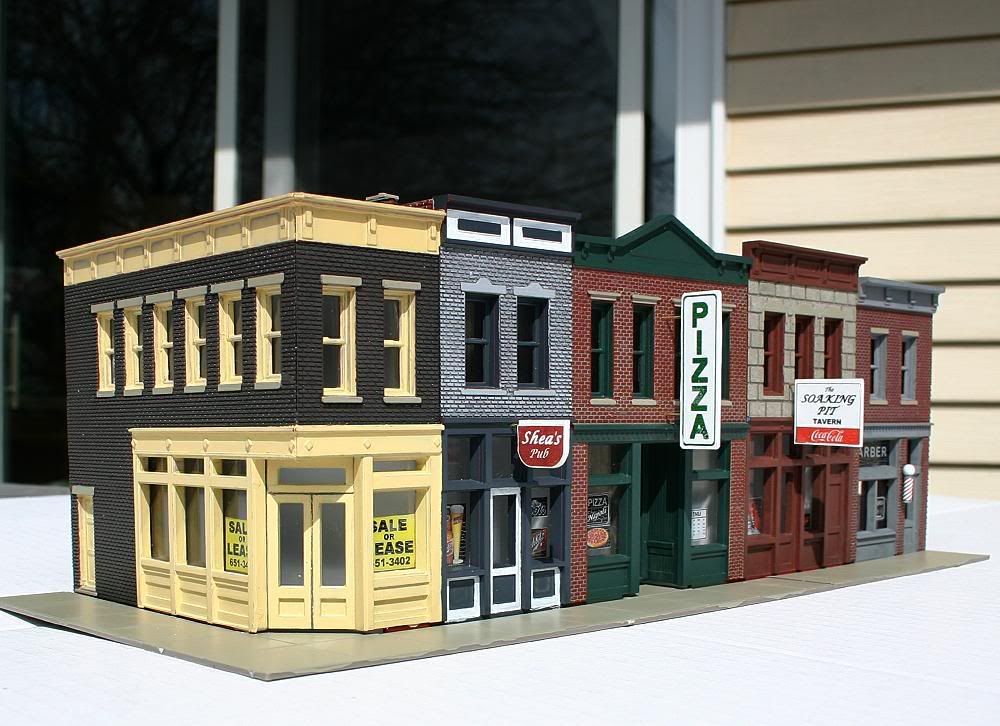
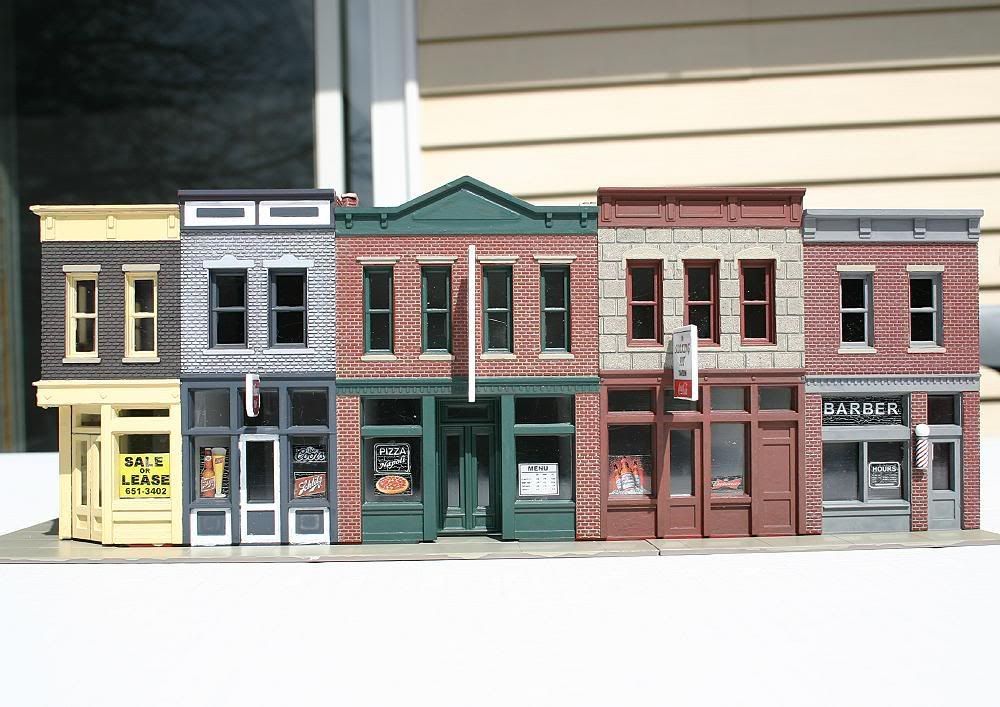
George, looks like I’ll have to get me one of those PIZZA neon signs - that would really complete my pizza shop! Now about my taverns, if only they could do some neon signs that say Coors… [:-^]
Loathar - I guess it really doesn’t make a difference whether we paint the brick or windows first, but the guy who gave me that piece of advice was pretty insistent about it and he’s built up a few entire HO scale city blocks so I assumed he knew what he was talking about…
Tom Kat, I might redo some of my window signs using your method. Black inkjet printer ink seems to develop cracks when it dries on decal paper, as you might have noticed from some of my closeups; glossy photo paper might solve that problem. BTW- do you know if there are any online sign collections for the 1990’s that are similar to those ones you posted for the 50’s?
As long as we’re at this point, does anyone remember the thread in which a modeler posted links or photos showing a wide variety of curtains and drapes in a nice array of colors that could be used for HO scale buildings?
I had downloaded and saved those pictures, however, but them lost them when one a portion of my computer’s files were wiped out last year.
One thing I forgot to mention in my prior post. If you plan to light the building, before you paint anything, paint the interior with flat black, I use Rustoleum in a spray can). Follow with flat white (I use Rustoleum white primer). Before spraying any exterior colors, mask off all the windows on the inside to keep overspray off the white walls.
Miniatronics tends to keep their signs generic to avoid licensing costs.
I get most of my signs off ebay: Go to… categories- collectables-avertising then put “sign” into the search. Then open the auctions that have the signs you want then copy & paste to a MS Publisher, MS Word, MS PAINT or other desktop that you can resize to your scale. I also search “decal”, “sticker”, “patch”, “logo” ect
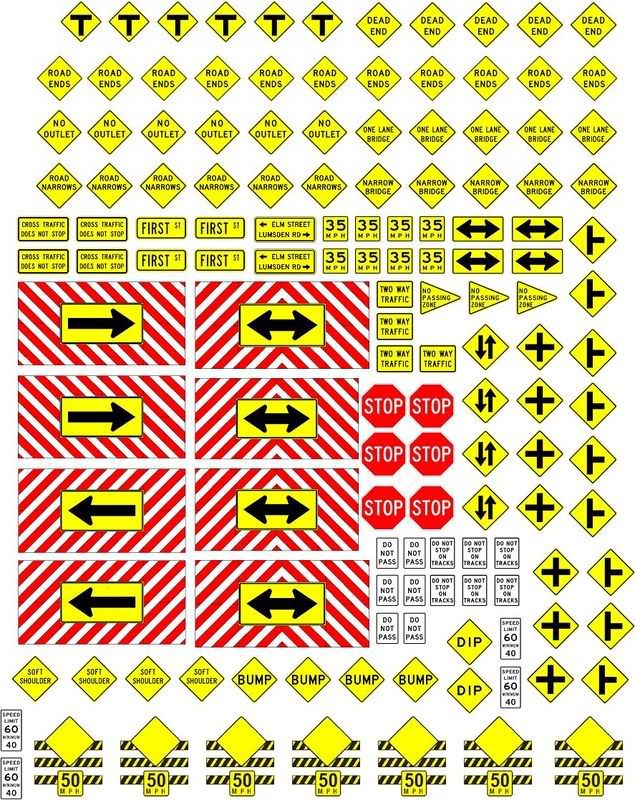
You also can find road signs, background buildings ect.
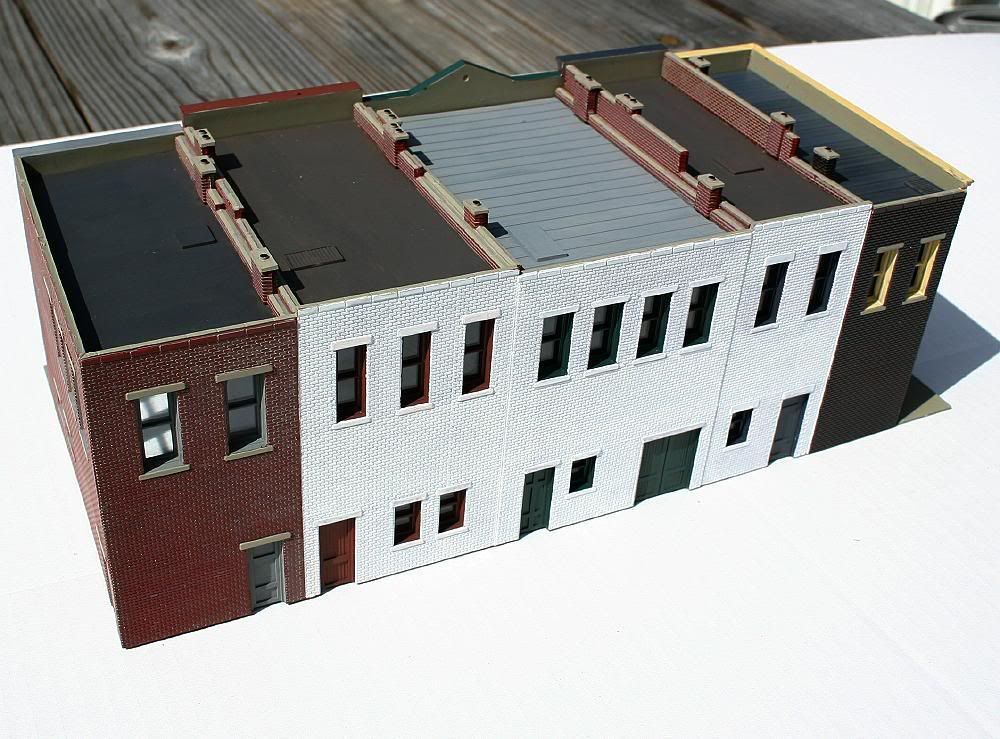
Thanks for posting. The alternative colors on the front could also be typical of painted brick very popular in the 60’s in city row homes. The mortar joints would also be painted. The treatment of the rear is also great. I had not thought of “white washing” like you have. great job!
If you light buildings, you want to paint the interior to prevent the plastic walls and roof from glowing in the dark. You also want to caulk any light leaks at the joints. Some recommend black paint, but it soaks up a lot of the light. I use lighter colors. If fully detailed interiors seem a bit too much, at least install floors in multi story buildings. The view in the windows is much improved if you see a floor where it’s supposed to be rather than a yawing gap right down to the basement. They make a thin copper sticky tape which makes wiring interior lights much easier. The tape sticks to the walls and stays out of sight and you can solder to it.
220 grit silicon carbide sandpaper makes good looking roofing material for flat city roofs. It’s black and puts some texture into your simulated tar and gravel roofs.
I too have just started building the Walthers Merchants Row [I have both the 1 and 2 models]. I started with my usual technique of spray can painting the walls [masking the various businesses] and then painting the windows by hand with acrylic paints, a small brush and a steady hand. They look OK from a distance but wouldn’t stand close scrutiny. One of the posts mentioned masking what they could and airbrushing. I was a bit hesitant to do this for the windows since I thought this would be too fiddley. However, I tried it using Tamiya masking tape. I mounted the tape a little proud of the window edge [tweezers help here in placing] and then cut the corners with a sharp hobby knife and foulded the proud piece [about1/3 mm] over into the window opening. Burnish down the edges with a sharp wood tool. It actually didn’t take that long. Mask the rest of the wall of course. After airbrushing [I use Scalecoat 1] - I was delighted with the result. The transition lines were very sharp. This is now my new technique and I will now experiment with blue painters tape [cheaper] and a spray can for the paint [no airbrush cleanup].
I would be interested in learn of other peoples’ window painting techniques. Also thanks for all of the great poster images. I remember seeing an MR article recently that described a method of pasting “distressed” paper images onto the brick walls with white glue.


