I know that Woodland Scenics and other companies produce compounds for making asphalt roads. Are there any products or combinations of products that can be purchased at a local hardware store or craft store that can be used for asphalt?
I started with pink foam. I laid a layer of my version of Ground goop, Premixed light weight drywall seam compond from Mynards mixed with sawdust and black paint. I used course sawdust. I then used a couple of grayish washes. I then scratched some lines with a knife and used a white wash.
This is Durhams Water Putty from the hardware store, painted with a wash of 50/50 water and cheap gray acrylic paint from a craft shop:
I add vinegar to the putty to retard setting, which still happens in a half-hour or so. I pour it and smooth it as well as I can in a liquid state, and then use a foam brush moistened with water to keep smoothing it as it sets. This process takes about a half-hour, and I try to keep the brush clean by dumping the old water (outside, not down the sink!) and getting a fresh containier full. You can sand it afterwards, but the putty dries very hard, and it’s a lot easier to get it smooth with the foam brush when wet than with sandpaper after it’s dry.
I like the paint wash because it comes out a bit unevenly colored, not uniform like it would with straight-from-the-bottle, full-strength paint.
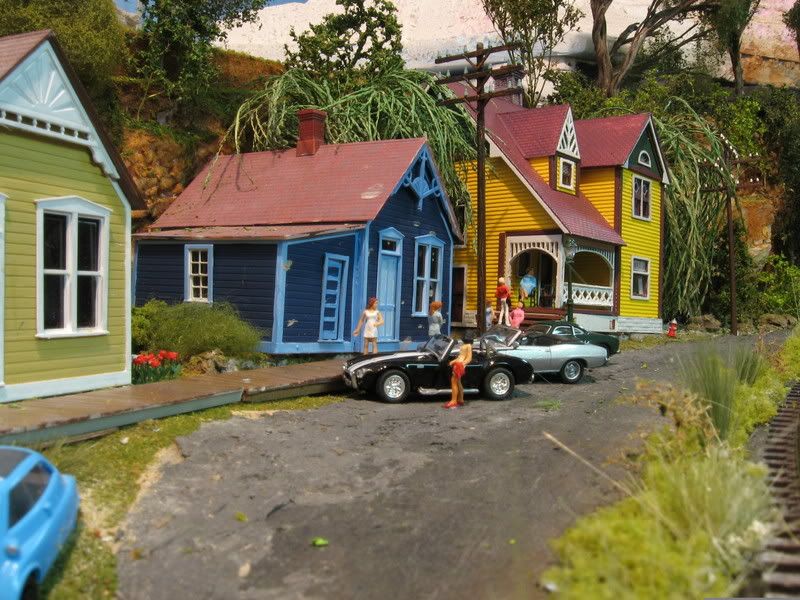
I’d say both Art and Mr Beasley did a good job. The roads look very realistic for black top, and either method would work well.
I must agree with the water putty idea, the only thing I would like to add is that when I mix the putty, I add a gray/black paint to the mixture. By adding the paint, if it happens to get scratched it will not show nearly as bad. Mike
I’ve used the Durhams Water Putty also. It’s pretty easy to control and takes a wash of grey paint well.

JaRRell
Do you spread it on with a putty knife/spatula or make forms/shoulders and pour in and level? Just wondering…
Brian
P.S. Thanks for tip on coloring it when making…
Cheap, easy, & effective! Works for sidewalks and roads! Change the color and add expantion joints and you have concrete!
http://www.telusplanet.net/public/crowley/ashphalt_roads.htm
Steve,
Although I haven’t installed any yet on my layout, I have experimented with 1/16" thick rolled cork contact paper that I picked up at Office Max with pretty good results. I think I paid $6-7 for a 18" x 36" roll?
You cut the cork to the size width you want, peel off the back, then lay it down on your wood or foam. Since cork is porous, I also fill in the voids with thin layers of vinyl spackle and sand after every application. (2 or 3 applications is usually sufficient.) After that I paint it an asphalt color.
Here’s what it looks like unfinished, spackled, and painted with Pollyscale Grimy Black:
 Click to enlarge picture(s)

Hope that helps…
Tom
If you want the edges to be straight and square, then you would have to make “forms”, I have done it both ways. Use card stock for the forms and pour in the water putty mixture (about the consisty of pancake batter) and use a credit card to smooth the putty. When it is dry, sand and weather. You can then add the lines it you want to. Mike
Has anyone found an alternative for the WS paving tape? (the stuff you make the forms with)
Weather stripping tapes too thick. I can’t find any that’s only 1/16" or 1/8".
It’s not pavement, but I used double sided foam tape 1" wide that I found at a dollar store. In my case, it made credible sidewalks. It is about 1/16" thick, so may be what you are looking for?

I’ve used AMI instant roadbed for roads. Easy to lay down and easy to paint. Unfortunately, I believe this product is no longer available.
Durhams also works great. A little messy, and has a distinctive odor when mixing, but impressive results and fairly easy to find in your hardware/craft stores. I’ve even used Durhams for my California Mission project back in 4th grade. It is difficult to remove though if you change your highway plans down the road…ha ha “down the road” [(-D]
Here’s AMI instant roadbed used as roads on my HO layout:


I used Rust-oleum multicolor textured “Aged Iron” paint that I bought at My local Wall mart store.It looks great for paved roads.I made the road by using wood sticks for forming the edge of the road and used spackling paste.I had to wait for the paste to harden and then add more as it does shrink a little bit,Then spray with the rust-oleum.total cost was under $8.00 and I have enough material to do lots of roadway.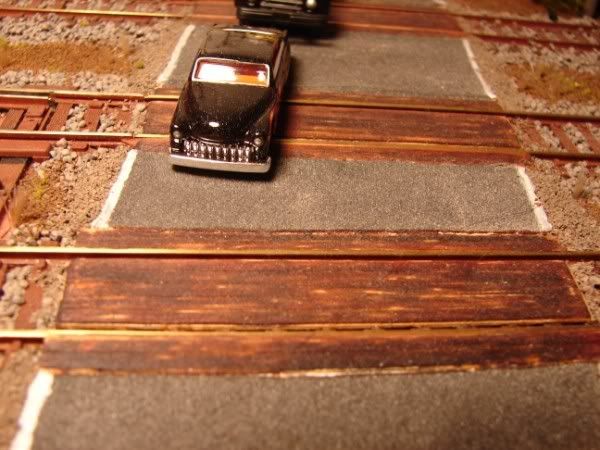
Hi Gang,
For making paved roads and parking lots, I use joint compound, which comes ready to apply and is very inexpensive. What I like about it is that it doesn’t set up like plaster-of-paris and Durham’s water putty. You can continue to work it for several hours, if necessary. While it does tends to crack, it’s very easy to just spread another light coat over the cracks. Once the joint compound is really dry, paint is easily applied…I dilute dark grey acrylic paint (50/50 with water) and brush it on. Then, after this is dry, I use some black poster paint powder mixed with brown, add water, and brush on a “finish” coat. This is where I can get variations in color and keep the surface from looking too smooth.
Hope this helps.
Mondo
I’m in the joint compound/plaster camp, my choice is vinyl spackle, it stays a little flexible (less likely to crack), adheres really well to foam. I add some acrylic paint so the base color goes all the way through.
Does the joint compund crack in a way that replicates real cracks in road pavement? I would think cracking in that case may be desirable, insomuch that real asphalt has lots of cracking. Do you use a diluted joint compound or the mix right out of the canister?
I’ve heard of people using extra fine sandpaper, which they affix and then paint. Anyone with any tips or experience with that? I understand that tearing the sandpaper accurately models cracks in the road too.
I’m obviously looking to model some beat-up roads. [;)]
I’m about a month away from some serious roadbuilding, so I’m looking to bolster my understanding and options of more realistic road making.
The joint compound cracks can be “adjusted” before they dry completely by manipulating the compound and pushing the edges of a crack together. And yes, I have been able to make cracks that look realistic. I use the joint compount right out of the container, without diluting.
Hope this h
I started an earlier thread on this same topic.
http://www.trains.com/TRC/CS/forums/1212714/ShowPost.aspx
I am attempting to use the Arizona Rock & Mineral asphalt products. You mix it with water and glue and spread it like icing. I am getting better with each attempt. I’ll have some more pictures later this week as I finish up another section.
I’ll repeat what I said on the earlier thread. If I have to make forms, spread it out, level it, and wait for it to dry, it’s too messy and too much work for me. I think that styrene can easily be made to look like an authentic asphalt road with the right paint and weathering chalks with a lot less effort. I used the water putty method for one section of road and a parking lot (concrete colored, in this case) and it took me as much time as laying down and finishing the remaining 40 feet or so of styrene roadway. The water putty part looks fine but I can’t say it looks any better than my styrene sections.