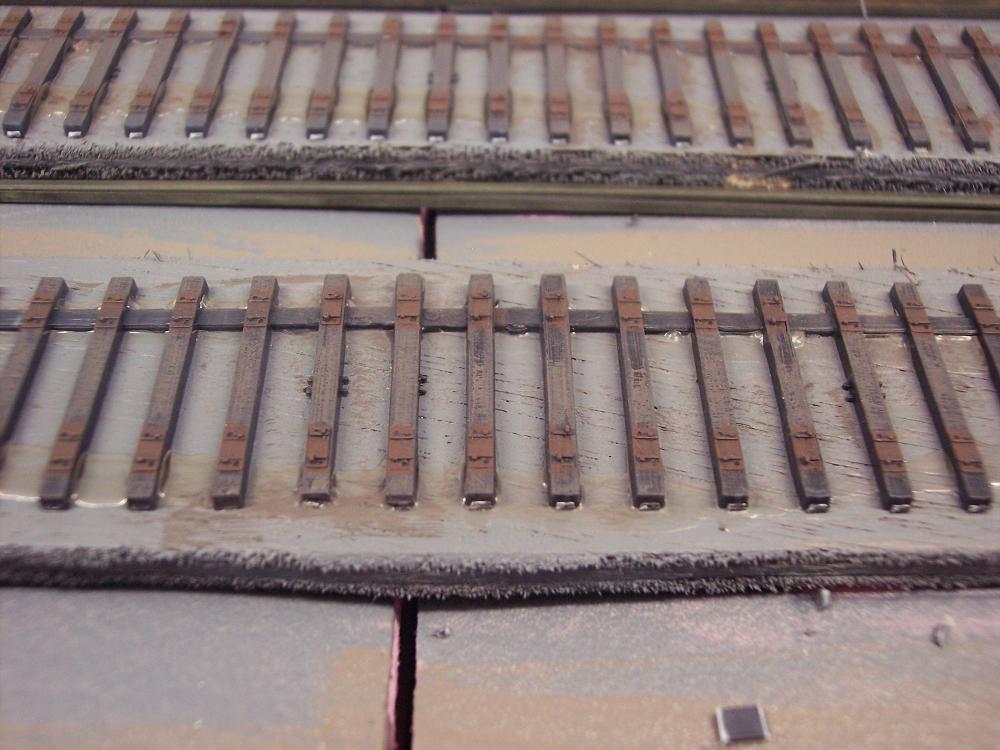
Last week I got a wild hare and decided to paint the track on my layout. After practicing on some scrap track, and armed with a jar of Floquil Roof Brown, a 1/2" flat brush with a chisel end, and a rag, I had at it. The technique was straightforward enough: holding the brush end horizontally, make one long steady stroke along the side of the rail, reverse direction to get full coverage, then reverse again. Wipe the top of the rail with the rag, move down the line, and repeat. The work progressed easily and quickly, in spite of multiple interruptions from the television, which forced me, against my will, to repeatedly stop and watch football [:-^].
I was surprised at the very nice effect I got for such little effort. I ballasted a portion of track (a much slower process) to get a feel for the overall impact
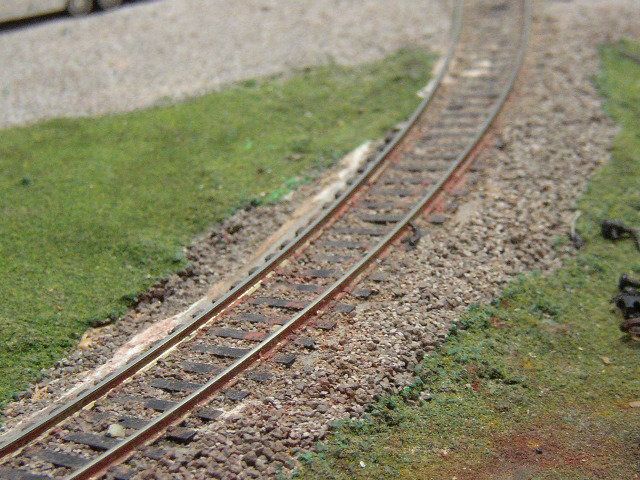
The look is not too bad at all for my old code 100 track
This image shows the nearside rail painted and the farside rail unpainted for comparison, though the photo really doesn’t do justice to the difference
I freely admit that I used to kind of pooh-pooh the idea of track weathering, putting it in the realm of the over-detail-obsessed zealot (sorry if that offends anyone). Boy was I wrong. You get a lot of pop for a realtively small investment of time and effort, and I heartily recommend giving it a try.
And here’s Uncle Jim’s Helpful Hint Of The Week: If you plan on painting your track, it’s better to do so prior to installing other scenic elements near the tracks (things like hills, trees, buildings, basement walls, etc).
Since I am still laying track on parts of my new layout, I tend to paint the track prior to installation. (A lot easier.) I do leave a tiny space on the middle of the outside rail on 3 foot sections as well as the ends unpainted for soldering the buss wires and joiners. Once in place and soldered, a few moments touchup and you’re done.
My layout is a very long run, 2 foot wide shelf railroad, no one can or will ever see the backside of any of my track. For this reason, I leave the far side of both rails unpainted. Saves time and obscenely expensive RR hobby paint.
I fell in love with painted, (weathered rail), the moment I saw it on a friends layout a while back.
Steve, nice job. I too find that the Floequil Roof Brown to be a good "average"color to show seasoned rust for the rails. Rail brown just doesn’t do it- have no idea where that color originated.
Also as I weather rail as you, I will have weathered black and rust on a pallet to occasionally dip into and alter the color. This is especially true for areas around points or yard tracks.
I find that solvent works far better for this and any remanant coating/ film on rail doesn’t affect the bond of the solvent paint, as does w/ acylics.
I also use this to weather wheelsets. Rust alone to show new “rust” roof brown for more aged. Or some mix in between.
Yes indeedy and in a clinic on track and track laying I have given to the local NMRA Division, I pass around a masonite board with “before and after” samples of mounted weathered and unweathered HO Code 100, N scale Code 80, and (just for fun) Lionel O-27 with balsa wood ties added to the base. All of them are greatly improved, and all look smaller and more scale like as a result. The before and after examples are to convince the doubters. But even Code 70 HO track looks better weathered or at least painted.
There are by the way still additional steps one can take on weathering that might qualify for the OP’s reservations about taking things too far in his opinion. For example, when the ground is soft and the track moves up and down as trains pass over, that tends to pump up dirt from down below, often a much lighter color, that gets on the ties, the ballast and the sides of the rail in particular areas (oddly enough often near grade crossings, perhaps because it is harder to maintain the track near a grade crossing(?). Newly laid rail is a sort of bluish gray that over time gets more brown, and this too can be replicated. Flange oilers leave their own distinctive weathering. There are more examples.
I have done a similar method, and have to say it makes a nice difference.
In addition, I took a 1/2 inch flat brush and dipped it in a dirty black/brown wash, and swiped it down the center ties (before ballasted of course). The two processes really look good together.
I agree…My waistline is down to a size 40 but,I’ll like a 38…
I remember reading in MR "Track Is A Model Too " and that lead me to reevaluate my track modeling and since that time I have painted my track as well as model track.
On some of my past ISLs I carefully removed some of the plastic ties and replace those ties with wood ties so I could brake and crack several ties.A industrial brach isn’t a highly maintain trackage .
I also took a jewlers hammer and lightly tap the track so it would dips in it-the cars rocking look pretty darn convencing…BTW…Of course one wouldn’t want to do this on a high speed main line.
Now on track weathering I did the best I could with what I have. Bachmann EZ-Track has never been known for winning beauty contests but I did the best with mine that I could.
Great-looking improvement in your track, Jim. [tup]
While it’s easier to paint the rails before laying the track, it can result in flex track becoming less flexible and, once you flex it, the sliding rail will expose shiny, unpainted areas.
You’re right about hobby paint being expensive (a bottle of Floquil or Pollyscale goes for $6.99 around here) but it doesn’t require a lot of paint to do rail: I used only two or three bottles to paint over 200’ of track and a lot of turnouts.
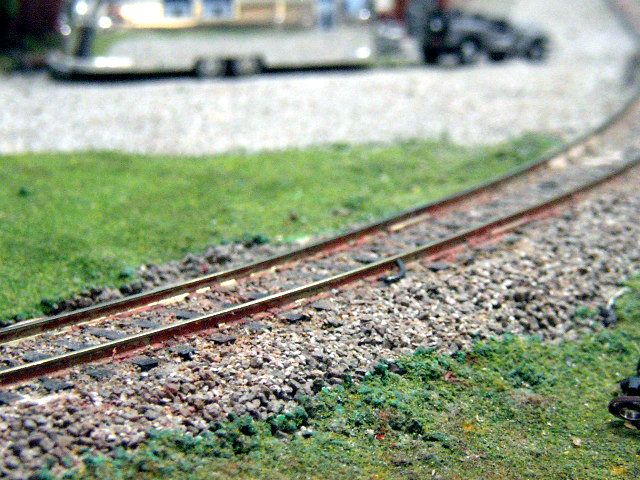
My layout is an around-the-room type, but much of it is 30" wide and some only 20". While the back side of the rails are not visible under most normal viewing conditions, a digital camera, placed directly on the layout, can open-up all-new vistas for your viewing pleasure, including those shiny rails. I think that it’s well-worth the extra effort and expense to do the unseen side of the rails. Here’s a few examples:
I have used those Floquil pens that come in a track weathering set. They seem to work well once the paint starts flowing. There was another product - think it was called Rusty Rails - that some have written about but I have no first hand experience.
Guy, thanks for your kind words regarding the Atlas water tower. The main alteration was to use a Grandt Line spout in place of the original.
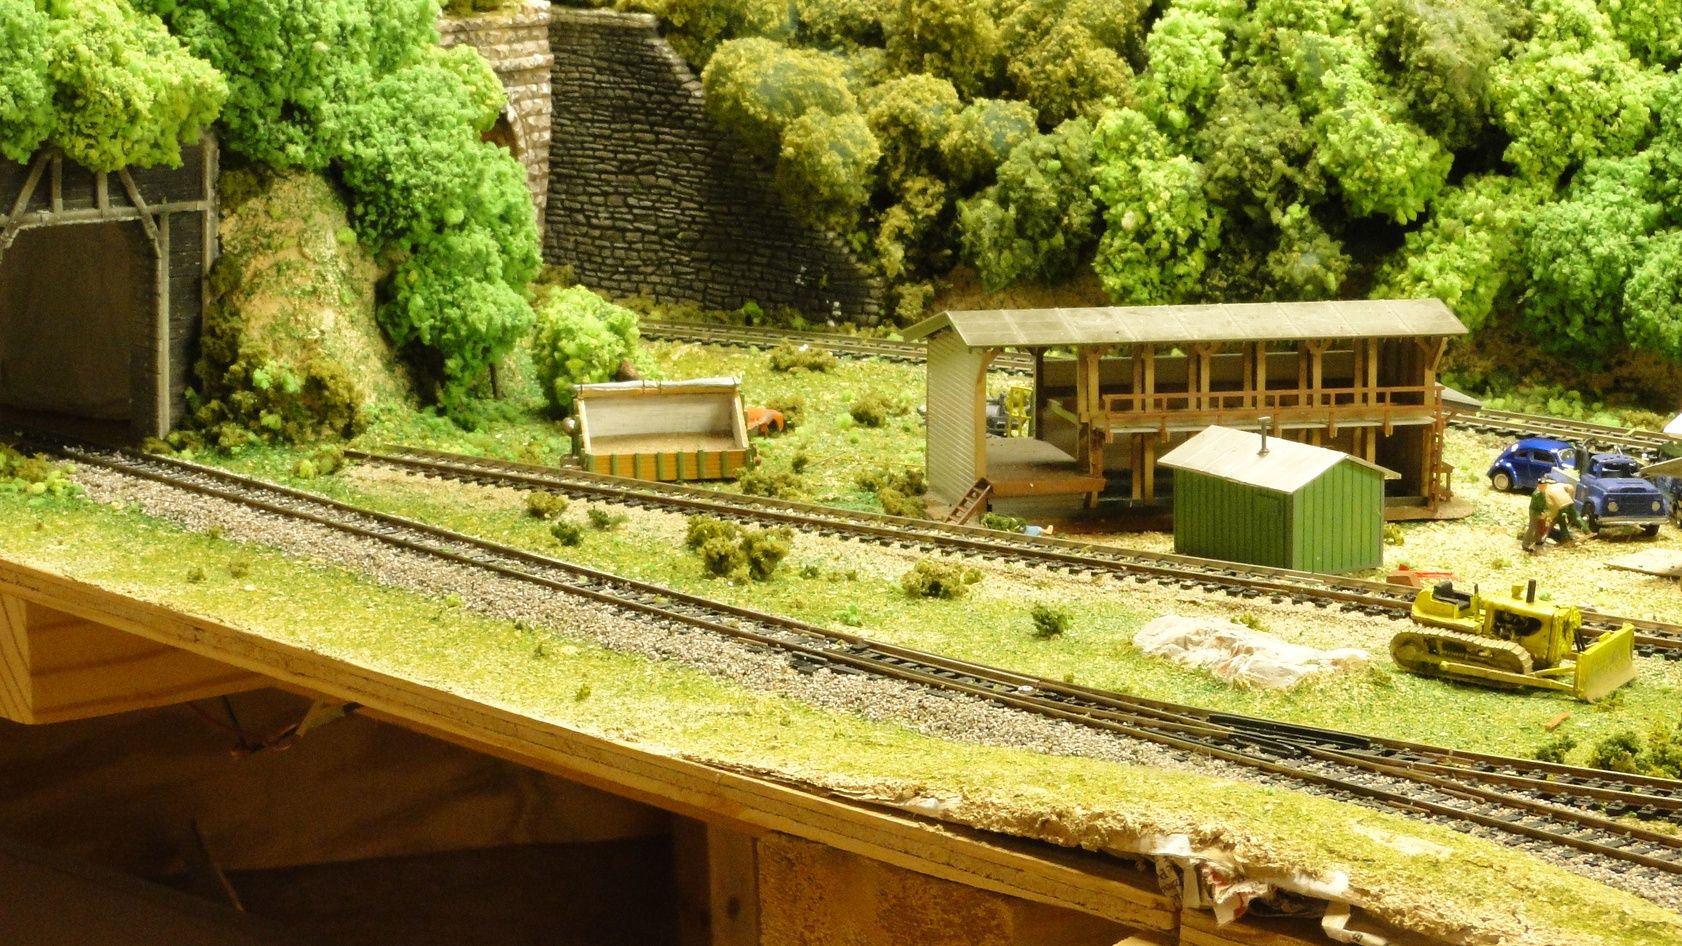
I really like the look which you’ve achieved with your ballast, especially the weathered grease effect on the points - very nicely done. The rest of your layout looks like it will be interesting to operate, with lots of good opportunities for scenery. I especially liked the scene with the road grader - I’ve been contemplating purchasing one for some time, and you may have convinced me to get with it. [swg]
I’m also a big Twilight Zone fan, and we’ve been watching them on DVD recently.
I paint my track using PollyScale paints, straight from the bottle and applied with a 1/2" brush. I don’t pre-clean the track and have no problem with paint adhesion. The only time I clean track is either after painting the rail (a clean dry rag) or after applying ballast or scenic ground cover nearby. In that case, I use a mildly-abrasive contact-point cleaning block.
I do vacuum the track and structures every couple of years or so, but no other housekeeping has been required so far. [swg]