Looking really good. Little nitpicks, many of which will seem fussy….On the wood, if you want the weathered look, it is better to stain it before you glue it down. I would make the boards as snug as you can, so we see almost no gap between them along their lengths. Definitely put boards between the rails.
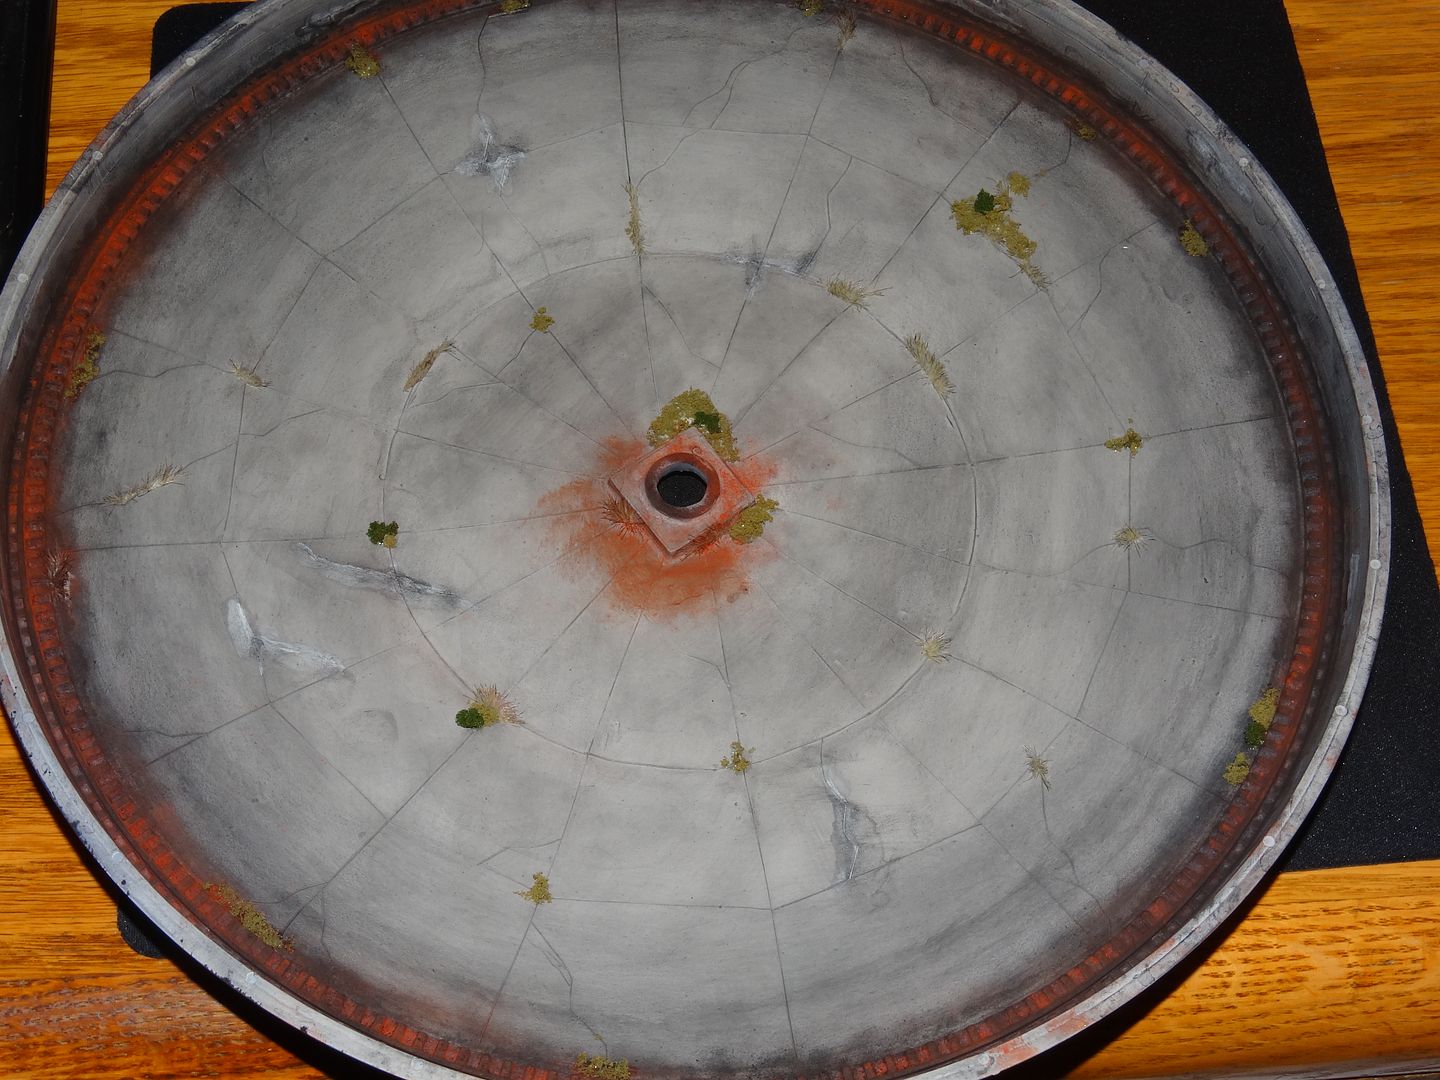
The weathering in the pit is spot on but you do have a few hard edges where droplets dried. I would soften those by applying powder etc. Little point again as They most likely won’t show if you leave them as is…
You make some very good suggestions. I wish I had thought the process through a little better. The boards are CA’d in place so removing them will be messy but not impossible. I bought more than enough to do it over.
Could I have lessened the effect of the ‘hard edges’ on the concrete stains by adding a little soap to the mix? I used tap water and Polly Scale acrylic paint. Should I have used distilled water or alcohol to dilute the paint?
Now worries on the wood. You can still stain it in place. Just make sure that the wash you use isn’t too dark (alcohol and shoe dye/india ink mixture) Test on a scrap piece to see the results before applying to the deck.
As for the hard edges on the pit weathering: using Polly scale as weathering is a bit tricky because of this tendency. I usually will feather the paint a bit to break up those edges. It does have a tendency to bead up a bit and create the edge. This can also happen with alcohol/dye washes on plastic as well.
I’m not sure that you will see the edges when you get the bridge back in and your grass in place. If it is still noticeable, I would use some black or rust colored weathering powder and just soften the very edges of a few of the spots. You don’t have to eliminate the edges just blend them enough so that the eye can’t connect the circle and they don’t read as “water spots”.
The Paint thinner doesn’t seem to matter much in my experience as far as whether the edges develop. You didn’t say how you applied the weathering, but I find using an airbrush will make this tendency go away but there is also a very distinctive “airbrush look” that I try to avoid.<
The wood is history. I was able to get it off with a wide X-acto chisel blade and some sand paper. There was maybe $4.00 in wood so its not a huge loss. Good lesson learned. I also thought about your suggestion of not leaving spaces between the wood strip which I had done. I think that it will look better without gaps.
I used a wide artist’s brush to apply the wash in the pit. It tended to leave streaks no matter how I tried to manipulate it so I ended up applying a fair amount of wash, spreading it around, and then I used the brush to wick the excess off the surface. I’m going to try a little isopropyl alcohol to see if I can soften the lines.
I don’t plan on putting a lot of grass in the pit. I just want a few spots here and there. I’m going to try to cut the self adhesive grass tufts into thin strips so it will look like the grass is only growing in the cracks. If that doesn’t work, I have some WS grass fibres that I can hopefully ‘plant’ in the cracks. I also have some WS ground cover to mimic a few weeds too.
I’m in a quandry as to what colour weathering powders to use and how to apply them. I’ve only got 4 or 5 colours, all in the yellow/brown range, plus black. Any suggestions?
The other thing I want to do is re-create some lime deposits on the side walls. I’m thinking of getting some white and grey artists oil paints, applying them in thin irregular lines, and then using paint thinner to ‘wash’ the paint into streaks below the lines. I also want to put rust streaks on the walls from the rails using artists oils as well, but I think that will have to wait until the turntable and tracks are in place so I can position the rust stains properly.
Comments and advice welcomed as always! (Did I say that before?)
On the wood: Wow you don’t mess around when it comes to removing what you don’t like!! When you snug the wood together you may have to have a thinner strip to make the width work out. It will look better if the thin piece isn’t on the outside edge…
Suggestions for pit weathering: a black or dark rust color powders applied sparingly will work. You can really make lots of colors work depending on how you blend them. Try practicing on a scrap to check the techniques. You can layer a brown with black to mute it a bit. If you use powders they can be rinsed off if you don’t like them (providing none of the other weathering materials are water soluble)
On the rust and lime: I might try dry brushing some Polly scale… Easy does it… Practice on the scrap to get the technique right…I really like Model master rust color for darker rust….Not sure how paint thinner will act on the plastic in the pit. At this point you may have covered it with enough paint to render that issue moot…
Below is something you may have already seen. It is a description of the specifics of using real
Thanks for taking the time to post all that information. Very helpful and much appreciated. I’ll have to read it a couple of times to let it all soak in. Pardon the pun - ‘soak’ as in when dyeing the wood.[:o)][(-D][(-D]
The water tank is really impressive. You are setting a high standard.
Thanks, but I’ve already had my Thanksgiving! Canadian eh! It was good! I hope yours is good too!
This is a really informative thread Dave, It has just confirmed to me though, when I build my own layout I will be incorporating at least two Wyes!!![swg]
Cheers, the Bear.[:)]
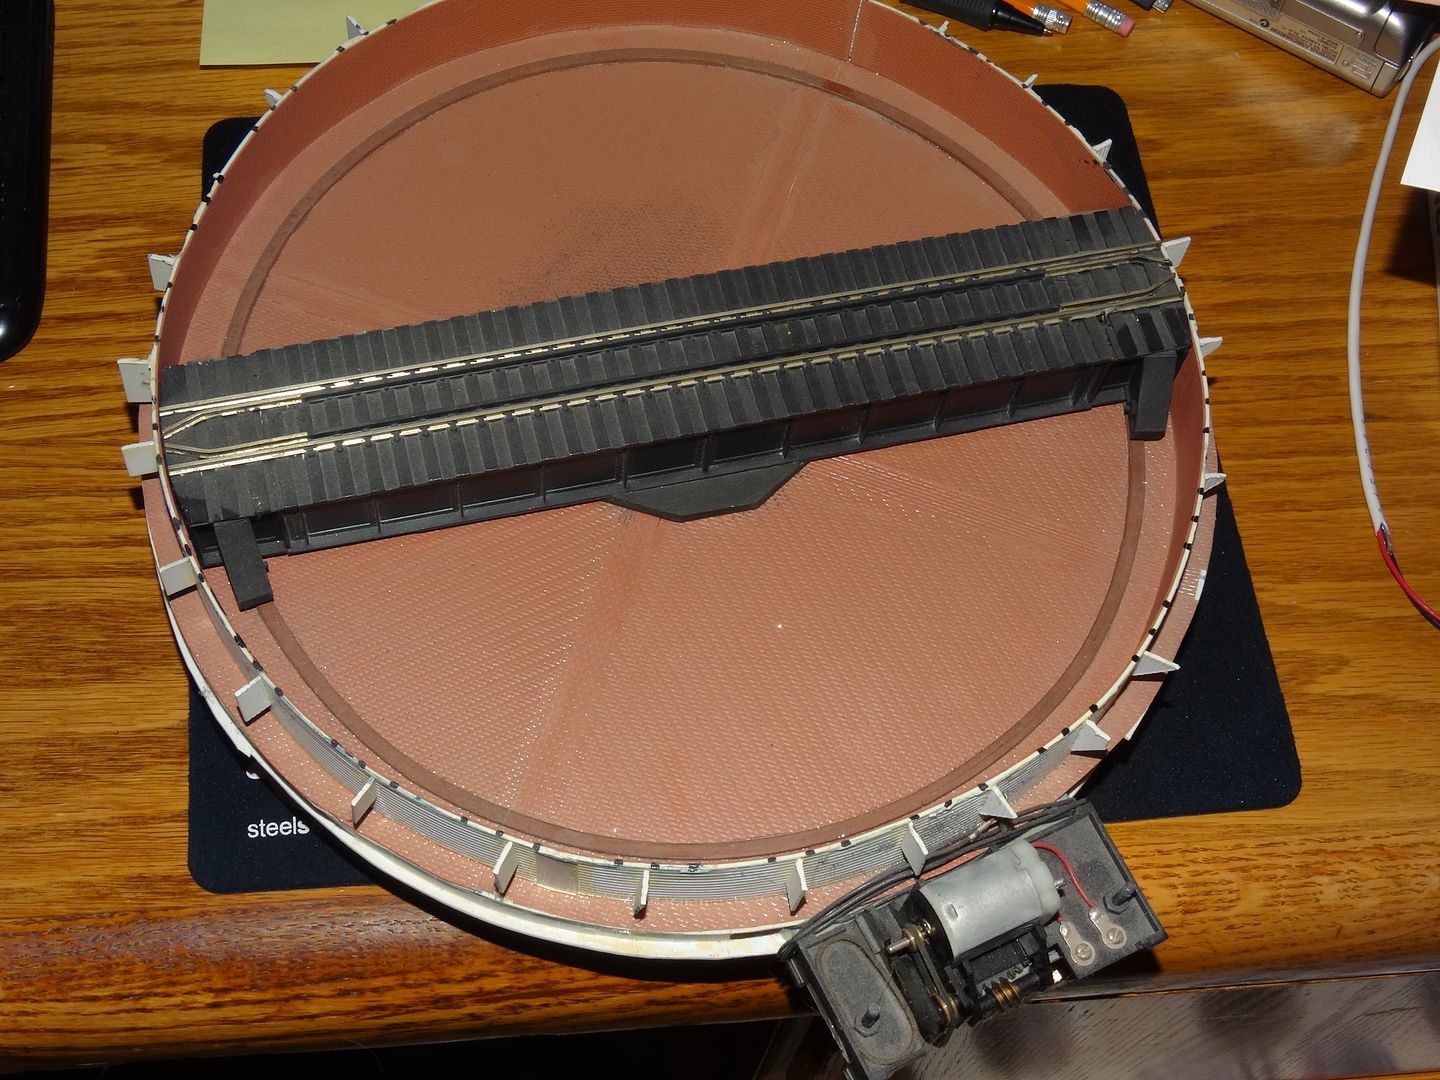
Well, this is mine. I’m sure it’s not terribly prototypical, since it’s based on an Atlas and is very short, but I like it.
This is a “pit-bash,” taking the venerable Atlas deck turntable, dropping it into the layout and building a false floor which does not rotate. The bridge is mounted to the deck through the hub in the middle.
Your turntable is very rustic. How did you do the stone walls?
I did something similar with an Atlas turntable except it was lined with Plastruct brick sheets. I used an Atlas deck girder bridge and extended it to fit the turntable. After doing all that work I decided that I couldn’t stand the noise and the start/stop action so it sits gathering dust. Its likely headed for a train show/sale.
I applied some grass tufts and some lime stains. They looked OK. Then I attempted to apply some weathering powders. I managed to get the weathering around the pit rail way too dark and the rust effects way too prominent. I’ll have to figure out how to tone it down.
I have had some luck toning down weathering powders (Pan Pastels) by using fine mists of “wet water” and in the case of your pit you might want to hold the pit vertically to keep too much “rust” from spoiling the look of the pit floor.
As you apply the damp mist use a fairly large artist’s brush, 5 to 8mm or so, to help wash away the water. Hold the pit over a laundry tub or something to collect the wash water.
If that doesn’t have enough lightening effect, then use a broad brush and simply apply some very light gray over the rails and ties to “bleach” them out.
Just a suggestion, others may have some better ideas.
I followed Ed’s suggestion and washed off as much of the weathering powders as I could. The turntable looks better but it’s still pretty dark. I will have to do a little touch up along the edge of the ring rail ties. I’ll try a much smaller brush and a lot less black weathering powder:
Over the years, an awful lot of grease and grime is going to accumulate at the ring-rail from all that grease being slung off the gears and bridge journals. I wouldn’t be too concerned about it being dark. With all that oil and grease, the rust would not be very prevalent, either, in my estimation.
On to the bridge. I’m waiting for some black shoe dye to arrive so I can stain the second attempt at planking. Guy suggested not leaving any gaps between the boards and I think he is right, so I stripped out the first attempt at planking which had spaces. The spaces just didn’t look right.
I also have to build an overhead light to go outside the control cabin so the operator can see the track alignment. There will be a second very dim light in the cabin. I’m not sure how often a turntable would be operated at night at the end of the steam era, but the turntable also services a diesel engine shop too so my service facility staff choose to be ready for anything!
Purchased the 130’ TT 18 months ago, spent the last year trying to get this working properly. Great pains have been taken to get bench work true and level. It was installed on Midwest cork roadbed to match existing track levels. Calibration was successful. I only installed the lead track and track 2. I purchased two Walthers 3 stall round house buildings and laid out the track locations and 5 more garden tracks. This is where the problems began…the bridge would never properly line up with different types of locomotives. I don’t know if weight was a factor or not. Multiple resets and calibrations failed to resolve the wandering alignment with different steam or diesel locomotives. Went over the rotation mechanism with a magnifying glass and see nothing wrong. Disassembled the contact ring…cleaned and adjusted contact fingers and that assembly also is fine. Just when you think that last "adjustment " has corrected the problem, it would fail. Researched the various suggestions posted on MR forum to no avail. I have reached my limit of frustration. As of yesterday…TT has been returned to the original shipping container…I glued the floors together for both roundhouse buildings and construction stops there, lids back on the box…plywood will be replaced and the space used for something else. My experience with Walther’s 130’ TT has been an exercise in aggravation. As a side note…this was the first time I worked with code 83 track and I found it way to “fragile” for my purpose. My layout consists of 900+ feet of code 100 flex track and 115 turnouts laid on Midwest cork roadbed for decades…still runs fine!