What type of "water" to use for pouring my harbor and beach scene???

Hello all! I am in need of some advice from modelers who have already taken on this task… I am preparing to pour water for a harbor and beach scene. I have a few questions before moving forward as I want to get this right the first time.

A few things to know…

  1. This water will come to the edge of my layout and at the point where the styrene dam (which will be removed once water sets) and layout edge meet, it will approximately be 1.5" deep.

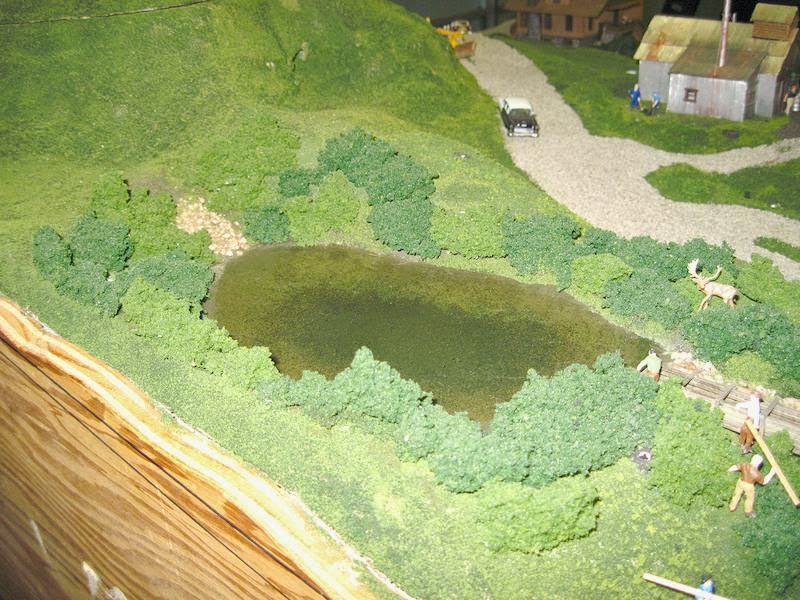
  2. The water will be poured around bridge abutments, around trestle supports, and fade up to a beach where the water will gradually become more shallow.

  3. Everything has been properly sealed, painted, leveled, and detailed to prevent leaks.

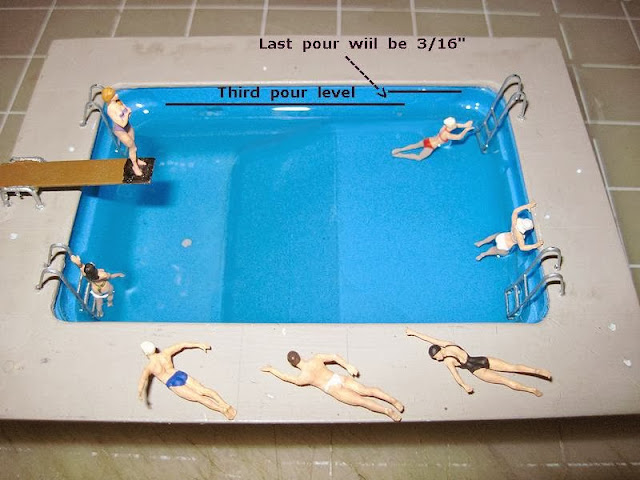
So now, what kind of water do I use? Should I use Envirotex, Woodland Scenics realistic water, Woodland Scenics Deep Pour water? How deep of a pour should I do at a time? Will there be any shrinking of the hardened water over time? Also, I will have boats, people, animals on/in the water…

Any advice, experiences, how to’s and pictures would be greatly appreciated. As always, I look forward to hearing and learning from you all. Cheers!

That will be rather costly. Why not paint up a bottom just below the height you really need for the water surface, and then pour over that to a depth of about two pours, say a whole quarter-inch? If you want to show the depth of the water, as it should be, at the edge of the layout, back the edge of the filler plug toward the back of the layout about half an inch, paint it dark green or black, maybe dark turquoise, and let your water substance run into that and create an illusion of depth.

I have used a two-part finish-quality epoxy from Swing Pain

I can’t offer much in the way of comments on “water” products, as I use patching plaster, with paint and a clear finish to represent water.

However, I’m wondering if that 1.5" depth is going to cause problems with your “water”. The general idea with such products is usually to suggest depth by painting the “bottom” using suitable colours, while the water products are mostly to represent the wet surface, with only a suggestion of depth - the paint does the bulk of that.

Wayne

Use Magic Water

https://www.unrealdetails.com/

I have used Woodland Scenics Realistic Water on several occasions in the past.

When I followed the instructions and poured a shallow amount, things worked out well. But, later on, when I poured slightly deeper than recommended, it took several weeks to cure. I place a tug boat in the “hardened” water which sank into the water over a period of a few years.

So, your 1 1/2" pour may take months to harden. Meanwhile, the pour will remain cloudy and will not clear for those many months.

Rich

As my British wife would say, “That’s Irish!”.

Maybe the OP thinks he needs to pour a deep layer of water to get the sense of depth, but as others have pointed out, you get depth by painting the base first with appropriate shades and then only need a thin layer of whatever water product you use. I followed Rob Spanglers methods to get my river - bottom and water surface (gloss Mod Podge).

Good morning lots of great advice so far… thank you. After reading my original post, I need to make a correction. The depth would be approximately .5" not 1.5". I must have hit an incorrect key stroke. Also, this is designed to be more of a lake, not quite a river. Please continue with your advice. I am learning so much. Thank you!

I forget wich product I used, but anyway it was a clear casting product, and I spent a lot time painting the bottom of the area to get the look I wanted, so that just a very thin coat, maybe an 1/8" or less, would cover it, and then added surface effects.

I think you’ll have to search around and find a product that you can pour that thick, and end up with good results.

A 1/2" is still very thick, for a typical hobby casting resin. And if you did do it, and it looked fine in the beginning, as the the product cures, over time, maybe months, or a even a year or two, the edges will curl up, including curled away from anything you poured around, like bridge piers, pilings, etc.

I think painting the bottom for the looks you want is the key. Deep water would be dark blues and greens, nothing else showing like rocks, etc. As it shallows around the edges, more will become visible.

Good luck!

Mike.

I agree with Mike, even a half-inch is very thick. I would guess closer to 1/8th of an inch is closer to what you would really need.

I applied my gloss Mod Pod probably close to 3/16ths and possibly 1/4-inch in the thickest places and IMO, it was too thick.

Next time around I would apply it thinner and shoot for 1/8th inch. Of course check the product you are using but I doubt any of them would recommend a even 1/4 inch.

If you use Woodland Scenics Realistic Water, even a 1/2" pour is too deep. It will take forever to set up clear. Even a 1/4" pour is deep. I would recommend no more than 1/8".

Rich

That site https://www.unrealdetails.com/ has a testimonial that Envirotex turns a root bear color over time. I’ve not seen that problem mentioned before.

1/2" is better than 1.5" but still seems a little thick to me. My resin experience is in the distant past.

David Popp used WS Deep pour water for the Canadian Canyons. His pour didn’t look 1/2" thick though. MRVP might be worth your while to watch some of the water videos. The resin has a surface tension so it has to be teased to the edge of where you want it to go (he used a wooden tongue depressor) but once there it also tends to creep.

He also did water in the Virginian series, which I watched last night. In attempting to creates waves with Modge podge, he created an unwanted spit effect because of the bubbles produced.

I used Mod-Podge, the glossy one. I wouldn’t make a single pour more than about 1/8" thick. As it cures, you can add waves by stippling the surface of the final pour. It’s water soluble until it dries. I’d follow Wayne’s advice about using paint to give the illusion of depth. Even if you’re not dead set on making it deeper, you’ll have to create a damn at the edge of the layout, sealed below the bottom of the “water” level (I used silicone caulk).

For a contrarian view, here’s a rather low cost method by our friend at Marklin of Sweden (YouTube video). It’s pretty easy and cheap, using mostly toilet paper, glue, and paint - yet the results look fairly good to me.

That’s the brand I have used for three scenes. I don’t think I ever went .5 inches deep, but one use was pretty close to that, maybe exactly that, with no cracking or shifting. I thoroughly prepare the bottom with scenic material and do not tint the water. Magic Water has no odor that I can detect. Just give it time to set and harden. By the way it WILL find any tiny gap or hole!

One thing is that there is a slight tendency for the liquid resin to creep up when it is poured, that is, modeled vegetation on the edge of the water sometimes gets the liquid to wick upwards into it. And abutments tend to show a bit of an upward wicking as well. I’m less troubled by it than some are.

My wife used a similar product for artificial flowers in a vase - a two part product that dried very clear to a depth of a couple of inches in that vase. So I suspect there should be no problems (heh - that vase of artificial flowers looked great for years until a friend who was watering our plants and looking after our cat while we vacationed decided she need to add real water to the vase! That was not a good idea …).

Dave Nelson

I used WS Realistic Water for creeks and small rivers for years but when I made a swimming pool it failed big time, twice. It turned a grungy brown after two years. I then went to Magic Water it has been perfect for years. I discovered that Parks Super Glaze available at BB stores works equally well for about 25% of the cost of hobby waters.

This is my pond made with Magic Water back in 2014.

I get the same results using Parks Super Glaze.

My swimming pool was made with Magic Water. The instructions say to keep the pours to ½” so to be on the safe side I went with ⅜” pours. The deep end of the swimming pool is a bit over 1¼”.

Thanks for that link! Good-looking results, and, as usual, an interesting presentation.

Wayne

On a large job as you discribe, I feel that flat masonite painted and coated with urathane works best. Poured stuff tends to creap up the sides of things like piers and have wallows around them, very unrealistic. Yes I have pored stuff but only in cases where I acually need the depth because of sunken trees etc,. Also if you make a mistake with the pored stuff it can be hard to imposible to fix, not so with the other.

I like his videos. He’s to the point and precise, and when he begins the process, he moves right though it. No hemin and hawin, no slow moving person trying to get materials together and explaining where they bought each individual item, and price comparing between brands, no wasted effert, just method.

All those that try and make “how-to” videos should learn from him. Most of them I can’t stand! and never get very far, or keep skipping through the video, trying to get to the point.

His method with this water and wave modeling, I think looks excellent.

Mike.

I ended with the same trouble years ago when I need to add water for my Port Allen

Port Allen is a big surface, and the layout itself, is rounded by the banks of the Maclau River, which is the edge of the layout.

I quickly understand that any pouring was not possible for such surface.

I ended by using this method.

First I paint the surface a deep marin blue, nearly black using enamels paint.

Second I brush translucide acrilyc heavy gel from Golden artist colors, and work it to make waves; this materials keep forms easily, stay in forms, dry quickly and completely translucide.

When dry, I have a surface with small waves everywhere.

But the surface is not shiny.

I brush the whole surface with epoxy resin, the stuff used to build fiberglass things.

Three or four coats are applied, this give depht but also made the “water” more ondulating over the waves; this resin dry quickly but I brush a coat only each 24 hours.

The last coat receive a drop of brow acrilyc color in the mixture, this add depht and kill a bit the blue effect, which ended with a more realistic look.

The result is an ondulating (in move ) water, brillant and translucide with depht even if the real thickness is only a few millimeters.

The surface is really shinning with good looking waves.

The fact the resin is brushed, allow to cover big surface even in one or two times because the resin in your jar dry quickly.

This resin is really inexpensive,

Following a few pictures of my “water”

I like Envirotex, too. I pour several things layers over a few days. Each layer gets lightly tinted with a drop or two of craft paint, darker colors and then lighter.

If you go to Michael’s or A.C. Moore, download and print the 40% off coupon. Envirotex isn’t cheap, but lasts forever if you keep the bottles clean and tightly sealed.