I have several ladder tracks constructed using Atlas manual turnouts. I utilized them before learning of frog neutrality, frog juicers, etc! Now my locomotives stall as a matter of course. To replace them would necessitate destruction of all that is built. I wonder and this is the basis of my question, is it possible to drill a small hole in the middle of the frog, solder the power wire to the correct rail and the ground to its correct location to eliminate this problem? I know this is an attempt to electrify an insulated area but I am desperate I do not know how to fix this problem surely there’s an answer somewhere besides replacing all of the switches with new switches that have electrified frogs, or changing everything to DCC! Desperately seeking switches, William
presumably you’re having problems with a small steam loco where you could add pickups to all tender wheels
Changing to DCC will not solve a “dead” frog issue. Which Atlas turnouts are you using? Custom Line? Snap switches? What number? #4, #6, etc. What type of locomotives? Steam? Diesel? Wheel configuration? Your locomotives should not all stall “as a matter of course”. I run a large layout with Atlas Custom Line #6 insulated frogs and none of my locos stall on any of my frogs. So, we need to learn more about your layout.
Rich
Hi and welcome to the forum. I don’t think you can electrify the frogs without removing the turnouts. If I were you, I would focus on the turnouts on the mainline to allow you to run smaller locos there. You can electrify the frogs or install shorter turnouts, if you run shorter equipment.
As mentioned by Greg, you might have some shorter locos that stall easily. Maybe you can keep these for your mainline (once these are fixed). Keeping the turnouts clean on the contact points can make a big difference too. Installing keep-alive decoders can help.
Simon
It would probably be difficult to solder to a cast metal frog without melting the plastic ties. I have powered them by drilling a hole for a slightly flattened solid wire. Insert the wire then wedge it place by driving a tapered pin into the hole, then nip it off and file flush.
Mark Vinski
Well, switching to DCC would allow you to install decoders with one of the various “keep alive” capacitors. That would stop the engines from stalling. But that is kind of extreme, I’d try powering one of the frogs first and see how it goes.
BTW one more reason to not glue everything down until you’ve tested every possibility and are sure that there are no issues that need work.
To go back to the original question, and assuming he would use something like a hex juicer to do multiple frogs – if he drills a hole in the frog top-to-bottom and passes the wire down through a hole in the scenery and benchwirk, he might avoid ‘melted ties’ by using resistance soldering with the wire itself as the ground. Good flux an comparatively low-melting solder might be advisable.
The OP has not yet returned to respond to the various replies.
As I said earlier, there is not necessary any good reason why all of his locomotives are stalling as a matter of course. I suppose that all of his locomotives could be short wheelbase, but we don’t that as of yet.
Rich
First things first allow me to thank everybody for their replies although we haven’t solved anything yet! Again I mentioned that these are track ladders located in an engine service facility and a freight yard as well as a future passenger car yard I know of no other way to construct the trackage other than the way it’s being done as the room available is an issue. All of the shorter wheelbase locomotives be they steam or diesel stall as the switches are stacked one upon another. The alcos and f units along with multi-unit lash ups of E’s tend to stall in the engine facility ( I thought I was being sarcastic when I said matter of course and I apologize I will no more do so in the future). The railroad is just in its beginning phase so the small freight yard will not be the main one. I will take some photographs to help all who are interested identify the switches. I must admit I don’t know myself my fault my faul! I have the train table split as I was planning to move and it fell through however I do have a lot of work to do because I want to rewire and get ready to expand try to fix the switch problem without too much work etc etc etc okay have Adam guys I’ll look and check what you have to say quite regularly and as again I say I will post some pictures! Thanks so very much again!
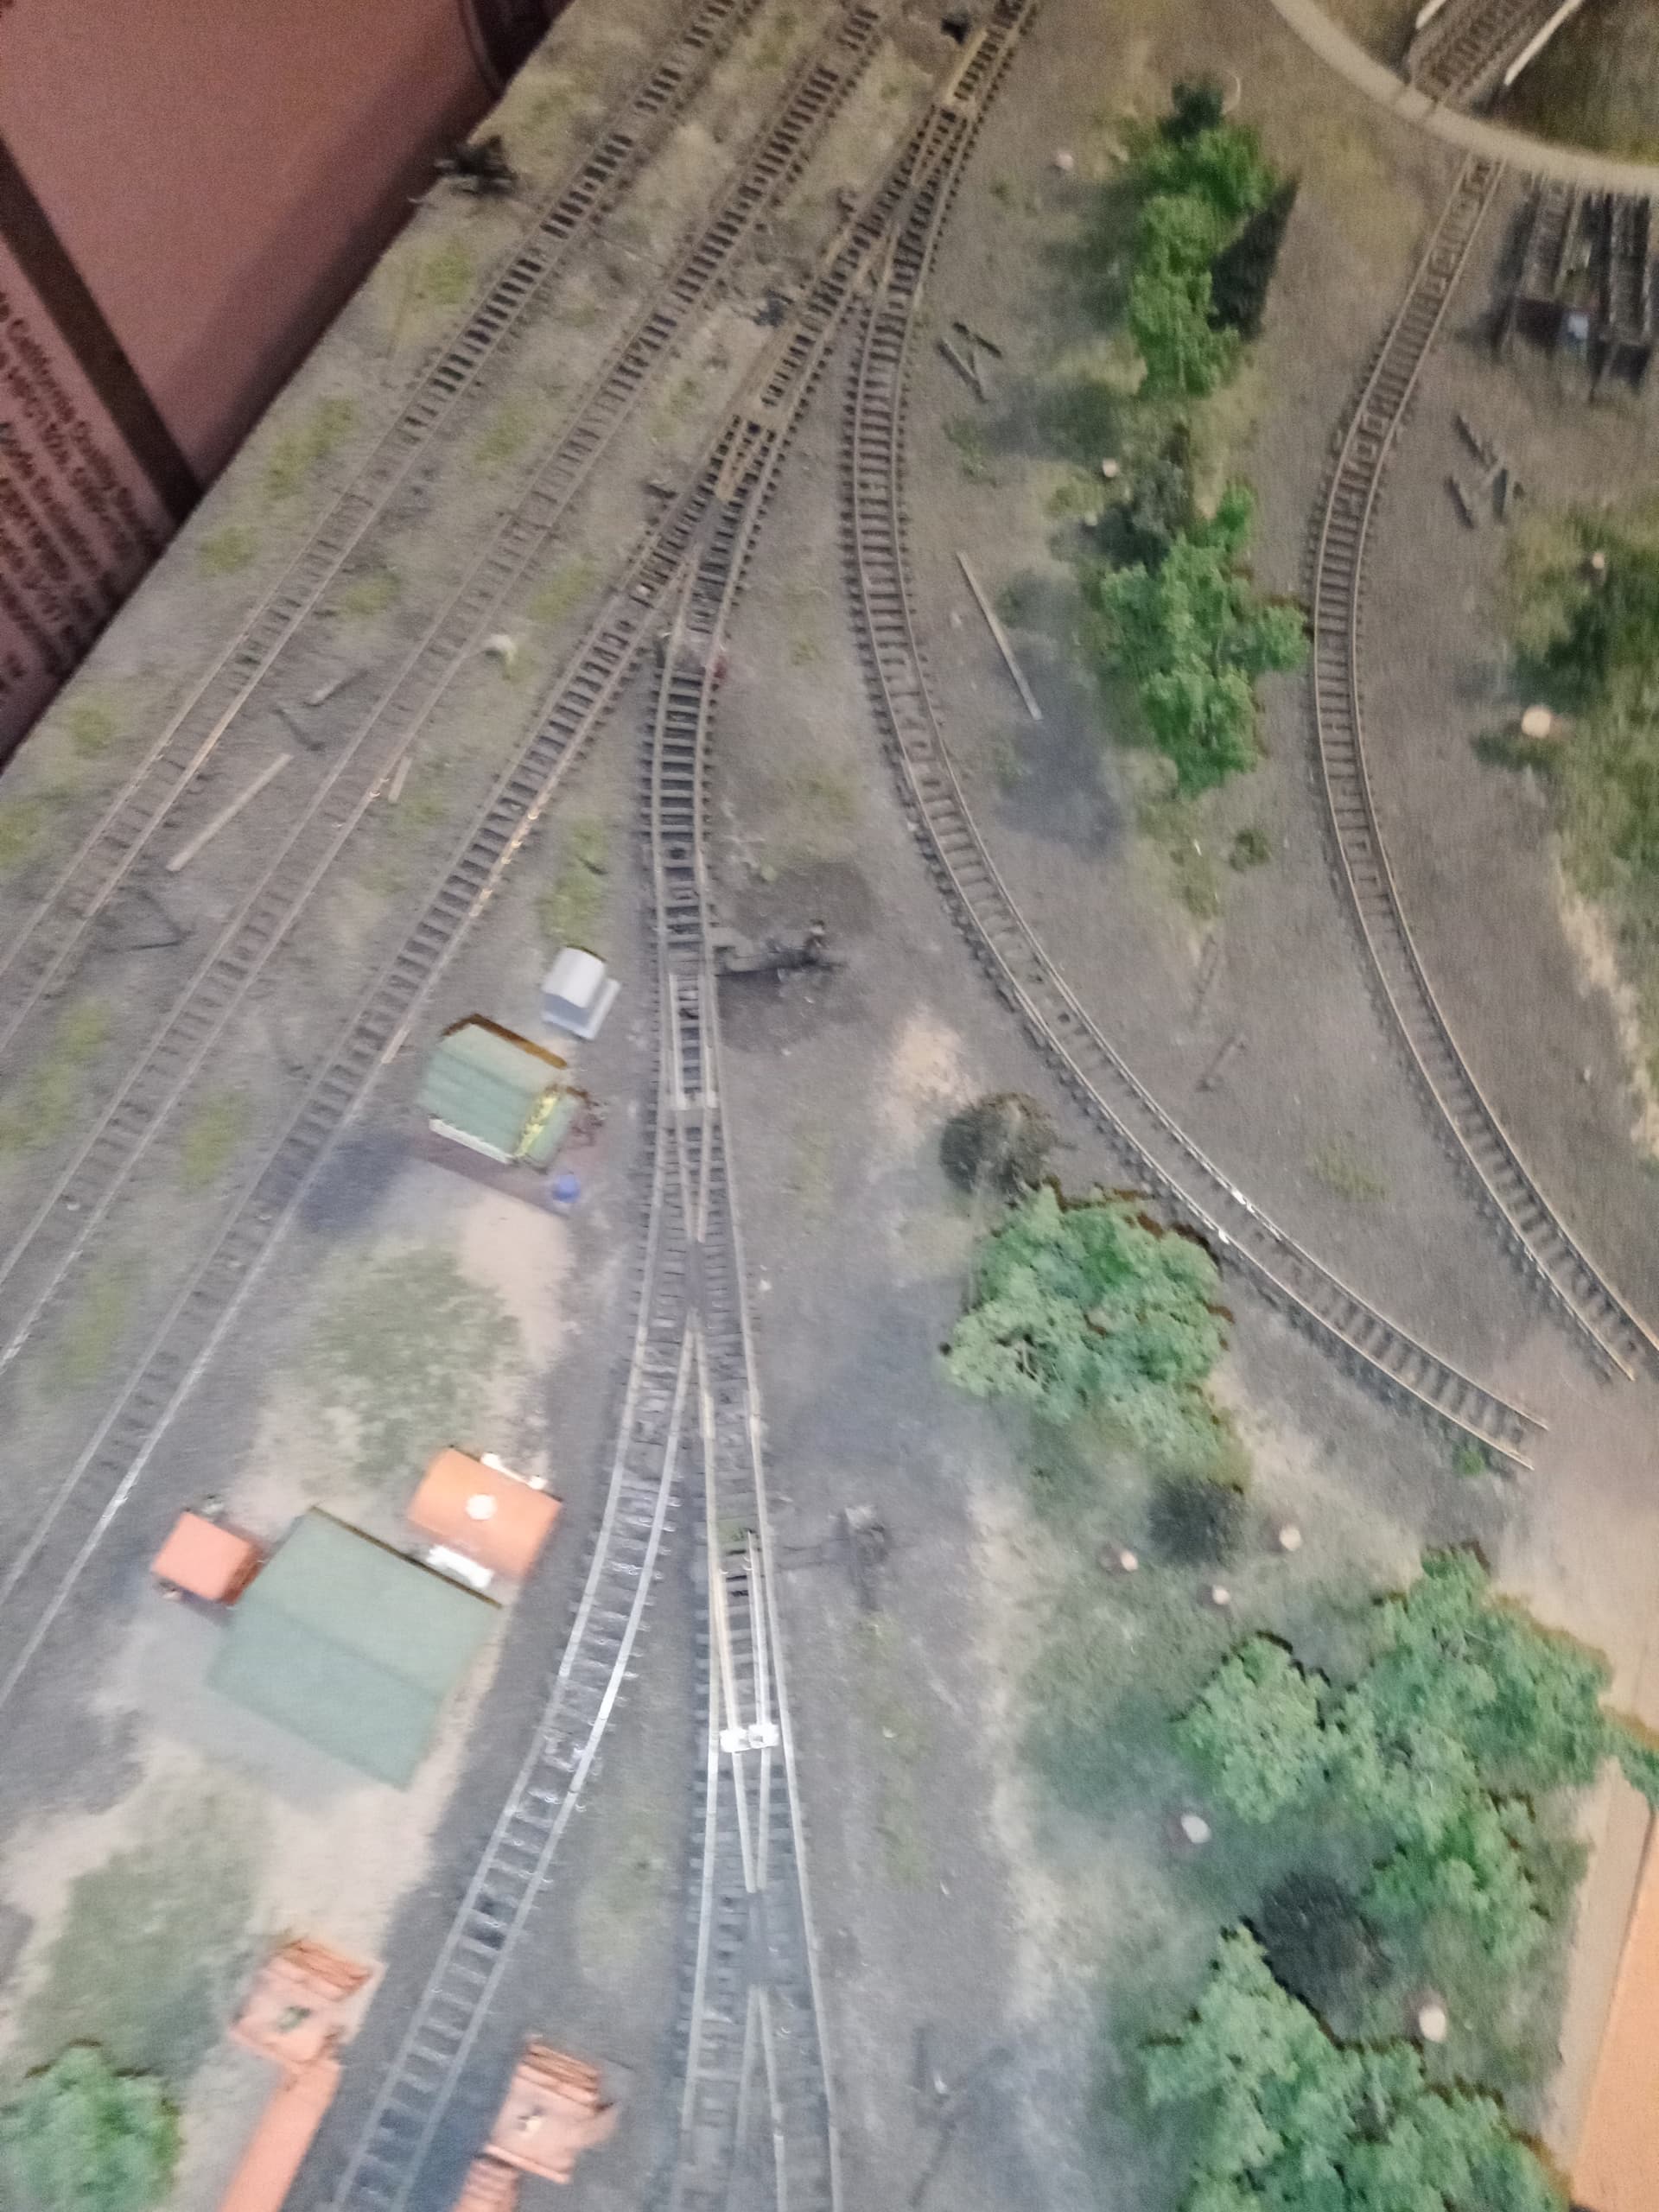
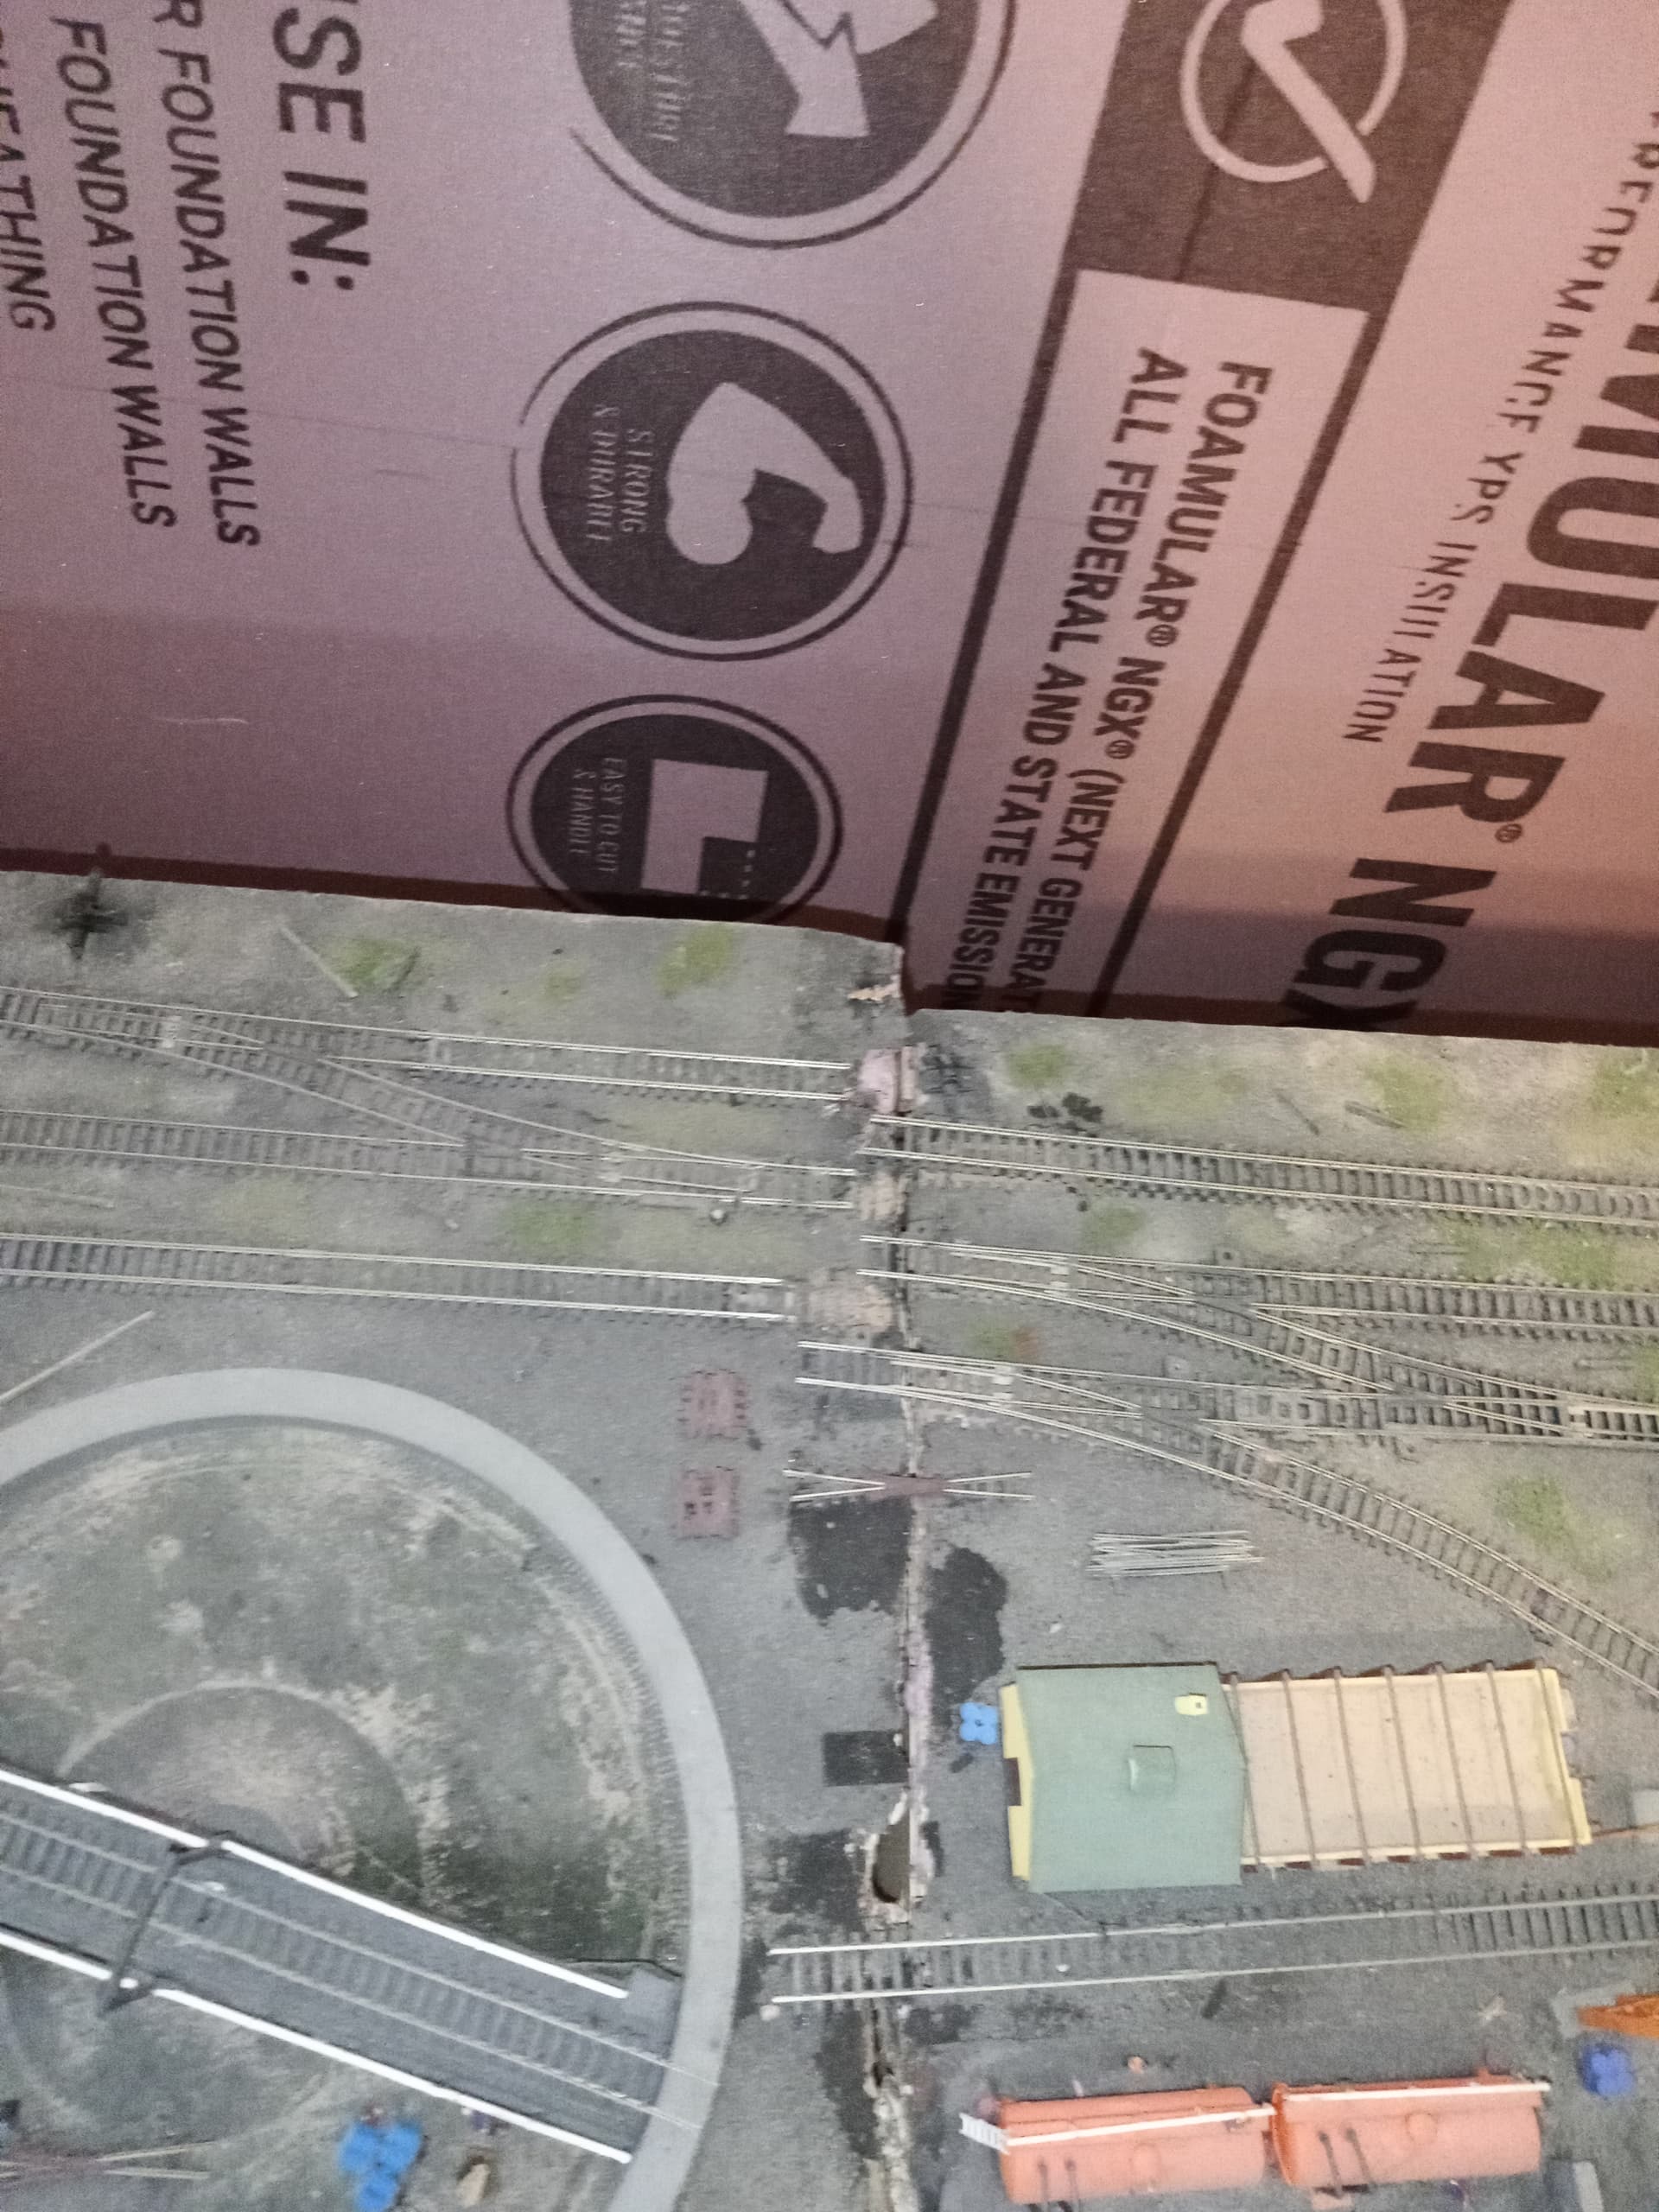

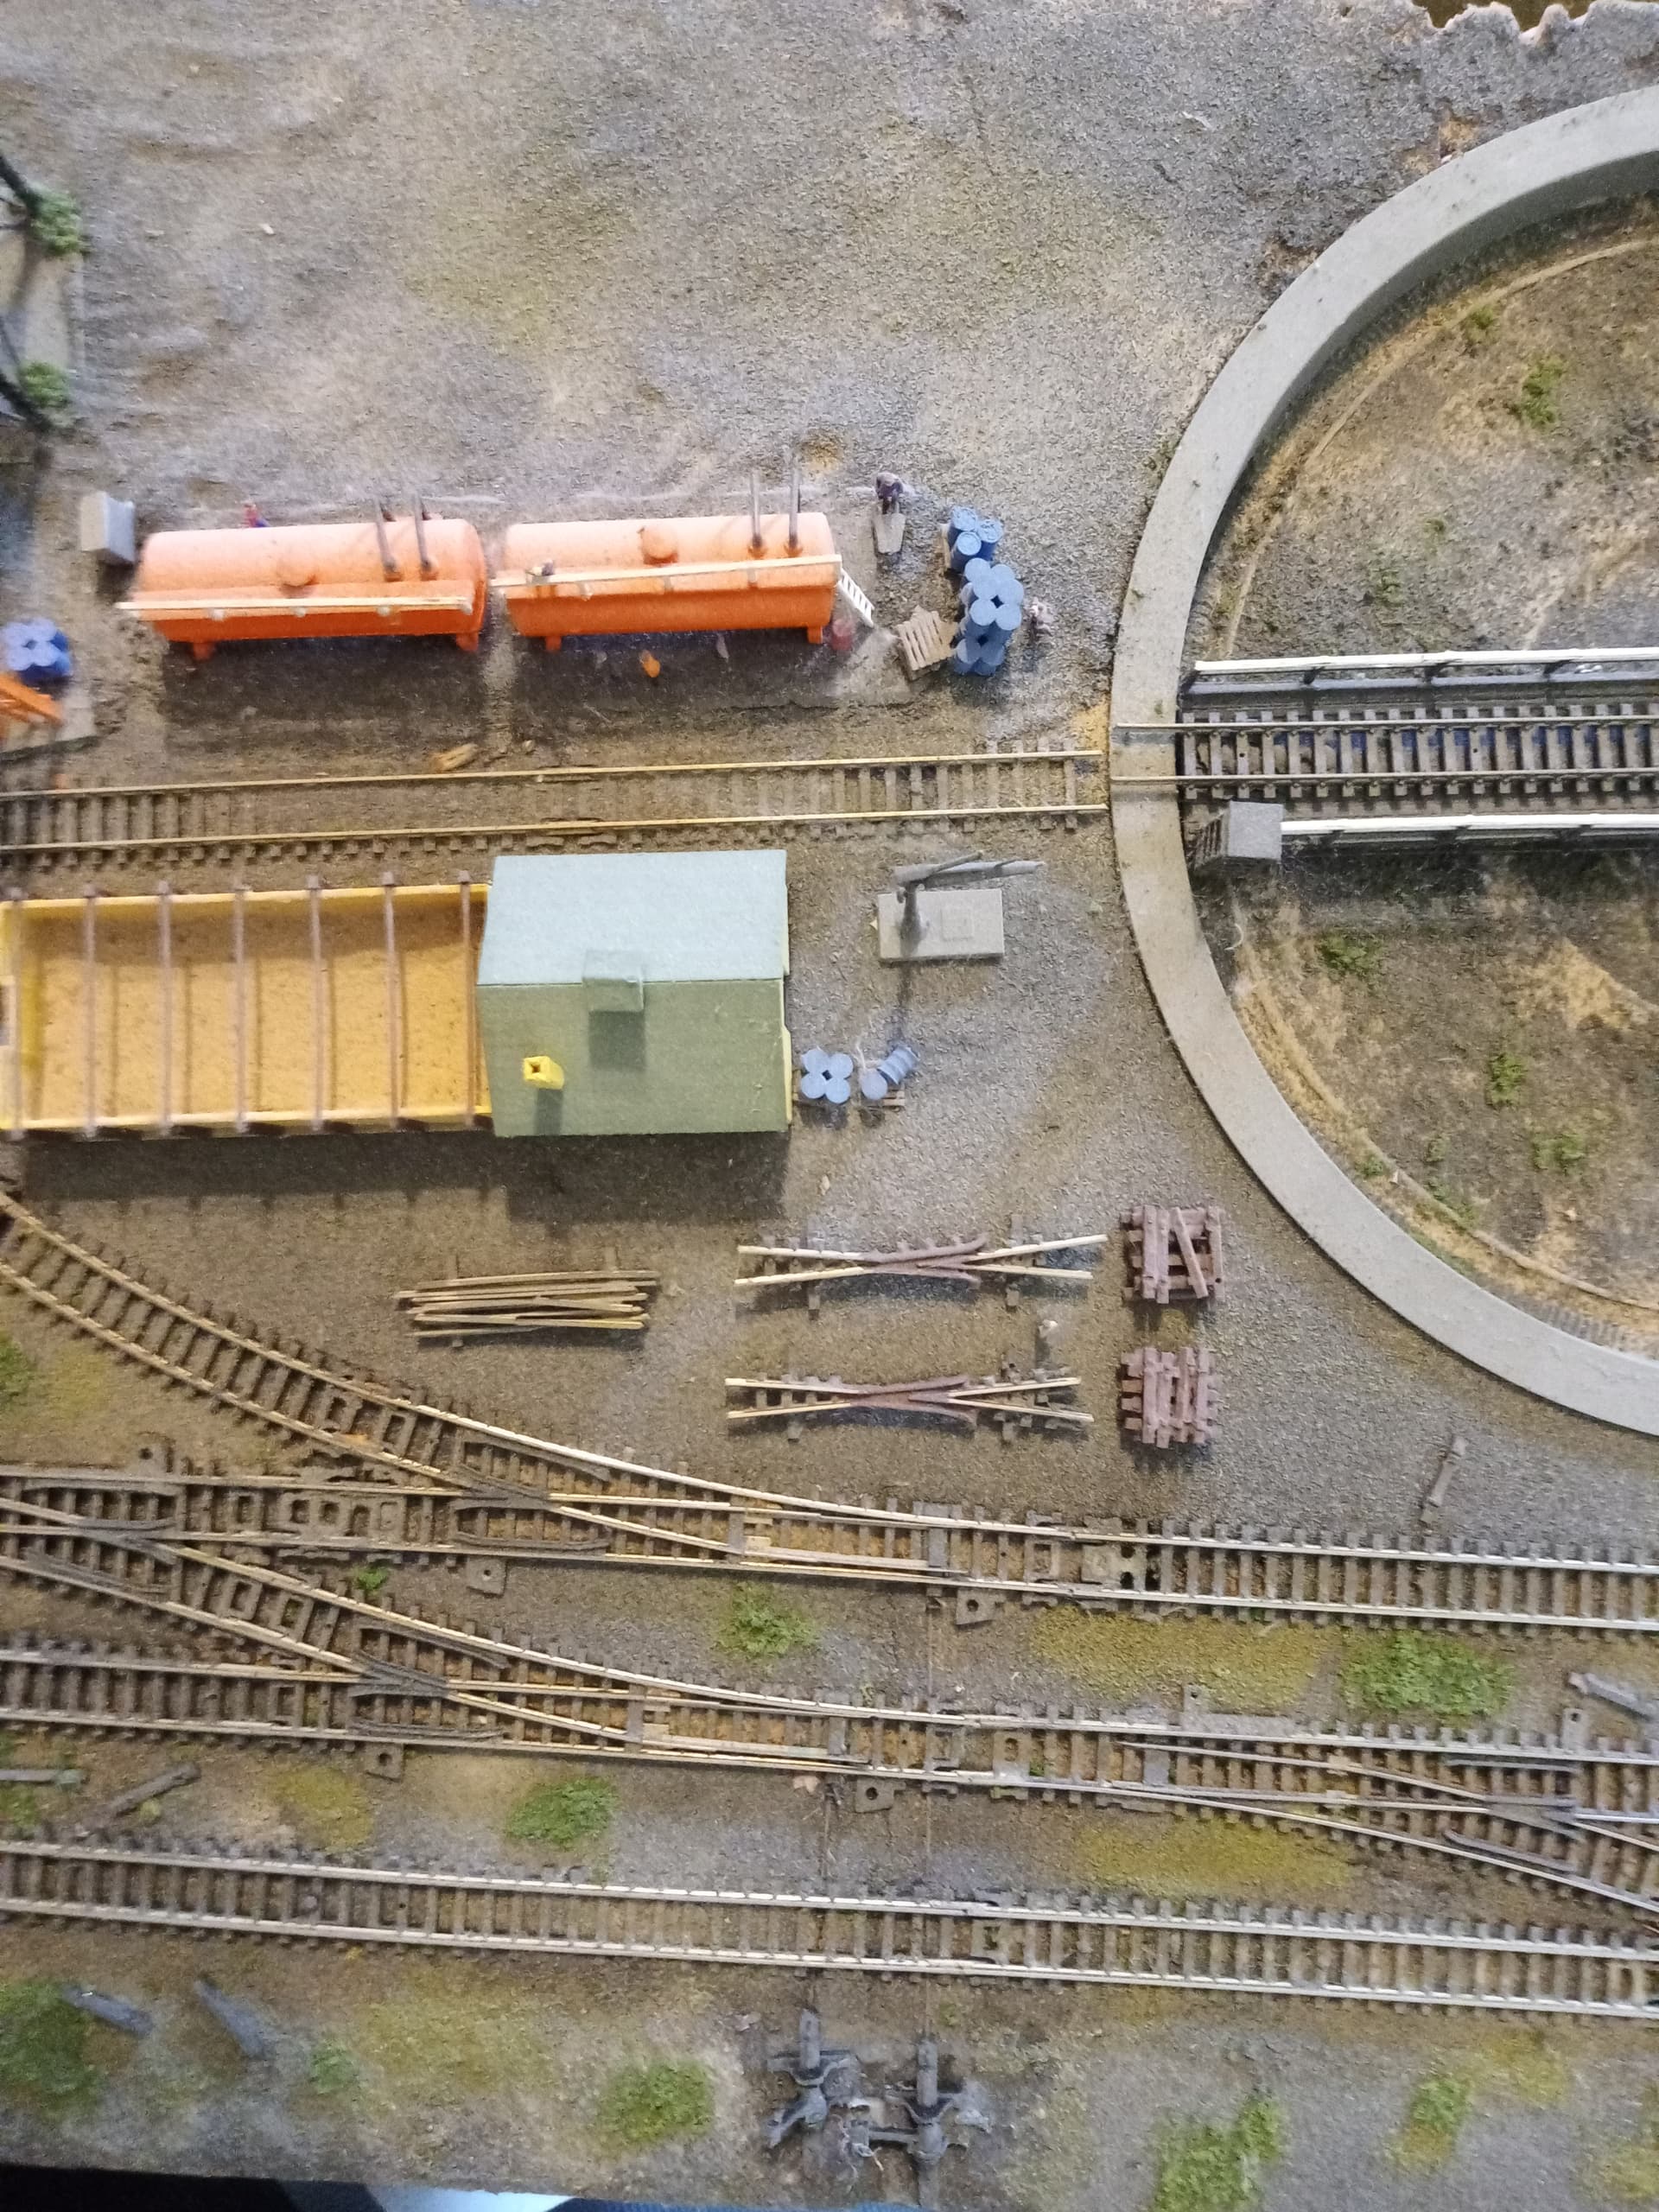
OK, only Rich asked the important questions, which the OP has not answered. What type, age, size, scale Atlas turnouts? Is that HO or N?
Some of those look like Atlas snap switches (plastic frogs that cannot be powered). Some look like N scale turnouts?
OR, are they really old ROCO turnouts that Atlas sold unter their name briefly 30 plus years ago in addition to their snap track and custom line products?
But best as I can tell they are are all plastic frog turnouts - sorry no good answer.
Again, it would be nice to know for sure which products we are talking about here?
I use Atlas Custom line turnouts which have isolated metal frogs that can be powered. I power mine and the work great, but I know lots of guys who leave them unpowered with no issues.
Need more info on what you actually have…
Sheldon
The problem the OP refers to is in reference to the original Atlas switches (#4?) that existed before DCC, it happens mostly with short locomotives that do not have extended electrical pickup. The four axle Atlas diesel locomotives did OK back in the day but they also have excellent electrical wheel pickup…those locomotives were expensive then and probably are expensive now though.
It’s a combo of the locomotive manufacturer and the electrical pickup approach being used on the locomotives. Also the shorter radius on the #4 switches will cause issues unless the switch is absolutely level, run a locomotive over it slowly and watch on a test track with one of those short radius switches on it. Ladder track make the issue worse. What I did before the age of DCC is buy an Atlas high nose GP-38 and it ran pretty well over the switch but that was regular DC. Atlas FP7 did well too, again it was regular DC. Non-Atlas locomotives had issues with regular DC if they were short.
Moving onto DCC, it makes mild electrical issues worse. This is why they recommend you solder an electrical connection to the rail every so many inches for the DCC sound to work right and not reset with an electrical flicker. I noticed with the Atlas custom line switches they have to be almost perfectly level to not cause issues. In part this is why some people use cork roadbed under their tracks to smooth out the uneven wooden benchwork underneath (and it deadens the sound of running). It does not look like your using roadbed in your photos which only means you have to be careful all aspects of the switch are level via running a loco over at slow speed. You might need small wooden shims to level if it is not.
You will find with the #4 switches there is no one size fits all answer. I see you might have some #6 switches and my guess with those is they are not level. You can’t tell easily if they are level via top down look or event looking over the railhead…you really have to run a locomotive over them slowly and see if it shifts…watch all the wheel contact with the rail, especially the electrical wheel pick-up. Someone above mentioned with his small steam locomotive he extended the electrical pickup to the tender as well. You could try that with caboose if your running a diesel. Weight the caboose down and fashion a small electric plug between loco and caboose or tow a dummy locomotive (with no engine). This might be the easiest solution…extend the electrical pickup.
I hate to say it, but in the long run your best bet might be to start over.
Besides the electrical problems, you’ve got several pretty nasty S-curves on the layout. Since you mention E-units, I assume you’re looking to do passenger trains. All trains - but especially longer engines and cars on passenger trains - are going to do much better without the S-curves, and with crossovers from one mainline track to another being No. 6 turnouts rather than No. 4s. You can still use the No. 4 turnouts like for industry tracks, but No. 6s will work better for everything else (sometimes No. 5 turnouts are a nice compromise).
Plus having the track glued (I assume) directly to the plywood isn’t the best way to go. Having some sort of roadbed (like cork or other similar products) look better and reduce noise. You could also look into Woodland Scenic foam risers, so you can have things like bridges and rivers without having to cut up the plywood.
I suggest at least taking a look at Kato Unitrack. Nice to be able to run trains without problems. You can find cheaper prices online, but here’s a link to see what is available…
Yep, we lack critical information here.
So, let’s try again.
~ HO scale or N scale?
~ Atlas Snap Switches or Atlas Custom Line Switches?
~ Are the turnouts #4, #6, #8?
~ Types of locomotives and their wheel configurations?
~ Type of subroadbed? Plywood, foam,Homosote, etc.?
~ Are you using roadbed under your track?
Inquiring minds want (need) to know.
Rich
This should be a lesson learned - - to test track thoroughly after installing and wiring it before permanently securing it and landscaping around it.
Well, whether you hate to say it or not, that may well be the best advice. Start over once the issues are identified. It just may be that a different type of turnout is needed either to facilitate the powering of the frogs or simply to accommodate the types of locomotives being run over the turnouts.
Rich
Agreed.
Great advice. The operative word here is “level”. That is why roadbed is so important.
Rich
I will also repeat, as best as I can see in the photos, at least some of those do not look like Atlas turnouts at all.
OR, it is N scale.
OR, it is ROCO turnouts Atlas sold under their name for a short while.
AND, some of it that does look like Atlas manufactured product appears to be VERY OLD Atlas Custom Line or Snap Switches back when both had plastic frogs which obviously cannot be powered. Which would be from the 1970’s or earlier.
Yes, time to just start over with track manufactured in the 21st century… or at least from the last quarter of the 20th century… Atlas introduced the metal frog on the Custom Line turnouts around 1980?, maybe a bit sooner. Like nearly 50 years ago.
Sheldon
If they are HO-scale Snap or Custom-Line switches made during at least the past 25-30 years, and maybe older, you can use Atlas “BUS BAR FOR SNAP RELAY” fastened with Atlas “MACHINE SCREW RD HD SNAP RELAY/BUSBAR”.
The bus bars slide (from either side) into a recess in the tie that’s even with the screw hole in the frog. With a little care you can do that with the turnout installed and minimal disruption to the surrounding scenery. Certainly less disruptive than replacing the turnout.
This post describes it pretty well:
no. besides the need to cover the frog with something metalic, the rail the frog needs to be connected to depends on which way the points are thrown. Turnouts with metal frogs are often connected to SPDT contact on a Tortoise switch machine to correctly polarize the frog or a frog-juicer
on my relatively new layout with Atlas customline turnouts having metal frogs using over-center springs instead of machines, i decided to go with diesel locomotives with pickups on both trucks to avoid the need to power the frogs even though i have a nice collection of brass camelback locomotives.
some day i hope to add pick-up to all my camelbacks.
I was going to say start over as well but it might not be in his budget. I started in the hobby at age 7 which was a long time ago. Model railroading is not a cheap hobby today and wasn’t back then either.
Also, don’t feel bad about the sunk cost of all the track. Between the age of 7 and 21 I think I ripped up my old track three times over. Agree it is not cheap. I started with brass rail and segment track, then brass flex track cut with a Dremel tool…now I am exclusively nickel silver rail.
I use Atlas Flex track with a Walther’s hand spiker and rail spikes also bought from Walther’s. I use the little predrilled holes in the center of the track and spike the track down that way because I can take it back up without damage to the track and reconfigure. One issue with spiking is if you push down too hard you warp the track, if you do not push down hard enough the spike sticks up, so a little practice there but not much. Anyway, you will learn this stuff from others via MR club in a lot of cases or asking at MR shows.