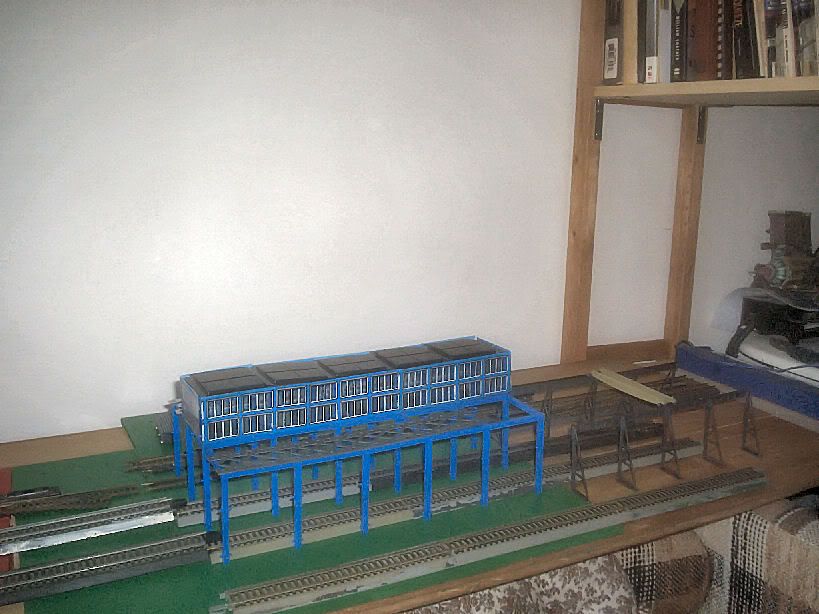
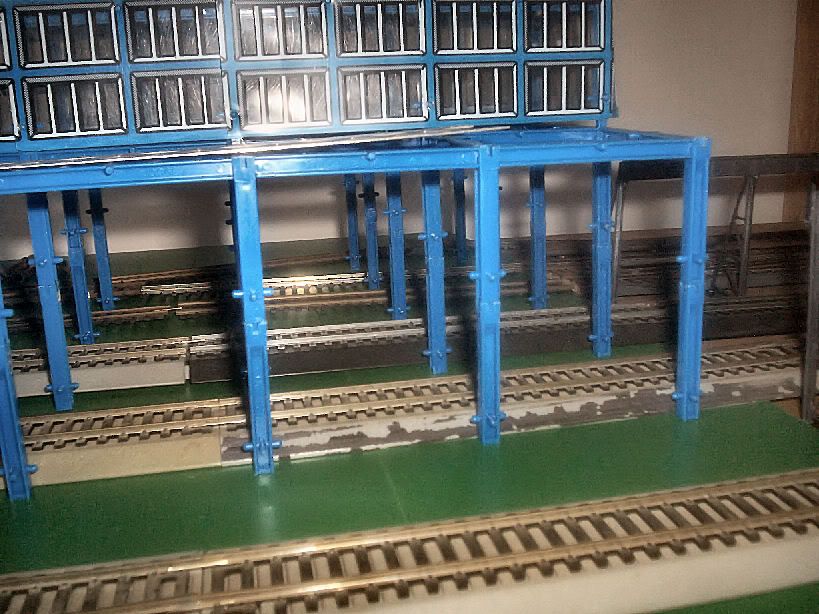
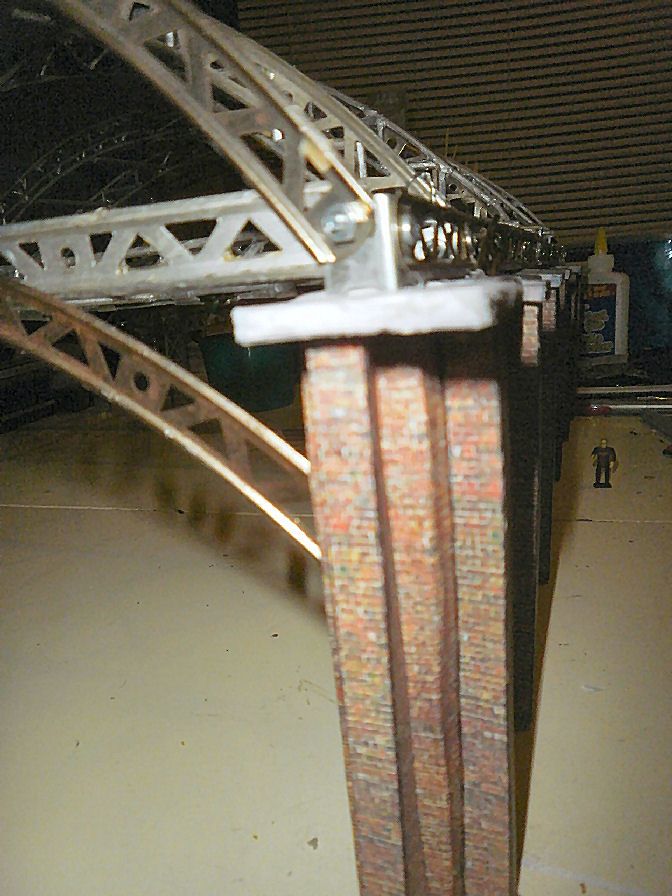
This weekend I’ve been trying out the layout for my ‘yard’, by combining several vintage toy kits and styles. The girders are obviously from a Kenner’s Girder & Panel set, along with a Walther’s Overhead Crane. Now, although I’ve got Bachmann HO EZ track in the photos, I’ll be using Atlas code 100 for the actual layout. The Atlas track, laid on top of the bases for the Girder & Panel set, perfectly matches the height of the EZ track, so going from one to the other is no problem. Embedding the track would have been a nice touch, but it’s one step beyond the level of work I want to put in on this one, unless I hear of a foolproof way of doing it.
I’ll be painting all the girders with a silver acrylic mixed with a touch of black; & then weathering will be applied to the entire structure. (All unecessary ‘nubs’ will be sliced off & smoothed down prior to painting.) Concrete gray floors throughout; and I’m looking forward to installing an inspection pit which will be backlit. (It’s one of the free offerings from Scalescenes this month.) http://www.scalescenes.com/railscenes
Later, i’ve got a pack of Walther’s Piping to further add to the overall clutter, some pipe stacks & other emphemera scattered around; and then probably fiber optics for assorted lights. More pics to come as it develops.
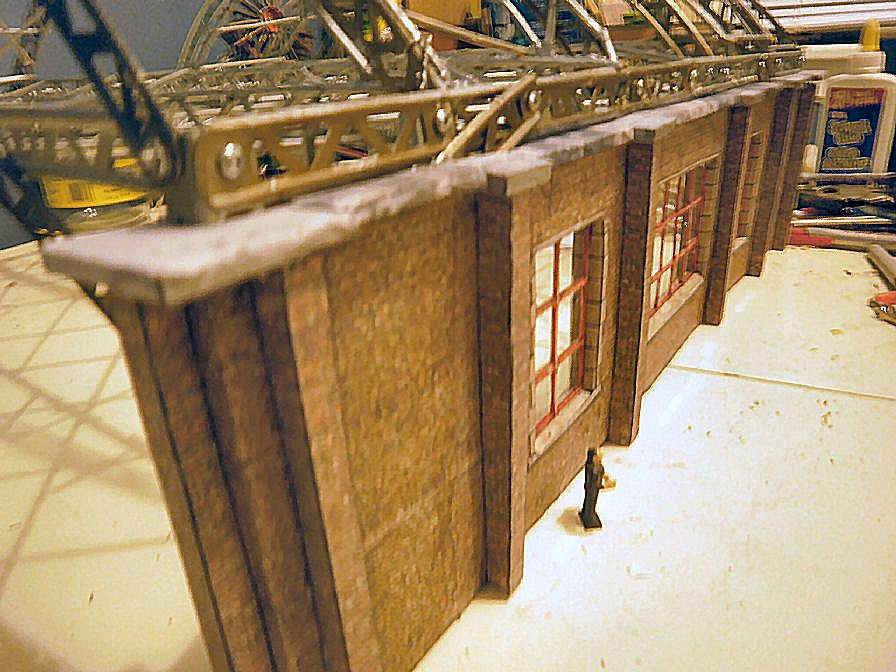
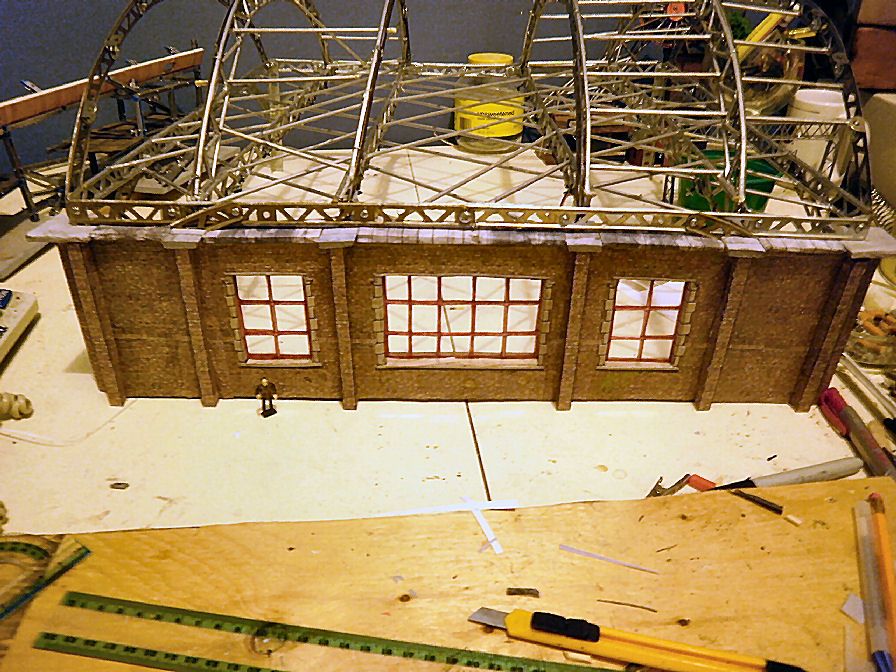
Roofwork is coming along nicely. I just have to join the two main sections & figure out how to put joiners on the inside ends to make it look like it’s connected to the Meccano arches, yet be able to lift it off as a whole unit including the roof, which will be shingled with corrugated iron.
Thanks for the tip - but Scalescenes conveniently & kindly supplies the workaround; which is to print the 00 gauge at 87%, and everybody’s happy! (It’s under their page, “Printing Tips”, ‘Modelling in another scale’.)
The roof trusses are all done in bamboo skewers - I’ve already gone through one pack of 100!
Kenner “girder/ building” set, wow does that bring back some memories from almost 50 years ago! Didn’t think there were any left in existence. Had quite a bit of fun w/ them, If you need additional girgers for kit bashing, check out Evergreen “I” beams and the boxed CV girders and ones from the ME city viaduct.
Thanks, Bob, I’ll definitely check that out! But I’ve got access to all the Kenner-type Girder & Panel stuff I need, thanks to a company called Bridgstreet Toys, which now manufacture & market all the old series, except for the SkyRail monorail system. (These and the other old sets can also be found on E-bay, where I got my Meccano stuff, as well as Central Valley ladders & steps for skywalks, or at least I used to until I found a wonderful LHS right here in the Hamilton area.)
I’m sorry to say that this entire layout is on hold until the new year as an untenable situation has developed in my apartment, severe enough that I’ve given notice. (I should have checked the Bed Bug Registry before I moved in!)
I’ve been able to treat and store the sections & buildings of the layout but it won’t be up & running again until the New Year.
Thanks to all for your input & help; I’ll be back as soon as I can…[:'(]
Wow, bed bugs really suck!! Had a similar problem at one place I rented. Best way to keep em under control is to put ALL clothing into rubbermaid containers with a special bed bug killing bait. Then wash all bed linnen in HOT water and dry in a HOT dryer. ( bugs will die above 140 degrees) ( wash clothing this way B4 putting into containers ) . Buy the Tyvek mattress and box spring covers and install them after spraying the mattress/springs well. Also extermanators are EXPENSIVE, but worth at least the first visit to knock most of the critters down. HTH…Mike
We caught it early; the central heat had woken some dormant eggs. The pest control company was in within a couple of days of the first bites while we started doing laundry. It now seems to be under control - I’m still moving; but at least the layout sections are clean. Had I gone through the wall, as per the original plan, it probably would have been noticed sooner. (Can you imagine the grief if the outbreak had been around the layout?) Thanks again for everyone’s help.
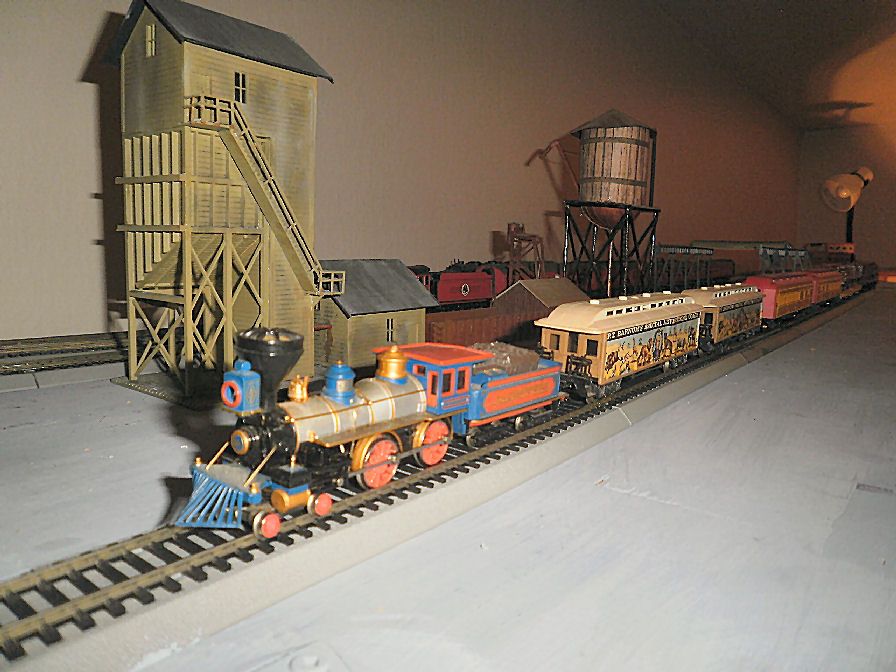
I’ll amuse myself in the meantime by painting a Walther’s Skytop in the Canadian National’s 1954 livery. Well, it could have happened…Skytops exisited at the time, even though CN didn’t buy their 6 until the '70’s from UP. I just like ‘end’ cars for my consists…I plan on doing one for the Hogwarts Express, as well, with one of those new mini plasma bulbs inside…a ‘crystal ball’, as it were.
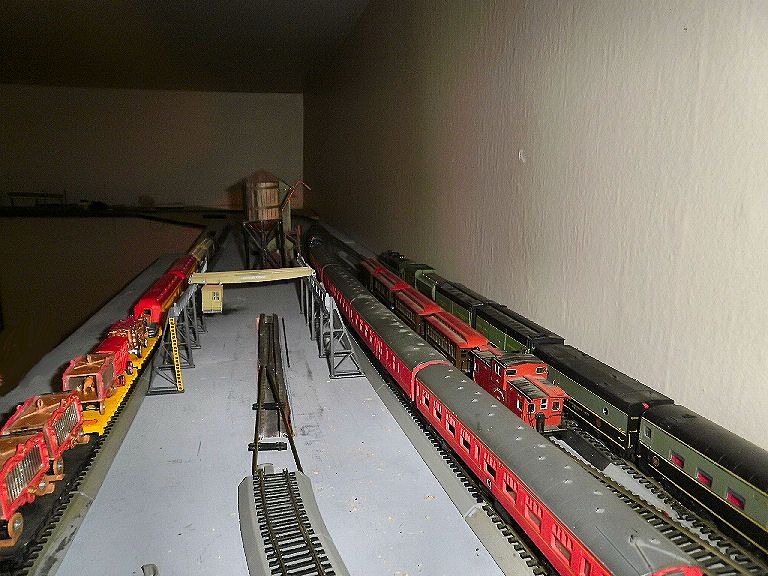
OK, I’ve gotten back to work, after settling into a 150 year old apartment in Brantford, Ontario, of all places. (Actually, the home town…) I’m about 3/4 done, now, as the pics will show:
(This was 3 pieces from an earlier layout, now joined and re-purposed as an inside curve). Some India Ink & weathering, & the whole thing comes together:
Gidday Paul, read your post on another thread regarding confusion over posting, and decided against replying there. I, and I suspect other “LURKERS”, view a large number of posts and like yours check up on it when you add new postings. However I, and if you ever saw me you’d understand why!!, am no cheer leader. As I suggested on that other thread I would have thought that perhaps that the number of views your thread is receiving might just indicate that it is a reasonably popular.
Incidentally I am impressed with how you are making use of the space available. You keep posting, I’ll keep visiting.
And here’s the basic yard. The shed will encompass all five tracks including the overhead travelling crane, with an inspection pit located underneath that. Motion sensor signals will be mounted on the end of the shed as well.
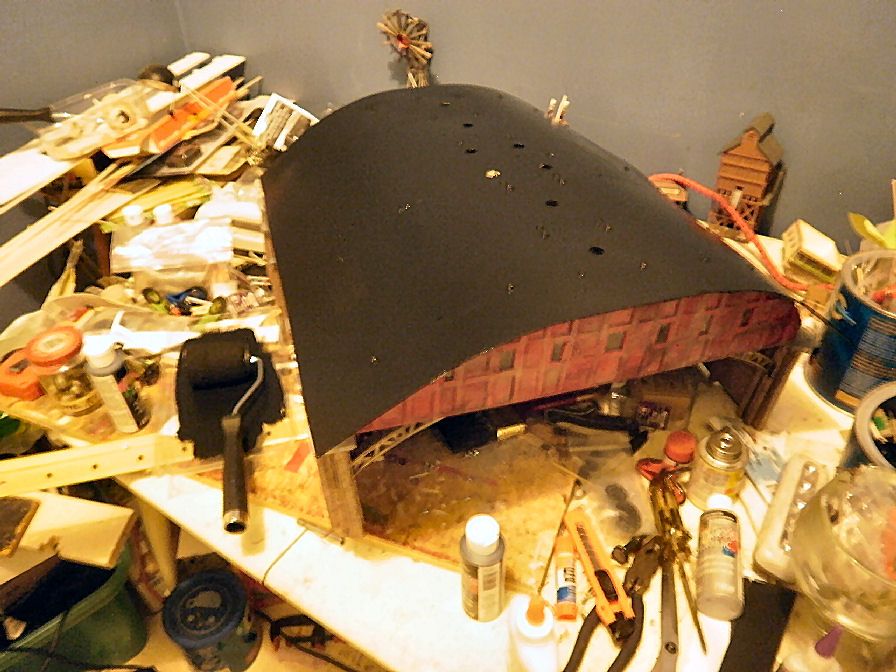
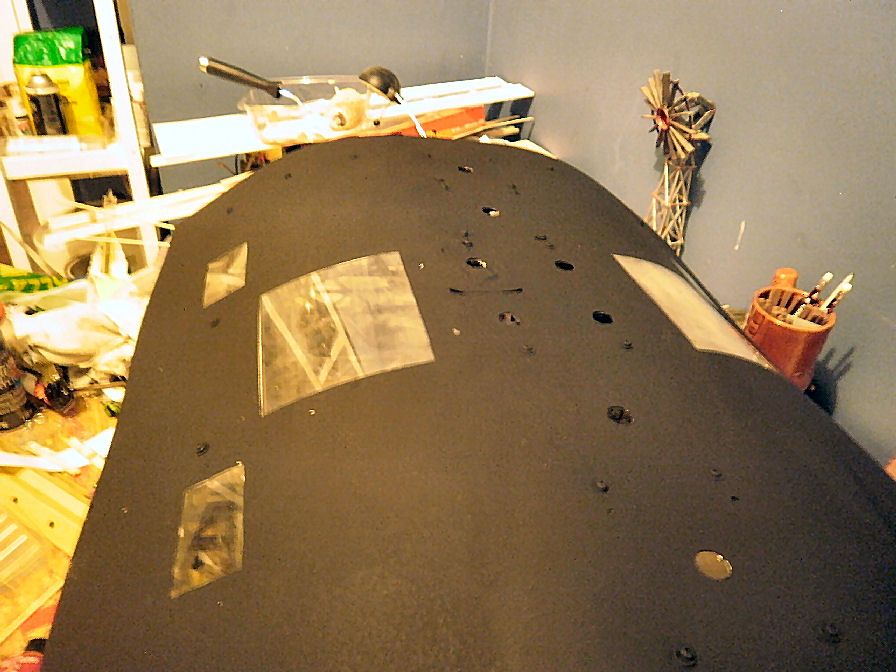
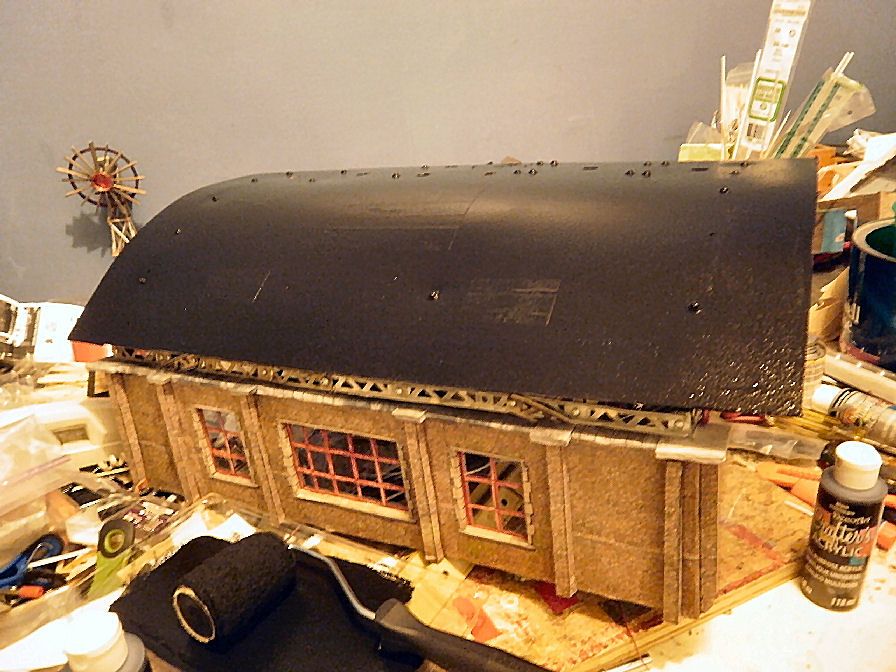
And the Roof is on!! I found a piece of plexiglass or something in a cheap frame & it’s been a godsend. I painted the inside with a dark beige & weathered it with Sierra Scale models chalks. The top was then masked & roller painted with a flat black acrylic craft paint from the dollar store, to simulate black roofing felt. The small windows will host skylights from Kenner’s girder & Panel Skyscraper Set, while the larger openings will be filled with a safety glass grid printed on inkjet transparencies, then blocked in with metalized balsa strips.
The roof will then be finished in foil die-pressed into corrugated steel 8’X4’ tiles & weathered. The holes down the centre will be 4’ diesel fans.
Upcoming projects include reverse-engineering an IHC signal bridge to span the width of the train shed, with working motion sensor-activated targets.
I love the windows in the train shed roof! Who’d have thought that old erector type toys could look so great in a model?[:D] The weathering on the structure looks great!
I’d say thanks, but thanks should go to our fellow modellers here whose posts have been an enjoyable learning curve.
The combination of several childhood toys into the model & the layout is a form of closure, I suppose; the old dream of ‘confluence’, where your G.I. Joes would fit inside a Tonka truck, or that Matchbox cars were just a bit smaller so they would work with your trains…but of course, it was precisely those differences which sparked & spawned our sense of imagination, so I guess it wasn’t a bad thing after all, at that…
Just a quick update - I took a tumble in my apartment a few weeks ago; I just got out of hospital for surgery to a fractured right shoulder, so future installations will be on hold for a while, sorry for the delays…